Advertisement
Available languages
Available languages
AOS-HERO-CHR
Owner's Manual | El manual del proprietario
HIGH-EFFICIENCY
REVERSE OSMOSIS
with SmartFlow
OSMOSIS INVERSA DE ALTA EFICIENCIA CON TECNOLOGÍA SMARTFLOW™
IF YOU NEED HELP OR HAVE A QUESTION, WE'VE GOT YOU COVERED. GIVE US A CALL AT 877.333.7108
PLEASE DO NOT RETURN TO THE STORE.
SI NECESITA AYUDA O TIENE ALGUNA CONSULTA, NOSOTROS NOS ENCARGAMOS. LLÁMENOS AL 877.333.7108.
NO ES NECESARIO QUE VUELVA A LA TIENDA.
technology
™
Advertisement
Chapters

Related Manuals for A.O. Smith AOS-HERO-CHR


Summary of Contents for A.O. Smith AOS-HERO-CHR
- Page 1 AOS-HERO-CHR Owner’s Manual | El manual del proprietario HIGH-EFFICIENCY REVERSE OSMOSIS with SmartFlow technology ™ OSMOSIS INVERSA DE ALTA EFICIENCIA CON TECNOLOGÍA SMARTFLOW™ IF YOU NEED HELP OR HAVE A QUESTION, WE’VE GOT YOU COVERED. GIVE US A CALL AT 877.333.7108 PLEASE DO NOT RETURN TO THE STORE.
- Page 2 If you need help or have a question, we’ve got you covered. Give us a call at 877.333.7108. The recommended replacement frequency for the AOS-HERO-CHR is every 6 months for the Carbon Blocks (Stage 1 & 3) and every 12 months for the SmartFlow™ Membrane (Stage 2).
-
Page 3: Table Of Contents
Under Sink HIGH-EFFICIENCY REVERSE OSMOSIS with SmartFlow™ technology TABLE OF CONTENTS Box Contents ......................1 Installation Guide ....................2-7 Care & Safeguards ....................8-11 Performance & Certifications ................12 Warranty .........................13 Spanish/Español ....................14-28 Scan to view the AO-HERO-CHR installation video. NEED HELP? GIVE US A CALL 877.333.7108... -
Page 4: Box Contents
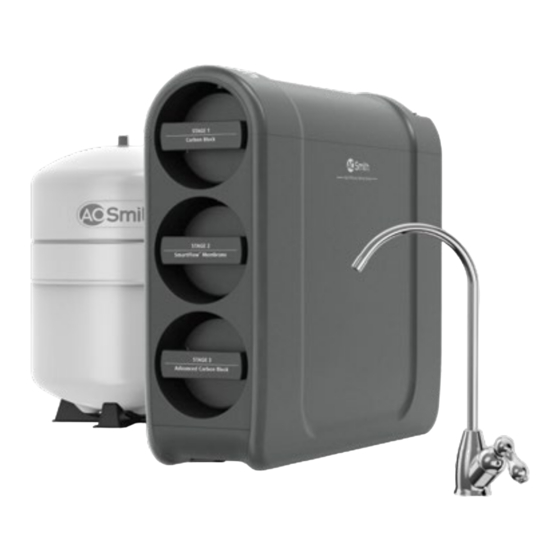
BOX CONTENTS SYSTEM MANIFOLD WATER TANK AND STAND STAGE 1: CARBON BLOCK EYEDROPPER STAGE 2: SMARTFLOW™ MEMBRANE DRAIN SADDLE KIT STAGE 3: ADVANCED CARBON BLOCK TUBING 1/4" WHITE AIRGAP FAUCET WITH PRE-CONNECTED TUBING TUBING 1/4" YELLOW SLOTTED FAUCET WASHER INLET TEE VALVE Please read entire manual to ensure all parts listed are present before installation. -
Page 5: Installation Guide
INSTALLATION GUIDE STEP 1 Site Setup Note: This system requires an existing faucet hole 7/8" to 1 1/2" in diameter in the sink or countertop to install the supplied dedicated faucet. You may also replace an existing kitchen sink sprayer, soap dispenser, or pre-existing hole on the sink or countertop. If drilling a new hole, ensure faucet body will mount flat against surface and there is sufficient tubing between faucet body and system manifold. - Page 6 INSTALLATION GUIDE STEP 2 Install Air Gap Faucet 1. Feed pre-connected air gap faucet through countertop hole. 2. Underneath countertop, slide the slotted faucet washer onto threaded base of faucet. Washer should be in between countertop and white plastic spacer. If needed, loosen nut to move spacer down to create enough room for the washer.
- Page 7 INSTALLATION GUIDE STEP 4 Install Inlet Tee Valve and Tubing Note: Ensure water valve is turned off before continuing. 1. Place a pan or bucket under cold water line to catch any excess water. With an adjustable wrench, disconnect COLD water line from the 1/2" threaded stem on the bottom of the kitchen faucet.
- Page 8 INSTALLATION GUIDE STEP 6 Sanitize and Install Water Tank 1. Open water tank valve. Valve should be pointing towards the valve port. 2. Insert one end of yellow tubing into the quick connect port that is pre-installed on the top of the water tank. 3.
- Page 9 INSTALLATION GUIDE STEP 7 Connect Tubings Notes: Insert tubing completely to ensure connection. A fully connected tube can be inserted up to an inch. Wet end of tubing for easier insertion. If cutting the tubing due to excess length, cut the tubing straight across, not at an angle.
- Page 10 INSTALLATION GUIDE STEP 8 Insert Filter Cartridges 1. Insert each filter cartridge into its designated location in the system manifold by turning to the right. The guides on each filter will ensure proper alignment within the system manifold. 2. Once the filter is engaged, push the filter fully in while rotating 90 degrees to the right.
-
Page 11: Care & Safeguards
CARE & SAFEGUARDS Care To clean the system manifold and tank, wipe exterior with a damp cloth. Do not use any strong or abrasive cleaning agent or solvent cleaner. NOTICE Safeguards • If you experience a tubing connection leak, shut off cold water, disconnect and re-set the tube. - Page 12 CARE & SAFEGUARDS Specifications AOS-HERO-CHR Efficiency rating is the percentage of Replacement cartridge AOS-HERO-S1S3 the influent water to the system that is and AOS-HERO-S2 available to the user as reverse osmosis is treated water. This measurement is Membrane TDS Reduction 89.6% minimum...
- Page 13 CARE & SAFEGUARDS Carbon Block and Advanced Carbon Block SmartFlow™ Membrane Replace every 6 months* Replace every 12 months* The Carbon and Advanced Carbon The SmartFlow™ Membrane is located Blocks are replaceable activated carbon in Stage 2. This membrane reduces the cartridges located in Stages 1 and 3.
- Page 14 Public water utilities must have their free chlorine or combined chlorine is used water tested for arsenic. You can get the in the water system. The AOS-HERO-CHR results from your water utility. If you have system is designed to remove pentavalent your own well, you can have the water arsenic only.
-
Page 15: Performance & Certifications
This system conforms to NSF/ANSI 58 for VOC reduction. See Performance Data Sheet for individual contaminants and reduction performance. All claims are verified and subastantiated by test data. For the full list of contaminants filtered, scan to view the AOS-HERO-CHR Performance Data Sheet. NEED HELP? GIVE US A CALL 877.333.7108... -
Page 16: Warranty
LIMITED WARRANTY Y E A R Who is covered: 5. Manufacturer shall not be liable for any water damage arising, directly A. O. Smith and its suppliers, (herein collectively referred to as or indirectly, from any defect in the water filter or component part(s) or “Manufacturer”) warrants to the original owner who purchased and from its use. -
Page 17: Spanish/Español
Si necesita ayuda o tiene alguna consulta, nosotros nos encargamos. Llámenos al 877.333.7108 La frecuencia de reemplazo recomendada para el AOS-HERO-CHR es cada 6 meses para los bloques de carbón (Etapa 1 y 3) y cada 12 meses para la membrana SmartFlow™ (Etapa 2). - Page 18 OSMOSIS INVERSA DE ALTA EFICIENCIA con tecnología SmartFlow™ TABLA DE CONTENIDO Contenido de la caja ....................16 Guía de instalación ................... 17-22 Cuidado y resguardos ..................23-26 Rendimiento y certificaciones ................27 Garantía ........................28 Inglés/English ...................... 1-13 Escanee para ver el video de instalación de AO-HERO-CHR.
-
Page 19: Contenido De La Caja
CONTENIDO DE LA CAJA COLECTOR DEL SISTEMA TANQUE DE AGUA Y SOPORTE ETAPA 1: BLOQUE DE CARBÓN GOTERO ETAPA 2: MEMBRANA SMARTFLOW™ KIT DE ABRAZADERA DEL DRENAJE ETAPA 3: BLOQUE DE CARBÓN AVANZADO TUBO 1/4" BLANCO LLAVE CON ESPACIO DE AIRE CON TUBO TUBO 1/4"... -
Page 20: Guía De Instalación
GUÍA DE INSTALACIÓN PASO 1 Preparación del lugar Nota: Este sistema requiere un orificio de llave existente de 2.2 a 3.8 cm (7/8" a 1-1/2") de diámetro en el fregadero o la encimera para instalar la llave dedicada que se incluye. También puede reemplazar un pulverizador de fregadero de cocina existente, un dispensador de jabón o un orificio preexistente en el fregadero o la encimera. - Page 21 GUÍA DE INSTALACIÓN PASO 2 Instalación de la llave con espacio de aire 1. Pase la llave con espacio de aire conectada previamente a través del orificio de la encimera. 2. Bajo la encimera, deslice la arandela ranurada de la llave en la base roscada de la llave. La arandela se debe colocar entre la encimera y el separador de plástico blanco.
- Page 22 GUÍA DE INSTALACIÓN PASO 4 Instalación de la válvula en T de entrada y el tubo Nota: Asegúrese de que la válvula de agua esté cerrada antes de continuar. 1. Coloque una bandeja o cubeta bajo la tubería de agua fría para atrapar el exceso de agua.
- Page 23 GUÍA DE INSTALACIÓN PASO 6 Desinfección e instalación del tanque de agua 1. Abra la válvula del tanque de agua. La válvula debe estar orientada hacia el puerto de la válvula. 2. Inserte un extremo del tubo amarillo en el puerto de conexión rápida que está...
- Page 24 GUÍA DE INSTALACIÓN PASO 7 Conexión de los tubos Notas: Inserte el tubo completamente para garantizar la conexión. Un tubo completamente conectado se puede insertar hasta 2.5 cm (1"). Moje el extremo del tubo para insertarlo más fácilmente. Si corta el tubo porque está demasiado largo, corte el tubo de manera recta, no en ángulo.
- Page 25 GUÍA DE INSTALACIÓN PASO 8 Inserción de los cartuchos de filtro 1. Inserte cada cartucho de filtro en su lugar designado en el colector del sistema y gírelo hacia la derecha. Las guías en cada filtro garantizarán la alineación adecuada dentro del colector del sistema.
-
Page 26: Cuidado Y Resguardos
CUIDADO Y RESGUARDOS Cuidado Para limpiar el colector del sistema y el tanque, limpie el exterior con un paño húmedo. No use agentes de limpieza abrasivos o fuertes ni limpiadores con solventes. AVISO Resguardos • Si tiene una fuga en la conexión del tubo, cierre el agua fría, desconecte el tubo y vuelva a fijarlo. - Page 27 CUIDADO Y RESGUARDOS Especificaciones AOS-HERO-CHR La clasificación de eficiencia es el porcentaje de agua entrante al sistema que está disponible Cartucho de repuesto AOS-HERO-S1S3 para el usuario como agua tratada por osmosis y AOS-HERO-S2 inversa. Esta medición se realiza en condiciones Reducción de TDS de la membrana...
- Page 28 CUIDADO Y RESGUARDOS Bloque de carbón y bloque de carbón avanzado Membrana SmartFlow™ Reemplace cada 6 meses* Reemplace cada 12 meses* Los bloques de carbón y de carbón avanzado La membrana SmartFlow™ se ubica en la Etapa 2. Esta membrana reduce los sólidos disueltos y son cartuchos de carbón activado reemplazables la materia orgánica.
- Page 29 Se mide con una prueba combinado en el sistema de agua. El sistema de laboratorio. Los servicios públicos de AOS-HERO-CHR está diseñado para eliminar agua deben realizar pruebas de arsénico en solo arsénico pentavalente. No convertirá el su agua.
-
Page 30: Rendimiento Y Certificaciones
Todas las declaraciones se verifican y corroboran mediante los datos de prueba. Para conocer la lista completa de los contaminantes filtrados, escanee para ver la hoja de datos de rendimiento de AOS-HERO-CHR. ¿NECESITAS AYUDA? LLÁMANOS AL 877.333.7108... -
Page 31: Garantía
GARANTÍA LIMITADA A Ñ O S Y E A R Quién está cubierto: 6. El Fabricante no será responsable por ningún daño o fallas de producto A. O. Smith y sus proveedores (en adelante, mencionados en conjunto como el provocados por cualquiera de los siguientes: “Fabricante”) garantizan al propietario original que compró... - Page 32 Love it? Need help? We welcome your rating & review. Save a trip and give us a call instead Visit AOSmithatLowes.com/reviews at 877.333.7108 Tell us what’s going on. We’ll do our best to help ¿Te encanta? solve the problem and improve the product. Apreciaremos tu calificación y comentarios.
Need help?
Do you have a question about the AOS-HERO-CHR and is the answer not in the manual?
Questions and answers