
Related Manuals for Futurepump SF2


Summary of Contents for Futurepump SF2
- Page 1 Futurepump SF2/ SF2H Installation Manual Manuel d’installation Manual de Instalação v. 8 04/23...
- Page 2 Contents: 1 x Futurepump SF2/SF2H pump 1 x Suction hose (6m) - 1 1/ 4 ” (32mm) - with filter/strainer 1 x Box of spare parts and tools Panel options: 120W: 2 x panels with hinge and stand 240W: 2 sets of 2 x panels with hinge and stand...
- Page 3 Switch on the pump!..................17 Mettre en marche la pompe! Ligue a bomba! Make sure you have registered your 10 year warranty..20 Assurez-vous d’avoir enregistré votre garantie de 10 ans Certifique-se de que você registrou seus 10 anos de garantia warranty.futurepump.com...
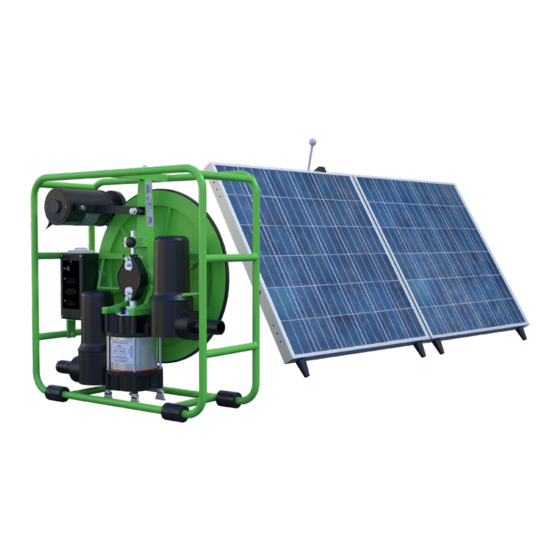
- Page 5 The parts Les composantes As partes Solar panel / Panneau solaire / Painel solar ON/OFF switch / Interrupteur marche ou arrêt / Interruptor liga ou desliga Prop bar / Barre de support / Barra de apoio Panel stand clamp / Pince de support de panneau / Braçadeira de suporte do painel Pump chamber / Corps de la pompe / Câmara de bombeamento...
- Page 6 Identify installation location Identifier l’emplacement de l’installation Identifique o local de instalação Near water source A proximité d’une source d’eau Instale próximo à fonte de água In full sunlight En plein soleil Instale o painel sob sol direto As near as possible to irrigated plot Plus proche possible de la parcelle à...
- Page 7 Measure total head (SF2) Mesurer la hauteur monométrique totale Meça a altura total de sucção Discharge Lift Ascenseur de decharge Altura de saída Total Head Hauteur manométrique totale Elevação total Suction Lift Hauteur d’aspiration Max 15m Altura de sucção (50ft)
- Page 8 Measure total head (SF2H) Mesurer la tête totale Meça a altura total de sucção 120W panel Discharge Lift Hauteur de décharge option Altura de saída Total Head Hauteur Total head manométrique totale Elevação total Max 25m (82ft) Suction Lift Hauteur d’aspiration Altura de sucção Max 7m (22ft)
- Page 9 Unpack Pump Déballez la pompe Tire a bomba da embalagem Cut the plastic strapping and lower the motor onto the flywheel. Remove the bolts and black spacers holding the flywheel so the wheel moves freely. Coupez le feuillard en plastique et abaissez le moteur sur le volant.
-
Page 10: Initial Checks
Initial checks Vérifications initiales Checagens iniciais Rotate the flywheel clockwise by hand. Check that the pulley is touching the flywheel and is straight and that the wheel can move freely. Tournez le volant dans le sens des aiguilles d’une montre à la main. - Page 11 Check pulley Vérifier la poulie Verifique a polia Small Pulley/ Petite poulie/ Polia Pequeña Large pulley/ Grande poulie/ Polia grande The pulley has two settings. Select the correct one, based on the total pressure to the pump and the solar radiation available. La poulie a deux réglages.
- Page 12 Check pulley continued Vérifier la poulie a continué Continuação da verificação da polia To adjust the pulley, unscrew the front knob on the motor shaft, pull the pulley off from the motor and turn it around. Re-mount the pulley onto the motor shaft and retighten the front knob.
-
Page 13: Set Up Panel
Set up panel Installez le panneau Montagem do painel 1) Place the panel stand clamp into the matching hinge connection on the panel 2) Screw in the bolt and nut to secure 3) Insert the prop bar into panel stand clamp 4)Adjust the angle of panel towards the sun and tighten the knob to secure it. - Page 14 Stand up panel Installez le panneau Montagem do painel To angle the panel to the sun, loosen the knob and slide the clamp on the panel stand up or down. Tighten the knob to secure. Pour incliner le panneau par rapport au soleil, desserrez le bouton pour faire glisser le panneau vers le bas ou vers le haut sur le support.
-
Page 15: Connect Inlet Hose
Connect inlet hose Connectez le tuyau d’admission Conecte a mangueira de entrada Connect the inlet hose to the inlet side on the pump (the lower hose nipple). Push the hose nipple into the air vessel and twist until secure. Connectez le tuyau d’aspiration à la prise d’entrée de la pompe (embout de tuyau inférieur). - Page 16 Connect outlet hose Raccordez le tuyau de sortie Conecte a mangueira de saída Connect the outlet hose to the tapered hose nipple, then attach this to the outlet side of the pump. *The SF2H comes with a threaded hose collar for securing the connection.
- Page 17 Plug in panel & turn on Connecter le panneau et allumer Conecte o painel e ligar Plug the panel into the pump IEC connector. Branchez le panneau dans le connecteur IEC de la pompe. Conecte o painel no conector IEC da bomba.
- Page 18 Optimum hose sizes SF2 Diamètres optimales des tuyaux SF2 Tamanhos ideais de mangueira SF2 Total head / Hauteur totale /Elevação total Maximum output / Debit maximale / Saída máxima 3600L/hr 2000L/hr Hosepipe diameter (inches) / Physical head (m) / Ascenseur physique (m) / Elevação física (m) Diamètre du tuyau (pouces)
- Page 19 Optimum hose sizes SF2H Diamètres optimales des tuyaux SF2H Tamanhos ideais de mangueira SF2H Total head / Hauteur totale / Elevação total 1000L/hr (120W) 800L/hr (120W) 700L/hr (240W Maximum output / Debit maximale / 1500L/hr (240W) 1200L/hr (240W) only) Saída máxima Hosepipe diameter (inches) / Physical head (m) / Ascenseur physique (m) / Elevação física (m) Diamètre du tuyau (pouces)
-
Page 20: Registering Your Warranty
Enregistrement de votre garantie Registrando a sua garantia To register your warranty is easy: 1. Log on to warranty.futurepump.com 2. Enter your pump serial number and your details 3. Click register You will now receive 10 years warranty on all spare parts and labour. - Page 21 Exclusions - This limited warranty does not cover: 1. Materials, supplies or accessories not manufactured or supplied by Futurepump Ltd; 2. Futurepump equipment that has been modified without prior approval; 3. Repairs performed by personnel not authorized by Futurepump Ltd;...
-
Page 22: Preventative Maintenance
Avoid extreme back pressure on the pump: optimal hose size is greater than 1-inch, avoid kinks in the pipe, if using sprinklers connect max 4 (SF2) or 2 (SF2H) Do not leave the pump outside in the elements -... -
Page 23: Entretien Préventif
à 1 pouce, évitez les déformations du tuyau, si vous utilisez des arroseurs, connectez-les max 4 (SF2) ou 2 (SF2H). Ne laissez pas la pompe à l’extérieur dans les éléments - si vous ne l’utilisez pas, stockez-la à l’intérieur ou recouvrez-la Ne pas essayer d’alimenter la pompe avec autre chose... -
Page 24: Manutenção Preventiva
Evite pressão de retorno extrema na bomba: o tamanho ideal de mangueira é maior que 1 polegada, evite torções nos canos, e se estiver utilizando sprinklers, conecte no máximo 4 (SF2) o 2 (SF2H) Não deixe a bomba exposta ao clima – quando não estiver usando-a, guarde-a em um lugar... - Page 25 Have you registered your warranty? Visit warranty.futurepump.com to register for your 10 year warranty Problem with your pump? Please reach out to the shop where you purchased your pump or visit support.futurepump.com Avez-vous rempli votre garantie ? Visitez warranty.futurepump.com pour vous inscrire à...
Need help?
Do you have a question about the SF2 and is the answer not in the manual?
Questions and answers