Table of Contents
Advertisement
Quick Links
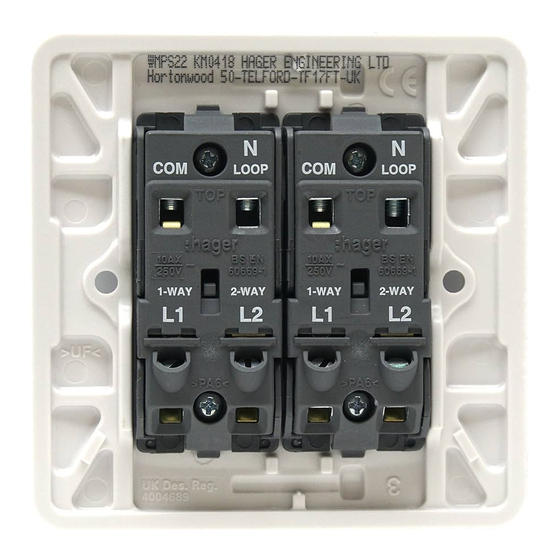
16AX switches 1way/2way
10AX intermediate switch
Hager Dream
Safety instructions
Electrical equipment must only be installed and assembled by a qualified
electrician in accordance with the relevant installation standards, regulations,
directives and safety and accident prevention directives of the country.
Failure to comply with these installation instructions may result in damage to
the device, fire or other hazards.
Function
Mechanical light switches for electrical installations in buildings.
Correct use
- For the flush-mounted installation in standard wall boxes
(recommended wall box depth ≥ 35 mm).
- Only suitable for use in indoor areas with no drip and no spray water.
Technical data
Rated voltage:
Frequency:
Conductor cross-section of screw terminals:
Distance of fixing holes:
Switch compliance:
16AX switches 1way/2way
Rated current:
10AX intermediate switch
Rated current:
Installation manual
max. 3 x 1.5 mm²
BS EN 60669-1, IEC 60669-1
www.hager.com
250 V~
50/60 Hz
60.3 mm
max. 16 AX
max. 10 AX
Advertisement
Table of Contents

Related Manuals for hager 16AX


Summary of Contents for hager 16AX
- Page 1 Installation manual 16AX switches 1way/2way 10AX intermediate switch Hager Dream Safety instructions Electrical equipment must only be installed and assembled by a qualified electrician in accordance with the relevant installation standards, regulations, directives and safety and accident prevention directives of the country.
- Page 2 Disconnect the connecting cables before working on the device and cover all live parts in the area! Preparing the device for installation (for example “16AX 2gang 1way switch”) Cover Notches Carefully loosen the cover on the notches with a flat-blade screwdriver (1).
- Page 3 2way switch 2way 2way General circuit diagram 2gang 2way 1gang 2way 1gang 2way switch switch switch Intermediate switch Intermediate 2way 2way General circuit diagram 1gang 2way 1gang 2way Intermediate switch switch switch Strip connection cables approx. 10 ... 12 mm. „...
- Page 4 Installing the device into the wall box (for example “16AX 2gang 1way switch”) After wiring, fix the device with the two screws attached into the wall box (3). „ Assembling the cover (for example “16AX 2gang 1way switch”) Cover Snap the cover onto the device (4).
Need help?
Do you have a question about the 16AX and is the answer not in the manual?
Questions and answers