
Related Manuals for Cilio LIGHTER ARC


Summary of Contents for Cilio LIGHTER ARC
- Page 1 LICHTBOGENFEUERZEUG BEDIENUNGSANLEITUNG BEDIENUNGSANLEITUNG BITTE AUFBEWAHREN!
-
Page 2: Wichtige Hinweise
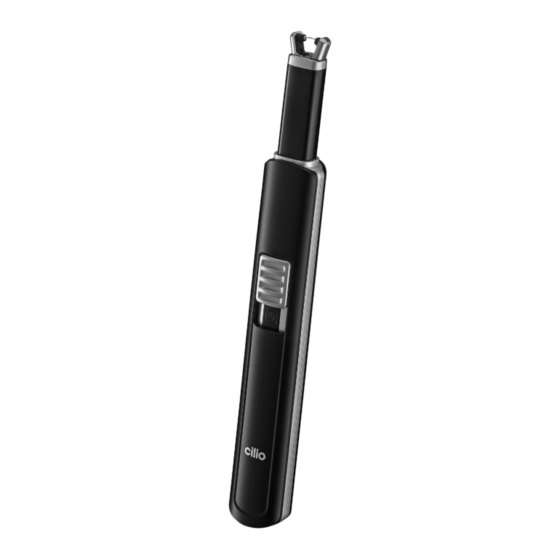
Unfälle und Störungen zu vermeiden. Durch falsche Verwendung, Benutzung oder unzureichende Reinigung und Pflege kann die Sicherheit beeinträchtigt werden, und es können Gefahren für den Benutzer entstehen. Für Schäden, die auf unsachgemäßen Gebrauch zurückzuführen sind, kann cilio keine Haftung übernehmen. Produktbeschreibung Lichtbogen Druckknopf (Zündung) -
Page 3: Technische Daten
Ladevorgang Stecken Sie das mitgelieferte USB-Kabel in die USB-Ladeschnittstelle des Feuerzeuges und laden es an einem geeigneten USB-Anschluss auf. Während des Ladevorgangs (ca. 2-3 Stunden) leuchtet das Kontrolllicht. Sobald das Licht erlischt, ist der Ladevorgang abgeschlossen. Aus Sicherheitsgründen ist das Feuerzeug während des Ladevorgangs nicht funktionsfähig. - Page 5 LIGHTER OPERATING INSTRUCTIONS PLEASE KEEP THIS USER’S GUIDE!
-
Page 6: Product Description
Improper use, application or insufficient cleaning and care can impair safety and result in danger for the user. cilio cannot accept any responsibility for injuries or damage attributed to improper use. Product description... -
Page 7: Charging Process
Charging process Plug the supplied USB cable into the USB charging interface of the lighter and charge it at a suitable USB connection. During the charging process (about 2-3 hours) the control light illuminates. As soon as the light goes off the charging process is completed. - Page 9 BRIQUET MODE D’EMPLOI CONSERVEZ SVP CE MODE D’EMPLOI !
-
Page 10: Description Du Produit
Merci d'avoir choisi ce briquet USB rechargeable de cilio haut de gamme. Il s'agit d'un produit de qualité conforme aux règles reconnues de la technique et à la législation sur la sécurité des appareils. Informations importantes Avant la première utilisation du briquet, merci de lire attentivement cette notice. -
Page 11: Données Techniques
Chargement Branchez le câble USB fourni sur l’interface USB du briquet et chargez-le sur une connexion USB appropriée. Pendant le chargement (environ 2-3 heures) la lampe témoin s'allume. Dès que la lampe s'éteint le chargement est terminé. Pour des raisons de sécurité, le briquet ne fonctionne pas pendant le chargement. - Page 13 ACCENDINO MANUALE D'USO SI PREGA DI CONSERVARE LE ISTRUZIONI!
-
Page 14: Descrizione Del Prodotto
Usi errati oppure pulizie e cure inadeguate possono pregiudicare la sicurezza, con conseguenti rischi per l'utente. cilio non risponde dei danni imputabili a usi non consoni. Descrizione del prodotto Arco elettrico... -
Page 15: Processo Di Carica
Processo di carica Inserire il cavo USB incluso nell’interfaccia USB dell'accendino e caricarlo in una connessione USB adatta. Durante il processo di carica (circa 2-3 ore) la spia luminosa si illumina, non appena la spia si spegne, il processo di carica è completo. Per ragioni di sicurezza, l'accendino non funzionerà... - Page 17 ENCENDEDOR INSTRUCCIONES DE USO ¡GUARDE EL MANUAL DE INSTRUCCIONES!
- Page 18 Debido a un uso o una utilización erróneos o a una limpieza y un cuidado insuficientes, puede verse afectada la seguridad y pueden surgir peligros para el usuario. cilio no puede asumir ninguna responsabilidad por daños derivados de un uso incorrecto.
-
Page 19: Proceso De Carga
Proceso de carga Conecte el cable USB incluido al interfaz USB del encendedor y cargue en una conexión USB adecuado. Durante el proceso de carga (cerca de 2-3 horas) el indicador luminoso se enciende. Tan pronto como se apaga el indicador luminoso el proceso de carga está... - Page 21 AANSTEKER GEBRUIKSAANWIJZING BEWAAR DEZE GEBRUIKSAANWIJZING GOED!
-
Page 22: Belangrijke Instructies
Voor schade die als gevolg van ondeskundig gebruik ontstaat, kan cilio zich niet aansprakelijk stellen. Productbeschrijving Elektrische boog... -
Page 23: Technische Gegevens
Laadproces Sluit de meegeleverde USB-kabel aan op de USB-interface van de aansteker en laad deze op via geschikte USB-poort. Tijdens het laadproces (ongeveer 2-3 uur) gaat het controlelampje branden, zodra het lampje uitgaat, is het laadproces voltooid. Om veiligheidsredenen zal de aansteker tijdens het laadproces niet werken. - Page 24 GmbH Höhscheider Weg 29 42699 Solingen · Germany www.cilio.de...
Need help?
Do you have a question about the LIGHTER ARC and is the answer not in the manual?
Questions and answers