Table of Contents
Advertisement
Quick Links
Advertisement
Table of Contents

Related Manuals for midiplus Tiny Series


Summary of Contents for midiplus Tiny Series
- Page 1 User Manual MIDIPLUS...
-
Page 2: Table Of Contents
OOLS X (MMC) ...............................14 3.5 L OGIC (MMC) ................................ 15 3.6 R EAPER 4. APPENDIX ................................16 ................................16 4.1 S PECIFICATIONS ................................17 4.2 MIDI CC L ..........................18 4.3 MIDI DIN TRS A DAPTER TINY series MIDI keyboard User Manual... -
Page 3: Introduction
Important Notes: Please use dry and soft rag to wipe the TINY series MIDI keyboard when cleaning. Do not use paint thinners, organic solvents, detergents or other wipes soaked in aggressive chemicals so as not to discolor the panel or keyboard. -
Page 4: Overview
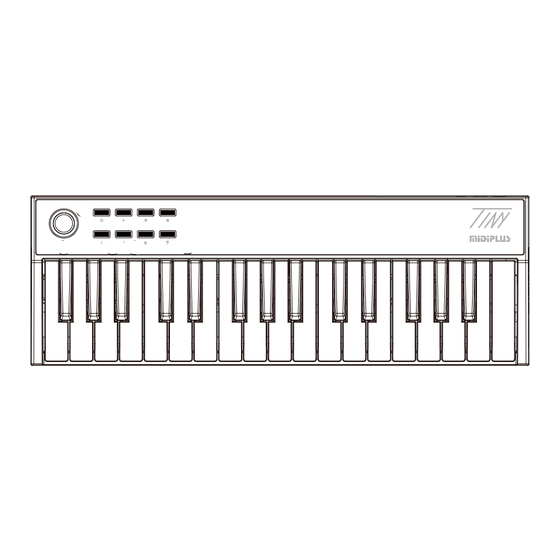
④ Transpose and Octave: Activate keyboard’s semitone control and octave control. ⑤ CHORD: Activate keyboard’s Chord mode. ⑥ SUSTAIN: Activate keyboard’s SUSTAIN. ⑦ Keyboard: Trigger notes on/off. Controller Edition: ⑧ Knobs: Control DAW and software instrument parameters. ⑨ Pads: Trigger channel 10 instrument note. TINY series MIDI keyboard User Manual... -
Page 5: The Rear Panel
2. Guide 2.1 Ready to use Use with computer: Connect TINY series MIDI keyboard to your computer using the included USB cable. TINY series MIDI keyboard is a class-compliant USB device, so its drivers are automatically installed when connecting to a computer. - Page 6 Use with external MIDI device: Connect to a USB 5V power adapter using the included USB cable, connect the MIDI OUT of TINY series MIDI keyboard to MIDI IN of external MIDI device with a 5 pin MIDI cable. TINY series MIDI keyboard User Manual...
-
Page 7: Pitch And Modulation Joystick
Certain instruments or presets will not use the modulation parameter. In the MIDIPLUS Control Center, the pitch bend can be defined by you as CC number (range CC0-CC128) and MIDI channel (range 0-16).the Modulation Control can be defined by you as CC number (range CC0-CC127) and MIDI channel (range 0-16). -
Page 8: Chord Mode
② Hold down SUSTAIN to activate SUSTAIN, release to deactivate. 2.7 Transport The three transport buttons of the TINY series MIDI keyboard are in MMC mode, which represent Play, Stop, and Record. In the MIDIPLUS Control Center, the Transport button contains the MMC mode and the CC mode. -
Page 9: Knobs (Tiny+)
CC#91 CC#71 CC#74 In the MIDIPLUS Control Center, you can customize the CC number (range CC0-CC127) and MIDI channel (range 0-16) of K1-K4 respectively. 2.9 Pads (TINY+) TINY+ features 4 velocity sensitive pads represents different Pad Banks, 4 Pad Banks can be switched by pressing the SHIFT and Pads,and they can send different note.The note of 4 Pad Banks as below:... -
Page 10: Daw Settings
2. Select the Machine Control and enable MMC Slave Active, set the MIDI Input and MIDI Output as TINY series MIDI keyboard, then set the MMC Device ID as 116 3. Click on OK to finish setup Note: Cubase LE/AI/Elements does not support MMC. TINY series MIDI keyboard User Manual... -
Page 11: Fl Studio(Mmc)
3.2 FL Studio(MMC) 1. Go to menu: Options > MIDI settings (keyboard shortcut: F10) 2. In the Input tab, find and Enable TINY series MIDI keyboard, then close the window to finish setup 3.3 Studio One (MMC) 1. Go to menu: Studio One > Options...(keyboard shortcut: Ctrl+, ) - Page 12 3. Then click on Add... 4. Select New Keyboard 5. Set both Receive From and Send To as TINY series MIDI keyboard 6. Click on OK to finish this part * Step 7 and 8 applies to Studio One 3 and earlier version...
- Page 13 7. Click on Add... 8. Find the PreSonus folder in the list and select MMC, set both Receive From and Send To TINY series MIDI keyboard, then click on OK to finish setup. * Step 9 and 10 applies to Studio One 4 and later version 9.
-
Page 14: Pro Tools (Mmc)
10. Select the Advanced and select the Synchronization, enable the Sync to External Devices, set MIDI Machine Control is TINY series MIDI keyboard, then click on OK to finish setup. 3.4 Pro Tools (MMC) 1. Go to menu: Setup > Peripherals... -
Page 15: Logic Prox (Mmc)
ID as 116, then close the window to finish setup. 3.5 Logic Pro X (MMC) 1. Go to menu: Preferences > MIDI... 2. Select the Sync window, find the MIDI sync Project Settings... and click on it TINY series MIDI keyboard User Manual... -
Page 16: Reaper (Mmc)
3. Enable the Listen to MIDI Machine Control (MMC) Input , then close the window to finish setup. 3.6 Reaper (MMC) 1. Go to menu: Options > Preferences... (keyboard shortcut: Ctrl + P) TINY series MIDI keyboard User Manual... -
Page 17: Appendix
2. In the Preferences window, click on the MIDI Devices tab, find and right click on the the TINY series MIDI keyboard from the Device list, select Enable input and Enable input for control messages, then close the window to finish setup. -
Page 18: Ist
All Notes Off 46 ~ 47 Undefined Omni Mode Off 48 ~ 51 General Purpose Controller LSB 1 ~ 4 Omni Mode On 52 ~ 63 Undefined Mono Mode On Sustain Poly Mode On Portamento On/Off TINY series MIDI keyboard User Manual... -
Page 19: Midi Din To 3.5Mm Trs Adapter
MIDI IN, you need to use a 3.5mm TRS to MIDI DIN adapter, please note that there are 3 most common type adapter, make sure you are using the Type A, the MIDI-pin arrangement as below: MIDI 4 (Source) > TRS Ring MIDI 2 (Shield) > TRS Sleeve MIDI 5 (Sink) > TRS Tip TINY series MIDI keyboard User Manual... - Page 20 TINY series MIDI keyboard User Manual...
Need help?
Do you have a question about the Tiny Series and is the answer not in the manual?
Questions and answers