
Subscribe to Our Youtube Channel
Related Manuals for True ETHRIO ET 1600


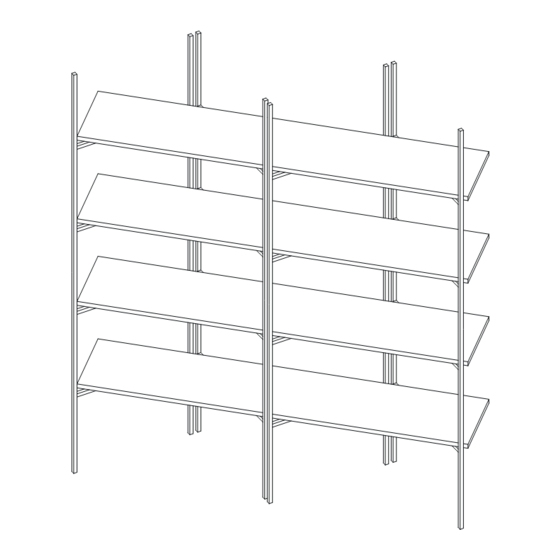
Summary of Contents for True ETHRIO ET 1600
- Page 1 ETHRIO ET 1600 bookshelf assembly instructions istruzioni montaggio libreria ET 1600 instructions de montage du étagère ET 1600...
- Page 2 Components Componenti | Éléments M6x14mm M6x16mm Screw and insert Screw and insert Chipboard screw (for concrete, tiles walls) (for gypsum board) (for wood) Tassello e vite Tassello e vite Vite truciolare (per cemento, mattoni) (per legno) (per cartongesso) Ancrage et vis Bouchon et vis (pour le mur) (pour panneaux d'aggloméré)
- Page 3 Step Before starting the assembly, align properly the 4 A elements as shown below. Prima di iniziare il montaggio, allineare correttamente i 4 elementi A come illustrato. Avant de commencer le montage, alignez correctement les 4 éléments A comme indiqué. 113,24mm 148,92mm...
- Page 4 Step In order to guarantee the stability of the structure, first secure the second shelf B to the two elements A starting from the bottom with the 8 M6x16mm screws. Per garantire stabilità alla struttura, fissare per prima ai due elementi A la seconda mensola B a partire dal basso con le 8 viti M6x16mm. Afin de garantir la stabilité...
- Page 5 Step Repeat the procedure of step 2 with the other 3 shelves B. Ripetere il procedimento dello step 2 con le altre 3 mensole B. Répétez la procédure de l'étape 2 avec les 3 autres tablettes B.
- Page 6 Step If you have adjustable feet, screw them at the desired height to ensure stability on the floor. Se si dispone dei piedini regolabili, avvitarli fino all’altezza desiderata che garantisca stabilità sul piano. Si vous avez des pieds réglables, vissez-les à la hauteur souhaitée qui assure stabilité sur le sol.
- Page 7 Step If you have the wall-mounted kit, bring Ethrio close to the reference support. Se si dispone del kit fissaggio a parete, avvicinare Ethrio al supporto di riferimento. Si vous avez le kit de fixation murale, rapprochez Ethrio au support de référence. Only if you have both the mounting kit, for the wall and for the floor, follow the steps in this order: Solo se si dispone di entrambi i kit fissaggio, sia per parete sia per pavimento, seguire gli step in questo ordine: Seulement si vous avez tous les deux kit de montage, pour le mur et pour le sol, suivez les étapes dans cet ordre:...
- Page 8 Step Before fixing the two C and D elements, please follow strictly the under instructions. Prima di iniziare il montaggio dei due elementi C e D, attenersi alle indicazioni qui di sotto riportate. Avant de commencer le montage des deux éléments C et D, suivez les instructions ci-dessous. Select the A element with column closest to the support Scegliere l’elemento A che abbia la colonna più...
- Page 9 Step Once selected the position on the column where C and D elements should be inserted, drill the support aligned with the C element hole. Repeat the procedure on the other columns with the other available C and D elements. Scelta la posizione lungo la colonna dove inserire gli elementi C e D, forare il supporto in allineamento al foro dell’elemento C.
- Page 10 Step Secure the 2 elements C and D using the M6x14mm screw and consequently block with E nut. Fissare i due elementi C e D con la vite M6x14mm e successivamente bloccare con il dado E a disposizione. Fixez les deux éléments C et D avec la vis M6x14mm, puis bloquez-les avec l'écrou E fourni. M6x14mm...
- Page 11 Step Secure each Ethrio column to the support (if in wood) with the two chipboard screws. Fissare ogni colonna di Ethrio al supporto (se in legno) con le due viti truciolari. Fixez chaque colonne de Ethrio au support (si en bois) avec les deux vis à aggloméré. for wood wall per legno pour panneaux...
- Page 12 Step Use the proper screw and insert according to your specific type of wall composition. A seconda del supporto, utilizzare la vite e il tassello corrispondente. En fonction du support, utilisez la vis et la cheville correspondantes. for gypsum board walls per cartongesso pour placoplâtre for concrete or tiles walls...
- Page 13 Step If you have the floor mounting kit, remove the screw and adjust the feet at the desired height. Later mark the point where the floor must be drilled. Se si dispone del kit fissaggio a pavimento, rimuovere la vite e regolare i piedini fino all’altezza desiderata. Successivamente segnare il punto dove forare nel pavimento.
- Page 14 Step Remove Ethrio before drilling the floor in the previously marked points. Rimuovere Ethrio prima di forare il pavimento nei punti contrassegnati in precedenza. Removez Ethrio avant de percer le sol dans les points précédemment marqués.
- Page 15 Step According to the type of the floor, to secure the feet, use the corresponding screws and dowels. A seconda della tipologia del pavimento, per fissare i piedini, utilizzare le viti e i tasselli corrispondenti. En fonction du type de sol, pour fixer les pieds, utilisez les vis et les chevilles correspondantes. for wood per legno pour panneaux d'aggloméré...
-
Page 16: Care And Maintenance
ETHRIO Care and Maintenance It is a good idea to distribute the weight evenly on each shelf and not to use the shelves themselves as a resting place to retrieve objects located above. Remember to use saucers that do not exude moisture before placing the plants on the shelves. - Page 17 True Design s.r.l. Via Leonardo Da Vinci 2 - 35040 Sant’Elena (PD) Italy Tel. +39 0429 692483 - info@truedesign.it - www.truedesign.it...
Need help?
Do you have a question about the ETHRIO ET 1600 and is the answer not in the manual?
Questions and answers