Advertisement
Quick Links
Installation and Operator's Manual
LT19 (2 Position) & LT21 (3 Position)
Lockable Trimmer Racks
for Utility Landscape Trailers
GENERAL SAFETY PRECAUTIONS
This symbol points out important safety instructions which,
if not followed, could endanger the personal safety and/or
property of yourself and others. Read and follow all instructions
in this manual before attempting to install or operate this
Lockable Trimmer Rack. Failure to comply with these
instructions may result in personal injury. When you see this
symbol. HEED ITS WARNING!
WARNING
Improper installation and operation could cause personal
injury, and/or property damage. Observe the following Safety
Precautions before, during and after operating this spare tire
carrier. By following these precautions and common sense,
possible injury to persons and potential damage to this accessory
may be avoided.
BEFORE YOU BEGIN INSTALLING:
1. Read and understand these instructions completely.
2. Verify that you have received all the parts listed in the
bill of materials.
WARNING
Always wear safety glasses when using power tools.
Tools Required:
• 1/2" Wrench and/or sockets
• 7/16" Wrench and/or sockets
• Electric Drill
• 11/32" Drill Bit
• Carpenter's Square
• Tape Measure
• (2) C-clamps
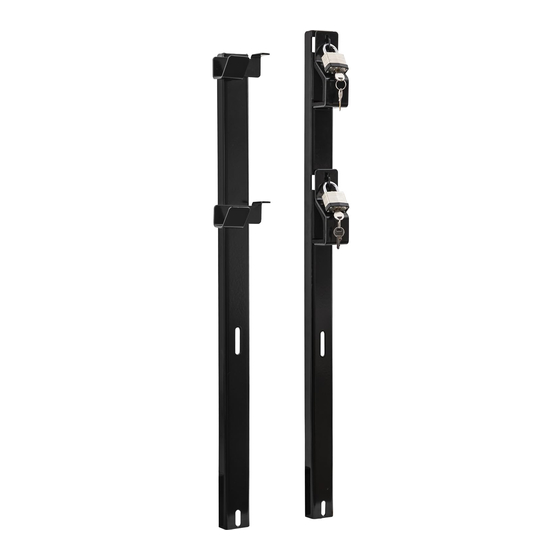
1. Clamp the locking and nonlocking uprights to the trailer
side rail approximately 28" to 34" apart with the base of
the upright on the trailer floor. The locking upright may be
assembled on the left or right of the nonlocking upright.
Verify the uprights are square to the trailer deck in both
directions with a carpenter's square. Note: If bent shaft
trimmers are used, the uprights need to be mounted
closer together than if straight shaft trimmers are used.
2. Assemble a line trimmer to the rack to verify the
distance between the uprights is correct for the model
of trimmer you wish to hold. Note: The large hook on
the locking upright should engage the trimmer's grip
and the smaller hook on the nonlocking upright should
engage the shaft of the trimmer. Do not clamp on or
near the throttle trigger of the trimmer. With the trimmer
assembled in position, verify that the lock assembly
hook can rotate freely over the trimmer grip.
3. Clamp the two uprights to the rail of the trailer. Make
sure the uprights are square to the rail and the deck of the
trailer with a square.
4. Mark the center of the two holes on each rail.
Check for locations of brake lines and electrical wiring
etc., before drilling any holes. Any damage to trailer during
installation is the installer's sole responsibility.
5. Drill two 11/32" holes through the marked locations.
6. Fasten each upright to the trailer with two 5/16-18 x
1-1/2" cap screws, four 5/16" flat washers, and two 5/16-
18" nylock nuts. Tighten all four screws.
MAINTENANCE
Examine the general condition of the Lockable Trimmer
Rack for any damage or worn parts before installation and
monthly after mounted to your trailer. Check all nuts and
bolts to make sure they are secure and tight monthly. Have
necessary repairs made by qualified service personnel.
1
www.buyersproducts.com
Phone (440) 974-8888
Fax 800-841-8003
WARNING
—continued
Advertisement

Summary of Contents for Buyers LT19
- Page 1 Phone (440) 974-8888 Fax 800-841-8003 Installation and Operator's Manual LT19 (2 Position) & LT21 (3 Position) Lockable Trimmer Racks for Utility Landscape Trailers GENERAL SAFETY PRECAUTIONS This symbol points out important safety instructions which, if not followed, could endanger the personal safety and/or property of yourself and others.
- Page 2 Normal wear is excluded. The sole responsibility of Buyers Products Co. under this warranty is limited to repairing or replacing any part or parts which are returned, prepaid, and are found to be defective by Buyers Products Co. Authorization from Buyers Products Co.


