Table of Contents
Advertisement
Quick Links
Advertisement
Table of Contents

Subscribe to Our Youtube Channel
Related Manuals for Luxair Master Series


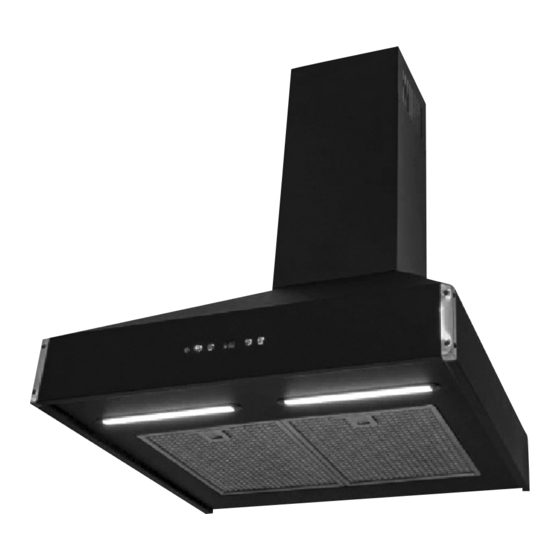
Summary of Contents for Luxair Master Series
- Page 1 Installation Instructions Master Range Cooker Hood MASTER RANGE...
-
Page 2: Table Of Contents
CONTENTS INSTRUCTIONS FOR SAFE OPERATION OF THE HOOD TECHNICAL DATA TECHNICAL DRAWING III. KIT CONTENTS IV. NOTES BEFORE INSTALLATION – Technical Problems – Spatial Aspect – Select the hood operating mode: extractor or extractor – Hood as an extractor (open circuit) and the selection of ventilation duct –... -
Page 4: Instructions For Safe Operation Of The Hood
INSTRUCTIONS FOR SAFE OPERATION OF THE HOOD 1. Please read carefully before proceeding with the installation this manual. 2. Installation of the hood should be carried out in accordance with the description and guidelines presented in chapter VI. DETAILED INSTRUCTIONS Assembly. 3. - Page 5 10. There is a risk of fire if cleaning is not carried out as directed. 11. Do not use open fire under the cooker hood. 12. Food prepared with fats should be constantly supervised as hot fat can ignite easily. 13.
-
Page 6: Technical Data
I. TECHNICAL DATA MODEL MASTER RANGE SUPPLY VOLTAGE 230 V / 50 Hz NUMBER OF TURBINES NUMBER OF TURBINE SPEEDS WIDTH 600 mm 700 mm 800 mm 900 mm 1000 mm 1100 mm 1200 mm Number of Aluminium Filters LED 2 x 3 W LED 3 x 3 W Lighting |KELVIN| 4000K... -
Page 7: Technical Drawing
II. TECHNICAL DRAWING MASTER RANGE... -
Page 8: Kit Contents
III. KIT CONTENTS 1⃣ 2⃣ 3⃣ HOOD (Body) Lower Chimney Upper Chimney 1 piece. 1 piece. 1 piece. 4⃣ 6⃣ 5⃣ Chimney Bracket reducer Ø150 / Ø125 non-return flaps (depending on the model, attached separately or already mounted on the turbine outlet) Remove during installation! 1 pcs. -
Page 9: Notes Before Installation
IV. NOTES BEFORE INSTALLATION Technical problems Before proceeding with the installation of the device, take into account all possible technical problems and difficulties that may occur during the installation of the hood and its operation. Installation of the device should be performed by qualified and trained personnel. -
Page 10: Duct
• When to opt for open circuit? (Ducted Out) When there are technical possibilities (ducts and a dedicated ventilation grille for the chimney of the appropriate diameter/dimensions). º When cooking in the kitchen a lot. º When the room needs to be quiet. º When the distance between the hood and the ventilation chimney is small •... - Page 11 • Flat ducts can be used as an alternative to tubing. An appropriate equivalent should be used. Their internal cross-sectional area must correspond to the internal cross-sectional area of round pipes, i.e.: Ø150mm pipe, i.e. 220 x 90 mm flat duct, Ø125 mm pipe, i.e. 150 x 70 mm flat duct.
- Page 12 • Motor Flaps We advise that motor flaps are removed during installation. These are situated in the hood for transport purposes and to prevent debri falling in to the motor during installation. Backflap Attachment...
-
Page 13: Open-Circuit Ventilation Grille (Hood As An Extractor Hood)
Open-circuit ventilation grille (hood as an exhaust hood ducted out) • If in the room, apart from the hood, there are other devices with non- electric power supply (e.g. fireplaces, instantaneous heaters or liquid fuel stoves), the discharged gases from combustion may cause poisoning of household members . •... -
Page 14: Hood As An Absorber (Closed Circuit)
Hood as an absorber (closed circuit - Recirculated) When choosing an extractor (Fig. 5), remember that: This mode of operation is used when it is not possible to lead the extractor outside. No ventilation ducts are installed to the absorber. In order for the hood to absorb odors, it is necessary to use an activated carbon filter. -
Page 15: Wall Mounting
Wall mounting • The wall must be flat and vertical. • The wall must be sufficiently load-bearing. • The depth of the holes must be equal to the length of the screws. • Wall plugs must be firmly seated. • Taking into account the wide range of building materials that are currently used to construct walls, the manufacturer does not include screws or wall plugs. -
Page 16: General Assembly Notes
V. GENERAL ASSEMBLY NOTES Below are general considerations related to the installation of hoods. Compliance with the described principles will enable correct installation and safe use of the device. Contents of the package • Check the set is complete ONCE AGAIN. In point III. KIT CONTENTS •... -
Page 17: Mounting The Hood
The hood should be installed at a distance of min. 55 cm above the hob of the electrical appliance and min. 65 cm above the hob of the gas appliance. The distance is measured between the surface supporting the cooking utensils on the hob and the lowest part of the range hood. -
Page 18: Assembly Instructions
VI. DETAILED HOOD ASSEMBLY INSTRUCTIONS Before installing the hood, protect the furniture, ATTENTION! hob and other devices located in the close vicinity of the assembly area. Description of symbols etc. is in Chapter III. K IT CONTENTS 1. Remove the aluminum filters. 2. -
Page 19: Electrical Connection
Electrical connection • Please connect the device to the mains before completing the installation and test for any faults. • Do not bend or pinch the connection cable during installation. The required parameters of the connections are on the rating plate placed inside the appliance, visible after removing the aluminum grease filter. -
Page 20: Use
VII. USE Proper use of the hood: • The instruction manual is a part of the device and should be kept carefully so that it can be consulted at any time. If the hood is sold, these instructions must be handed over to the purchaser. -
Page 21: Electronic Push-Button Control With A Display
It is FORBIDDEN to smoke cigarettes and exhale cigarette smoke with your head placed under the hood. PARTICULAR danger for people with long hair, which can be caught in the turbine. Placing your head under the eaves may result in loss of health and injury. It is FORBIDDEN to place animals on the hood, which may lead to their injury, but also damage to the hood, eg scratching. -
Page 22: Manufacturers Declaration
VERIFICATION OF THE CONDITION OF THE Weryfi kacja stanu okapu po montażu HOOD AFTER INSTALLATION • Należy ściągnąć wszystkie folie ochronne, następnie usunąć ewentualne pozostałości kleju oraz (w razie potrzeby) plamy tłuszczu i oleju. • Remove all protective films, then remove any residues, glue and (if necessary) grease and •... -
Page 23: Technical Card
IX. TECHNICAL CARD... -
Page 26: Support Service
X. SUPPORT AND SERVICE If, despite our thorough quality control, you find irregularities in the work and functioning of the purchased device, please contact our Service, which will provide professional assistance. Before calling for service, make a note of the following equipment details: Type / Model name: •Date of purchase: ______________________________________ •Fault description Spare parts can be purchased directly from the manufacturer or authorized... -
Page 28: Warranty Card
XI. WARRANTY CARD • The seller guarantees the smooth peration of the equipment for 12 months from the date of sale. Manufacturing defects revealed during this period will be removed free of charge. • The warranty card is valid only with proof of purchase. •...
Need help?
Do you have a question about the Master Series and is the answer not in the manual?
Questions and answers