Advertisement
Quick Links
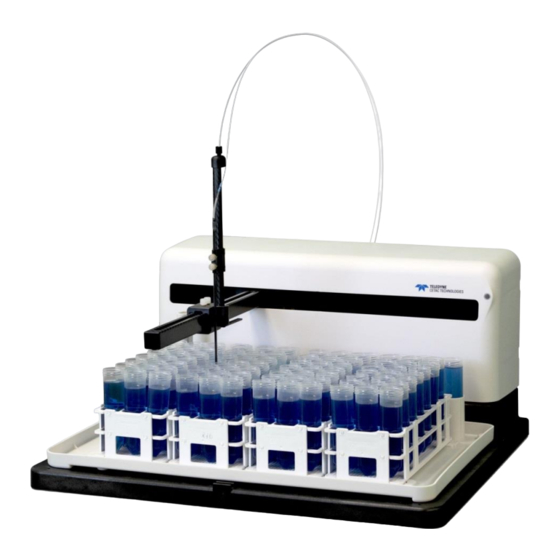
ASX-560 Autosampler
ASX-280 Autosampler
Alignment Guide
Manual Part Number 480221 Rev 4
© 2015-2022 Teledyne Technologies Incorporated.
All rights reserved. Printed in USA.
Use and Disclosure of Data
Information contained herein is classified as EAR99 under the U.S. Export Administration Regulations.
Export, reexport or diversion contrary to U.S. law is prohibited.
Advertisement

Related Manuals for Teledyne Cetac Technologies Everywhereyoulook ASX-560


Summary of Contents for Teledyne Cetac Technologies Everywhereyoulook ASX-560
- Page 1 ASX-560 Autosampler ASX-280 Autosampler Alignment Guide Manual Part Number 480221 Rev 4 © 2015-2022 Teledyne Technologies Incorporated. All rights reserved. Printed in USA. Use and Disclosure of Data Information contained herein is classified as EAR99 under the U.S. Export Administration Regulations. Export, reexport or diversion contrary to U.S.
- Page 2 Introduction The autosampler’s alignment is critical to its ability to operate reliably. Alignment sets the horizontal location of known positions on the tray in relation to the home position at the rinse station. This alignment is done by setting offsets in the firmware. No mechanical adjustments are required.
- Page 3 Overview of the Alignment Process Step 1: Prepare the autosampler and computer. ❖ Gather the required equipment. ❖ Install the ASX Dashboard software and configure the PC. ❖ Physically prepare the autosampler for alignment. Step 2: Start the alignment software. ❖...
-
Page 4: Equipment Required
Step 1: Prepare the Autosampler and Computer Equipment Required • ASX-560 or ASX-280 autosampler • USB cable • Sample probe with probe clamps • Rinse station and spill tray • Two 60- or 90-position racks • Four empty sample vials •... - Page 5 For the Decimal symbol, choose the period (‘.’). Click OK. Preparing the Autosampler Turn the autosampler off. Remove any liquids (samples, standards, etc) from the tray of the autosampler. Place the four sample vials and three standards vials as shown. You will need three standards vials with caps*, two 60- or 90-position racks, and four empty sample vials.
- Page 6 ASX-560 with 60-position racks Standards Vials (Caps are Optional*) For systems which use five 250 mL standards bottles, use the left, center, and right positions (1, 3, and 5). Center Standards Vial Should Line Up With Center of Tray Vials in the Right-Back and Right-Front Corners Vials in Second Column from Left, Back and Front Rows EAR99 Technology Subject to Restrictions Contained on the Cover Page.
- Page 7 ASX-560 with 90-position racks Standards Vials (Caps are Optional*) For systems which use five 250 mL standards bottles, use the left, center, and right positions (1, 3, and 5). Center Standards Vial Should Line Up With Center of Tray Vials in the Right-Back and Right-Front Corners Vials in Second Column from Left, Back and Front Rows EAR99 Technology Subject to Restrictions Contained on the Cover Page.
- Page 8 ASX-280 with 60-position racks For the ASX-280, All Three Standards Vials Are in the Front Row Vials in Left-Back and Left-Front Corners Vials in the Right-Back and Right-Front Corners ASX-280 with 90-position racks Vial placement in the left rack is different for the ASX-280 with 90-position racks. Vials in Left-Back and Left-Front Corners Vials in the Right-Back and...
- Page 9 Connect the autosampler to the PC using a USB cable. Turn the autosampler on. Check that no other software is communicating with the autosampler. Close any other software (such as the ICP software) which could potentially try to communi- cate with the autosampler. Ensure that the autosampler is in the home position before proceeding.
- Page 10 Step 2: Start the Alignment Software Open the ASX Dashboard. Select the Alignment Utility from the Dashboard. Select the appropriate COM port. Note that USB connections appear as COM ports. Note: If the com port does not automatically populate, ensure that all other programs are closed and then select Refresh List.
- Page 11 Step 3: Follow the Instructions Displayed by the Software Click START ALIGNMENT. The software will guide you through each step of the alignment. The first step of the alignment is always the origin, or home, point. This will be at the back left corner of the tray, at the rinse station.
- Page 12 Alignment Zones Home Position (Origin) Use the alignment controls (X/Y Axis Controls and Z Axis Controls) to center the probe tip in the rinse station. Position the probe so that the tip is approximately 1 cm into the rinse station (Z-axis) and the edges are equally spaced from the walls of the rinse station (X and Y axes).
-
Page 13: Rinse Station
Correct alignment over a standards vial should look like this: Rinse Station This position was already aligned as the “home” position, so all you need to do is verify that it is correct and click SAVE ZONE. This is the last zone, so after you click SAVE ZONE, click VERIFY ALIGNMENT. The autosampler will move to each of the alignment targets;...
Need help?
Do you have a question about the Everywhereyoulook ASX-560 and is the answer not in the manual?
Questions and answers
Power LED flashing in ASX 560 autosampler