Advertisement
Advertisement
Table of Contents

Related Manuals for iOptron Tri-Pier


Summary of Contents for iOptron Tri-Pier
- Page 1 ® ® iOptron Tri-Pier Instruction Manual Product #8034...
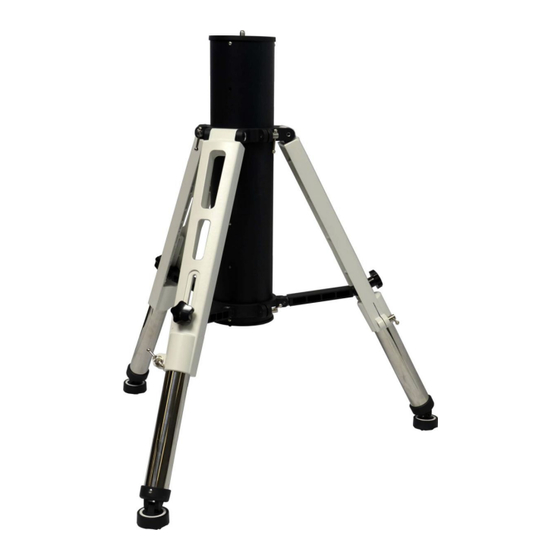
- Page 2 ® The iOptron Tri-Pier combines the strength and stableness of a pier with the leveling flexibility of a tripod. It is designed for iOptron GOTO mounts, which includes CEM70, CEM60, GEM45, CEM40, iEQ45/iEQ45 Pro, HEM44, HAE43, iEQ30/iEQ30 Pro, MiniTower/MiniTower II/MiniTower Pro mount. It also can be used for other mounts with a proper customized mounting adapter, #8036.
- Page 3 3. Pull a Tri-pier leg out from the pier tube. There is a vibration suspension pad on each foot. Legs 4. Install the leg onto the Tri-pier leg house. Make sure the feet locking screw is aligned to the Leg Adjustment & Leveling Screw.
- Page 4 5. After all three legs are installed, set the Tri-pier upright. Loosen 6 Pier Height Adjustment Levers (do not fully separate the Mounting Rings from the Center Column) and 3 Leg Adjustment & Leveling Screws. Center Column Pier Height Adjust. Lever...
- Page 5 7. Move the Center Column up or down to desired height until hear the “click” sound. Lock the Pier Height Adjustment Levers. 8. Adjust the Tri-pier legs by spreading the legs. Make sure that the Tri-pier feet are sit inside the vibration suspension pads. The pads and the ground surface are contacted well. Tighten the Leg Adjustment &...
- Page 6 Replace center Post for MiniTower/MiniTower Pro/AZ Mount Pro: 1. Remove three screws that hold the top plate in place. 2. Replace it with MiniTower Center Post. 3. Reinstall the top plate.
- Page 7 Pier Top Dimension:...
Need help?
Do you have a question about the Tri-Pier and is the answer not in the manual?
Questions and answers