Advertisement
Quick Links
Advertisement

Related Manuals for Livoo DOM297


Summary of Contents for Livoo DOM297
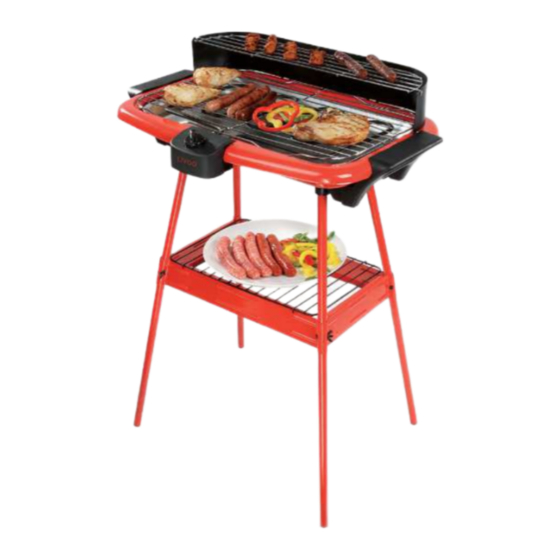
- Page 1 Instruction manual Stand electrical barbecue Reference : DOM297 Version : 1.4 WWW.LIVOO.FR...
- Page 2 Instruction manual Language : English You have purchased a product LIVOO brand and we thank you. We take great care in design, ergonomics and ease of use of our products. We hope that this product will give you complete satisfaction.
- Page 3 Instruction manual 2. The safety instructions do not by themselves eliminate any danger completely and proper accident prevention measures must always be used. 3. Never leave the appliance unsupervised when in use. 4. Keep the appliance and its cord out of reach of children less than 8 years.
- Page 4 Instruction manual 8. If the supply cord is damaged, it must be replaced by the manufacturer, its service agent or similarly qualified persons in order to avoid a hazard (*). 9. Do not pass the cord over objects with sharp edges and keep it at a distance from, hot objects and bare flames.
- Page 5 Instruction manual whatsoever. Never place into dishwasher. 14. In case the appliance accidentally falls into water disconnect it immediately. Have it checked by an expert before re-using, if you do not do this you run the risk of electrocution. 15. Never try to open the casing yourself 16.
- Page 6 Instruction manual way. Do not wind the cord around the appliance and do not bend it. 21. Place the device on a flat, stable, heat- resistant surface. 22. Unplug the appliance when not in use. 23. It is absolutely necessary to keep this appliance clean at all times as it comes into direct contact with food.
-
Page 7: Water Level
Instruction manual 29. This appliance is intended to be used in household and similar applications such as: • staff kitchen areas in shops, offices and other working environments • farm houses • by clients in hotels, motels and other residential type environments •... - Page 8 Instruction manual ← — —Min. water level indicator The water level indicator can be found inside the tank. 33. The appliance must not be used without water 34. Regarding the instructions for cleaning with food, thanks to refer to the below paragraph of the manual surfaces in contact .
-
Page 9: Specifications
Instruction manual Special measures Warning Caution hot surface! Surfaces are liable to get hot during use. DO NOT OPERATE this product near water sources or flammable liquids. DO NOT CLEAN OR TOUCH the metals part of this product when it is still hot DO NOT USE SHARP OBJECTS Caution: do not, under any circumstances, cover the grill rack with aluminous foil, barbecue dishes ●... - Page 10 Instruction manual AC 220-240V 50Hz 2000W DESCRIPTION & BARBECUE ASSEMBLY Before using for the first time Remove any packaging materials from the appliance. Clean the tank, tray salvage dealer of fat and the grill pan The tank must be filled with water up between MIN and MAX marking, never fill water on the heating element, it will damage it.
- Page 11 Instruction manual Tank Metal hook 3. Handle + Base feet Step 1: Insert the four base feet into the plastic handles according to the same direction as showing above. Step 2: Install the plastic handles on the two sides of the tank by four screws. 4.
- Page 12 Instruction manual 5. Tray salvage dealer of fat 6. Nut 7. Metal pipe Step 4: Insert the metal pipe into the tray salvage dealer of fat (No.5). Step 5: Insert each side of the metal pipe (No.7) into the two small holes on the left & right sides of the tank (No.1) individually.
- Page 13 Instruction manual 8 . Heating Element Step 7: Put the whole heating element (No.8) onto the base. There is a small hole on the bottom side of the heating element. Make sure that the metal hook (No.2) is inserted inside the hole completely. 9.
- Page 14 Instruction manual Step 8: Put the big grid onto the BBQ. Step 9: Put the small grid onto the windshield. Stand Assembly: A1.short leg A2.long leg A3.short metal shelf A4.long metal shelf A5.butterfly nut A6.M5 Screw Step 1: Insert the short leg into the long leg, and ensure the hole on short leg can meet with hole on long leg to make the black screw inserting successfully.
- Page 15 Instruction manual A7. Rubber sockets A8. Lower grill Get all four legs fixed as a complete stand, same as the diagram above. Step 3: Insert the 8pcs of rubber socket into the hole of stand separately. Step 4: Put the lower grill onto the stand and put the table BBQ onto the stand. Step 5: Now you are ready to use the Barbecue.
- Page 16 Instruction manual 6. When grilling is finished, turn the thermostat to “0” (off position) and disconnect the grill from the mains supply socket. CLEANING AND STORAGE Caution: Do not use wire brush or any abrasive items or liquids to clean the appliance. Always remove the plug from the socket before cleaning the barbecue 1.
- Page 17 The symbol of the crossed out dustbin is marked on all products to remind the obligations of separate collection. Consumers should contact their local authority or retailer for information concerning the correct disposal of their product. LIVOO BP 61071 67452 Mundolsheim - FRANCE •...
Need help?
Do you have a question about the DOM297 and is the answer not in the manual?
Questions and answers