Table of Contents
Advertisement
Available languages
Available languages
Quick Links
Elettrosega telescopica
ISTRUZIONI PER L'USO
Istruzioni originali
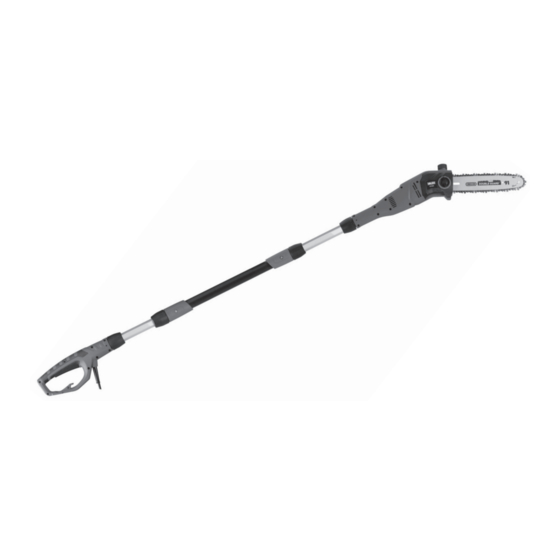
Electric pole chainsaw
INSTRUCTION MANUAL
Translation of the original instructions
ATTENZIONE! Prima di usare la macchina, leggete e comprendete le istruzioni di sicurezza e le istruzioni d'uso fornite
WARNING! Before using the machine, read and understand the supplied safety instructions and operating instructions
ATTENZIONE! Questa è una elettrosega per potatura e deve essere usata solo da operatori addestrati
IMPORTANT! This is a pruning chainsaw. It must only be used by trained operators
Final dimension: A5
06.02.2020
ET 301
S493953
Advertisement
Table of Contents

Summary of Contents for Valex ET301
- Page 1 Final dimension: A5 S493953 06.02.2020 ET 301 Elettrosega telescopica ISTRUZIONI PER L’USO Istruzioni originali Electric pole chainsaw INSTRUCTION MANUAL Translation of the original instructions ATTENZIONE! Prima di usare la macchina, leggete e comprendete le istruzioni di sicurezza e le istruzioni d’uso fornite WARNING! Before using the machine, read and understand the supplied safety instructions and operating instructions ATTENZIONE! Questa è...
- Page 2 - 2 -...
- Page 3 - 3 -...
- Page 4 - 4 -...
- Page 5 - 5 -...
-
Page 6: Installazione
COMPONENTI Fare riferimento alla fig. A e seguenti, allegate alle presenti istruzioni. SIMBOLOGIA 1. Spina e cavo di alimentazione Osservate con attenzione la simbologia della fig.B e memo- 2. Impugnatura posteriore rizzate il rispettivo significato. Una corretta interpretazione 3. Interruttore di avvio/arresto dei simboli consente un uso più... - Page 7 MESSA IN SERVIZIO - Se la catena risultasse troppo tesa, girare di poco la ghiera Nel luogo che utilizzerete l’utensile elettrico è opportuno tendicatena (20) in senso orario per allentare la tensione considerare: - A regolazione ultimata, stringere manualmente (non usare - che la zona non sia umida e che agenti atmosferici avversi pinze o attrezzi) in modo sicuro il volantino centrale (19).
- Page 8 mere con un cacciavite sottile all’interno del foro di sblocco CONTROLLO DEL CORRETTO FUNZIONAMENTO DELL’O- (26) per comprimere il perno (9) e contemporaneamente LIATORE AUTOMATICO estrarre il tubo. Oltre a controllare visivamente l’olio depositato sulla catena, è possibile verificare praticamente se l’olio è presente in AGGANCIO DELLA PROLUNGA DI ALIMENTAZIONE (Fig.G) giusta quantità: Agganciare la prolunga di alimentazione (non inclusa) come...
-
Page 9: Manutenzione
MANUTENZIONE Osservare sempre il movimento del ramo e spostarsi immediatamente non appena il ramo cade verso il terreno. ! ATTENZIONE! Prima di effettuare le seguenti operazioni staccate l’alimentazione elettrica scollegando la spina. 6. Effetto del suolo in pendenza Quando si sta tagliando su un terreno in pendenza, l’ope- ! ATTENZIONE! Non manomettete o tentate di riparare ratore deve posizionarsi sul lato a monte in quanto il ramo l’utensile elettrico. -
Page 10: Problemi, Cause E Rimedi
PROBLEMI, CAUSE E RIMEDI presso un centro di assistenza autorizzato esibendo la prova di acquisto e richiedendo ricambi originali. Fate sempre riferimento alle informazioni riportate sull’eti- PROBLEMA CAUSE RIMEDI chetta dati tecnici. L’utensile elettri- Linea di alimenta- Verificate la linea di co non si avvia zione scollegata alimentazione elettrica... -
Page 11: Installation
10. Oil tank cap 11. Housing 12. Electric motor cooling vents SYMBOLS 13. Bar 14. Saw chain Carefully observe the symbols in fig. B and memorise their 15. Bar cover respective meanings. Correct interpretation of the symbols 16. Sprocket allows safer use of the power tool. 17. - Page 12 ASSEMBLING WARNING! Before filling it is important to clean with a brush in the area of the cap, in order to eliminate dirt. 1. ASSEMBLING THE BAR AND CHAIN (Fig. C) Unscrew the oil cap (pos. 10) and fill the tank with biode- ! IMPORTANT! Installation must be carried out with gradable chain oil (not included);...
- Page 13 USER INSTRUCTIONS - Cut-resistant gaiters and safety shoes with anti-slip soles, crush-resistant and cut-resistant toe caps. After reading the previous chapters carefully, apply these instructions scrupulously to obtain maximum performance. 3) Limiting access to danger zones Proceed calmly so as to become familiar with all the controls; Limit access to the area using special warning signs and barriers.
-
Page 14: Maintenance
PROBLEMS, CAUSES AND SOLUTIONS If you have to remove cut branches that got snagged on the tree, turn the tool off, seize the branch with the branch hook (pos. 16, where fitted), and pull. PROBLEM CAUSES SOLUTIONS During use, keep the chain lubricated: see chapter “Main- tenance”. -
Page 15: Warranty
STORAGE Clean the whole tool and all its accessories thoroughly (see Maintenance chapter); slip the sleeve over the bar/chain and use the original packaging to protect the tool. If the chainsaw is not used for a long period of time, we recommend that you empty the oil tank and store the chain and the bar in greaseproof paper. -
Page 16: Dati Tecnici
è conforme ai technical file is in requisiti essenziali di sicurezza e salute contenuti nelle seguenti direttive europee: Valex SpA - Via Lago Maggiore 24 2006/42/CE, 2006/95/CE, 2014/30/CE, 2011/65/CE 36015 Schio (VI) - Italy DECLARATION OF CONFORMITY 02.2020...


Need help?
Do you have a question about the ET301 and is the answer not in the manual?
Questions and answers