Table of Contents
Advertisement
Advertisement
Table of Contents

Subscribe to Our Youtube Channel
Summary of Contents for Sitecom LN-308
- Page 1 MULTI FUNCTIONAL USB SERVER LN-308/309, WL-203 Full manual...
-
Page 2: Table Of Contents
Sitecom Multi Functional USB server LN-308/309, WL-203 1. Table of Contents 1. TABLE OF CONTENTS ........................2 2. INTRODUCTION ............................ 4 2.1 T HANK YOU 2.2 A ..........................4 BOUT THIS ANUAL 3. PRODUCT OVERVIEW ........................5 3.1 P ..........................5... - Page 3 Please check www.sitecom.com for up to date drivers & utilities, manuals and support 8.1 U ......................31 SING OOLS OF ONTROL ENTER 8.2 S ......................31 ETTING UP ERVER ONFIGURATION 8.2.1 G ........................31 ENERAL ONFIGURATION 8.2.2 TCP/IP 31 8.2.3 W ........................
-
Page 4: Introduction
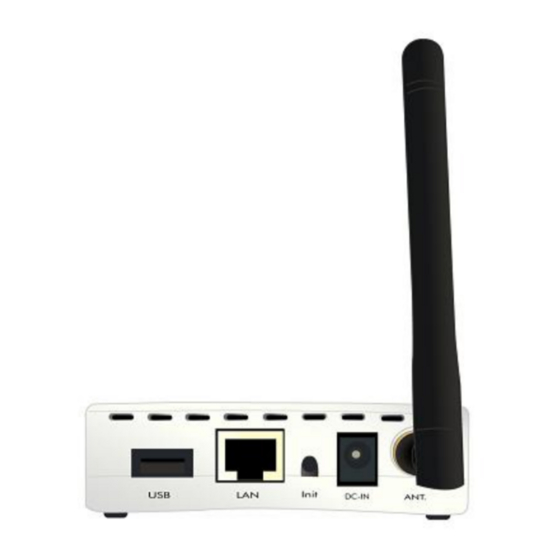
2. Introduction 2.1 Thank you Thank you for buying the Sitecom Multi Functional USB Server WL-203. With this product you will be able to connect your AIO/MFP (All-In-One/Multifunction Peripheral), printers, USB mass storages (hard drives, flash drives, and memory card readers), and scanners, to your network, allowing all network users access to these shared USB devices. -
Page 5: Product Overview
Please check www.sitecom.com for up to date drivers & utilities, manuals and support 3. Product Overview 3.1 Package Contents • The MFP Server (WL-203) • CD-Rom (Control Center software, User’s Manual and Quick Installation Guide) • Power Adapter • Warranty Card •... -
Page 6: Features And Benefits
Sitecom Multi Functional USB server LN-308/309, WL-203 3.3 Features and Benefits This Server provides the following features and benefits: • Reliability: The Server provides high performance and reliability combined with low power consumption. • Flexibility: The Server supports print/File/Scan sharing in all major computer systems and environments. -
Page 7: Basic Installation & Configuration
Please check www.sitecom.com for up to date drivers & utilities, manuals and support 4. Basic Installation & Configuration 4.1 Connecting the Hardware • Make sure that your USB devices are switched off and that the Server’s Power Adapter is disconnected. - Page 8 Sitecom Multi Functional USB server LN-308/309, WL-203 Select “Use the following IP address”. And then put the factory default IP • <192.168.0.200> and Subnet mask <255.255.255.0>. Then click “OK” to finish the setting. Then Sitecom MFP can directly be found in the Control Center. •...
-
Page 9: Installing Control Center Software
Please check www.sitecom.com for up to date drivers & utilities, manuals and support 4.2.3 Installing Control Center software • Install the WL-203 Control Center by running the Autorun CD. • Click Install Control Center to start the installation. • Click Next to start. - Page 10 Sitecom Multi Functional USB server LN-308/309, WL-203 • Then click Next, until you click the Finish to complete the installation.
-
Page 11: Setting The Ip Address Using The Control Center
Please check www.sitecom.com for up to date drivers & utilities, manuals and support 4.2.4 Setting the IP Address Using the Control Center • Start the Control Center. The Main window will open. (Detailed information about the server and the printer will be shown when the ‘Server Information’ button is pressed.) Note:... -
Page 12: Setting The Ip Address Using The Server's Web
Sitecom Multi Functional USB server LN-308/309, WL-203 • Click the button corresponding to your choice of IP setting method (static or dynamic using DHCP). When assigning a static IP address you also have to define Subnet Mask and Default Gateway. If you choose Automatically get IP by DHCP, you can use desired DNS by clicking the Manual DNS button and manually assigning a DNS. - Page 13 Please check www.sitecom.com for up to date drivers & utilities, manuals and support • A web page “System Status” is shown. Please click Basic Settings. • And then click the TCP/IP setting.
- Page 14 Sitecom Multi Functional USB server LN-308/309, WL-203 • Select the button which corresponds with your choice of IP settings (static or dynamic using DHCP). When assigning a static IP address you also have to define Subnet Mask and Default Gateway.
-
Page 15: Print Server In Windows
Please check www.sitecom.com for up to date drivers & utilities, manuals and support 5. Print Server in Windows 5.1 Connecting the Server To configure your Server correctly, you should know which type of network topology your Server connects to. 5.1.1 The Server and Windows PC on LAN 5.1.2 Setting up Local Windows Printer Driver... -
Page 16: File Server
NetUSB mode. Please refer to the Storage Access Mode. • Sitecom is not responsible for the loss or corruption of data in memory devices, including hard disks; Sitecom is not responsible for leaking, manipulation, loss, or corruption of data (after unauthorized access) on memory devices connected to the Server. - Page 17 Please check www.sitecom.com for up to date drivers & utilities, manuals and support...
-
Page 18: Supported Codepages
Sitecom Multi Functional USB server LN-308/309, WL-203 6.3 Supported Codepages The Server supports Windows codepages. If users want to communicate with the Server using an FTP client tool or SMB on Windows 2000, they have to set their Server codepage as the codepage that their Windows PC is using. -
Page 19: Setting Up File Server Using The Control Center
Please check www.sitecom.com for up to date drivers & utilities, manuals and support 6.4.1 Setting up File Server Using the Control Center • Open the Control Center • Select the MFP Server from the Server List. • Double click the highlighted option in the list or click Configure Server, and enter the Server’s interface using administrator username (default: admin) and password (default:... -
Page 20: Set Up File Server Configuration
Sitecom Multi Functional USB server LN-308/309, WL-203 6.4.3 Set up File Server Configuration 6.4.3.1 Set SMB/CIFS Print/File Server • Enable SMB/CIFS Print/File Server: select the item, if you want to support SMB/CIFS print/File server. • Enable Internet Access: clear the item, if you do not allow that users can access your SMB/CIFS server via Internet. -
Page 21: Storage Access Mode
Please check www.sitecom.com for up to date drivers & utilities, manuals and support your storage will be shared without security. • Allow Anonymous Login: select the item, if you want to allow the user “anonymous” to login to your FTP server with read-only permission and the Server will not check the password. -
Page 22: Using Shared Storage By Ftp Methods For Windows
Sitecom Multi Functional USB server LN-308/309, WL-203 6.6 Using Shared Storage by FTP Methods for Windows • Open Microsoft Internet Explorer. • In the Web Address List, enter the command: “ftp://Server’s Host Name“ or “ftp://Server’s IP address”. If you have changed the default FTP port : 21 to the new value, you have to add the new port number behind the command (e.g. -
Page 23: Netusb Mode
USB MFP server via TCP/IP. The simplest way to do this is using “Control Center” to search for the Sitecom USB MFP server on the network and change its IP address to be the same subnet as your PC. If the MFP server and your PC are not in the same TCP/IP subnet, Control Center will show the... - Page 24 Connect the USB device to Sitecom WL-203. The LED of the USB port will light. • Run the Control Center. In the “USB MFP Server List” window, you can see the host names and IP addresses all of the Sitecom WL-203 servers (in blue) on the network, as shown below. •...
-
Page 25: Netusb Printing Using Auto-Connect Printer
Please check www.sitecom.com for up to date drivers & utilities, manuals and support • Please follow the user manual of the USB device to install its driver. For example, you may put the driver CD of the USB device in the CDROM player to install the driver. - Page 26 Sitecom Multi Functional USB server LN-308/309, WL-203 • Choose the desired printer. The desired printer must be the Windows printer (this is a logical printer) that matches the printer attached on the MFP server (this is a physical printer). Then click the “Apply” button.
- Page 27 Please check www.sitecom.com for up to date drivers & utilities, manuals and support...
-
Page 28: Netusb Scanning Using Network Scanning
Sitecom Multi Functional USB server LN-308/309, WL-203 • Then try to issue a print job to the desired printer. You will see the Control Center will automatically do a connect operation and, once the print job finished, it will hold the connection. -
Page 29: Netusb Mode For Usb Storage
Please check www.sitecom.com for up to date drivers & utilities, manuals and support • Then you can see that the Control Center will automatically do a “connect” operation. The following window will appear. • Choose one of TWAIN or WIA item. Click “OK”. The following window will appear. - Page 30 Sitecom Multi Functional USB server LN-308/309, WL-203 Before you use NetUSB technology to access USB storage, please make sure the storage access mode is in NetUSB mode. For detail setting, please refer to <8.2.3 Supported Protocols > • In the Control Center, click the MFP server that has the desired USB storage device attached.
-
Page 31: Using The Control Center
Please check www.sitecom.com for up to date drivers & utilities, manuals and support 8. Using the Control Center 8.1 Using Tools of Control Center You can use the following tools to help you use the server: Refresh Server List: renew to auto search the existing servers on the network. -
Page 32: Wireless Configuration
Sitecom Multi Functional USB server LN-308/309, WL-203 8.2.3 Wireless Configuration • Region or Domain: Select your region to configure the available wireless channels. • Station Name: The BSSID or MAC-Address of the Wireless Multi Function Printserver. • Network Type: Select Infrastructure when the printserver has to connect to a router or AccessPoint, select Ad-Hoc to connect to a client computer or Peer-to-Peer network. -
Page 33: User Accounts
Please check www.sitecom.com for up to date drivers & utilities, manuals and support Factory Default. • FTP Server: select or clear FTP Server support. It is enabled in Factory Default and set some parameters as below : • FTP Port: enter an integer number to set FTP server’s TCP port (default: 21) •... -
Page 34: Snmp
Sitecom Multi Functional USB server LN-308/309, WL-203 Then, please click the Set button to complete and save the new settings. Note: If you forgot the administrator username and password, you must perform Restore Factory Default action by plugging in the power adaptor while pressing the Init button. Please refer to the “10. -
Page 35: Email
Please check www.sitecom.com for up to date drivers & utilities, manuals and support • SNMP V3: select or clear SnmpV3 support. • User Security name: set user security name of SNMP v3 • Auth Password: set authentication password of SNMP v3. -
Page 36: Maintenance
Sitecom Multi Functional USB server LN-308/309, WL-203 8.6 Maintenance To restart the Server, restore the Server to factory defaults, download new firmware file from product’s public website and upgrade new firmware. • Time Setup: click this button, to configure the time-zone, and time-settings for the Server. - Page 37 Please check www.sitecom.com for up to date drivers & utilities, manuals and support Note: The Control Center doesn’t really quit if you click the “X” box (close box) at the top right corner of the window. Instead, it just minimizes itself to the system tray. There are two ways to really close the Control Center.
-
Page 38: The Server's Web
Sitecom Multi Functional USB server LN-308/309, WL-203 9. The Server’s Web Pages 9.1 Introduction By using the web pages to see the Server’s system status and configure the Server. 9.2 Using the Server’s Web Pages 9.2.1 Displaying Server Status •... -
Page 39: Tcp/Ip Configuration
Please check www.sitecom.com for up to date drivers & utilities, manuals and support 9.3.2 TCP/IP Configuration To set the MFP server’s TCP/IP configuration and connect TCP/IP network, please see < 4.2.5 Setting the IP address Using the Server’s Web Pages > for details. -
Page 40: Wireless Configuration
Sitecom Multi Functional USB server LN-308/309, WL-203 • FTP Server: select or clear FTP Server support. It is enabled in Factory Default and set some parameters as below : • FTP Port: enter an integer number to set FTP server’s TCP port (default: 21) •... -
Page 41: Advanced Settings
Please check www.sitecom.com for up to date drivers & utilities, manuals and support • Region or Domain: Select your region to configure the available wireless channels. • Station Name: The BSSID or MAC-Address of the Wireless Multi Function Printserver. •... -
Page 42: Snmp
Sitecom Multi Functional USB server LN-308/309, WL-203 • Permission: select Read-Only or Read-Write permission to access File servers. • Add: click Add button, after entering the user name, corresponding password, and Permission selection. The account will take effect once shown in the blank below. -
Page 43: Email
Please check www.sitecom.com for up to date drivers & utilities, manuals and support 9.4.3 Email If you want to receive alert mails from the Server, you have to enable SMTP Protocol, and set Email configuration. You can set new SMTP port number (default: 25) •... -
Page 44: Restart
Sitecom Multi Functional USB server LN-308/309, WL-203 9.5.2 Restart Click the Apply button, the Server will be restarted. -
Page 45: Restore
Please check www.sitecom.com for up to date drivers & utilities, manuals and support 9.5.3 Restore Click the Apply button, the Server will restore factory default settings and then restart. 9.5.4 Time Setup On this page, you can configure the correct Time-Zone, and select a NTP-server. -
Page 46: Using The Control Center
Sitecom Multi Functional USB server LN-308/309, WL-203 10. Restore Factory Defaults 10.1 Using the Control Center • Start the Control Center. • If the tool finds Servers in your local area network, then you have to select a Server from the Server List. -
Page 47: Upgrade Firmware
Please check www.sitecom.com for up to date drivers & utilities, manuals and support 11. Upgrade Firmware Note: Before starting to upgrade the firmware, please do power off and on the MFP device. It is easy to do by removing the power plug & plugging-in the unit again. -
Page 48: Using The Server's Web
Sitecom Multi Functional USB server LN-308/309, WL-203 11.2 Using the Server’s Web Pages • Power on the Server. Suppose that the Server is in DHCP mode • Check the Server's IP address. • First, run Control Center. It will automatically search for Servers on the LAN. Then Servers’... -
Page 49: Using The Init Button And The Tftp Client
Server’s configuration will recover to Factory Default values. • Start the TFTP client Tool: Image Burner • Press Start -> All Programs -> Sitecom -> Multi-Function Printserver Control Center -> Image Burner. • Enter the Server’s Fallback IP address: 192.168.0.100 and click Open Image to open your new firmware. - Page 50 Sitecom Multi Functional USB server LN-308/309, WL-203 Note: After performing the tasks mentioned above, you have to unplug the power adaptor and then plug in the power adaptor to restart the Server.
Need help?
Do you have a question about the LN-308 and is the answer not in the manual?
Questions and answers