Polti Vaporetto ECO PRO 3000 Manual
- Usage instructions (13 pages) ,
- Usage instructions (2 pages) ,
- Instructions for use manual (9 pages)
Advertisement
- 1 PRECAUTIONS
- 2 SAFETY WARNINGS
- 3 KEY
- 4 CORRECT USE OF THE PRODUCT
- 5 ATTENTION
- 6 SET UP
- 7 PREPARATION FOR USE
- 8 INSTRUCTIONS FOR USE
- 9 STEAM REGULATION FEATURE
- 10 CONNECTION OF ACCESSORIES
- 11 USE OF THE ACCESSORIES HOLDER
- 12 PRESSURE INDICATOR
- 13 PATENTED SAFETY CAP / ''WATER OUT''
- 14 PRECAUTIONS FOR DELICATE SURFACES
- 15 PRACTICAL ADVICE FOR THE USE OF THE ACCESSORIES
- 16 KALSTOP
- 17 CARE OF YOUR VAPORETTO
- 18 OPTIONAL ACCESSORIES
- 19 STEAM DISINFECTOR (mod. PAEU0197)
- 20 TROUBLESHOOTING
- 21 Documents / Resources
PRECAUTIONS
KEEP THESE INSTRUCTIONS
- Read these instructions carefully before using the appliance.
- Any use which does not comply with these instructions will invalidate the warranty.
- If this instruction manual is lost, it is possible to review it and/or download it from the web site www.polti.com
- Unpack the product and make sure it is intact as well as all the accessories listed in the key. If in doubt, do not use the product and contact an Authorized Service Centre.
- This appliance has been designed only for domestic use.
- This appliance can be used by children aged from 8 years and above and per-sons with reduced physical, sensory or mental capabilities or lack of experience and knowledge if they have been given supervision or instruction concerning use of the appliance in a safe way and understand the hazards involved. Children shall not play with the appliance. Cleaning and user maintenance shall not be made by children without supervision. Keep the iron and its cord out of reach of children less than 8 years of age when it is energized or cooling down.
- Children should be supervised to ensure that they do not play with the appliance.
- In case the appliance is accidentally dropped, it is necessary to have it checked by an authorized Service Centre as the internal safety features may have been affected.
- High-pressure jets can be dangerous if used improperly. Do not direct the steam jet at people, live electrical equipment or the appliance itself.
- Keep all the parts of the packaging out of the reach of children, they are not a toy. Keep the plastic bag out of the reach of children: danger of suffocation.
 | ATTENTION: High temperature. Risk of scalding! If indicated do not touch the parts on the product |
 | ATTENTION: Risk of scalding! |
SAFETY WARNINGS
Risk of electric shock and/or short circuit:
- The wiring system to which the appliance is connected must always comply with the laws in force.
- Before connecting the appliance, make sure that the mains voltage is the same as the voltage indicated on the data label of the appliance and that the power outlet is connected to earth.
- Always turn off the appliance at the on/off switch before unplugging it.
- If the appliance is left unused, always disconnect it from the mains. Never leave the appliance unattended with the cable plugged into the mains.
- Always make sure the appliance is unplugged before performing maintenance work of any kind.
- Do not pull the power cable out of the socket, but grasp the plug itself to avoid damage to the socket.
- Do not allow the power cable to be twisted, crushed, stretched, or come into contact with sharp or hot surfaces.
- Do not use the appliance if the power cable or other important parts of the appliance are damaged. Instead, contact an authorised service centre.
- If the supply cord is damaged, it must be replaced by the manufacturer, its service agent or similarly qualified persons in order to avoid a hazard.
- Do not use electric extension leads that are not authorized by the manufacturer, as they may cause damage or fire.
- Never touch the appliance with wet hands or feet with the cable plugged into the mains.
- Do not use the appliance when barefoot.
- Do not use the appliance near washbasins, bathtubs, showers or containers full of water.
- Never immerse the appliance, the cable or the plugs in water or another liquid.
- Do not direct the steam jet at live electrical and/or electronic equipment or at the appliance itself.
Risk of injury and/or burns during use of the appliance
- Use of the appliance in places where there is a danger of explosions is prohibited.
- Do not use the product with toxic substances.
- In case of breakdown or malfunction switch off the appliance and never attempt to disassemble it, but refer to an authorized Polti Service Centre.
- This appliance is equipped with safety devices which are to be replaced only by a suitably qualified technician.
- Before cleaning or storing the appliance, always first ensure that the appliance has cooled down completely.
- Do not direct the steam jet at people, animals or debris.
- Never place your hands inside the jet of steam.
- While refilling with water, switch off and disconnect the appliance from the mains.
- Do not use if the appliance has been dropped, has visible signs of damage or leaks.
- If ironing whilst sitting down, take care to ensure that the jet of steam is not angled towards your legs. Steam can scald.
- Before connecting the appliance to the current, ensure that the continuous steam jet button is not pressed.
- Never leave the iron unattended when it is plugged in.
- Before refilling the appliance when it is hot, allow it to cool for a few minutes.
- Keep your face away if you fill the boiler when it is still hot, the water can evaporate on contact with the hot boiler, causing a jet of steam.
When filling a hot boiler, we recommend adding small amounts of water to avoid the water evaporating instantly with the risk of burning. - Do not empty the appliance when the water inside the boiler is still hot.
- Do not try to unscrew the cap when the appliance is in operation.
- Regularly check the status of the safety cap and seal, replace with original parts as necessary.
- Make sure the safety cap is screwed on properly, otherwise it may cause steam leaks.
- Do not force open the cap when there is a minimum pressure of steam in the boiler.
- Never leave the filling bottle or the funnel resting on the mouth of the boiler, with the product connected to the power supply, since this could cause burns.
Using the appliance:
- This appliance has been designed to work with normal tap water.
Absolutely do not use distilled water, dryer condensate water, perfumed water, rain water, battery water, water from air conditioning systems and the like. Do not use chemical substances or detergents. - Do not use limescale products other than Kalstop FP2003.
- Never leave the appliance exposed to the weather.
- Do not place the appliance near a live element, an electric stove or any other source of heat.
- Do not expose the appliance to temperatures under 0°C or over 40°C
- Press the buttons only with a finger, without excessive force and avoid using a pointed object such as a pen.
- Do not wind the power cable around the appliance, especially when the appliance is still hot.
- To avoid prejudicing the safety of the appliance when repairing or replacing accessories, use only original spare parts.
- Let the appliance cool down before cleaning it.
- Before storing the appliance make sure that it has completely cooled down.
- It is necessary to keep the unit in horizontal position during operation.
- Always rest the appliance on a stable surface.
- Iron only on supports that are heat resistant and which allow the steam to permeate.
- If the iron rest mat needs to be replaced, only use original spare parts.
- The iron must be used and rested on a stable surface.
- When placing the iron on its stand, make sure that the surface on which the stand is placed, is stable.
- Do not place the hot appliance on heat-sensitive surfaces.
- During use the appliance must be resting on a surface (table or floor). The handle is only used for transport.
- Keep the device out of the reach of children, when it is on and during cooling.

 Read these instructions carefully before using the appliance.
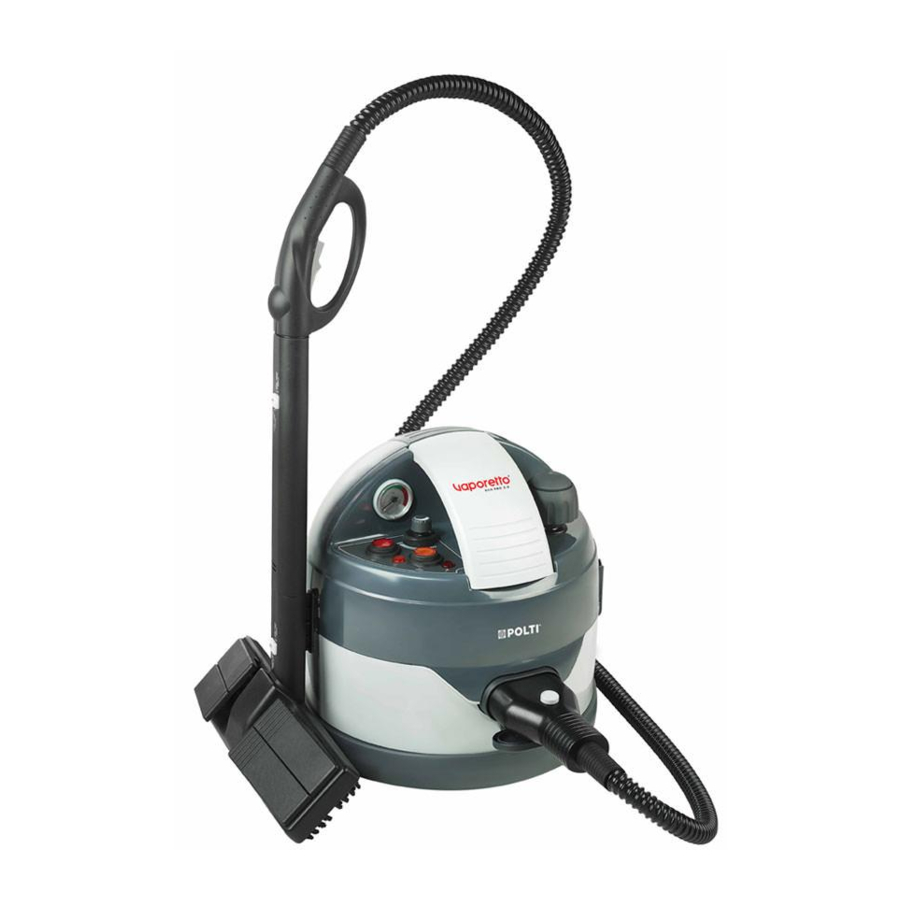
KEY

GENERATOR
- Patented Safety Cap
- Generator on/off switch
- Accessory on/off switch
- Central connector block with splash proof cover
- Lock-in aperture for central connector
- Power supply cable
- Carrying handle
- Pivotting wheels
- Steam flow regulation control
- "Out of water" indicator light
- Steam pressure indicator light
- Pressure indicator
ACCESSORIES
- Flexible hose
- Steam gun
- Safety switch
- Steam request lever
- Connector assembly
- Press down connector button
- Locking tab
- Extension tubes
- Brush for floors
- Cloth retaining clips
- Replaceable bristles plate
- Accessories locking button
- Small brush
- Cotton cloths
- Filler bottle
- Spare washers for accessory connections
- 120° accessory
- Small round brush for 120° accessory
- Window squeegee tool
- Small blade for window tool
- Large blade for window tool
- High pressure lance
- 2 Phials of Kalstop FP2003
OPTIONAL ACCESSORIES
- Triangular brush
- Wallpaper stripper tool
- Iron
- Steam request button
- Temperature regulation dial
- Iron rest mat
- Continuous steam jet button
- "Iron heating" indicator light
 This unit conforms with EC-directives 2004/108/CE (EMC) and 2006/95/CE (low voltage).
Polti S.p. A. reserves the right to change equipment or accessory specification without prior notice.
CORRECT USE OF THE PRODUCT
This appliance is intended for home use as a steam cleaner as described and in accordance with the instructions provided in this manual. Please read these instructions carefully and keep them, as you may find them useful in future.
Polti declines liability for any damage or accident derived from any use of this appliance which is not in conformity with the instructions contained in this booklet.
ATTENTION
Directive 2002/96/EC (Waste Electrical and Electronic Equipment - WEEE): information for users
This product complies with EU Directive 2002/96/EC.
 The crossed-out wastebasket symbol on the appliance means that at the end of its useful lifespan, the product must be disposed of separately from ordinary household wastes.
The user is responsible for delivering the appliance to an appropriate collection facility at the end of its useful lifespan.
Appropriate separate collection to permit recycling, treatment and environmentally compatible disposal helps prevent negative impact on the environment and human health and promotes recycling of the materials making up the product. For more information on available collection facilities, contact your local waste collection service or the shop where you bought this appliance.

Before leaving our factory all our products are rigorously tested. For this reason, your VAPORETTO may contain some residual water in the boiler from the testing.
SET UP
Before using VAPORETTO for the first time assemble the pivoting wheels as indicated in the Fig. A.

PREPARATION FOR USE
- Unscrew the patented safety cap (A) and fill the boiler with about 2 litres of water using the filler bottle (14) making sure that it does not overflow (Fig 1).
![]()
![]()
When filling a hot boiler, we recommend adding small amounts of water to avoid the water evaporating instantly with the risk of burning.
This appliance has been designed to work with normal tap water.
However, since water contains limescale by nature, which may cause scaling in the long run, we recommend using a mixture of 50% tap water and 50% demineralised water or treated with water softener systems. To use tap water only and avoid scale formation, we recommend the addition of the special natural scale removal agent Kalstop FP2003.
Absolutely do not use distilled water, dryer condensate water, perfumed water, rain water, battery water, water from air conditioning systems and the like. Do not use chemical substances or detergents. - Carefully screw on the safety cap to hand tight (Fig. 2). Make sure the patented safety cap (A) is fully and correctly screwed on, otherwise you may experience steam escaping from around the cap. In this case turn off the appliance, unplug it from the mains and wait for it to cool before screwing the cap back on.
![]()
- Connect the power supply cable (F) into an earthed power supply of the correct voltage.


NOTE: when filling, make sure that the water does not overflow, to avoid wetting the surface on which your Vaporella is resting

Never leave the filling bottle or the funnel resting on the mouth of the boiler, with the product connected to the power supply, since this could cause burns.
INSTRUCTIONS FOR USE
- Press down the generator on/off switch (B) and the accessories on/off switch (C) which will light up together with the pressure indicator light (K).
- Open the cover of the central connector block(D) and insert the central connector (4) pressing the connector button (5) and taking care that the locking tab (6) is correctly positioned in the lock-in aperture (E) on the block (Fig. 3).
![]()
- When the pressure indicator (K) goes off, the steam cleaner is ready for use.
- The steam gun (2) is equipped with a safety switch (2A) which prevents the accidental start of the steam jet by children or people who do not know how to operate the appliance.
With the switch (2A) in the "OFF" position, the lever controlling the steam jet is locked (Fig.4b). To start working, set the (2A) switch to the "ON" position and press the steam button (Fig.4a).
![]()


Should you have to leave the appliance unattended, turn it off, unplug it and position the button (4) in the OFF position.
The first burst of steam may contain some water droplets, due to imperfect thermic stabilisation inside the flexible hose. We would therefore advise that the first jet of steam is played onto an old cloth until a constant pressure of steam is obtained.
Note: The generator on/off switch (B) may go on and off from time to time during use of VAPORETTO. This means the machine is maintaining the correct and constant pressure and is quite normal.
STEAM REGULATION FEATURE
VAPORETTOs are equipped with a steam regulation control (I) (Fig. 5). You can increase the steam flow by turning the control in clockwise direction. Turning it in an anti- clockwise direction reduces the steam flow. Here are some suggestions for the choice of steam flow level:

- Strong steam: for encrusted dirt, stains, grease and for sanitising.
- Normal steam: for carpets, rugs, glass, tiles etc.
- Delicate steam: for vaporising plants and cleaning delicate surfaces.
CONNECTION OF ACCESSORIES
All the accessories of VAPORETTO can be connected to the handle or to the extension tubes as per the following instructions (fig. 6):

- Move the locking button (11) on the accessory to the "open" position.
- Attach the required accessory to the hand gun or to the extension tube.
- Move the locking button (11) back to the position 'closed'.
- Check that the locking button has engaged and the accessory is fully connected.
USE OF THE ACCESSORIES HOLDER
The accessories holder allows to fix the tube with the brush mounted on it on the appliance body.
Reposition on the appliance body: make the groove on the back of the brush slide into the guide of the accessories holder on the appliance (Fig. 7).

PRESSURE INDICATOR
Vaporetto is equipped with an indicator (L) displaying operating pressure.
PATENTED SAFETY CAP / ''WATER OUT''
The appliance is equipped with a safety cap, which prevents opening of the generator tank as long as there is any pressure remaining inside. This is an important and indispensable safety device, and it is necessary to follow the procedure here below when re-filling the generator tank.
According to model, 'water out' is indicated by a warning light (J), or by an audible alarm signal from the machine, or on more basic models by the exhaustion of the steam output.
When you have used up all the water in the tank, proceed as follows:
- Switch off the machine at the generator on/off switch (B).
- Press the steam request lever (3) on the steam gun (2) or, if using the iron, the steam request button (R) on the iron (Q) so as to fully exhaust the steam supply from the tank.
- Switch OFF the accessory on/off switch (C).
- Disconnect the power supply cable (F) from the mains.
- Unscrew anti-clockwise the patented safety cap (A)
- Wait for a few minutes to allow the generator tank to cool down.
- When cool proceed to carefully refill the tankas described in paragraph 1 of the section "Preparation for Use".
Not complying with this procedure can expose you to the risk of burns.
PRECAUTIONS FOR DELICATE SURFACES
- Before treating leather, special fabrics and wood surfaces, consult the manufacturer's instructions and always carry out a test on a hidden part or on a sample of the material. Allow the steamed part to dry to make sure that no changes in colour or deformations have occurred.
- Please pay careful attention when cleaning wooden and treated terracotta flooring as prolonged use of steam may damage the wax, polish or colour of the surfaces to be cleaned. We therefore recommend adjustment the steam to minimum (if your appliance has steam adjustment) and never direct the jet of steam directly on the surface, but cover the brush with a cloth. Do not keep spraying steam in the same place.
For wooden surfaces (furniture, doors, etc.), we recommend cleaning with a cloth which has been steamed previously. - Also on particularly delicate surfaces (e.g.synthetic materials, lacquered surfaces etc.) it is recommended to always cover the brushes with a cloth and to use steam to a minimum.
- If cleaning glass surfaces in particularly low temperatures preheat the glass using the hand gun from about 50 centimetres distance from the surface to be cleaned.
- For care of your plants vaporise at a minimum distance of 50 centimetres.
PRACTICAL ADVICE FOR THE USE OF THE ACCESSORIES
STEAM GUN (2)
The steam gun can be used directly on all spots requiring a stronger, closer treatment without connecting the brushes. The more resistant the stain, the closer you should hold the gun, the steam pressure and temperature being higher at the source. Always wipe with a dry cloth (or a slightly abrasive sponge if the spot is a difficult one to remove) after using the gun. Steam gun is particularly efficient at:
- breaking down rug and carpet stains before they are treated with the large brush;
- cleaning stainless steel surfaces, panes, mirrors, enamelled surfaces;
- cleaning hard-to-reach corners, such as stairs, window sills, door posts;
- cleaning cooking top knobs, taps bases
- cleaning window shutters, heaters, car interiors;
- spraying plants (from a distance);
- removing odours and creases from clothes.
To reach higher points, the steam gun can be connected to one or both extension tubes.
FLOOR BRUSH (8)
- To clean floors, attach a dry, clean cloth to the brush and pass it moving from top to bottom without pressing. When one side is dirty, turn the cloth.
- Use the brush without cloth over dirty or scaled areas and over tile joints making lateral movements to lift the dirt.
- For vertical washable surfaces or upholstery and ceilings, cover the brush with a dry cloth and proceed as for the floor.
- On all types of synthetic or wool floor/wall car-pets, as well as area rugs, Vaporetto ensures maximum hygiene, giving them back their original appearance and brightening up the colours. Run the brush without cloth over the surface to make dirt rise to the surface, cover the brush with a cotton cloth locking it in the relevant lever hooks (9), then wipe the surface again to collect the dirt. Proceed rapidly and without pressing over the carpet, running the brush forward, backward and sideways without pausing too long at the same point. Treatment can be repeated as often as you like, with no danger for the surfaces. The drying is almost immediate. If the carpet is very dirty or saturated with cleaning products, do not to insist too much. Results will be evident only after a few uses of Vaporetto.
- To clean stubborn stains, before cleaning as indicated above, direct the steam directly onto the stain with the greatest possible angle (never vertically to the surface to be treated) and position a cloth beyond the stain, in order to collect up the dirt that has been "blown" away by the steam pressure.
SMALL BRUSH (12)
The small brush is used whenever the big brush is too big or not practical to be used.
The small brush can be connected directly to the steam gun or to the extension tubes. The small brush can be used on:
- furnishing fabrics (after testing on a small hid-den area)
- car linings (not pile surfaces), car windows (not in freezing temperatures)
- small window surfaces
- tile and other small surfaces
To clean wood (doorposts, floors etc) do not apply the steam directly but cover the brush (big or small) with a doubled cotton cloth. For furniture cleaning, direct the steam jet onto a dry cotton cloth, and then start the cleaning. The warm moisture on the cloth traps the dust, spots and the static electricity so that the furniture stays clean longer.
120° STEAM NOZZLE (16)
The 120° nozzle (which can be connected directly to the gun or together with the extension tubes) allows you to concentrate a powerful jet of steam to otherwise inaccessible locations, such as radiators, door posts, sills and shutters, as well as for sterilising toilet bowls. It's a very useful and indispensable tool.
WINDOW SQUEEGEE TOOL (18-19-20)
DO NOT USE STEAM ON GLASS IN FREEZING TEMPERATURES
The window squeegee tool allows you to clean effectively and rapidly all glass surfaces without using detergents. Your glass will remain cleaner longer thanks to the absence of the film normally left behind by chemical cleaning products on which new dust and grease can attach themselves.
Cleaning glass is done in two stages:
- Spray the steam onto the surface to be cleaned to loosen the dirt (not touching with the blade).
- Pull the blade straight down the window surface from top to bottom without applying the steam, to take away the dirt.
- For extra abrasive action and more effective removal of dirt, we recommend using the bristles supplied with the large window cleaning kit.
To clean especially large glass surfaces, attach the window squeegee tool to the extension tubes.
HIGH PRESSURE LANCE (21)
This accessory allows you to reach the most inaccessible places. Ideal for cleaning large radiators or shutters etc.
KALSTOP
Water by its nature contains magnesium, mineral salts and other deposits which in hard water areas can contribute to limescale build up in the tank. In very hard water areas we recommend the use of our Kalstop FP2003, a special natural-base decalcifier which inhibits and breaks down limescale. This is a preventive against scale build-up and protects the metal walls of the boiler. Kalstop FP2003 can be found in small appliance stores, Polti service centres and on the web site www.polti.com.
CARE OF YOUR VAPORETTO
- Before carrying out any maintenance on the device, always unplug it from the power mains making sure that the product has cooled down before proceeding.
- After using the brushes, we recommend let-ting the bristles cool down in their natural position, in order to avoid any deformation.
- To clean the body of the appliance, simply use a moist cloth.
- Regularly check the status of the coloured washer located in the connector assembly (4). If necessary, replace with the appropriate spare part (15), as described below.
- Remove the damaged washer.
- Insert the new washer, placing it on the steam nozzle and pushing it until it is in its place. See (Fig. B)
![]()
- Lubricate the gasket with silicone grease or Vaseline, or alternatively with small quantities of vegetable oils.
Make the same check also on the connection washers of the extension tubes (7) and of the steam gun (2). If necessary, replace with the appropriate spare part (15), as described below. - Remove the damaged washer.
- Insert the new washer, placing it on the steam nozzle and pushing it until it is in its place. See (Fig. C).
![]()
- Lubricate the gasket with silicone grease or Vaseline, or alternatively with small quantities of vegetable oils.


OPTIONAL ACCESSORIES
IRON ACCESSORY (Q)
Vaporetto can be quickly transformed into a highly effective ironing system to make ironing quick and easy. Simply connect the product to the iron accessory for Vaporetto.
- mod. PFEU0013 - Professional Iron
- mod. PFEU0031 - Inox Iron
You may purchase the iron accessory at any Polti service centre or from top home appliance retailers.
USE OF IRON
Connect the connector assembly at the end of the iron hose (4) to the generator as shown in the section "Instructions for Use".
Before ironing an item of clothing, always check the symbols on its label, for the instructions provided by the manufacturer.
Check, based on the following table, the most appropriate type of ironing:
 | Steam ironing allowed For dry ironing, set temperature adjustment knob (S) on ••• |
 | Steam ironing allowed For dry ironing, set temperature adjustment knob (S) on •• |
 | Check the fabric's resistance to steam ironing or dry iron with temperature adjustment knob (S) set on • |
 |
|
STEAM IRONING
- For STEAM ironing, turn the dial (S) and set the iron temperature to its maximum travel on the "COTTON-LINEN" steam position.
- Wait for a few minutes until the "Iron heating"indicator light (V) goes out, to show that the soleplate of the iron has reached the required temperature.
- Press the steam request button (R) to enable the steam to come out. The steam flow will stop when the button is released. After each filling, when you first start to use the iron, a few drops of water mixed with the steam may be emitted (due to imperfect heat stabilisation). It is therefore advisable to direct the first jet of steam onto a rag.
- The iron can also be used in a vertical position e.g. for removing creases from curtain, clothing etc
- To obtain a continuous jet of steam move the sliding button (U). The steam will continue to come out even when the steam request button (R) is released. To stop the steam flow move the sliding button backwards (U).
NOTE: using the iron, it is advisable to adjust the steam jet at medium output, or to do some testing in order to find the position on (U) which is most suitable to the fabric to be ironed.
DRY IRONING
- If you need to DRY iron (ONLY) (NOT steam ironing), press the accessory on/off switch (C) and adjust the temperature of the iron by turning dial (S) to the temperature required for the fabric (as shown on the dial).
- Do not leave the iron unattended whilst connected to the mains.
- Iron only on heat resistant surfaces.
TRIANGULAR BRUSH (23)
A new accessory whose shape allows access into the most difficult corners.
WALLPAPER STRIPPER TOOL (24)
Specially designed for easy removal of wallpaper without significant wetting.
STEAM DISINFECTOR (mod. PAEU0197)

The Steam Disinfector is the sanitiser for household surfaces that can connect up to your Vaporetto to deliver steam at high temperatures (up to 180°C) together with the sanitising solution HPMed. The system allows for the elimination of the bacterial, fungous and viral load on the surfaces and fabrics to which it is applied in just a few seconds. This helps prevent the risk of possible infections.
The Steam Disinfector is a Polti exclusive and is only available from the best electrical appliance stores.
TROUBLESHOOTING
| PROBLEM | CAUSE | SOLUTION |
| The appliance does not turn on. | Power cable (F) not plugged in | Connect the power supply cable (F) to a suitable electric socket. |
| Boiler switch (B) off | Turn on the boiler switch (B). | |
| The appliance is on but does not supply steam | The appliance is not pressurised yet | Wait the pressure indicator (K) goes off. |
| No water in the boiler. | Fill the boiler as described in the paragraph "Preparation". | |
| Flexible hose (1) not inserted correctly. | Insert the flexible hose completely. | |
| Steam adjustment dial (I) set to the minimum. | Adjust the position of the dial (I) for the desired increase. | |
| A little steam is released from the safety cap (A). | Damaged or missing seal. | Replace the safety-cap seal. |
| Safety cap not screwed on completely. | Turn off the appliance, unplug it from the mains and wait for it to cool before screwing the cap back on. | |
| Loss of steam from the connection of the accessories. | Damaged or missing seals. | Replace the seals. |

Documents / Resources
References
Download manual
Here you can download full pdf version of manual, it may contain additional safety instructions, warranty information, FCC rules, etc.
Advertisement


Need help?
Do you have a question about the Vaporetto ECO PRO 3000 and is the answer not in the manual?
Questions and answers