Table of Contents
Advertisement
Available languages
Available languages
Quick Links
KW-M785BW
MONITOR WITH RECEIVER
Quick Start Guide
MONITEUR AVEC RÉCEPTEUR
Guide de démarrage rapide
MONITOR CON RECEPTOR
Guía de inicio rápido
For detailed operations and information, refer to the INSTRUCTION
MANUAL on the following website:
Pour les opérations et les informations détaillées, reportez-vous au
MANUEL D'INSTRUCTIONS sur le site web suivant:
Para obtener más información y detalles sobre las operaciones, consulte
el MANUAL DE INSTRUCCIONES en el siguiente sitio web:
<https://www.jvc.net/cs/car/>
ENGLISH
FRANÇAIS
ESPAÑOL
B5K-0945-00 (KN)
Advertisement
Chapters
Table of Contents

Related Manuals for JVC KW-M785BW


Summary of Contents for JVC KW-M785BW
- Page 1 ENGLISH FRANÇAIS ESPAÑOL KW-M785BW MONITOR WITH RECEIVER For detailed operations and information, refer to the INSTRUCTION Quick Start Guide MANUAL on the following website: Pour les opérations et les informations détaillées, reportez-vous au MANUEL D’INSTRUCTIONS sur le site web suivant: MONITEUR AVEC RÉCEPTEUR Para obtener más información y detalles sobre las operaciones, consulte...
- Page 2 Products: MONITOR WITH RECEIVER de recogida de residuos) operate the equipment. KW-M785BW Model Name: Responsible Party: JVCKENWOOD USA CORPORATION Los productos con el símbolo de un NOTE: This equipment has been tested and found to comply 4001 Worsham Avenue, Long Beach, contenedor con ruedas tachado no podrán...
- Page 3 ISED Caution • Windows Media is a registered trademark or trademark of • SiriusXM and all related marks and logos are trademarks of This device contains licence-exempt transmitter(s)/receiver(s) Microsoft Corporation in the United States and/or other Sirius XM Radio, Inc. All rights reserved. that comply with Innovation, Science and Economic countries.
- Page 4 • THIS PRODUCT IS LICENSED UNDER THE MPEG-4 VISUAL Customers wishing themselves to use a software component Important Notice on Software PATENT PORTFOLIO LICENSE FOR THE PERSONAL AND NON- that is subject to the GPL/LGPL embedded in this product are COMMERCIAL USE OF A CONSUMER FOR encouraged to read the terms of the corresponding license Software License on This Product...
- Page 5 3. Use of Licensed Software is limited to a private extent, Article 6 (Responsibility for Third Parties) Article 11 (Export Control) and Licensed Software may not be distributed, licensed If disputes over the infringement of third parties’ intellectual 1. Licensed Software and the associated literature or the or sublicensed for any purposes whatsoever, including property rights, such as copyrights and patent rights, arise like may not be exported to places outside the Country...
-
Page 6: Table Of Contents
Component Names and Basic Operations ..4 Presetting stations in the memory ........20 website: Monitor panel ..................4 Selecting a preset station ............20 <https://www.jvc.net/cs/car/> Home screen ..................4 Bluetooth® Device ..........21 Turning on the power ..............4 The displays and panels shown in this Guide are Turning off the power ..............4... -
Page 7: Important Notice
Important Notice Important Notice To ensure proper use, please read through this CAUTIONS About GPS Guide before using this product. It is especially To care for the unit important that you read and observe WARNINGS When you turn on this unit for the first time, you •... -
Page 8: Component Names And Basic Operations
Component Names and Basic Operations Component Names and Basic Operations button (Press): Activates the voice recognition. Touching the operation keys performs the following Monitor panel – When no device for Apple CarPlay, Android actions: 1 The current playback source information. Auto, and Bluetooth phone is connected, pressing and holding this button displays Displays the current playing source control screen. -
Page 9: Adjusting The Volume
Component Names and Basic Operations Component Names and Basic Operations On the screen: <Demonstration> Turning off the AV source • ON (Initial): Activates the display demonstration. Display the source/option selection • OFF: Deactivates the display demonstration. Display the source/option selection screen. -
Page 10: Date And Clock Settings
In-Car Connections In-Car Connections Component Names and Basic Operations Component Names and Basic Operations To operate your smartphone hands-free, and Apps of <Time Format> Date and clock settings the smartphone (Apple CarPlay, Android Auto, and Select the time display format. USB Mirroring), the following connections are required. -
Page 11: Usb Connection
In-Car Connections In-Car Connections Auto pairing USB connection Bluetooth® connection When <Auto Pairing> is set to [ON], Bluetooth devices are automatically paired. Connect your smartphone (iPhone or Android device) Information for using Bluetooth devices • For iPhone with Apple CarPlay and Android device for using Apps on the screen of this unit. - Page 12 In-Car Connections In-Car Connections Pairing a Bluetooth device using SSP Once pairing is completed... Search for the unit “KW-M785BW” from (for Bluetooth 2.1) • For iPhone compatible with wireless Apple your Bluetooth device. CarPlay Display the Home screen. Confirm the request both on the device A confirmation message appears.
- Page 13 Cancel Display the <Device List> screen. From the Home screen (page 4), touch as Search for the unit “KW-M785BW” from Display the <PIN Code Set> screen. follows: From the Home screen (page 4), touch as your Bluetooth device.
- Page 14 In-Car Connections In-Car Connections • Touch [ < ] scrolls the text if not all of the text is Icon Profile Status (on/off/unavailable) Touch [Close] to finish. shown. The <Device List> screen is displayed again. This Bluetooth Bluetooth connection • For list/setting screen operations, see also page unit searches for the device you have just set the usage (profile) for, and activates the device if it is HFP1...
-
Page 15: Various Screens And Operations
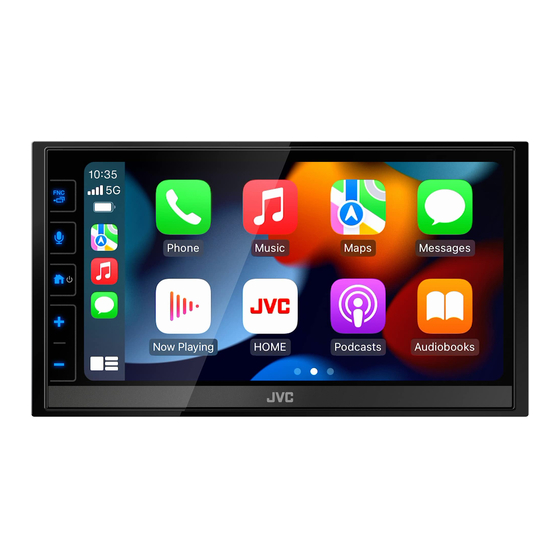
Various Screens and Operations Various Screens and Operations You can display or change to other screens at any time [Apple CarPlay] Displays the home screen of Apple Source control screen to show information, change the playback source, CarPlay. change the settings, etc. You can operate the playback source using the source [Android Auto] Displays the home screen of... -
Page 16: List/Setting Screen
Various Screens and Operations Various Screens and Operations 4 Sound attenuating key (page 5) To close the pop-up function menu Using the pop-up function menu 5 TEL indicator is shown when a hands-free phone is Press FNC- on the monitor panel or touch the You can easily access the frequently used features. -
Page 17: Apps
Apps Apps Various Screens and Operations Various Screens and Operations Touching the operation keys performs the following You can use the Apps installed in your iPhone and Compatible iPhone devices actions: Android device by using “Apple CarPlay,” “Android You can use Apple CarPlay with the following iPhone Auto,”... - Page 18 Apps Apps Starting Apple CarPlay Apple CarPlay screen operation Using Siri You can activate Siri while the Apple CarPlay screen is Once the wireless setting and connection are done for You can use the Apps of the connected iPhone. displayed. the first time, the source is automatically changed, and The items displayed and the language used on the you can use of the Apps of the connected iPhone.
-
Page 19: Using The Apps Of An Android™ Device - Android Auto
Apps Apps Starting Android Auto Operation buttons on the Android Auto Using the Apps of an Android™ device — screen Selecting [Android Auto] on the screen displays the Android Auto™ Android Auto screen and enable use of the Apps of the You can perform the operations of the Apps of the About Android Auto connected Android device. -
Page 20: Using The Apps Of An Android Device - Usb Mirroring
Switching the Android Auto screen and the Installing JVC’s Mirroring OA App Touch the icon of JVC’s Mirroring OA App. You can obtain “Mirroring OA for JVC” in Google Play. current playback source screen Touch [OK] to start JVC’s Mirroring OA •... -
Page 21: Usb
1 Displays/hides the following operation keys Selecting the file type to play Playback operations You can specify the file type to play. Selects a folder. Starting playing the USB Selects repeat playback mode by All files in the USB device will be played repeatedly touching repeatedly.* until you change the source or disconnect the USB [MODE]... -
Page 22: Video Playback Operations
Video menu control Displays the <Screen Adjustment> Video playback operations screen. Menu Control While watching a video, you can use the following 1 Touch [DIM ON] or [DIM OFF] to features. turn on or off the dimmer. 2 Touch [+]/[–] to adjust the other Touch screen operations items. -
Page 23: Tuner
Tuner Tuner 3 Current station frequency 7 Indicators Listening to the radio 4 Displays the preset stations window (page 20) • TI: Lights up white when receiving the traffic • To hide the window, touch [ > ]. information, and lights in orange when TI This unit alarms you emergency when receiving an 5 [P1] –... -
Page 24: Presetting Stations In The Memory
Tuner Tuner Manual presetting Presetting stations in the memory Selecting a preset station Select the band, and then tune in to a You can preset five stations each for AM and FM1/ Select the band, and then display the station you want to preset. FM2/FM3. -
Page 25: Bluetooth® Device
Bluetooth® Device Bluetooth® Device You can use the mobile phone and portable audio During a call... Bluetooth mobile phone player connected through Bluetooth. Device Name 1 Device Name 2 • While using Apple CarPlay, Android Auto, or USB When a call comes in, this unit automatically enters Name Talking... - Page 26 Bluetooth® Device Bluetooth® Device 1 From the call history* (missed calls/received Making a call To display other phone numbers in the same calls/dialed calls) contact Display the phone control screen. 2 From the phone book* You can store up to ten phone numbers per From the Home screen (page 4), touch as 3 From the preset list (page 23) contact.
-
Page 27: Bluetooth Audio Player
(Appear only when the information is acquired No preset from the device.) No preset 5 Device name • Touching the device name shows the <JVC (Hold) Select which phone to use if two mobile Streaming DJ> screen. 6 Displays/hides other available operation keys phones are connected. -
Page 28: Audio Settings
Audio Settings Audio Settings <Equalizer> <Sound Effect> Display the <Audio> screen. From the Home screen (page 4), touch as The following adjustments are memorized for each Adjust the sound effect. follows: source until you adjust the sound again. <Loudness> Adjusts loudness. Selecting a preset sound mode •... -
Page 29: Other Information
] or drag the mark to adjust. INSTRUCTION MANUAL on the following website: <Fader> <https://www.jvc.net/cs/car/> When <X'over Network> is set to [2 way], you can • The availability of each source vary depending on adjust the front and rear speaker output balance. -
Page 30: Installation And Connection
Installation and Connection Installation and Connection • If your car’s ignition does not have an ACC position, This section is for the professional installer. Before installation connect the ignition wires to a power source that For safety’s sake, leave wiring and mounting to can be turned on and off with the ignition key. -
Page 31: Installing The Unit
Installation and Connection Installation and Connection Parts list for installation Installing the unit using the mounting Install the unit in your car. sleeve Note: This parts list does not include all the package Make sure that the unit is installed securely in place. contents. -
Page 32: Removing The Unit
Installation and Connection Installation and Connection Removing the unit Insert the extraction keys ( ) deeply into Installing the supplied GPS antenna the slots on each side. GPS antenna is installed inside of the car. It should Remove the trim plate ( ) by inserting the be installed as horizontally as possible to allow easy two extraction keys (... -
Page 33: Connecting External Components
Installation and Connection Installation and Connection 1 GPS antenna input (GPS) (page 28) Notes on using the supplied GPS antenna («) 2 Use HDMI cable KS-U70 (optional accessory). 2 HDMI terminal • Use the supplied GPS antenna («). Using the GPS W: 11.1 mm or less 3 Rear view camera input (R-CAM) antenna other than the supplied one may cause a... -
Page 34: Wiring Connection
Installation and Connection Installation and Connection Wiring connection Connect to the video out terminal of the FRONT front camera VIEW CAMERA “ Connect the antenna cord to the antenna terminal USB terminal (1 m) 10 A fuse ¥ Connect a USB device (USB1)5V 1.5A Purple with white stripe... - Page 36 Préréglage des stations en mémoire ....... 20 base ............... 4 mode d’emploi sur le site Web suivant: Sélection d’une station préréglée ........20 Panneau du moniteur ..............4 <https://www.jvc.net/cs/car/> Périphérique Bluetooth® .........21 Écran d’accueil ..................4 Les affichages et les panneaux montrés dans Téléphone portable Bluetooth ..........21 Mise sous tension de l’appareil ..........4...
-
Page 37: Notice Importante
Notice importante Notice importante Pour utiliser correctement l’appareil, veuillez PRÉCAUTIONS À propos de GPS ce guide complément avant de l’utiliser. Il Pour prendre soin de l’appareil est particulièrement important que vous Lorsque vous mettez cet appareil sous tension • Si votre voiture est restée garée pendant longtemps lisiez et acceptiez les AVERTISSEMENTS et les pour la première fois, vous devez attendre que le dans un climat chaud ou froid, attendez que la... -
Page 38: Noms Des Composants Et Opérations De Base
Noms des composants et opérations de base Noms des composants et opérations de base 5 Touche (Appuyer) : Active la reconnaissance Toucher les touches de fonctionnement permet de Panneau du moniteur vocale. réaliser les actions suivantes : 1 Informations sur la source en cours de lecture. –... -
Page 39: Réglage Du Volume
Noms des composants et opérations de base Noms des composants et opérations de base Sur l’écran : Mise hors service la source AV <Demonstration> • ON (Réglage initial) : Met en service la démonstration Affichez l’écran de sélection de source/ des affichages. -
Page 40: Réglages De La Date Et De L'horloge
Connexion à l’appareil Connexion à l’appareil Noms des composants et opérations de base Noms des composants et opérations de base Pour utiliser votre smartphone en mode mains libres <Time Format> Réglages de la date et de l’horloge et les applications du smartphone (Apple CarPlay, Choisissez le format d’affichage de lvheure. -
Page 41: Connexion Usb
Connexions Connexions à l’appareil à l’appareil Pairage automatique Connexion USB Connexion Bluetooth® Quand <Auto Pairing> est réglé sur [ON], les périphériques Bluetooth sont appariés Connectez votre smartphone (iPhone ou appareil Informations pour l’utilisation de périphériques automatiquement. Android) pour utiliser les applications sur l’écran de cet Bluetooth •... - Page 42 Connexions à l’appareil Connexions à l’appareil Pairage d’un périphérique Bluetooth en utilisant Une fois le pairage effectué... Recherchez l’appareil “KW-M785BW” à SSP (pour Bluetooth 2.1) • Pour les iPhone compatibles avec Apple CarPlay partir de votre périphérique Bluetooth. sans fil Affichez l’écran d’accueil.
- Page 43 • Vous pouvez aussi connecter/déconnecter et Cancel supprimer les périphériques indésirables de la liste des périphériques. Recherchez l’appareil “KW-M785BW” à Affichez l’écran <PIN Code Set>. Affichez l’écran <Device List>. partir de votre périphérique Bluetooth. Sur l’écran d’accueil (page 4), touchez ce qui suit : Sur l’écran d’accueil (page 4), touchez ce qui suit :...
- Page 44 Connexions à l’appareil Connexions à l’appareil • Toucher [ < ] fait défiler le texte si tout le texte Touchez [Close] pour terminer. Icône Profil État (activé/désactivé/non disponible) n’apparaît pas. L’écran <Device List> apparaît de nouveau. Cette Bluetooth Connexion Bluetooth •...
-
Page 45: Divers Écran Et Opérations
Divers écran et opérations Divers écran et opérations Vous pouvez afficher ou changer d’autres écrans [Apple CarPlay] Affiche l’écran d’accueil de Apple Écran de commande de la source n’importe quand pour afficher des informations, CarPlay. changer la source de lecture, changer des réglages, etc. Vous pouvez commander la source de lecture en [Android Auto] Affiche l’écran d’accueil de Android... -
Page 46: Écran De Liste/Réglage
Divers écran et opérations Divers écran et opérations 4 Touche d’atténuation du son (page 5) Pour fermer le menu déroulant de la fonction Utilisation du menu déroulant de la 5 L’indicateur TEL apparaît lorsqu’un téléphone mains Appuyez sur FNC- sur le panneau du moniteur ou fonction touchez l’écran n’importe où... -
Page 47: Applications
Applications Applications Divers écran et opérations Divers écran et opérations Toucher les touches de fonctionnement permet de Vous pouvez utiliser les applications installées sur Périphériques iPhone compatibles réaliser les actions suivantes : votre iPhone et votre périphérique Android en utilisant Vous pouvez utiliser Apple CarPlay avec les modèles “Apple CarPlay”, “Android Auto”... - Page 48 Applications Applications Démarrage d’Apple CarPlay Utilisation de l’écran Apple CarPlay Utilisation de Siri Vous pouvez activer Siri pendant que l’écran Apple Une fois le réglage et la connexion sans fil Vous pouvez utiliser les applications de l’iPhone CarPlay est affiché. effectuées pour la première fois, la source change connecté.
-
Page 49: Utilisation D'applications De Périphériques Android™ - Android Auto
Applications Applications Démarrage de Android Auto Touches de fonctionnement sur l’écran Utilisation d’applications de périphériques Android Auto Android™ — Android Auto™ Choisir [Android Auto] sur l’écran fait apparaître l’écran Android Auto et permet d’utiliser les Vous pouvez réalisez les opérations des applications du À... -
Page 50: Utilisation D'applications D'un Périphérique Android - Usb Mirroring
Mirroring OA de JVC installée • Vous pouvez aussi utiliser le menu déroulant de la Connectez un périphérique Android avec l’application Now Playing fonction (page 12). Mirroring OA de JVC installée via une connexion USB et Bluetooth Audio Camera Apps SETUP Bluetooth (page 7). -
Page 51: Usb
1 Affiche/cache les autres touches de 9 Informations sur le fichier actuellement lu Opérations de lecture fonctionnement suivantes. (type de fichier/No. de dossier/No. de fichier) Démarrage de la lecture USB Choisit un dossier. * Vous ne pouvez pas mettre en service le mode de lecture répétée Tous les fichiers sur le périphérique USB sont et le mode de lecture aléatoire en même temps. -
Page 52: Utilisation De La Lecture Vidéo
Commandes du menu vidéo Affiche l’écran <Screen Adjustment>. Utilisation de la lecture vidéo 1 Touchez [DIM ON] ou [DIM OFF] Menu Control Lorsque vous regardez une vidéo, vous pouvez utiliser pour activer ou désactiver le les fonctions suivantes. gradateur. 2 Touchez [+]/[–] pour ajuster les Fonctionnement tactile autres éléments. -
Page 53: Tuner
Tuner Tuner 3 Fréquence de la station actuelle 7 Indicateurs Écoute de la radio 4 Affiche la liste des stations préréglées (page 20) • TI : S’allume en blanc lors de la réception • Pour cacher la fenêtre, touchez [ > ]. d’informations routières, et s’allume en orange Cet appareil vous alerte en cas d’urgence quand il 5 [P1] –... -
Page 54: Préréglage Des Stations En Mémoire
Tuner Tuner Sélection d’une station préréglée Préréglage manuel Préréglage des stations en mémoire Choisissez la bande, puis accordez la Vous pouvez prérégler cinq stations pour chaque Sélectionnez la bande, puis affichez la bande AM et FM1/FM2/FM3. station que vous souhaitez prérégler. fenêtre de préréglage de la station. -
Page 55: Périphérique Bluetooth
Périphérique Bluetooth® Périphérique Bluetooth® Vous pouvez utiliser le téléphone portable et le lecteur Téléphone portable Bluetooth Pendant un appel... audio portable connectés par Bluetooth. • Lorsque vous utilisez Apple CarPlay, Android Auto Lorsqu’un appel arrive, cet appareil passe Device Name 1 Device Name 2 ou USB Mirroring, utilisez leurs fonctions pour les Name... - Page 56 Périphérique Bluetooth® Périphérique Bluetooth® 1 À partir de l’historique des appels* (appels Pour afficher les autres numéros de téléphone Pour faire un appel manqués/appels reçus/appels passés) du même contact 2 À partir du répertoire téléphonique* Vous pouvez mémoriser un maximum de dix Affichez l’écran de commande du téléphone.
-
Page 57: Lecteur Audio Bluetooth
5 Nom du périphérique (Maintenir pressée) • Toucher le nom du périphérique affiche l’écran Choisissez quel téléphone utiliser si deux <JVC Streaming DJ>. 6 Affiche/cache les autres touches de téléphones portables sont connectés. Pour supprimer le contact du numéro préréglé : Touchez [ ] à... -
Page 58: Réglages Audio
Réglages audio Réglages audio <Equalizer> <Sound Effect> Affichez l’écran <Audio>. Sur l’écran d’accueil (page 4), touchez ce qui suit : Les ajustements suivantes sont mémorisés pour Ajustez l’effet sonore. chaque source jusqu’à ce que vous ajustiez de <Loudness> nouveau le son. Ajuste le loudness. -
Page 59: Autres Informations
Touchez [ ] ou faites glisser la marque reportez-vous au MANUEL D'INSTRUCTIONS sur le site pour ajuster. Web suivant : <https://www.jvc.net/cs/car/> <Fader> • La disponibilité de chaque source varie en fonction Quand <X'over Network> est réglé sur [2 way], vous du modèle. -
Page 60: Installation Et Raccordements
Installation et raccordements Installation et raccordements • Si l’allumage de votre voiture n’a pas de position Cette section est destinée à un installateur Avant d’installer ACC, connectez le câble d’allumage à une source professionnel. d’alimentation qui peut être mise sous et hors Précautions sur l’installation et les Pour des raisons de sécurité, confiez le câblage et tension avec la clef de contact. -
Page 61: Installation De L'appareil
Installation et raccordements Installation et raccordements Installez l’appareil dans votre voiture. Liste des pièces pour l’installation Installation de l’appareil en utilisant le Assurez-vous que l’appareil est solidement installé. manchon de montage Remarque : Cette liste des pièces ne comprend pas Si l’appareil est instable, il risque de mal fonctionner toutes les pièces de l’emballage. -
Page 62: Retrait De L'appareil
Installation et raccordements Installation et raccordements Insérez les clés d’extraction ( Retrait de l’appareil Installation de l’antenne GPS fournie profondément dans les fentes de chaque L’antenne GPS est installée à l’intérieur de la voiture. Retirez la plaque de garniture ( ) en côté. -
Page 63: Connexion D'appareils Extérieurs
Installation et raccordements Installation et raccordements 1 Entrée de l’antenne GPS (GPS) (page 28) Remarques sur l’utilisation de l’antenne GPS 2 Utilisez le câble HDMI KS-U70 (accessoire en 2 Prise HDMI fournie («) option). 3 Entrée de la caméra de recul (R-CAM) •... -
Page 64: Connexions
Installation et raccordements Installation et raccordements Connexions À connecter à la prise de sortie vidéo de la FRONT caméra avant VIEW CAMERA “ Connectez le câble d’antenne à la prise d’antenne Prise USB (1 m) ¥ Fusible 10 A Connectez un périphérique USB (USB1)5V 1.5A Au faisceau de câble du commutateur de détection du... - Page 66 Preajuste de emisoras en la memoria ......20 componentes ............4 instrucciones en el siguiente sitio web: Selección de una emisora preajustada ......20 Panel del monitor ................4 <https://www.jvc.net/cs/car/> Dispositivo Bluetooth® ........21 Pantalla de Inicio ................4 Las visualizaciones y paneles mostrados en Teléfono móvil Bluetooth ............21 Conexión de la alimentación ...........4...
-
Page 67: Aviso Importante
Aviso importante Aviso importante Antes de utilizar el producto y para garantizar PRECAUCIONES Acerca del GPS su uso correcto, lea completamente este guía. Cuidado de la unidad En especial, lea y acate las ADVERTENCIAS y Cuando encienda esta unidad por primera vez, •... -
Page 68: Nombres Y Operaciones Básicas De Los Componentes
Nombres y operaciones básicas de los componentes Nombres y operaciones básicas de los componentes 5 Botón (Pulsar) : Activa el reconocimiento de voz. Al tocar las teclas de funcionamiento se realiza lo Panel del monitor siguiente: – Cuando no hay conectado ningún dispositivo 1 La información acerca de la fuente de reproducción para Apple CarPlay, Android Auto y teléfono actual. -
Page 69: Ajuste Del Volumen
Nombres y operaciones básicas de los componentes Nombres y operaciones básicas de los componentes En la pantalla: Apagado de la fuente AV <Demonstration> • ON (Inicial): Activa la demostración en pantalla. Visualice la pantalla de selección de • OFF: Desactiva la demostración en pantalla. Visualice la pantalla de selección de fuente/opción. -
Page 70: Ajustes De Fecha Y Reloj
Conexiones dentro del automóvil Conexiones dentro del automóvil Nombres y operaciones básicas de los componentes Nombres y operaciones básicas de los componentes Para manejar su teléfono inteligente manos libres y las <Time Format> Ajustes de fecha y reloj aplicaciones del teléfono inteligente (Apple CarPlay, Seleccione el formato de indicación de la hora. -
Page 71: Conexión Usb
Conexiones dentro Conexiones dentro del automóvil del automóvil Emparejamiento automático Conexión USB Conexión Bluetooth® Cuando <Auto Pairing> está ajustado a [ON], los dispositivos Bluetooth se emparejan automáticamente. Conecte su teléfono inteligente (iPhone o dispositivo Información sobre el uso de dispositivos Bluetooth •... - Page 72 Emparejamiento de un dispositivo Bluetooth Una vez que se ha completado el Realice la búsqueda de la unidad mediante el SSP (para Bluetooth 2.1) emparejamiento... “KW-M785BW” desde su dispositivo • Para el iPhone compatible con Apple CarPlay Visualice la pantalla de Inicio. Bluetooth. inalámbrico Confirme la solicitud tanto en el Aparece un mensaje de confirmación.
- Page 73 Realice la búsqueda de la unidad En la pantalla de Inicio (página 4), toque lo “KW-M785BW” desde su dispositivo siguiente: Bluetooth. Seleccione la unidad “KW-M785BW” en su A continuación, en la pantalla <Settings>, toque lo siguiente: dispositivo Bluetooth. A continuación, en la pantalla <Settings>, toque [System] →...
- Page 74 Conexiones dentro del automóvil Conexiones dentro del automóvil • Si el texto no se muestra por completo, toque [ < ] Toque [Close] para finalizar. Icono Perfil Status (activado/desactivado/no para desplazar el texto. La pantalla <Device List> vuelve a aparecer. Esta disponible) •...
-
Page 75: Diversas Pantallas Y Operaciones
Diversas pantallas y operaciones Diversas pantallas y operaciones Puede visualizar o cambiar a otras pantallas en [Apple CarPlay] Visualiza la pantalla de inicio de Pantalla de control de la fuente cualquier momento, para mostrar información, Apple CarPlay. La fuente de reproducción se puede operar con la cambiar la fuente de reproducción, modificar los [Android Auto] Visualiza la pantalla de inicio de... -
Page 76: Pantalla De Lista/Ajuste
Diversas pantallas y operaciones Diversas pantallas y operaciones 4 Tecla de atenuación de sonido (página 5) Para cerrar el menú de funciones emergente Uso del menú de funciones emergente 5 El indicador TEL aparece cuando se conecta un Pulse FNC- en el panel del monitor o toque la Puede acceder fácilmente a las funciones utilizadas teléfono manos libres. -
Page 77: Apps
Apps Apps Diversas pantallas y operaciones Diversas pantallas y operaciones Al tocar las teclas de funcionamiento se realiza lo Puede usar las aplicaciones instaladas en su iPhone y Dispositivos iPhone compatibles siguiente: dispositivo Android usando “Apple CarPlay”, “Android Apple CarPlay es compatible con los siguientes Auto”... - Page 78 Apps Apps Inicio de Apple CarPlay Funcionamiento de la pantalla Apple Uso de Siri Puede activar Siri mientras se está visualizando la CarPlay Una vez realizada la conexión USB por primera vez, la pantalla de Apple CarPlay. fuente cambia automáticamente y puede utilizar las Puede utilizar las aplicaciones del iPhone conectado.
-
Page 79: Uso De Las Aplicaciones De Un Dispositivo Android™: Android Auto
Apps Apps Inicio de Android Auto Botones de operación en la pantalla de Uso de las aplicaciones de un dispositivo Android Auto Android™: Android Auto™ Seleccionar [Android Auto] en la pantalla muestra la pantalla Android Auto y habilita el uso de las Puede utilizar las aplicaciones del dispositivo Android Acerca de Android Auto aplicaciones del dispositivo Android conectado. -
Page 80: Uso De Las Aplicaciones De Un Dispositivo Android: Usb Mirroring
• Asegúrese de instalar la versión más reciente en su actual Toque [OK] para iniciar la aplicación dispositivo Android. • Al utilizar “Mirroring OA for JVC” por primera vez, Mirroring OA de JVC. Puede cambiar la pantalla de Android Auto y la aparecerán los términos de servicio. Para poder pantalla de fuente de reproducción actual al usar la... -
Page 81: Usb
1 Visualiza/oculta las siguientes teclas de 9 Información acerca del archivo de reproducción Operaciones de reproducción funcionamiento actual (tipo de archivo/n.º de carpeta/n.º de archivo) Inicio de la reproducción del USB Selecciona una carpeta. * No puede activar el modo de reproducción repetida y el modo de Todos los archivos del dispositivo USB se reproducirán reproducción aleatoria al mismo tiempo. -
Page 82: Operaciones De Reproducción De Vídeo
Control del menú de vídeo Visualiza la pantalla <Screen Operaciones de reproducción de vídeo Adjustment>. Menu Control Mientras ve un vídeo, puede usar las siguientes 1 Toque [DIM ON] o [DIM OFF] para funciones. activar o desactivar el atenuador de luz. -
Page 83: Sintonizador
Sintonizador Sintonizador 3 Frecuencia de la emisora actual 7 Indicadores Para escuchar la radio 4 Muestra la ventana de emisoras preajustadas • TI: Se ilumina en blanco cuando se recibe (página 20) información del tráfico, y en naranja cuando la Esta unidad le avisa cuando recibe una señal de •... -
Page 84: Preajuste De Emisoras En La Memoria
Sintonizador Sintonizador Preajuste de emisoras en la memoria Selección de una emisora preajustada Preajuste manual Puede presintonizar cinco emisoras para AM y FM1/ Seleccione la banda y, a continuación, Seleccione la banda y, a continuación, FM2/FM3. sintonícela en la emisora que desee visualice la ventana de emisoras preajustar. -
Page 85: Dispositivo Bluetooth
Dispositivo Bluetooth® Dispositivo Bluetooth® Puede utilizar el teléfono móvil y el reproductor de Teléfono móvil Bluetooth Durante una llamada... audio portátil conectados a través de Bluetooth. • Durante el uso de Apple CarPlay, Android Auto o USB Al recibir una llamada, esta unidad accede Device Name 1 Device Name 2 Mirroring, utilice sus funciones para teléfonos con... - Page 86 Dispositivo Bluetooth® Dispositivo Bluetooth® 1 Desde el historial de llamadas* (llamadas Para visualizar otros números de teléfono para Cómo hacer una llamada perdidas/llamadas recibidas/llamadas realizadas) el mismo contacto 2 Desde la guía telefónica* Puede memorizar hasta diez números de teléfono Visualice la pantalla de control de teléfono.
-
Page 87: Reproductor De Audio Bluetooth
5 Nombre del dispositivo • Tocar el nombre del dispositivo muestra la Seleccione qué teléfono usar si hay dos (Sostener) pantalla <JVC Streaming DJ>. teléfonos móviles conectados. 6 Visualiza/oculta otras teclas de funcionamiento Para borrar el contacto en el número de preajuste:... -
Page 88: Ajustes De Audio
Ajustes de audio Ajustes de audio <Equalizer> <Sound Effect> Visualice la pantalla <Audio>. En la pantalla de Inicio (página 4), toque lo Se memorizan los siguientes ajustes para cada fuente Ajusta el efecto de sonido. siguiente: hasta que usted vuelva a ajustar el sonido. <Loudness>... -
Page 89: Información Adicional
] o arrastre la marca para adicional, consulte el MANUAL DE INSTRUCCIONES en realizar el ajuste. el siguiente sitio web: <https://www.jvc.net/cs/car/> <Fader> • La disponibilidad de cada fuente varía en función del Al ajustar <X'over Network> en [2 way], podrá... -
Page 90: Instalación Y Conexión
Instalación y conexión Instalación y conexión • Si el encendido de su automóvil no tiene posición Esta sección es para el instalador profesional. Antes de la instalación ACC, conecte los cables de encendido a una Por razones de seguridad, deje el trabajo de fuente de alimentación que pueda conectarse y Precauciones acerca de la instalación y cableado y el montaje a profesionales. -
Page 91: Instalación De La Unidad
Instalación y conexión Instalación y conexión Instale la unidad en su automóvil. Lista de piezas para la instalación Instalación de la unidad utilizando el Asegúrese de que la unidad esté firmemente manguito de montaje Nota: Esta lista de piezas no incluye todas las piezas instalada en su lugar. -
Page 92: Desmontaje De La Unidad
Instalación y conexión Instalación y conexión Inserte las llaves de extracción ( Desmontaje de la unidad Instalación de la antena GPS suministrada profundamente en las ranuras de cada La antena GPS está instalada en el interior del Extraiga la placa embellecedora ( lado. -
Page 93: Conexión De Los Componentes Externos
Instalación y conexión Instalación y conexión 1 Entrada de antena GPS (GPS) (página 28) Notas sobre el uso de la antena GPS suministrada 2 Use el cable HDMI KS-U70 (accesorio opcional). 2 Terminal HDMI («) An.: 11,1 mm o menos 3 Entrada de la cámara de visión trasera (R-CAM) •... -
Page 94: Conexión Del Cableado
Instalación y conexión Instalación y conexión Conexión del cableado Conecte al terminal de salida de vídeo de FRONT la cámara delantera VIEW CAMERA “ Conecte el cable de antena al terminal de antena Terminal USB (1 m) ¥ Fusible de Conecte un dispositivo USB (USB1)5V 1.5A... - Page 96 © 2022 JVCKENWOOD Corporation 0922DTSMDTJKEI...
Need help?
Do you have a question about the KW-M785BW and is the answer not in the manual?
Questions and answers