Table of Contents
Advertisement
Available languages
Available languages
Quick Links
USA office: Fontana
AUS office: Truganina
GBR office: Ipswich
If you're having difficulty, our friendly
customer team is always here to help.
FRA office: Saint Vigor d'Ymonville
USA:cs.us@costway.com
AUS:cs.au@costway.com
GBR:cs.uk@costway.com
FRA:cs.f r @costway.com
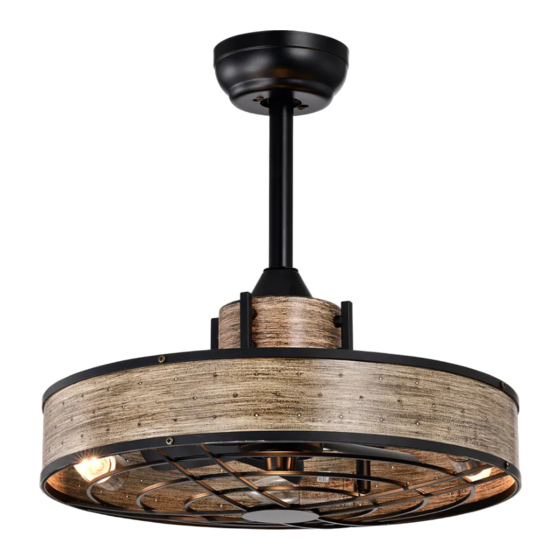
20-Inch Ceiling Fan with Light
Ventilateur de Plafond avec Lumière
ES10234US
THIS INSTRUCTION BOOKLET CONTAINS IMPORTANT SAFETY INFORMATION. PLEASE READ AND KEEP FOR FUTURE REFERENCE.
Advertisement
Table of Contents

Related Manuals for Costway ES10234US


Summary of Contents for Costway ES10234US
- Page 1 GBR office: Ipswich FRA office: Saint Vigor d'Ymonville USA:cs.us@costway.com If you're having difficulty, our friendly AUS:cs.au@costway.com customer team is always here to help. GBR:cs.uk@costway.com THIS INSTRUCTION BOOKLET CONTAINS IMPORTANT SAFETY INFORMATION. PLEASE READ AND KEEP FOR FUTURE REFERENCE. FRA:cs.f r @costway.com...
- Page 2 Before You Start Please read all instructions carefully. Retain instructions for future reference. Separate and count all parts and hardware. Read through each step carefully and follow the proper order. We recommend that, where possible, all items are assembled near to the area in which they will be placed in use, to avoid moving the product unnecessarily once assembled.
-
Page 3: Safety Information
Safety Information WARNING 1. To reduce the risk of electric shock, the electricity has been To reduce the risk of personal injury, do not bend the blade turned off at the circuit breaker or fuse box before begin. brackets (also referred to as flanges) during assembly or after installation. -
Page 4: Specification
SPECIFICATION Gross Cube Size Speed Volts Amps Watts Weight Weight Feet 0.24 12.1LBS 16.8LBS 20" Medium 120V 0.28 4.3cu.ft 5.45KG 7.6KG Electrical tape High 0.41 1240 Wire stripper The above data are for reference only. Actually the motor speed of each ceiling fan is a little different. Any product, subject to actual product as standard. -
Page 5: Package Contents
Pre-Installation(continued) Installation of the hanging bracket (suspension part) PACKAGE CONTENTS WOODEN CEILING Remote control Mounting (receiver) For wooden ceiling, Bracket<A> use wood screw to Remote control drill on the wooden (Transmitter) beam or the "junction box" to fix Self tapping the hanging bracket screw<B>... -
Page 6: Concrete Ceiling
STEP 2 A-CONCRETE CEILING IMPORTANT: SCREWS MUST BE TIGHTENED TILL SNUG SWITCH OFF THE ELECTRICAL MAINS AT THE CIRCUIT BREAKER FUSE BOX. According to the ceiling of different materials, use 1 )Use the Mounting Bracket as a guide, mark the spots where different screws to fix the hanging bracket. - Page 7 Assembly - Hanging the Fan □ Secure the outlet box (or make sure the existing box is secured) directly to the building structure. Use appropriate fasteners and building materials. Wood joist and outlet box must be able to support a minimum of 50 pounds. Install downrod assembly □...
- Page 8 Assembly-Attaching the Install remote receiver Lights □ Insert the receiver into the mounting bracket with the flat side of the receiver facing the ceiling. Install canopy * Selection of hanger pipes □ Ensure that the loosened screws 1. Use hanger pipes at an is inserted into the key holes on the appropriate height based mounting bracket.
- Page 9 Install the hanging part of the ceiling fan 1. Install downrod assembly 1:Vertical suspension 2. Install the bulbs Select the appropriate wattage bulb and install it in the lamp holder as shown. 12 inches...
- Page 10 2:Inclined suspension WARNIN: Each wire not supplied with this fan is designed to accept up to one12-gauge house wire and two wires from the fan. If you have larger than12-gauge house wiring or more than one house wire to connect to the fan wiring, consult an electrician for the proper size wire nuts to use.
-
Page 11: Preparing For Mounting
1. Raise the fan and place the hanger ball onto mounting bracket. 2. Rotate the fan until the notch on hanger ball snapped into the slot on mounting bracket and sits firmly. NOTE: THE DOWNROD AND HANGER BALL SHOULD NOT ROTATE IF THIS STEP IS DONE CORRECTLY. - Page 12 1. Carefully push the canopy to the bottom of the mounting bracket, make two sliding holes aligned to the two prominent screws on the mounting bracket, and then turn clockwise until Middle Level tight. 2. Push the canopy ring to the bottom oft he canopy, slide the Low Level High Level inner holes aligned to the two prominent screws on the mounting...
-
Page 13: Troubleshooting
Troubleshooting Problem Solution Problem Solution The fan will The fan ▪ Check the main and branch circuit fuses or ▪ Check that all blades and bladearm screws not start wobbles. breakers. are secure. ▪ Check the line wire connections to the fan ▪... -
Page 14: Informations De Sécurité
Informations de Sécurité conducteurs épissés doivent être tournés vers le haut et poussés avec précaution dans la boîte de sortie. Les fils doivent être écartés avec le conducteur de mise à la terre et le conducteur de 1. Pour réduire le risque de choc électrique, l'électricité a été mise à... -
Page 15: Outils Requis
Les schémas électriques ne sont donnés qu'à titre indicatif. OUTILS REQUIS L'utilisation facultative de tout kit d'éclairage doit être répertorié UL et marqué comme convenant à l'utilisation de ce ventilateur. Pour réduire les risques d'incendie, d'électrocution ou de blessures corporelles, installez l'appareil sur une boîte de sortie marquée «... -
Page 16: Contenu De L'emballage
Installation du support de Les accessoires ne suspension (pièce de suspension) Écrou de fil en REMARQUE sont pas représentés plastique à la taille réelle. (pas à l'échelle) PLAFOND EN BOIS Pré-Installation (suite) Pour les plafonds Support de en bois, utilisez des montage (A) CONTENU DE L'EMBALLAGE vis à... - Page 17 ÉTAPE 2 A - PLAFOND EN BÉTON IMPORTANT : LES VIS DOIVENT ÊTRE SERRÉES JUSQU'À CE QU'ELLES SOIENT BIEN SERRÉES. COUPEZ L'ALIMENTATION ÉLECTRIQUE AU NIVEAU DE LA BOÎTE À FUSIBLES DU DISJONCTEUR. Selon les matériaux du plafond, utilisez des vis 1) Utilisez le support de montage comme guide, marquez les différentes pour fixer le support de suspension.
- Page 18 Assemblage - Accrocher le □ Fixez la boîte de sortie (ou assurez-vous que la boîte existante est fixée) directement à la structure du bâtiment. Utilisez des Ventilateur fixations et des matériaux de construction appropriés. La solive de bois et la boîte de sortie doivent pouvoir supporter un Installer l'assemblage de la tige de fixation minimum de 50 livres.
- Page 19 Assemblage - Fixer les Installer le récepteur à distance Lumières □ Insérez le récepteur dans le support de montage avec le côté plat du récepteur face au plafond. * Sélection des tuyaux de Installer l'auvent suspension 1. Utilisez des tuyaux de □...
- Page 20 Installer la pièce de suspension du ventilateur de plafond 1. Installer l'assemblage de la tige de fixation 1:Suspension verticale 2. Installer les ampoules Sélectionnez l'ampoule de puissance appropriée et installez-la dans le support de lampe comme indiqué. PLAFOND 12 inches UTILISEZ UNIQUEMENT UNE AMPOULE E26...
- Page 21 2:Suspension inclinée AVERTISSEMENT : Chaque fil non fourni avec ce ventilateur est conçu pour accepter jusqu'à un fil domestique de calibre 12 et deux fils du ventilateur. Si vous avez un câblage domestique de plus de calibre 12 ou plus d'un fil domestique à connecter au câblage du ventilateur, consultez un électricien pour connaître la taille appropriée des serre-fils à...
- Page 22 AVERTISSEMENT : Retirez les butées de moteur en caoutchouc situées au bas du ventilateur avant d'installer les pales ou de tester le moteur. 1. Soulevez le ventilateur et placez la boule de suspension sur le support de montage. 2. Faites tourner le ventilateur jusqu'à ce que l'encoche de la boule de suspension s'enclenche dans la fente du support de montage et repose fermement.
-
Page 23: Préparation Du Montage
Assemblage - Accrocher le Préparation du montage Ventilateur (suite) Préparation du montage Contrôleur Installer la télécommande 1 : Retirez le support de montage de l'auvent en desserrant les deux vis de l'auvent situées dans les fentes en forme de L. 2 : Retirez et conservez les deux vis de l'auvent situées dans les trous ronds. -
Page 24: Dépannage
Dépannage Vitesse du ventilateur niveau bas Vitesse du ventilateur niveau moyen Vitesse du ventilateur niveau élevé Problème Solution Ventilateur ARRÊT Le ventilateur ▪ Vérifiez les fusibles ou les disjoncteurs du ne démarre circuit principal et de dérivation. pas. ▪ Vérifiez les connexions des fils de ligne au ventilateur et les connexions des fils de l'interrupteur dans le boîtier de l'interrupteur. - Page 25 Problème Solution Return / Damage Claim Instructions Le ventilateur ▪ Vérifiez que toutes les pales et les vis des DO NOT discard the box / original packaging. oscille. bras de pale sont bien fixées. In case a return is required, the item must be returned in original box. Without this your return will not be accepted.
Need help?
Do you have a question about the ES10234US and is the answer not in the manual?
Questions and answers