Table of Contents
Advertisement
Quick Links
EN
With your inspiring rating, COSTWAY will be more consistent to offer you EASY
SHOPPING EXPERIENCE, GOOD PRODUCTS and EFFICIENT SERVICE!
DE
Mit Ihrer inspirierenden Bewertung wird COSTWAY konsistenter sein, um Ihnen EIN
SCHÖNES EINKAUFSERLEBNIS, GUTE PRODUKTE und EFFIZIENTEN SERVICE zu
bieten!
FR
Avec votre évaluation inspirante, COSTWAY continuera à fournir une EXPÉRIENCE
D'ACHAT PRATIQUE, des PRODUITS DE QUALITÉ et un SERVICE EFFICACE !
ES
Con su calificación inspiradora, COSTWAY será más consistente para ofrecerle
EXPERIENCIA DE COMPRA FÁCIL, BUENOS PRODUCTOS y SERVICIO EFICIENTE.
IT
Con la tua valutazione incoraggiante, COSTWAY sarà più coerente per offrirti
ESPERIENZA DI ACQUISTO FACILE, BUONI PRODOTTI e SERVIZIO EFFICIENTE!
PL
Dzięki twojej opinii COSTWAY będzie mógł oferować jeszcze WYGODNIEJSZE
ZAKUPY, LEPSZE PRODUKTY i SPRAWNIEJSZĄ OBSŁUGĘ KLIENTA.
US office: Fontana
UK office: Ipswich
DE office: Hamburg
FR office: Saint Vigor d'Ymonville
AU office: Truganina
PL office: Gdańsk
THIS INSTRUCTION BOOKLET CONTAINS IMPORTANT SAFETY INFORMATION. PLEASE READ AND KEEP FOR FUTURE REFERENCE.
USER'S MANUAL
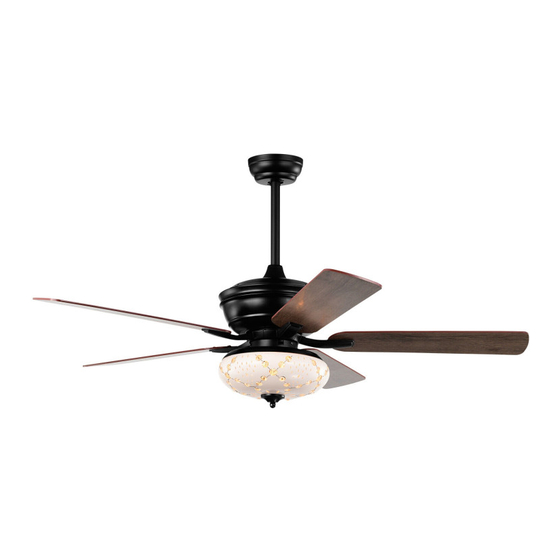
Ceiling Fan
ES10099US
Advertisement
Table of Contents

Related Manuals for Costway ES10099US


Summary of Contents for Costway ES10099US
- Page 1 With your inspiring rating, COSTWAY will be more consistent to offer you EASY SHOPPING EXPERIENCE, GOOD PRODUCTS and EFFICIENT SERVICE! Mit Ihrer inspirierenden Bewertung wird COSTWAY konsistenter sein, um Ihnen EIN SCHÖNES EINKAUFSERLEBNIS, GUTE PRODUKTE und EFFIZIENTEN SERVICE zu bieten! Avec votre évaluation inspirante, COSTWAY continuera à...
-
Page 2: Safety Information
Safety Information Pre-Installation SPECIFICATION 1.To reduce the risk of electric shock,the electricity has been WARNING: turned off at the circuit breaker or fuse box before begin. To reduce the risk of personal 2.The outlet box and support injury, do not bend the blade structure must be securely brackets (also referred to as mounted and capable of reliably... -
Page 3: Hardware Included
Pre-Installation(continued) Pre-Installation(continued) HARDWARE INCLUDED PACKAGE ONTENTS components table Slide-on mounting bracket Canopy 13cmBall/downrod assembly 25.5cmBall/downrod assembly(standby) NOTE: Hardware not shown to actual size "R"Locking Pin Hanging Pin Blade attachment screw and fiber washer Coupling cover Plastic wire nut (not to scale) Blade (5PCS) Blade arm screw and lock washer Fan-motor assembly... -
Page 4: Wooden Ceiling
Installation of the hanging bracket (suspension part) Installation of the hanging bracket (suspension part) WOODEN CEILING CONCRETE CEILING Mounting Bracket<A> Mounting Bracket<A> Expension Bolts<B> Flat Washers <C> Spring Washers<D> Self tapping screw<B> Nuts<E> Note: According to the ceiling of different materials, use different screws to fix the hanging bracket.Don't fix the hanging bracket on the wood ceiling less than 12MM to prevent danger caused by loosening of screws. -
Page 5: Making The Electrical Connections
Install the hanging part of the ceiling fan Assembly - Hanging the Fan(continued) 1.Making the electrical connections WARNING: Each wire not supplied with this fan is designed to accept up to one 12-gauge house wire and two wires from the fan.lf you have larger than 12-gauge house wiring or more than one house wire to connect to the fan wiring, consult an electrician for the proper size wire nuts to use. -
Page 6: Preparing For Mounting
Assembly - Attaching the Fan Blades Assembly - Hanging the Fan( continued) 1. Attaching the blades to the arms Preparing for mounting Phillips screwdriver Attaching the blades to the arms 1:Pass the red washer through the screw. 2:Tighten the screw through the blade and tighten it on the arms. Install remote control Preparing for mounting 3:Repeat the above steps to tighten the four sets of blades. -
Page 7: Operation
Assembly - Attaching the Lights Assembly - Attaching the Lights Assembly - Hanging the Fan( continued) 3. Connecting lamp wire WARNING:Allow the shatter resistant bowl to cool completely before removing. CAUTION: To reduce CAUTION: Make sure the power is off before attaching or the risk of electric shock, removing the shatter resistant bowl. - Page 8 Assembly - Attaching the Lights Use of remote control Problem Solution LIGHT ON/OFF -Check the main and branch circuit fuses or breakers. Auto off after 1hr -Check the line wire connections to the fan and switch Auto off after 2hrs wire connections in the switch housing.
Need help?
Do you have a question about the ES10099US and is the answer not in the manual?
Questions and answers