
Related Manuals for Smeg GN166130XB


Summary of Contents for Smeg GN166130XB
- Page 1 Refrigerator User Manual ثالجة دليل المستخدم GN166130XB EN/AR 58 6598 0000/AD EN-AR...
- Page 2 Dear Customer, Please read this manual before using the product. Thank you for choosing this product. We would like you to achieve the optimal efficiency from this high quality product which has been manufactured with state of the art tech- nology.
-
Page 3: Table Of Contents
1 Safety Instructions 6 Operation of the Product 1.1 Purpose of usage ....3 6.2 Indicator panel ..... . 20 1.2 Safety of children, vulnerable persons and 6.3 Deodoriser Module . -
Page 4: Safety Instructions
Safety Instructions This section includes the safety 1.2 Safety of children, instructions necessary to prevent vulnerable persons and pets the risk of personal injury or material This product may be used by children damage. aged 8 years and older and persons Our company shall not be held with underdeveloped physical, responsible for damages that may... -
Page 5: Handling Safety
Safety instructions maintenance, cleaning, repair, and 1.5 Installation Safety transportation operations. Contact the Authorized Service If the power the cord is damaged, for the product’s installation. To it shall be replaced by authorized prepare the product for installation, service only to avoid any risk that see the information in the user may occur. -
Page 6: Operational Safety
Safety instructions Do not connect your refrigerator to power of refrigerant. The amount of the saving devices. These systems are harmful for refrigerant available in your product the product. is specified in the Type Label. The installation place of the product 1.6 Operational safety shall not be exposed to direct Do not use chemical solvents on the product. - Page 7 Safety instructions chemical agents in the vicinity of Do not hit or exert excessive pressure the refrigerator. Risk of fire and on glass surfaces. Broken glass explosion! may cause injuries and/or material Do not store explosive materials damages. such as aerosol cans with flammable The cooling system in your product materials inside the product.
-
Page 8: Maintenance And Cleaning Safety
Safety instructions 1.7 Maintenance and 1.9 Lighting cleaning safety (May not be applicable for all models) Do not pull by the door handle if you Contact an authorized service when shall move the product for cleaning you shall replace the LED / bulb using purposes. -
Page 9: Environmental Instructions
Environmental instructions 2.1 Compliance with the WEEE Directive and Disposing of the Waste Product: This product complies with EU WEEE Directive (2012/19/EU). This product bears a classification symbol for waste electrical and electronic equip- ment (WEEE). This symbol indicates that this product shall not be disposed with other house- hold wastes at the end of its service life. -
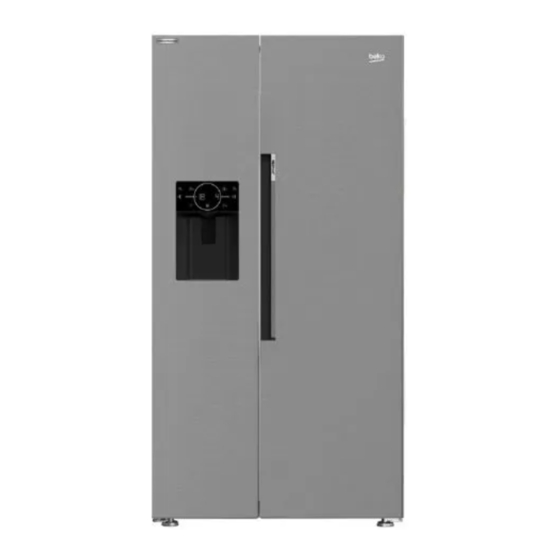
Page 10: Your Refrigerator
Your Refrigerator 1. Freezer compartment Glass shelves 2. Cooler compartment 3. Cooler compartment door shelves Frozen food storing compartments 4. Egg Holder Freezer compartment glass shelf 5. Bottle shelf Ice machine 6. Adjustable stands Freezer compartment door shelves *Optional 7. Crispers 8. -
Page 11: Installation
Installation 4.1 The right place for installation function efficiently. If the product will be placed Read the “Safety Instructions” section first! in an alcove, remember to leave at least 5 cm distance between the product and the ceiling and the walls. Your product requires adequate air circulation to 4.2 Attaching the plastic wedges function efficiently. -
Page 12: Adjustment Of The Feet
Installation In order to adjust the doors vertically, 4.3 Adjustment of the feet If the product is not in balanced position, adjust the front adjustable stands by rotating right or left. position of the door In order to adjust the doors horizontally, Loosen the fixing screw at the bottom Loosen the fixing bolt on the top Screw the adjusting bolt (CW/CCW) on the side... -
Page 13: Electrical Connection
Installation 4.4 Electrical connection 4.5 Water connection (Optional) WARNING: WARNING: Do not use extension or Unplug the product and multi sockets in power connection. the water pump (if available) during connection. The product’s water mains, filter and carboy connections must be rendered by authorizer WARNING: Damaged power cable service. -
Page 14: Connecting Water Hose To The Product
Installation 4.6 Connecting water hose to the 4.7 Connecting to water mains product (Optional) To connect the water hose to the product, To use the product by connecting to the cold water follow the instructions below. mains, a standard 1/2” valve connector must be 1. -
Page 15: For Products Using Water Carboy
Installation 1. Attach the connector into the faucet adaptor 2. Connect the other end of the water hose to and tighten by hand / tool. the water pump by pushing the hose into the pump’s hose inlet. 2. To avoid damaging, shifting or accidentally 3. -
Page 16: Fixing External Filter On The Wall (Optional)
Installation 4.10 Fixing external filter on the wall (Optional) WARNING: Do not fix the filter on the product. Check to see the following parts are supplied with your product’s model: 4. Attach the water hose extending from the top of the filter to the product’s water connection adaptor, (see 4.6.) 1. -
Page 17: Internal Filter
Installation 4.11.Internal filter 1. “Ice Off” indicator must be active while installing the filter. Switch the ON-OFF The internal filter provided with the product is not indicator using the “Ice” button on the screen. installed upon delivery; please follow the instructions below to install the filter. - Page 18 Installation Remove the water filter by-pass cover by pulling. A few drops of water may flow out after removing the cover; this is normal. 1. Place the water filter cover into the mechanism and push to lock in place. 2. Push the “Ice” button on the screen again to cancel the “Ice Off”...
-
Page 19: Preparation
Preparation energy while maintaining the freshness of your Read the “Safety Instructions” section first! foodstuff. In case of multiple options are present glass shelves must be placed so that the air outlets 5.1 What to do for energy saving at the backwall are not blocked, prefably air mehmet outlets are remaining below the glass shelf. -
Page 20: Operating The Product
Operating the Product Read the “Safety Instructions” section first! Do not use any mechanical tools or any other tools than the recommendations of the manufacturer to speed up the thawing operation. Do not use parts of your refrigerator such as the door or drawers as a support or a step. This may cause the product to trip over or its components to be damaged. -
Page 21: Operation Of The Product
Operation of the Product Read the “Safety Instructions” section first! 6.2 Indicator panel Indicator panels may vary depending on the model of your product. Audial and visual functions of the indicator panel will assist in using the refrigerator. 1- Quick Freeze Key 2- Ice Maker On/Off Button 3- Fault Condition Indicator 4- Cooling Compartment OFF (Vacation) Function Key... - Page 22 Using the product 5. Quick Cooling Key 1. Quick Freezing Key When the quick cooling key is pressed, the LED on When the quick freeze key is pressed, the LED on the key ( ) is illuminated and the quick cooling the key ( ) is illuminated and the quick freeze function shall be activated.
-
Page 23: Deodoriser Module
Using the product When the initial connection is established, you 6.3 Deodoriser Module may activate/deactivate the connection with a (FreshGuard) short press on this key. Until the connection is *May not be available in all models established, the LED on the key The deodoriser module quickly eliminates the bad blinks quickly (with the interval of 0.2 seconds). -
Page 24: Humidity Controlled Crisper (Everfresh+)
Using the product 6.4 Humidity controlled 6.5 Blue Light/HarvestFresh crisper (EverFresh+) *May not be available in all models *May not be available in all models For Blue light, Thanks to the humidity controlled crisper, Vegetables and fruit stored in crispers illuminated vegetables and fruits may be stored for a longer with blue light continue to perform photosynthesis period at an environment with ideal humidity... -
Page 25: Dairy (Cold Storage) Bin
Using the product 6.6 Dairy (cold storage) bin *May not be available in all models “The dairy (cold storage) bin ” provides lower temperature within the refrigerator compartment. Use this bin to store delicatessen (salami, sausages, dairy products and etc. ) that requires lower storage temperature or meat, chicken or fish products for immediate consumption. -
Page 26: Taking Ice / Water
Using the product 6.10 Taking ice / water The water may be cloudy during first use of the filter; do not consume the first 10 glasses (Optional) of water. To take water ( ) / ice cube ( ) / fragmented You must wait approximately 12 hours to get ice ( ), use the display to select the respective... -
Page 27: Ice Machine
Using the product 6.12 Ice Machine When using the ice machine for the first time or after (This feature is optional) a long period of disuse Ice cubes may get smaller due to the residual air in Ice machine is on the upper section of the freezer the water system. -
Page 28: Freezing Fresh Food
Using the product 6.13 Freezing fresh food Mark each food pack by writing the date on the package before freezing.This will allow you to To preserve food quality, the food items placed determine the freshness of each pack every in the freezer compartment must be frozen as time the freezer is opened. -
Page 29: Placing The Food
Using the product Boil the vegetables and filter the water to extend the frozen storage time. Place the food in air-tight packages after filtering and place in the freezer. Bananas, tomatoes, lettuce, celery, boiled eggs, potatoes and similar food items should not be frozen. -
Page 30: Maintenance And Cleaning
Maintenance and cleaning On the products without a No-Frost feature, WARNING: Read the “Safety water droplets and icing up to a thickness of a Instructions” section first! finger may occur on the rear wall of the freezer compartment. Do not clean, and never apply oils WARNING: Unplug the refrigerator or similar materials. -
Page 31: Maintenance And Cleaning
Maintenance and cleaning 7.2 Cleaning of the Products 7.3 Preventing Odours with Glass Doors The product is manufactured free of any Remove the protective foil on the glasses. odorous materials. However, keeping the food in There is a coating on the surface of the glasses. inappropriate sections and improper cleaning of This coating minimizes formation of stains and internal surfaces may lead to odours. -
Page 32: Troubleshooting
Troubleshooting Check this list before contacting the service. Doing In case of sudden power failure or pulling so will save you time and money. This list includes the power plug off and putting back on, the frequent complaints that are not related to faulty gas pressure in the product's cooling system workmanship or materials. - Page 33 Troubleshooting The food items kept in cooler compartment The new product may be larger than the drawers are frozen. previous one. Larger products will run for longer periods. The cooler compartment temperature is The room temperature may be high. >>> set to a very low degree.
- Page 34 Troubleshooting There is sound of wind blowing coming from The door is not closing. the product. Food packages may be blocking the door. The product uses a fan for the cooling >>> Relocate any items blocking the doors. process. This is normal and not a malfunction. The product is not standing in full upright There is condensation on the product's position on the ground.
- Page 35 ،عميلنا العزيز .يرجى قراءة هذا الدليل قبل استخدام المنتج نشكرك على اختيارك هذا المنتج. نتمنى أن تصل إلى الكفاءة المثلى من هذا المنتج عالي الجودة الذي تم تصنيعه بأحدث .التقنيات. للقيام بذلك ، اقرأ هذا الدليل بعناية وأية وثائق أخرى مقدمة قبل استخدام المنتج واحتفظ به كمرجع انتبه...
- Page 36 19 ....2.6 لوحة المؤشر 1 تعليمات األمان 3....1.1 غرض االستخدام 6 تشغيل...
- Page 37 تعليمات األمان .المتعلقة بذلك يوضح هذا الجزء تعليمات السالمة الالزمة لمنع خطر 8 ي ُسمح لألطفال الذين تتراوح أعمارهم بين 3 و .اإلصابة أو الضرر المادي سنوات بوضع وإخراج الطعام من / إلى المنتج ال تتحمل شركتنا المسؤولية عن أي أضرار قد تقع إذا .المبرد...
- Page 38 تعليمات األمان - على بعد 03 سم على األقل من مصادر الحرارة 4.1 السالمة عند حمل الجهاز ، مثل المواقد ووحدات التسخين والسخانات وما إلى ذلك .هذا المنتج ثقيل، ال تحمله لوحدك .- وعلى بعد 5 سم على األقل من األفران الكهربائية .ال...
- Page 39 تعليمات األمان ال تضرب أو تمارس ضغط ً ا زائ د ً ا على األسطح ال تضع المثلجات أو مكعبات الثلج أو األطعمة المجمدة في فمك بمجرد إخراجها من الفريزر. خطر الزجاجية. قد يتسبب الزجاج المكسور في حدوث !حدوث عضة صقيع .إصابات...
- Page 40 تعليمات األمان الكهربائية في ثالجتك ويسبب ما س ًا كهربائ ي ًا أو صدمة !كهربائية احرص على إبقاء الماء بعي د ً ا عن الدوائر اإللكترونية .أو إضاءة المنتج استخدم قطعة قماش نظيفة وجافة لمسح الغبار أو المواد الغريبة على أطراف القوابس. ال تستخدم قطعة قماش...
- Page 41 تعليمات بيئية 1.2 االمتثال للتوجيهات الخاصة :بنفايات األجهزة والتخلص منها .EU WEEE )2012/19/EU( هذا المنتج متوافق مع توجيهات يحمل هذا المنتج رمز تصنيف التخلق من األجهزة الكهربائية واإللكترونية .)WEEE( يشير هذا الرمز إلى أنه ال يجب التخلص من هذا المنتج .مع...
- Page 42 ثالجتك حجرة المجمد الرفوف الزجاجية المروحة حجرة المبرد حجرات تخزين األطعمة المجمدة رفوف باب حجرة المبرد الرف الزجاجي لحجرة المجمد حامل البيض آلة صنع الثلج رف زجاجات رفوف باب حجرة المجمد القواعد القابلة للتعديل *اختياري حجرة الخضروات )صندوق األلبان (التخزين البارد رف...
- Page 43 التركيب 1.4 المكان المناسب للتركيب • يتطلب الجهاز توزيعا كافيا للهواء حتى يعمل بشكل 5 فعال. إذا كنت ستضع الجهاز في فجوة، تذكر ترك ! ً اقرأ قسم "تعليمات األمان" أو ال .سم على األقل بين الجهاز والسقف والجدران 2.4 تثبيت األوتاد البالستيكية استخدم...
- Page 44 التركيب 3.4 تعديل األقدام ،من أجل ضبط األبواب عمود ي ًا إن لم يكن الجهاز في وضع متوازن، اضبط القواعد • قم بفك صمولة التثبيت في األسفل .األمامية القابلة للتعديل بإدارتها إلى اليمين أو اليسار ) وف ق ً ا لموضعCW / CCW( • اربط برغي الضبط الباب...
- Page 45 التركيب 5.4 توصيل الماء 4.4 التوصيل الكهربائي )(اختيارية :تحذير ال تستخدم أدوات التطويل أو :تحذير افصل الجهاز ومضخة الماء (إن .المقابس المتعددة في توصيل الطاقة .وجدت) عن الكهرباء أثناء التوصيل يجب إجراء توصيالت الماء الرئيسية والفلتر وقارورة الماء بواسطة خدمة الصيانة المعتمدة. يمكن توصيل :تحذير...
- Page 46 التركيب 6.4 توصيل خرطوم الماء بالمنتج 7.4 التوصيل بمصدر ماء رئيسي .لتوصيل خرطوم الماء بالجهاز، اتبع التعليمات أدناه )(اختيارية فك الموصل الموجود على وصلة فوهة الخرطوم الستخدام الجهاز للتوصيل إلى مصدر الماء البارد، يجب .على ظهر المنتج ومرر الخرطوم عبر الموصل تركيب...
- Page 47 التركيب ركب الموصل على وصلة الصنبور وشده بواسطة أوصل الطرف اآلخر لخرطوم الماء بمضخة الماء .اليد أو أداة .بدفع الخرطوم في مدخل خرطوم المضخة ،لتجنب إتالف الخرطوم أو ليه أو فصله عرضيا .ركب وشد خرطوم المضخة داخل القارورة استخدم المشابك المزودة لتثبيت خرطوم الماء كما .يجب...
- Page 48 التركيب 01.4 تركيب الفلتر الخارجي على الجدار )(اختياري :تحذير .ال تثبت الفلتر على المنتج :تحقق للتأكد من وجود القطع التالية مع موديل جهازك ثبت خرطوم الماء الممتد من أعلى الفلتر إلى وصلة .)4.6 الماء (انظر موصل (1 قطعة): يستخدم لتوصيل خرطوم الماء .بظهر...
- Page 49 التركيب 11.4.الفلتر الداخلي يجب أن يكون مؤشر "إيقاف صنع الثلج" نشط ً ا أثناء يتم تركيب الفلتر الداخلي المزود مع الجهاز عند - تركيب الفلتر. ب د ِّ ل المؤشر بين وضعي التشغيل .التوصيل؛ يرجى اتباع التعليمات أدناه لتركيب الفلتر إيقاف...
- Page 50 التركيب .فك الغطاء الجانبي لفلتر الماء بسحبه قد تفيض بعض قطرات الماء بعد فك الغطاء؛ .هذا أمر طبيعي ضع غطاء فلتر الماء على اآللة واضغط لقفله في .مكانه اضغط على زر "الثلج" الظاهر على الشاشة مرة ."أخرى إللغاء وضع "إيقاف صنع الثلج يعمل...
- Page 51 اإلعداد في الجدار الخلفي، وتبقى منافذ الهواء أسفل الرف ! ً اقرأ قسم "تعليمات األمان" أو ال الزجاجي. قد يساعد هذا المزيج في تحسين توزيع .الهواء وكفاءة الطاقة إجراءات توفير الطاقة mehmet يسبب توصيل الجهاز بنظام توفير الطاقة .اإللكتروني أضرارا، فقد يتلف المنتج .ال...
- Page 52 تشغيل المنتج ! ً اقرأ قسم "تعليمات األمان" أو ال ال تستخدم أي أدوات ميكانيكية أو أي أدوات أخرى • لتسريع عملية الذوبان غير األدوات التي توصي بها .الشركة المصنعة ال تستخدم أجزاء من ثالجتك مثل الباب أو األدراج • كداعم...
- Page 53 تشغيل المنتج ! ً اقرأ قسم "تعليمات األمان" أو ال 2.6 لوحة المؤشر .قد تتباين ألواح المؤشرات بناء على موديل جهازك .ستساعدك الوظائف الصوتية والبصرية للوحة المؤشرات على استخدام الثالجة مفتاح التجميد السريع زر تشغيل/إيقاف تشغيل جهاز صنع الثلج مؤشر حالة العطل )مفتاح...
- Page 54 استخدام المنتج 1. مفتاح التجميد السريع 7)، يمكن ضبط درجة حرارة الحجرة على 8 و ( المفتاح LED عند الضغط على مفتاح التجميد السريع، يضيء مؤشر .و6 و5 و4 و3 و2 و1 درجة مئوية .) ويتم تنشيط وظيفة التجميد السريع ( الموجود...
- Page 55 استخدام المنتج 3.6 وحدة مزيل الروائح .Android / للحصولhttps://www.homewhiz.com تفضل بزيارة )FreshGuard( .على معلومات مفصلة * قد ال تتوافر جميع الطرز 11. مفتاح ضبط درجة حرارة حجرة التجميد تعمل وحدة مزيل الروائح على التخلص بسرعة من الروائح يتم ضبط درجة حرارة مقصورة المبرد. سيؤدي الضغط الكريهة...
- Page 56 استخدام المنتج 4.6 درج الخضار ذو التحكم في الضوء األزرق / الحصاد )+EverFresh( الرطوبة HarvestFresh الطازج * قد ال تتوافر جميع الطرز * قد ال تتوافر جميع الطرز بفضل درج الثالجة ذو خاصية التحكم في الرطوبة ، يمكن ، للضوء األزرق تخزين...
- Page 57 استخدام المنتج )6.6 صندوق األلبان (التخزين البارد * قد ال تتوافر جميع الطرز "توفر حاوية تخزين األلبان (التخزين البارد)" درجة حرارة منخفضة داخل حجرة الثالجة. استخدم هذه الحاوية لتخزين األطعمة المعلبة (السالمي والنقانق ومنتجات األلبان وغيرها) التي تتطلب درجة حرارة تخزين أقل أو .منتجات...
- Page 58 استخدام المنتج 01.6 إخراج الثلج/ الماء يجب االنتظار 21 ساعة تقريبا للحصول على الماء .البارد بعد التركيب األول )(اختيارية تم تصميم نظام ماء الجهاز للماء النظيف فقط. ال ) / الثلج المفتت ( ) / مكعبات الثلج ( إلخراج الماء .تستخدم...
- Page 59 استخدام المنتج 21.6 ماكينة صنع الثلج تحذير: ال ت ُ د ِ خل يدك أو أي جسم آخر )(هذه الميزة اختيارية في قناة الثلج وشفرات تكسير الثلج أثناء .تقع ماكينة صنع الثلج على الجزء العلوي من غطاء ال م ُج م ّد تشغيل...
- Page 60 استخدام المنتج 31.6 تجميد األطعمة الطازجة يتم فيها فتح ال م ُجمد. خزن األطعمة األقدم في األمام للمحافظة على جودة الطعام، يجب تجميد األطعمة .لضمان استخدامها أوال المخزنة في حجرة المجمد بأسرع وقت ممكن بواسطة يجب استخدام األطعمة المجمدة بعد أن تذوب فورا .التجميد...
- Page 61 استخدام المنتج .اسلق الخضار ونقي الماء إلطالة زمن تخزين المجمدات ضع الطعام في أغلفة مانعة للهواء بعد التنقية وخزنها في ،المجمد. ال يجب تجميد الموز، الطماطم، الخس، الكرفس البيض المسلوق، البطاطا واألطعمة المماثلة. إن تجميد هذه المواد الغذائية سيقلل ببساطة من القيمة الغذائية وجودة .الطعام،...
- Page 62 الصيانة والتنظيف ً استخدم قطعة قماش من األلياف الدقيقة مبللة قلي ال • لتنظيف السطح الخارجي للمنتج. قد تسبب اإلسفنج :تحذير !ً اقرأ قسم "تعليمات األمان" أو ال .وأنواع تنظيف المالبس األخرى خدوشً ا لتنظيف جميع المكونات القابلة لإلزالة أثناء تنظيف •...
- Page 63 الصيانة والتنظيف 2.7 تنظيف المنتجات تاذ 3.7 منع الروائح األبواب الزجاجية تم تصنيع المنتج من مواد خالية من الروائح. إال أن .قم بإزالة الرقاقة الواقية عن الزجاج االحتفاظ بالطعام في أقسام غير مالئمة وتنظيف األسطح يوجد غالف على سطح الزجاج .يقلل هذا الطالء من .الداخلية...
- Page 64 استكشاف المشاكل وإصالحها تحقق من هذه القائمة قبل االتصال بمركز الصيانة. من شأن .تعمل الثالجة لفترة زمنية طويلة ذلك توفير الوقت والمال. تتضمن هذه القائمة الشكاوى غير ربما يكون المنتج الجديد أكبر من المنتج السابق. تعمل • المرتبطة بعيوب الصناعة أو المواد. وقد ال تنطبق سمات .األجهزة...
- Page 65 استكشاف األخطاء وإصالحها تم ضبط درجة حرارة حجرة المبرد على درجة عالية • ال يتم تنظيف الجهاز بانتظام. >>> نظف الجزء • جدا. >>> يؤثر إعداد درجة حرارة حجرة المبرد على الداخلي بانتظام مستخدما إسفنجة وماء دافئ وماء درجة حرارة حجرة المجمد. انتظر حتى تصل األجزاء .مكربن...
Need help?
Do you have a question about the GN166130XB and is the answer not in the manual?
Questions and answers