BBH SMX Series Installation Manual
Field buses
Hide thumbs
Also See for SMX Series:
- Installation manual (264 pages) ,
- Installation manual (260 pages) ,
- Installation manual (67 pages)
Table of Contents
Advertisement
Quick Links
Advertisement
Table of Contents

Subscribe to Our Youtube Channel
Related Manuals for BBH SMX Series


Summary of Contents for BBH SMX Series
- Page 1 Installation manual English SMX / SCU Series Field buses Modbus TCP/IP EtherNet/IP PROFINET EtherCAT PROFIBUS DeviceNet CANopen Read and observe installation manual before initial commissioning/ initial startup/ integration of the module! Observe safety instructions! Keep for future use!
- Page 2 Nevertheless, we draw your attention, that this document cannot always be updated at the same time as the technical development of our products. Information and specifications can be changed at any time. Please keep yourself informed about the latest version at www.bbh-products.de. BBH Products GmbH Böttgerstrasse 40...
-
Page 3: Table Of Contents
Installation manual Table of contents IMPORTANT NOTES ....................6 Definitions ..............................6 Applicable documents ............................ 6 Abbreviations used ............................8 SAFETY REGULATIONS ..................9 Intended use ..............................9 General safety regulations ..........................9 Operation and service ..........................10 Transport/Storage............................10 DESCRIPTION AND FUNCTION OF DEVICE ............ - Page 4 Installation manual 9.3.1 Output data ..........................43 9.3.2 Input data ............................. 44 10 SD-BUS DATA ......................45 10.1 Fieldbus data SD-Bus Gateway ......................... 45 10.2 Fieldbus data SD slave ..........................46 10.3 Structure of the SD bytes in the fieldbus protocol..................47 10.4 Reading acyclic data from the SD slave ....................
- Page 5 Installation manual List of tables Table 1: Abbreviations ........................8 Table 2: Field bus specific data for Modbus TCP/IP..............12 Table 3: Field bus specific data for EtherNet/IP ................14 Table 4: Field bus specific data for PROFINET ................15 Table 5: Field bus specific data for EtherCAT ................
-
Page 6: Important Notes
Important notes 1 Important notes Definition of individual target groups: Project engineering for safe drive systems: Engineers and technicians Assembly, electrical installation, maintenance and replacement of devices: Maintenance electricians and service technicians Commissioning, operation and configuration: Technicians and engineers 1.1 Definitions The designation SMX is used as generic term for all derivatives from the SMX product range. - Page 7 In case of uncertainties or need for further information, contact the publisher directly. If required, you can also obtain the documentation in printed form from BBH Products GmbH. Note: • Thoroughly read the manuals carefully before you start the installation and the commissioning of the devices.
-
Page 8: Abbreviations Used
Light Emitting Diode Programmable Logic Controller Power on Reset SDDC Safe Device To Device Communication SafePLC² Program for programming PLC, programming interface of BBH for assemblies. SELV Safety Extra Low Voltage Synchronous Serial Interface Verband der Elektrotechnik, Elektronik und Informationstechnik e. V. -
Page 9: Safety Regulations
Safety regulations 2 Safety regulations 2.1 Intended use The universal communication interface COM is an option for the modules of the following series: SCU-x-EC/NM and SDU-x SMX1x/2/x and SMX1xx/2/x and their variants for non-safe data transfer via an Ethernet or CAN or RS485 based protocol. -
Page 10: Operation And Service
This will also lead to the loss of all warranty and compensation claims against BBH Products GmbH. 2.3 Operation and service The module must always be deenergized before installation and removal, or before disconnecting signal lines. -
Page 11: Description And Function Of Device
Description and function of device 3 Description and function of device The universal communication interface COM is permanently integrated into every base module with the option /DNM, /xNM, /NM or /DBM, /xBM. In this connection the COM interface is responsible for non-safe communication based on Ethernet or CAN respectively RS485 bus protocols. -
Page 12: Field Bus Characteristic Data
Description and function of device 3.1 Field bus characteristic data 3.1.1 Modbus TCP/IP Reaction time Processing time incoming fieldbus protocols: min.1 ms; Response time depending on SMX/SCU system SMX1x/2: 8ms SMX1xx/2: 16-32ms SCU-x-EC/NM: 16 ms SDU-x/NM: 8 ms Protocol TCP/IP Address range 260 Byte Coils... - Page 13 Description and function of device Memory Layout: Byte Content Holding Input Coil Access Supported Register Register Function Codes Functional Inputs 1..8 Read Coils, 0..7 Read Holding Register, Functional Inputs 9..16 Write Single Coil, 8..15 Write Single Register, Functional Inputs 17..24 Write Multiple Coils, 16..23 Write Multiple...
-
Page 14: Ethernet/Ip
Description and function of device 3.1.2 EtherNet/IP Reaction time Cycle Time (Input Trigger) minimum 1ms, Reaction time base on host device SMX1x/2: 8ms SMX1xx/2: 16 – 32ms SCU-x-EC/NM: 16 ms SDU-x: 8 ms Output Data Size (O -> T) 68 Byte Input Data Size (T ->... -
Page 15: Profinet
Description and function of device 3.1.3 PROFINET Reaction time Cycle Time (Input Trigger) minimum 1ms, Reaction time base on host device SMX1x/2: 8ms SMX1xx/2: 16 – 32ms SCU-x-EC/NM: 16 – 32 ms SDU-x/NM: 8 ms Cyclic Output Data Size 80 Byte Cyclic Input Data Size 204 Byte Baud Rate... -
Page 16: Profibus
Description and function of device 3.1.5 PROFIBUS Reaction time Cycle Time (Input Trigger) minimum 1ms, Reaction time base on host device SMX1x/2: 8ms SMX1xx/2: 16-32ms Cyclic Output Data Size 80 Byte Cyclic Input Data Size 204 Byte Device Class DP Slave Safety I/O data (output) 12 Byte (Extended format) Safety I/O data (input) -
Page 17: Devicenet
Description and function of device 3.1.6 DeviceNet Reaction time Cycle Time (Input Trigger) minimum 1ms, Reaction time base on host device SMX1x/2: 8ms SMX1xx/2: 16-32ms Protocol DeviceNET / CAN Connector Sub-D Type 12 – Communications Adapter Output Data Size 4 Byte functional inputs (Consumed) (Network to Slave) Input Data Size... -
Page 18: Canopen
Description and function of device 3.1.7 CANopen Reaction time Reaction time base on host device SMX1x/2: 8ms SMX1xx/2: 16-32ms Device Type NMT Slave Protocol Connector Sub-D Node ID Physical rotary switch Baud Rate Manually configured: 125, 250, 500 kBaud With Auto detection: 10, 20, 50, 100, 125, 250, 500, 800, 1000 kBaud Baud Rate Auto-Detection supported... -
Page 19: Device Equipment And Settings
Device equipment and settings 4 Device equipment and settings 4.1 Ethernet-based device derivatives (/DNM) The front panel of the Ethernet-based fieldbus derivatives shows the following features: Diagnostics LEDs (see chapter 0 LEDs Diagnostics Ethernet female connector for Ethernet based fieldbus see chapter 5.5.1 Female connector for the fieldbus interface with /DNM, /xNM and / (RJ45) -
Page 20: Can Or Rs485-Based Device Derivatives (/Dbm)
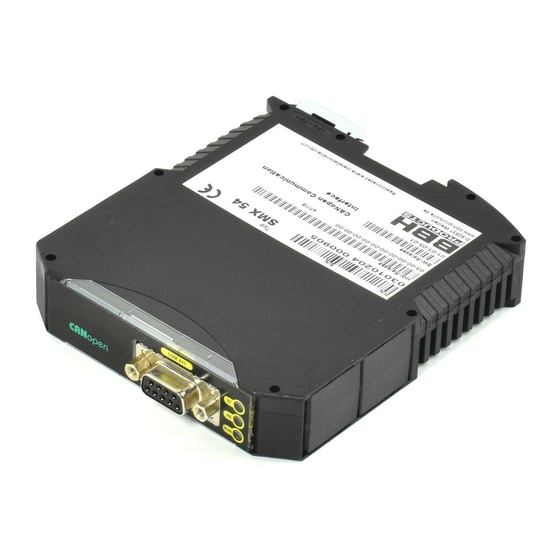
Device equipment and settings 4.2 CAN or RS485-based device derivatives (/DBM) The front panel of the CAN or RS485-based fieldbus derivatives shows the following features: Diagnostics LEDs (see chapter 0 LEDs Diagnostics D-SUB 9P female connector for CAN or RS485-based fieldbus derivatives (see Capture “5.5.2 Female connector for the fieldbus interface with /DBM, /xBM (D-SUB)”) Figure 2: Front view device Variant (/DBM) -
Page 21: Diagnostics Leds
Device equipment and settings 4.3 Diagnostics LEDs The universal communication interface has 4 bi-color LEDs, regardless of the device model. Name function SMX status SDDC/SMMC communication Field bus feedback Ethernet/IP: Network Status Cross Communication to F-CPU Ethernet/IP: Module Status SD-Bus LED Figure 3: Diagnostic LED's The diagnosis LEDs are not reliable indicators and cannot be guaranteed to provide accurate information. - Page 22 Device equipment and settings The following table shows the display functions: orange flashing Initialization; Waiting for connection and receiving the device and connection parameters permanent Waiting for logical link to master COM green flashing Waiting for receiving the device and connection parameter after a time- out of master Run permanent Active process data exchange...
-
Page 23: Table 9: Display Functions Of Diagnostic Leds
Device equipment and settings Green/red flashing EtherNet/IP: Waiting for TUNID (Out-of-box) Others: green flashing SD-Bus scan active permanent Data Exchange active red/orange flashing Error SD-Bus Scan permanent SD Bus error in cyclic operation No slave connected to SD-bus Table 9: Display functions of diagnostic LEDs HB-37450-810-01-13F-EN COM Installation Manual Page 23 of 60... -
Page 24: Connection And Installation
Connection and installation 5 Connection and installation The COM interface requires no additional voltage supply for non-secure fieldbus communication. The interface is supplied directly from the basic module. The installation of the bus systems must be carried out according to the respective installation regulations of the user organizations (ODVA, PNO, ETG, CiA). -
Page 25: Installation Of Scu / Smx Modules
Connection and installation Measures concerning the electromagnetic compatibility (EMC): The SCU/SMX modules are intended for use in the drive environment and meet the Standard EMC requirements. It is also assumed that the electromagnetic compatibility of the overall system is ensured by application of appropriate measures. -
Page 26: Assembly Of Modules And Backplane Bus
Connection and installation 5.3 Assembly of modules and backplane bus Figure 5: Assembly The devices are inserted into the rail under an oblique angle and then snapped on downwards. For further information, refer to the "Installation Manual SMX Gen2", " Installation Manual SMX100 Gen2 and Installation manual SCU". -
Page 27: Pin Assignment Female Connector
Connection and installation 5.5 Pin assignment female connector 5.5.1 Female connector for the fieldbus interface with /DNM, /xNM and /NM (RJ45) Name Description Colour Transmit Data white-orange Transmit Data - orange Receive Data + white-green not used Blue not used white-blue Receive Data - green... -
Page 28: Modification / Handling Changes To The Device
6 Modification / handling changes to the device Repair Repair work on the device can only be performed in the factory of BBH Products GmbH. Warranty By opening or modifying the module, all warranty will become null and void. HB-37450-810-01-13F-EN COM Installation Manual... -
Page 29: Maintenance
Maintenance 7 Maintenance 7.1 Exchanging a module The following sequence should be noted when exchanging a module: • De-activate power supply • Remove the connected Ethernet cable • Take the module off the top hat rail and pack up EMC-compliant •... -
Page 30: Technical Data
Technical data 8 Technical data 8.1 Environmental conditions Class of protection IP 20 Operating ambient temperature 0°C* ... 50°C Storage temperature -25°C … +70°C Climatic category 3k3 acc. to DIN 60 721 Min-, Maximum relative humidity 5% - 85% (no condensation) Overvoltage category Degree of contamination Operating materials... -
Page 31: Input/Output Data
Input/Output Data 9 Input/Output Data The first 128 Bytes of the input assembly are used for Diagnostic data. The following 64 Bytes are used for SD-Bus data which is described in chapter “10 SD-Bus data”. 128 bytes of diagnostic data are always sent, regardless of how much data the superordinate standard control system actually need. -
Page 32: Table 12: Logic And Process Data Of The Smx1X/2/(Dnm, Xnm, Dbm, Xbm)
Input/Output Data Process data follow with a byte offset of 7; Byte 0 of process data is Byte 8 of the total frame/input assignment. Byte Assignment Byte 0 Status Byte 1 Logic data (Bit ID: 49..56) Byte 2 Logic data (Bit ID: 41..48) Byte 3 Logic data (Bit ID: 33..40) Byte 4... -
Page 33: Input Data
Input/Output Data 9.1.2 Input data Structure of functional input data Byte Assignment Byte 0 Logic data (Bit ID: 1..8) Byte 1 Logic data (Bit ID: 9..16) Byte 2 Logic data (Bit ID: 17..24) Byte 3 Logic data (Bit ID: 25..32) Byte 4 SD-Gateway - Instruction Byte 5... -
Page 34: Smx100-X/2/(Dnm, Xnm, Dbm, Xbm)
Input/Output Data 9.2 SMX100-x/2/(DNM, xNM, DBM, xBM) 9.2.1 Output data Three different profiles can be used; they are determined in SafePLC². 9.2.1.1 Structure Device Profile 0 (=legacy profile) 9.2.1.1.1 Configuration with axis extension modules (slave devices) Structure of the overall frame: Size of diagnostic data: 128 Byte Byte Offset Description... -
Page 35: Configuration Without Axis Extension Modules (Slave Device)
Input/Output Data 9.2.1.1.2 Configuration without axis extension modules (slave device) Organization of the frame Total size of diagnostic data: 128 Bytes Byte Offset Description Data Size Bit data type „1“ 8 Byte (Logic data Bit ID1 to Bit ID56) Bit data type „2“ 7 Byte (Logic data Bit ID57 to Bit ID112) Bit data type „2“... -
Page 36: Data Types
Input/Output Data 9.2.1.2 Data Types 9.2.1.2.1 Bit data type “1” Byte „Run“ mode (2, 3, 4) Error case ( A, F) Byte 0 0...3 device mode 1, 2, 3, 4, 5, 6 = Fatal error, 7 = Alarm 0x1 (always 1) 5..7 Alive counter (3 Bit) Byte 1... -
Page 37: Process Data Slave Devices
Input/Output Data 9.2.1.2.3 Process data slave devices Byte Data BYTE 0 Process data Bit 1..8 BYTE 1 Process data Bit 9..16 BYTE 2 Process data Bit 17..24 BYTE 3 Process data Bit 25..32 BYTE 4 Process data Bit 33..40 BYTE 5 Process data Bit 41..48 BYTE 6 Process data Bit 49..56... -
Page 38: Structure Device Profile 1 (=Only Logic Data)
Input/Output Data 9.2.1.3 Structure Device Profile 1 (=only logic data) Byte „Run“ mode (2, 3, 4) Error case ( A, F) Byte 0 0..3 device mode 1, 2, 3, 4, 5, 6 = Fatal error, 7 = Alarm 0x1 (always 1) 5..7 Alive counter (3 Bit) Byte 1... -
Page 39: Structure Device Profile 2 (=Logic Data And Process Data For Every Slave Device)
Input/Output Data 9.2.1.4 Structure Device Profile 2 (=logic data and process data for every slave device) Byte „Run“ mode (2, 3, 4) Error case ( A, F) Byte 0 0..3 Device mode 1, 2, 3, 4, 5, 6 = Fatal error, 7 = Alarm 0x1 (always 1) 5..7 Alive counter (3 Bit) - Page 40 Input/Output Data Byte 78 0..7 Process data axis slave device 2 Bit 81..88 Byte 79 0..7 Process data axis slave device 2 Bit 89..96 Byte 80 0..7 Process data axis slave device 3 Bit 1..8 Byte 81 0..7 Process data axis slave device 3 Bit 9..16 Byte 82 0..7 Process data axis slave device 3 Bit 17..24...
-
Page 41: Table 20: Structure For Device Profile 2 (=Logic And Process Data For Every Slave Device)
Input/Output Data Byte 120 0..7 Process data axis slave device 6 Bit 33..40 Byte 121 0..7 Process data axis slave device 6 Bit 41..48 Byte 122 0..7 Process data axis slave device 6 Bit 49..56 Byte 123 0..7 Process data axis slave device 6 Bit 57..64 Byte 124 0..7 Process data axis slave device 6 Bit 65..72... -
Page 42: Input Data
Input/Output Data 9.2.2 Input data Structure of input data Byte Assignment Byte 0 Logic data (Bit ID: 1..8) Byte 1 Logic data (Bit ID: 9..16) Byte 2 Logic data (Bit ID: 17..24) Byte 3 Logic data (Bit ID: 25..32) Byte 4 SD-Gateway - Instruction Byte 5 SD-Gateway - Address... -
Page 43: Scu-X-Ec/Nm
Input/Output Data 9.3 SCU-x-EC/NM 9.3.1 Output data Structure of the functional outputs Byte „Run“ mode (2, 3, 4, 8) Error case ( A, F) DEBUG 0 0..3 device mode 1, 2, 3, 4, 5, 6 = FatalError, 7 = Alarm, 8 0x1 (define) 5..7 Alive counter (3 Bit) -
Page 44: Input Data
Input/Output Data 9.3.2 Input data Structure of functional input data Byte Assignment Byte 0 0..7 Functional Input (0..7) Byte 1 0..7 Functional Input (8..15) Byte 2 0..7 Functional Input (16..23) Byte 3 0..7 Functional Input (24..31) Byte 4 0..7 Functional Input (32..39) Byte 5 0..7 Functional Input (40..47) -
Page 45: Sd-Bus Data
SD-Bus data 10 SD-Bus data The universal communication interface (/DNM, /xNM, /DBM, /xBM) behaves like a gateway with regard to the SD bus data; communication from the SD bus to the fieldbus in both directions. 10.1 Fieldbus data SD-Bus Gateway For the Gateway diagnostics and for the acyclic data request of the SD slaves, 2 bytes are reserved in the request and the response of the fieldbus protocol. -
Page 46: Fieldbus Data Sd Slave
SD-Bus data 10.2 Fieldbus data SD slave For each SD slave, 2 bytes are reserved in the request and the response of the fieldbus protocol. - SD slave 01 uses byte 02 and 03 of the fieldbus - SD slave 02 uses byte 04 and byte 05 of the fieldbus …... -
Page 47: Structure Of The Sd Bytes In The Fieldbus Protocol
SD-Bus data 10.3 Structure of the SD bytes in the fieldbus protocol Request for all fieldbus systems (OUTPUT byte control, transmission of the request data to the SD slave) Byte no. Byte 00 Byte 01 Byte 02 Byte 03 Byte 62 Byte 63 SD device Gateway... -
Page 48: Reading Acyclic Data From The Sd Slave
SD-Bus data 10.4 Reading acyclic data from the SD slave In a permanently defined cycle, acyclic data of the individual SD slave can be requested through the 2 request bytes (fieldbus request byte 00 and byte 01) and the data byte (fieldbus response byte 01). -
Page 49: Table 22: Overview Of The Instructions And Response Data
SD-Bus data Instructions, Instruction SD address Data byte Data description acyclic data request byte fieldbus fieldbus byte 01 fieldbus byte 01 (response) byte 00 (request) (request) Delete data byte Hex: 00 Hex: xx Hex: FF Data deleted, ready for new instruction Read number of projected SD slaves Hex: 01 Hex: 00... -
Page 50: Table 23: Sd Master Diagnose, Sd System Error / Content Response Byte 00, Diagnostic Byte
SD-Bus data The following device categories are defined: Hex: 30 CSS 34, Safety sensor Hex: 31 AZM 200, Solenoid interlock „Z“-variant Hex: 32 MZM 100, Solenoid interlock „Z“-variant Hex: 33 AZ 200, Safety sensor Hex: 34 CSS 30S, Safety sensor Hex: 35 MZM 100 B, Solenoid interlock „B“-variant Hex: 36... -
Page 51: Safety Data
Safety Data 11 Safety Data There are 12 bytes of secure data in each direction. These depend on the device description file, e.g.: ESI, EDS ... already predefined. Configuration of Diagnostic data is done in SafePLC². 11.1 Fieldbus Specific Safety Instructions Depending on the used fieldbus and the underlying safety protocol, additional instructions must be followed. -
Page 52: Smx1X/2/, Smx1Xx/2(Dnm, Xnm, Dbm, Xbm) Or Sdu-X/Nm
Safety Data 11.2 SMX1x/2/, SMX1xx/2(DNM, xNM, DBM, xBM) or SDU-x/NM Organization of the frame: Size of safety data: always 12 Byte F-Bus Input or Output: Byte Data BYTE 0 Safe data Bit 1..8 BYTE 1 Safe data Bit 8..16 BYTE 2 Safe data Bit 17..24 BYTE 3 Safe data Bit 25..32... - Page 53 Safety Data Example: F-bus input Byte 0: Bit 0 is mapped to Bit 1 (E-Stop EXT) in the SafePLC² in the F-Bus module. Output F-Bus output: Bit 1 (Safety OK) is mapped to byte 0 bit 0 by the SafePLC². HB-37450-810-01-13F-EN COM Installation Manual Page 53 of 60...
-
Page 54: Commissioning And Troubleshooting
Commissioning and Troubleshooting 12 Commissioning and Troubleshooting 12.1 EtherNet/IP EtherNet/IP is available for all Ethernet based field bus devices. 12.1.1 Enabling Ethernet/IP fieldbus To activate the EtherNet/IP communication, the following steps should be followed: Make sure, a project with a compatible device is created and opened in SafePLC2 ... -
Page 55: Setting Tcp/Ip Parameters
Commissioning and Troubleshooting 12.1.2 Setting TCP/IP Parameters An out-of-box EtherNet/IP device does not have an IP address set and is waiting on an assignment through DHCP/BOOTP. The commissioning of a safety device with IP Address and TUNID settings should be done prior to installing it onto a safe network. ... - Page 56 Commissioning and Troubleshooting Once applied, the device responds on your newly set IP address. This IP address is volatile and does not persist through power-off To permanently store the IP address in the device press “Disable BOOTP/DHCP” while the assigned device is selected.
-
Page 57: Propose And Apply Tunid (Snn)
Commissioning and Troubleshooting 12.1.3 Propose and Apply TUNID (SNN) Every CIP Safety device needs a unique device identifier (TUNID, Target Unique Node ID). It has to be unique within the reachable network. The TUNID contains the SNN (safety network number) which also has to be unique. A SNN should be assigned for each safety network or safety sub-net that are unique system-wide. -
Page 58: Propose/Apply
Commissioning and Troubleshooting 12.1.3.1 Propose/Apply Stop the device by pressing the “Stop” button on the menu Make sure no TUNID is applied to the device. There are several ways to identify this state: An unset TUNID can be identified with an all FF entry and the specific date 31.12.1971 in the “Current TUNID”... - Page 59 Commissioning and Troubleshooting The response label reads “Command successful” The Module LED is now flashing green (Idle) The Network LED is not flashing red/green anymore and reflecting the current network status Restart the device by pressing the button “Run” on the menu ...
-
Page 60: Reset To Out-Of-Box
Commissioning and Troubleshooting 12.1.3.2 Reset to Out-Of-Box Stop the device by pressing the “Stop” button on the menu Press the button “Reset” in the “Current TUNID” group box The response label reads “Command successful” The Module LED is now flashing green/red ...
Need help?
Do you have a question about the SMX Series and is the answer not in the manual?
Questions and answers