
Subscribe to Our Youtube Channel
Related Manuals for GERMANICA GAF9PLUSW


Summary of Contents for GERMANICA GAF9PLUSW
- Page 1 INSTRUCTION MANUAL Please read this manual carefully before using, and keep it for future reference.
-
Page 3: Table Of Contents
CONTENTS General Safety Introduction Product Overview Important Info Preparing for Use Before First Use Preparing for Use Using The Appliance Cleaning Storage Troubleshooting Specifications Customer Helpline Last Page... -
Page 4: General Safety
GENERAL SAFETY IMPORTANT INFORMATION Read this manual thoroughly before you start using the Air Fryer. The safety precautions instructions reduces the risk of fire, electric shock and injury when correctly complied to. Please follow all instructions and take notice of all warnings. The lightning flash with symbol within the triangle is intended to warn you of a non-insulated dangerous voltage in the... - Page 5 GENERAL SAFETY (Cont.) • When handling Air fryer, make sure to use handle to remove basket after using the air fryer. Other surfaces may be hot. • The outside of the air fryer is hot during and after use. • Always use heat-resistant gloves, pads, or oven mitts when handling hot materials, and when placing items in or removing items from the air fryer, including trays, racks, accessories, or containers.
- Page 6 GENERAL SAFETY (Cont.) IMPORTANT SAFEGUARDS WHEN USING ELECTRICAL APPLIANCES, BASIC SAFETY PRECAUTIONS SHOULD ALWAYS BE FOLLOWED INCLUDING THE FOLLOWING: 1. Read all instructions. 2. Do not touch hot surfaces. 3. To protect against electric shock do not immerse cord, plugs, or base in water or other liquid.
- Page 7 GENERAL SAFETY (Cont.) 10. Do not place on or near a hot gas or electric burner, or in a heated oven. 11. Extreme caution must be used when moving an appliance containing hot oil or other hot liquids. 12. Always attach plug to appliance first, then plug cord in the wall outlet. To disconnect, turn any control to “off,”...
-
Page 8: Introduction
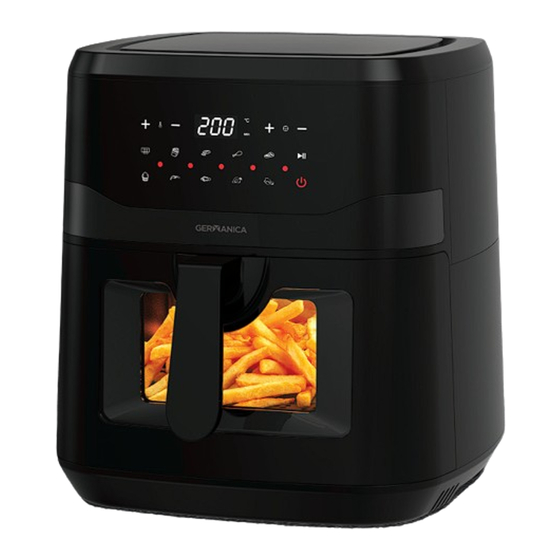
INTRODUCTION Thank you for buying this top quality air fryer. You will now be able to cook a wide assortment of food in a healthier manner – with little or no oil! The air fryer uses hot air, in combination with high-speed air circulation, and a top grill to prepare your dishes quickly and easily. - Page 9 PRODUCT OVERVIEW A: Pre-heat H: Time plus/minus B: Temperature plus/minus I: Light C: French fries J: START/Stop D: meat K: LIGHT E: Time/Temperature L: Chicken F: Drumsticks M: fish G: Steak N: Shrimp N: Cake...
-
Page 10: Important Info
IMPORTANT INFO Read this user manual carefully, before you use the appliance, and keep it safely for future reference. DANGER - Never immerse the housing, which contains electrical components and the heating elements, in water nor rinse it under the tap. - Do not let any water or other liquid enter the appliance –... - Page 11 IMPORTANT INFO - Keep the appliance and its mains cord out of the reach of children when the appliance is switched on or is cooling down. - Keep the mains cord away from hot surfaces. - Do not plug in the appliance or operate the control panel with wet hands. - Only connect the appliance to an earthed wall socket.
-
Page 12: Preparing For Use
IMPORTANT INFO CAUTION - Place the appliance on a horizontal, level and stable surface. - This appliance is intended for normal household use only. It is not intended for use in environments such as staff kitchens, offices, farms or other work environments. -
Page 13: Before First Use
BEFORE FIRST USE 1. Remove all packing material. 2. Remove any stickers or labels from the appliance – other than the rating label. 3. Thoroughly clean the rack, and frying tray, with hot water and some liquid washing soap using a non-abrasive sponge. Note: You can also clean these parts in the dishwasher. -
Page 14: Using The Appliance
USING THE APPLIANCE 1. Power on Plug in, there is BEEPS sounds. Light up. 1 seconds will be back to standby mode: all light will be off expect 2. Menu selection/Temperature/Time Plug in, it is at the standby mode. press , default temperature and default time of the Program are 180°C, 15 min respectively, at that time you can adjust the time and temperature freely by using Time +/- and Temperature +/- button. - Page 15 USING THE APPLIANCE Noted: (1). During working, you can take frying tray out, stop working, and you can check cooking result or add more food, machine continue to work on the program if pull in the frying tray. (2). Power cut or unplug during working, machine stop working, all light off, machine continue to work on the program when power on or plug in again.
- Page 16 USING THE APPLIANCE Menu table PROGRAM LOGISTICS Default Default menu time(min) temperature°C pre-heat French fries Meat Drumsticks Function Steak Cake Prawn Fish Chicken Caution: Do not touch the pan during and about 30mins after use, as it gets very hot. Only hold the pan by the handle.
- Page 17 USING THE APPLIANCE Operation step 1. Put the mains plug in an earthed wall socket. 2. Put the ingredients into the frying tray 3. Put the frying tray in the right position. Choose function from menu and press START/PAUSE to start cooking. 4.
- Page 18 USING THE APPLIANCE Settings Except the preset menu, you also can use this air fryer to make other foods by setting the time and temperature. This table below helps you to select the basic settings for the ingredients you want to prepare. Note: Keep in mind that these settings are only for reference.
- Page 19 USING THE APPLIANCE Time Temper- Shake Extra information (min.) ature(°C) POTATOES & FRIES Thin frozen fries 12-16 Shake Thick frozen fries Shake 12-20 Home-made fries Shake 18-25 add1/2 tbsp of oil (8x8mm) Home-made potato Shake 18-22 add1/2 tbsp of oil wedges Home-made potato 12-18...
- Page 20 USING THE APPLIANCE Making home-made fries For the best results, we advise to use pre-baked fries. If you want to make home-made fries, follow the steps below: 1. Peel the potatoes and cut them into sticks. 2. Soak the potato sticks in a bowl of water for at least 30 minutes, take them out and dry them with kitchen paper.
-
Page 21: Cleaning
CLEANING Clean the appliance after every use. The frying tray, rack and the inside of the appliance have a non-stick coating. Do not use metal kitchen utensils or abrasive cleaning materials to clean them, as this may damage the non-stick coating. 1. -
Page 22: Troubleshooting
TROUBLESHOOTING White smoke is caused by grease heating up in the pan . ma Problem Possible cause The appliance is not plugged into the mains. The Hot-air fryer does not work You have not set the timer. The amount of the ingredients in the tray is too much. - Page 23 ake sure you clean the pan properly after each use. Solution Put the mains plug in an earthed wall socket. Turn the timer knob to the required Preparation time to switch on the appliance. Put smaller batches of ingredients in the tray. Smaller batches are fried more evenly.
-
Page 24: Specifications
SPECIFICATIONS Power Supply 220V-240V; 50Hz/60Hz Rated Power 1600W-1800W Dimensions 327 (w) x 383 (d) x 352 (h) mm Weight Net: 6Kgs / Gross: 6.5Kgs Correct Disposal of this product This marking indicates that this product should not be disposed with other household wastes throughout the Australia. -
Page 26: Customer Helpline
CUSTOMER HELPLINE: DISTRIBUTED BY: info@ayonz.com Ayonz Pty Ltd...
Need help?
Do you have a question about the GAF9PLUSW and is the answer not in the manual?
Questions and answers
What do Icons represent please from left to right
The icons on the GERMANICA GAF9PLUSW represent the following functions from left to right:
1. Plus/Minus – Adjust settings
2. Light
3. French fries
4. START/Stop
5. Meat
6. LIGHT
7. Time/Temperature
8. Chicken
9. Drumsticks
10. Fish
11. Steak
12. Shrimp
13. Cake
This answer is automatically generated
What is the warranty
The warranty for the GERMANICA GAF9PLUSW is provided by the manufacturer. The seller takes no responsibility for the content, fulfilment, or enforcement of the manufacturer's warranty. It is the buyer's responsibility to contact the manufacturer regarding any warranty claims. The seller does not guarantee that the manufacturer's warranty complies with Australian Consumer Law.
This answer is automatically generated