
Related Manuals for GERMANICA GEAF5L3LD


Summary of Contents for GERMANICA GEAF5L3LD
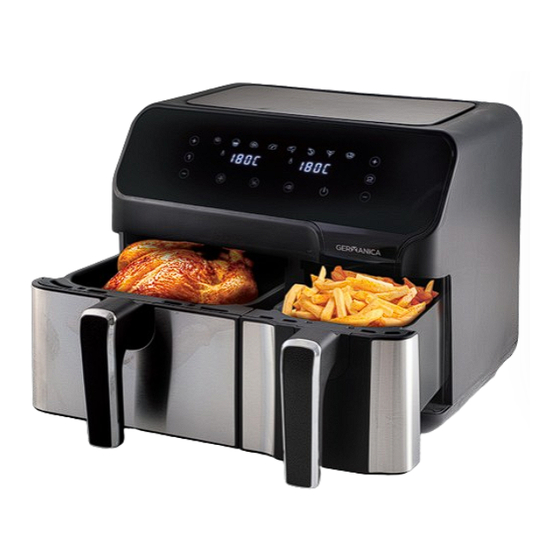
- Page 1 8L DUAL ZONE AIR FRYER GEAF5L3LD INSTRUCTION MANUAL Please read this manual carefully before using, and keep it for future reference.
-
Page 3: Table Of Contents
CONTENTS GENERAL SAFETY INTRODUCTION IMPORTANT DANGER WARNING CAUTION BEFORE FIRST USE PREPARING FOR USE USING THE APPLIANCE CONTROL PANEL INSTRUCTIONS ICON RESOLUTION DETAILED OPERATION INSTRUCTIONS REMARK ITEMS SETTINGS CLEANING STOAGE, ENVIRONMENT TROUBLESHOOTING SUPPORT SPECIFICATION CUSTOMER SUPPORT Last Page... -
Page 4: General Safety
GENERAL SAFETY SAVE THESE INSTRUCTIONS This appliance is intended to be used in household and similar applications such as: - staff kitchen areas in shops, offices and other working environments; - farm houses; - by clients in hotels, motels and other residential type environments; - bed and breakfast type environments. - Page 5 6. If the supply cord is damaged, it must be replaced by the manufacturer, its service agent or similarly qualified persons in order to avoid a hazard. 7. The use of accessory attachments not recommended by the appliance manufacturer may cause injuries. 8.
-
Page 6: Introduction
INTRODUCTION This all now Hot-air fryer provides an easy and healthy way of preparing your favorite ingredients. By using hot rapid air circulation and a top grill, it is able to make numerous dishes. The best part is that the Hot-air fryer heats food at all directions and most of the ingredients do not need any oil. - Page 7 Fig.2 Fig.3...
- Page 8 Fig.5 Fig.4 Fig.6...
- Page 9 Fig.7...
-
Page 10: Important
IMPORTANT DANGER - Keep the appliance and its cord out of reach of children less than 8 years. - Never immerse the housing, which contains electrical components and the heating elements, in water nor rinse it under the tap. - Do not let any water or other liquid enter the appliance to prevent electric shock. - Always put the ingredients to be fried in the basket, to prevent it from coming into contact with the heating elements. -
Page 11: Warning
IMPORTANT WARNING - Check if the voltage indicated on the appliance fits the local mains voltage. - Do not use the appliance if there is any damage on plug, mains cord or other parts. - Do not go to any unauthorized person to replace or fix damaged main cord. - Keep the mains cord away from hot surfaces. -
Page 12: Caution
IMPORTANT CAUTION - Ensure the appliance in placed on a horizontal, even and stable surface. - This appliance is designed for household use only. - Always unplug the appliance while not using. - The appliance needs approximately 30 minutes to cool down for handle or cleaning safely. -
Page 13: Before First Use
BEFORE FIRST USE 1. Remove all packaging materials. 2. Remove any stickers or labels from the appliance . 3. Thoroughly clean the shelf and pot with hot water, some washing-up liquid and a non-abrasive sponge. 4. Wipe inside and outside of the appliance with a moist cloth This is an oil-free fryer that works on hot air, Do not fill the pot with oil or frying fat directly. -
Page 14: Using The Appliance
USING THE APPLIANCE The oil-free can prepare a large range of ingredients. HOT AIR FRYING 1. Connect the mains plug into an earthed wall socket. 2. Carefully pull the pot out of the Hot-air fryer (Fig.4) 3. Put the ingredients in the basket. (Fig.6) 4. - Page 15 USING THE APPLIANCE 9. To remove ingredients (e.g. fries), pull the pot out of the Hot-air fryer and place it on trial framework. DO NOT TURN THE BASKET UPSIDE DOWN , AS ANY EXCESS OIL THAT HAS COLLECTED ON THE BOTTOM OF THE POT WILL LEAK ONTO THE INGREDIENTS.
-
Page 16: Control Panel Instructions
CONTROL PANEL INSTRUCTIONS ICON RESOLUTION Key 1 – Power Key Once the Basket and pot are properly placed in the main housing, the Power light will be illuminated. Select the power key to put the machine into standby mode, After selecting the pot body to be used Selecting the Power key a second time will start the cooking process. - Page 17 ICON RESOLUTION Key 3 – The left pot Key Touch the “ ”key The icon of the function key of the pot body on the left will light up the menu defaults to the first menu (fries), at this time the fries indicator flashes, pot corresponding digital tube display flashes, and alternately display the default temperature and time of the fries program.
- Page 18 Key 7 & Key 8 – Temperature and Timer Control Keys For The right pot Key The Key 7 and Key 8 symbols enable you to add or decrease cooking temperature 5° C at a time for right pot. Keeping the Key held down will rapidly change the temperature.
-
Page 19: Detailed Operation Instructions
DETAILED OPERATION INSTRUCTIONS 1. BOOT MODE Firstly, to confirm that the frying pan is correctly installed into the machine, insert the plug into the socket, the machine will be powered on, the machine will beep once, all the lights are lit for one second and then extinguished, the Power Icon will be illuminated. - Page 20 3.1.5 After the debugging to recipe, temperature and time are all complete, touch the Power Key Icon, the pan starts working, and the display shows the current cooking time in count down manner. 3.1.6 If need to adjust the temperature or time during the cooking process, pressing the Temp or Time Key Icon once, then pressing “+”...
- Page 21 4. DOUBLE POT WORKING MODE 4.1 Starting The 2 Pots 4.1.1 Firstly, select one side and debug the menu, temperature and time according to steps 3.1.2 - 3.1.7. Secondly, select another side and debug the wanted recipe, temperature and time in the same way. 4.1.2 Pressing the Power Key Icon, 2 pots start working at the same time, the display shows both sides working time in count down manner.
- Page 22 4.4.2 During cooking process, if one pan was drawn out, the corresponding side will stops working (both heating and motor will be stopped), and it will resume working as per previous setting when the basket is inserted back. 4.5 Cooking Process Is Completed 4.5.1 When the cooking process is completed, the display shows “OFF”...
-
Page 23: Remark Items
4.6.3.5 Withdraw any side basket, its display will show “OPEN,” and it will stops working, when insert the basket back, its cooking time will match with another side time to ensure the Smart Finish Function is still working. 4.6.3.6 If any side is paused, the Smart Finish Function will be quitted, the Smart Finish Key Icon will be extinguished, and another side keeps working as per its pre-set time/temp. - Page 24 When the 2 pot is in the selected state at the same time, the side that is not selected, the corresponding menu does not flash, the corresponding display alternately shows the temperature and time without flashing, in this process heaters and motors are not work; 4.
-
Page 25: Settings
10. Power off memory: if the machine is in use, if the power is cut off accidentally, as long as it is re-energized within 30 minutes, the machine will return to the working state before power off; 11 Display failure mode: 11.1 E1 is displayed: The NTC is Opened. - Page 26 - Snacks that can be prepared in a oven can also be prepared in the Hot-air fryer - The optimal amount for preparing crispy fries is 500 grams. - Use pre-made dough to prepare filled snacks quickly and easily. Pre-made dough also requires a shorter preparation time than home-made dough.
-
Page 27: Cleaning
Note1: Add 3 minutes to the preparation time when you start frying while the Hot-air fryer is still cold. Note2:You can adjust the temperature or time according to the actual cooking effect when using two cooking pots at the same time. CLEANING Clean the appliance after every use. -
Page 28: Stoage, Environment
STORAGE 1 Unplug the appliance and let it cool down. 2 Make sure all parts are clean and dry. ENVIRONMENT Do not throw away the appliance with the normal household waste when it is exhausted,, but hand it in at an official collection point for recycling. By doing this, you help to preserve the environment... -
Page 29: Troubleshooting
TROUBLESHOOTING Possible cause Solution Problem The appliance is not Put the mains plug in an plugged in. earthed wall socket. The Hot-air fryer does not work You have not set Set the timer key to the the timer. required preparation time to switch on the appliance. - Page 30 TROUBLESHOOTING Possible cause Solution Problem There are too much Do not fill the basket I cannot slide the ingredients in the beyond the MAX pan into the basket. indication. appliance properly. The basket is not placed Push the basket down into in the pot correctly.
- Page 31 Correct Disposal of this product This marking indicates that this product should not be disposed with other household wastes throughout the EU. To prevent possible harm to the environment or human health from uncontrolled waste disposal, recycle it responsibly to promote the sustainable reuse of material resources.
-
Page 32: Support
SUPPORT If your products stops working, contact our call centre at info@ayonz.com. Do not attempt to open and repair the unit yourself. SPECIFICATIONS Power Supply 220-240V ~ 50-60Hz 1700W Power consumption: Weights NET: 7.15 KG GROSS: 8.05 KG Dimensions 400 (w) x 352 (d) x 306 (h) mm ... - Page 36 CUSTOMER HELPLINE: DISTRIBUTED BY: info@ayonz.com Ayonz Pty Ltd...
Need help?
Do you have a question about the GEAF5L3LD and is the answer not in the manual?
Questions and answers
What does trial framework mean? # 9 page 15