
Related Manuals for Eurocave V-ROYALE-L


Summary of Contents for Eurocave V-ROYALE-L
- Page 1 Mode d’emploi User Manual Gebrauchsanweisung Modo de empleo Gebruiksaanwijzing Istruzioni per l’uso 用户手册 用戶手冊...
- Page 3 Les informations contenues dans ce document sont sujettes à modifications sans préavis. EuroCave n’offre aucune garantie sur cet appareil lorsqu’il est utilisé pour un usage particulier autre que celui pour lequel il a été prévu. EuroCave ne pourra être tenue pour responsable des erreurs contenues dans le présent manuel ni de tout dommage lié ou consécutif à...
- Page 4 BIENVENUE DANS L’UNIVERS EUROCAVE Notre unique volonté est d’accompagner au mieux votre passion du vin tout au long des années… Pour cela, EuroCave déploie tout son savoir-faire pour réunir les 6 critères essentiels au service des vins : La température Les deux ennemis du vin sont les températures extrêmes et les fluctuations brutales de températures.
-
Page 5: Table Of Contents
SOMMAIRE 1 - Descriptif de votre cave à vin 2 - Alimentation électrique 3 - Protection de l'environnement - Eco-conception 4 - Installation de votre cave à vin 9-12 I – Mise en place du filtre à charbon II – Réglage des pieds et installation des enjoliveurs III –... -
Page 6: Descriptif De Votre Cave À Vin
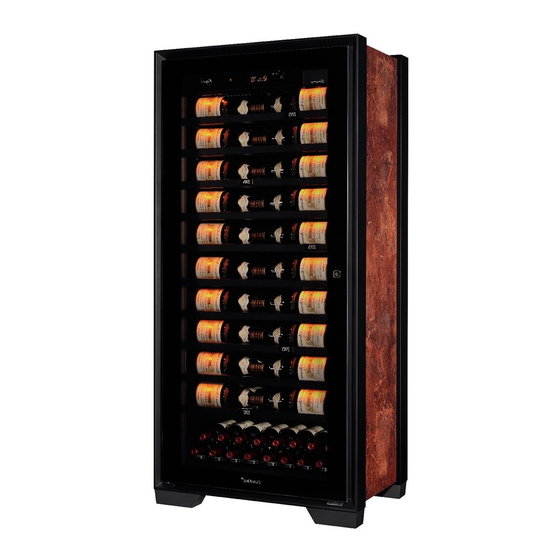
1/ DESCRIPTIF DE VOTRE CAVE À VIN Coffre de cave Cordon d’alimentation (2 mètres) Pupitre de contrôle et de réglage 4 pieds réglables Bac de régulation de l’hygrométrie – Hygrocontrol 4 enjoliveurs de pieds System Charnière basse Filtre à charbon Etiquette signalétique Eclairage –... -
Page 7: Alimentation Électrique
à la terre et qui effectuera, si nécessaire, les travaux de mise en conformité. Rendez-vous chez votre revendeur EuroCave habituel pour changer le cordon d’alimentation s’il est endommagé. Il doit être remplacé par une pièce EuroCave garantie d’origine constructeur. -
Page 8: I - Mise En Place Du Filtre À Charbon
Attention : N’utiliser que des pièces d’origine EuroCave. II. Réglage des pieds et installation des enjoliveurs L’entraxe des pieds de la cave est de 515 x 748 mm. Attention : Le réglage des pieds et la pose des enjoliveurs doivent être réalisés par un installateur EuroCave. -
Page 9: Remplissage Du Bac De Régulation De L'hygrométrie "Hygrocontrol System
4/ INSTALLATION DE VOTRE CAVE À VIN 60mm min. À l’aide d’une clé plate de 19 mm et d’un niveau à bulle, réglez les Pour vous aider, placez l’enjoliveur en face du pied, de manière à ce qu’il pieds de votre cave afin qu’elle soit complètement stable. n’y ait aucun espace entre l’enjoliveur et le sol. -
Page 10: Différentes Installations
Installation de la cave dans un angle Attention : Si la cave est placée dans un angle, la charnière de la porte doit être réglée de manière à ne pas s’ouvrir à plus de 90°. Si besoin, contactez votre revendeur EuroCave. T25 (non fourni) Retirez les vis fixant la charnière à... -
Page 11: Aménagement - Rangement
Il est fortement recommandé de ne pas laisser vos bouteilles de vin : - Enveloppées dans leur papier de soie à l’intérieur de votre cave à vin EuroCave. Le papier de soie est peu tolérant à l’humidité ambiante sur une longue durée. - Page 12 5/ AMÉNAGEMENT – RANGEMENT TAC ! Positionnez votre clayette le long des glissières gauche et droite et commencez par bloquer la partie arrière de la clayette. Faites glisser la clayette jusqu’à ce que les crochets arrière de la Logez ensuite les tétons avant de la clayette dans les emplacements clayette soient enclenchés dans les emplacements prévus dans les prévus à...
-
Page 13: Montage Et Utilisation Des Cavaliers
5/ AMÉNAGEMENT – RANGEMENT Attention : Pour configurer votre cave afin d’accueillir des magnums (cf p.131), placez les glissières dans les encoches marquées de la forme ci-contre. II. Montage et utilisation des cavaliers Les cavaliers en acier epoxy permettent d’identifier vos bouteilles et de les repérer facilement. -
Page 14: Ii-B. - Réglage De La Température (Usage De Service)
6/ MISE EN SERVICE DE VOTRE CAVE À VIN II-B. Réglage de la température (usage service) Attention : En usage "Veillissement" la température est réglée à 12°C et le taux d'hygrométrie s'affiche. En usage "Service" la température peut être réglée de 6°C à 11°C et de 13° à 18°C, l'hygrométrie ne s'affiche pas. 2 sec. -
Page 15: Réglage Du Mode Éclairage
6/ MISE EN SERVICE DE VOTRE CAVE À VIN IV. Réglage du mode éclairage Attention : tout remplacement des LED sur le pupitre de contrôle et les clayettes doit être fait uniquement par un électricien qualifié. Vous pouvez à tout moment choisir l’éclairage qui vous convient grâce au bouton de réglage du mode éclairage. Vous avez 3 possibilités de réglage pour l’éclairage : Précautions d’utilisation : rayonnement intense, ne Éclairage permanent. -
Page 16: Filtre À Charbon
La trappe s’ouvre. Retirez le filtre à charbon existant. Insérez le filtre à charbon EuroCave (l’étiquette EuroCave face à vous), en prenant soin d’enlever au préalable le plastique de protection. Repoussez la trappe vers le haut et revisser le bouton. -
Page 17: Désactivation De L'avertisseur Sonore Des Alarmes
6/ MISE EN SERVICE DE VOTRE CAVE À VIN VII. Désactivation de l’avertisseur sonore des alarmes Lors d’un disfonctionnement sur votre appareil, une alarme sonore peut accompagner l’alarme visuelle. Pour désactiver cette alarme sonore, il suffit d’effectuer un appui court sur la touche La désactivation de l’avertisseur sonore des alarmes ne désactive pas les alarmes visuelles. -
Page 18: Entretien Courant
7/ ENTRETIEN COURANT Votre cave à vin EuroCave est un appareil au fonctionnement simple et éprouvé. • Opérations d’entretien une fois par an environ Pour effacer les écritures faites à l’aide du marqueur blanc sur nos supports d’identification des bouteilles, utilisez un chiffon humide. -
Page 19: Caractéristiques Techniques Et Énergétiques
EN 55014-1: 2017 EN IEC 55014-2: 2021 R600a EN IEC 61000-3-2: 2019 EN 61000-3-3: 2013 EN 62233: 2008 Selon le pays, les caves à vin EuroCave contiennent un gaz réfrigérant inflammable 3 – ENVIRONNEMENT (R600a: ISO BUTANE) Règlement délégué 2019/2016/UE Règlements... - Page 20 EuroCave does not guarantee this appliance when it is used for purposes other than those for which it was designed. EuroCave shall not be held responsible for any mistakes in this manual or for any damage connected to or resulting from the supply, performance or use of this appliance.
- Page 21 WELCOME TO THE WORLD OF EUROCAVE Our greatest wish is to find the best solutions for your wine storage needs…To do so, EuroCave has drawn on its considerable expertise to bring together the 6 criteria essential for storing wine: Temperature The two enemies of wine are extreme temperatures and sudden changes in temperature.
- Page 22 CONTENTS 1 - Description of your wine cabinet 2 - Power supply 3 - Protecting the environment - Ecodesign 4 - Installing your wine cabinet 9-12 I – Installing the charcoal filter II – Setting the feet and fitting the covers III –Filling the “Hygrocontrol System”...
-
Page 23: Description Of Your Wine Cabinet
1/ DESCRIPTION OF YOUR WINE CABINET Cabinet body Powerlead (2 metres) Control panel 4 adjustable feet Hygrocontrol System– humidity control tray 4 feet covers Charcoal filter Lower hinge Lighting – 4 LEDs under each shelf Product identification label + 4 LEDs under the control panel Condensate collection tray with outlet hole Sliding shelf Door (built-in handle and dual action lock) -
Page 24: Power Supply
Have the power supply socket checked by a qualified electrician who will confirm whether or not it is earthed and will, if necessary, carry out work to make it compliant. Contact your usual EuroCave retailer to replace the power lead if it is damaged. It must be replaced by a EuroCave manufacturer’s part. -
Page 25: I - Installing The Charcoal Filter
N.B.: Only use genuine EuroCave parts. II. Setting the feet and installing the covers The distance between the centre of the cabinet feet is 515 x 748 mm. N.B.: Setting the feet and fitting the covers must be carried out by a EuroCave installer. -
Page 26: Filling The "Hygrocontrol System" Humidity Control Tray
4/ INSTALLING YOUR WINE CABINET 60mm min. Using a 19 mm open-ended spanner anda spirit level, set the feet of To help you, place thecover opposite the foot, so thatthereis no space your cabinet so thatit is completely stable. between thecover and the floor. Fit the covers onto each foot, by sliding them into the runners provided. -
Page 27: Different Installations
Installing the cabinet in a corner N.B.: If the cabinet is placed in a corner, the door hinge must be fitted so that it does not open more than 90°. If needed, contact your EuroCave retailer. T25 (not supplied) Remove the screws fastening the hinge to the door using a T25 Move forward the hinge attachment by one notch on the right. -
Page 28: Layout - Storage
- Stored in cardboard packaging or a wooden case in your EuroCave wine cabinet, in order to encourage maximum air flow around the bottles and prevent the packaging from deteriorating, which could eventually contaminate your wine bottles. - Page 29 5/ LAYOUT – STORAGE TAC ! Position your shelf along the left and right runners and start by securing the rear section of the shelf. Slide the shelf until the rear hooks of the shelf are locked into the Then slot the front studs of the shelf into the slots provided in the slots provided in the runners.
-
Page 30: Assembling And Using Shelf Labels
5/ LAYOUT – STORAGE Please note: To configure your cabinet to store magnums (see p.131), place the runners in the notches marked with the shape opposite. II. Assembling and using the shelf labels The epoxy-coated steel shelf labels allow you to identify your bottles and find them easily. -
Page 31: Ii-B. Setting The Temperature (Service Usage)
6/ USING YOUR WINE CABINET FOR THE FIRST TIME II-B. Setting the temperature (service usage) Please note: In maturing usage, the temperature is set at 12° and the humidity level is displayed. In service usage, the temperature is set from 6°C - 11°C and 13°... -
Page 32: Setting The Lighting Mode
6/ USING YOUR WINE CABINET FOR THE FIRST TIME IV. Setting the lighting mode N.B.: replacement of the LEDs on the control panel and the shelves must only be carried out by a qualified electrician. At any time you can choose the lighting you require using the lighting mode adjustment button. You have 3 setting options for lighting: Precautions to observe: bright light, never look directly into Permanent lighting. -
Page 33: Charcoal Filter
The hatch will open. panel. Remove the existing charcoal filter. Insert the EuroCave charcoal filter (with the EuroCave label facing you), taking care to first remove the protective plastic. Push the hatchupwards and screw the button back on. N.B.: Only use genuine EuroCave parts. -
Page 34: Disabling The Audible Warning Signal Of The Alarms
6/ USING YOUR WINE CABINET FOR THE FIRST TIME VII. Disabling the audible warning signal of the alarms When your appliance has a fault, an audible warning may accompany the visual warning. To turn off this alarm this audible warning, simply briefly press the key. -
Page 35: Everyday Maintenance
Use a damp cloth to clean the fronts of the shelves. the ledge at the bottom. • Use the EuroCave microfibre cloth to clean glass or plastic sections of your cabinet. • Clean the inside of the compartments with water and a gentle cleaning product. -
Page 36: Technical Features And Energy Data
Causes Corrective action Erh is displayed and the alarm is ringing. Humidity sensor fault alarm Contact your EuroCave retailer / customer services. button is red. (Humidity sensor fault alarm) The charcoal filter has been Replace the charcoal filter (see chapter 6, VI). - Page 37 EuroCave biedt geen enkele garantie op dit apparaat wanneer dit wordt gebruikt voor andere doeleinden dan waarvoor het gemaakt is. EuroCave kan niet aansprakelijk worden gesteld voor fouten in deze handleiding of voor schade in verband met of als gevolg van de levering, prestatie of gebruik van dit apparaat.
- Page 38 WELKOM IN DE WERELD VAN EUROCAVE Al jarenlang stellen wij ons ten doel u zo goed mogelijk te begeleiden bij uw passie voor wijn… Hiervoor zet EuroCave haar knowhow in en combineert de 6 essentiële criteria voor het serveren van wijn: Temperatuur De twee grote vijanden van wijn zijn extreme temperaturen en plotselinge temperatuurschommelingen.
- Page 39 INHOUDSOPGAVE 1- Schematische weergave van uw wijnkast 2 - Elektrische voeding 3 - Bescherming van het milieu - Eco-ontwerp 4 - Installatie van uw wijnkast 9-12 I – Installatie koolfilter II – Instelling voeten en plaatsing sierdoppen III – Vulling hygrometriebak “Hygrocontrol System” IV –...
- Page 40 1/ BESCHRIJVING VAN UW WIJNKAST Exterieur van de wijnkast Elektriciteitssnoer (2 meter) Bedienings- en regelpaneel 4 instelbare voeten HygrometriebakHygrocontrol System 4 voetsierdoppen Koolfilter Lage scharnier Verlichting– 4 LEDs onder elk plateau Identificatie-etiket + 4 LEDs onder het bedieningspaneel Opvangbank condenswater met afvoeropening Schuifplateau Deur (geïntegreerd handvat en slot dat twee Vast plateau (versterkingsstang) –...
-
Page 41: Elektrische Voeding
Ga met een beschadigd elektriciteitssnoer naar uw dealer van EuroCave. Het moet worden vervangen door een elektriciteitssnoer met fabrieksgarantie. In geval van verhuizing naar het buitenland dient u na te gaan of de kenmerken van de wijnkast voldoen aan die in het betreffende land (spanning/frequentie). -
Page 42: I - Installatie Koolfilter
II. Instelling voeten en plaatsing sierdoppen De asafstand van de voeten van de wijnkast is 515 x 748 mm. Let op: Het instellen van de voeten en het plaatsen van de sierdoppen moet worden uitgevoerd door een installateur van EuroCave. -
Page 43: Vulling Hygrometriebak "Hygrocontrol System
4/ INSTALLATIE VAN UW WIJNKAST 60mm min. Stel de de voeten van uw wijnkast af met behulp van een platte sleutel Ter ondersteuning kunt u de sierdop zodanig tegenover de voet van 19 mm eneen waterpas, zodat de wijnkast volledig stabiel staat. plaatsen dat er geen ruimte meer is tussen de sierdop en de vloer. -
Page 44: Diverse Installaties
Let op: Als de wijnkast in een hoek wordt geplaatst, dient de scharnier van de deur zodanig te worden ingesteld dat de deur niet meer dan 90° kan worden geopend. Neem indien nodig contact op met uw EuroCave-dealer. T25 (niet meegeleverd) Draai de schroeven waarmee het scharnier aan de deur is bevestigd los Bevestig de scharnier een gaatje meer naar rechts. -
Page 45: Inrichting - Indeling
Het doordrenkte papier gaat plakken en zal de etiketten van uw wijnflessen beschadigen. - Niet in een kartonnen doos of houten kist in uw wijnkast van EuroCave te plaatsen teneinde een optimale ventilatie rond de flessen te bevorderen en bederf van doos of kist en daardoor ook aantasting van uw wijnflessen te vermijden. - Page 46 5/ INRICHTING – INDELING TAC ! Plaats uw schuifplateau langs de linker en rechter geleiders en begin met het blokkeren van het achterste gedeelte van het schuifplateau. Schuif het plateau vervolgens totdat de haakjes aan de achterkant van Plaats vervolgens de pinnen aan de voorkant van het schuifplateau het schuifplateau in de hiervoor bestemde ruimte van de geleiders in de hiervoor bestemde ruimte aan de voorkant van de geleiders.
-
Page 47: Montage En Gebruik Etikethouders
5/ INRICHTING – INDELING Let op: Om uw wijnkast te configureren voor magnums (cf p.131), plaatst u de schuiven in de gleuven met de vorm zoals hiernaast afgebeeld. II. Montage en gebruik etikethouders De etikethouders van epoxy staal voor de identificatie van uw flessen, zodat u ze gemakkelijk kunt terugvinden. -
Page 48: Ii-B. Temperatuurregeling (Servicegebruik)
6/ INGEBRUIKNAME VAN UW WIJNKAST II-B. Temperatuurregeling (servicegebruik) Opgelet: gebruik voor rijping wordt temperatuur ingesteld 12° wordt vochtigheid weergegeven. Bij servicegebruik wordt de temperatuur ingesteld van 6°C tot 11°C en 13° tot 18°C, de vochtigheid wordt niet weergegeven. 2 sec. 2 sec. -
Page 49: Instelling Van De Verlichting
6/ INGEBRUIKNAME VAN UW WIJNKAST IV. Instelling van de verlichting Let op: de LED’s op het bedieningspaneel en de plateaus mogen uitsluitend worden vervangen door een bevoegd elektricien. U kunt op elk moment de door u gewenste verlichting kiezen met behulp van de regelknop van de verlichting. U kunt de verlichting op drie manieren instellen: Voorzorgsmaatregelen voor gebruik: intense straling, kijk nooit direct in de lichtbundel. -
Page 50: Koolfilter
De klep gaat open. bedieningspaneel los. Verwijder het bestaande koolfilter. Plaats het koolfilter van EuroCave (met het EuroCave-etiket naar u toe gericht) nadat u eerst het beschermende plastic hebt verwijderd. Duw de klep terug omhoog en schroef de knop weer vast. -
Page 51: Uitschakeling Geluidssignaal Alarm
6/ INGEBRUIKNAME VAN UW WIJNKAST VII. Uitschakeling geluidssignaal alarm Tijdens een storing van het apparaat kan een visueel alarm gepaard gaan met een geluidssignaal. Om dit alarm uit te zetten, dient u kort op de knop te drukken. Door het geluidssignaal van een alarm uit te schakelen, wordt niet het visuele alarm uitgeschakeld. -
Page 52: Algemeen Onderhoud
Gebruik een vochtige doek voor de reiniging van de voorkant van de plateaus. microvezeldoek. • Gebruik de microvezeldoek van EuroCave voor de reiniging van de glazen of • De glazen onderdelen moeten worden gereinigd met de door EuroCave kunststof onderdelen van de wijnkast. -
Page 53: Technische Kenmerken
8/ STORINGEN Mogelijke incidenten Oorzaken Correctieve handelingen De melding Erh wordt weergegeven en Storingsalarm Moet u contact opnemen met de klantenservice of uw dealer van EuroCave. hygrometriesonde het alarm klinkt. De knop is rood. (Storingsalarm hygrometriesonde) Het koolfilter is 365 Vervang het koolfilter (zie hoofdstuk 6, VI). - Page 54 10/ V-ROYALE-L 124 Bouteilles 124 Bouteilles 106 Bouteilles 106 Bouteilles 124 bouteilles - 124 bottles - 124 Flaschen - 124 botellas 106 bouteilles - 106 bottles - 106 Flaschen - 106 botellas 124 flessen - 124 bottiglie - 124瓶 106 flessen - 106 bottiglie - 106瓶...
- Page 55 NOTES ________________________________________________________________________________________ ________________________________________________________________________________________ ________________________________________________________________________________________ ________________________________________________________________________________________ ________________________________________________________________________________________ ________________________________________________________________________________________ ________________________________________________________________________________________ ________________________________________________________________________________________ ________________________________________________________________________________________ ________________________________________________________________________________________ ________________________________________________________________________________________ ________________________________________________________________________________________ ________________________________________________________________________________________ ________________________________________________________________________________________ ________________________________________________________________________________________ ________________________________________________________________________________________ ________________________________________________________________________________________ ________________________________________________________________________________________ ________________________________________________________________________________________ ________________________________________________________________________________________ ________________________________________________________________________________________ ________________________________________________________________________________________ ________________________________________________________________________________________ ________________________________________________________________________________________ ________________________________________________________________________________________ ________________________________________________________________________________________ ________________________________________________________________________________________ ________________________________________________________________________________________ ________________________________________________________________________________________ ________________________________________________________________________________________ ________________________________________________________________________________________ ________________________________________________________________________________________ ________________________________________________________________________________________ ________________________________________________________________________________________ ________________________________________________________________________________________ ________________________________________________________________________________________ ________________________________________________________________________________________ ________________________________________________________________________________________ ________________________________________________________________________________________ ________________________________________________________________________________________...
- Page 56 NOTES ________________________________________________________________________________________ ________________________________________________________________________________________ ________________________________________________________________________________________ ________________________________________________________________________________________ ________________________________________________________________________________________ ________________________________________________________________________________________ ________________________________________________________________________________________ ________________________________________________________________________________________ ________________________________________________________________________________________ ________________________________________________________________________________________ ________________________________________________________________________________________ ________________________________________________________________________________________ ________________________________________________________________________________________ ________________________________________________________________________________________ ________________________________________________________________________________________ ________________________________________________________________________________________ ________________________________________________________________________________________ ________________________________________________________________________________________ ________________________________________________________________________________________ ________________________________________________________________________________________ ________________________________________________________________________________________ ________________________________________________________________________________________ ________________________________________________________________________________________ ________________________________________________________________________________________ ________________________________________________________________________________________ ________________________________________________________________________________________ ________________________________________________________________________________________ ________________________________________________________________________________________ ________________________________________________________________________________________ ________________________________________________________________________________________ ________________________________________________________________________________________ ________________________________________________________________________________________ ________________________________________________________________________________________ ________________________________________________________________________________________ ________________________________________________________________________________________ ________________________________________________________________________________________ ________________________________________________________________________________________ ________________________________________________________________________________________ ________________________________________________________________________________________ ________________________________________________________________________________________...
Need help?
Do you have a question about the V-ROYALE-L and is the answer not in the manual?
Questions and answers