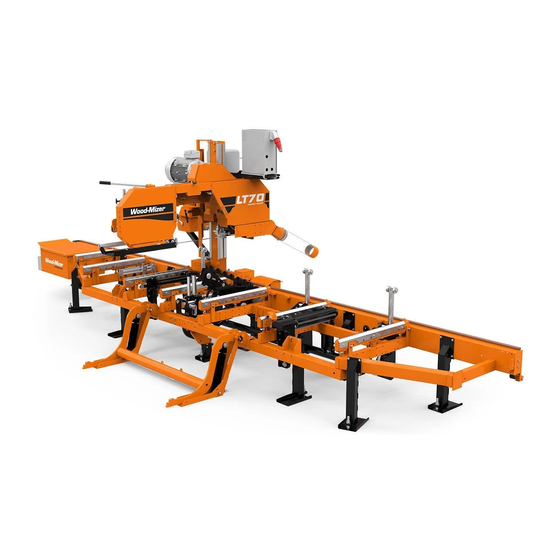
Wood-mizer LT70 Operator's Manual
Sawmill
Hide thumbs
Also See for LT70:
- Operator's manual (80 pages) ,
- Safety, operation, maintenance & parts manual (44 pages) ,
- Safety, installation, operation, maintenance & parts manual (41 pages)

Subscribe to Our Youtube Channel
Related Manuals for Wood-mizer LT70


Summary of Contents for Wood-mizer LT70
- Page 1 ® Wood-Mizer Sawmill Remote Operation LT70 AH Remote rev. A2.02 Operator’s Manual This manual is to replace the related appropriate information from the non-remote sawmill Operator’s Manual Form #676...
-
Page 2: Table Of Contents
Table of Contents Section-Page SECTION 1 REMOTE OPERATION Preparing for Remote Operation ................1-2 Remote Sawmill Operation ..................1-5 Preparing The Remote Option For Towing............... 1-6 Cold Weather Operation.................... 1-7 Recommended Cable Chain deicing Procedure Recommended Cable Chain Ice Prevention Procedure Hydraulic Control Operation.................. -
Page 3: Remote Operation
The Remote Option also includes Wood-Mizer’s Simple Setworks system which allows automatic, incremental up/down movement of the cutting head. -
Page 4: Preparing For Remote Operation
Remote Operation Preparing for Remote Operation Preparing for Remote Operation Set up the sawmill as instructed in your sawmill operator’s manual. CAUTION! Moving the saw carriage before removing the cable chain support may cause damage to the chain. Also, moving the saw carriage when the chain is frozen can damage the chain. - Page 5 Remote Operation Preparing for Remote Operation Before operating the controls on the control box, you will need to pivot the control from its travel position to the operating position. See Figure 1-2. 3h1126 FIG. 1-2 1. Turn the control pivot locking handle counterclockwise. 2.
- Page 6 Remote Operation Preparing for Remote Operation designed to loosely hold the control in the operating position. The control can still be pivoted as needed during the sawing operation. The lock will hold the control firmly in the traveling position during towing. See Figure 1-3.
-
Page 7: Remote Sawmill Operation
Remote Operation Remote Sawmill Operation Remote Sawmill Operation See Figure 1-4. All sawmill controls operate exactly as described in your sawmill operator’s manual except the clutch/brake. Instead of pulling a handle to engage the blade, push the toggle switch on the control panel up. Hold the switch up until the clutch motor stops completely. -
Page 8: Preparing The Remote Option For Towing
Remote Operation Preparing The Remote Option For Towing Preparing The Remote Option For Towing 1. After placing the saw head in its traveling position, engage the remote clutch switch to engage the drive belts. This will keep the engine from bouncing while towing the sawmill. 2. -
Page 9: Cold Weather Operation
Remote Operation Cold Weather Operation Cold Weather Operation If the sawmill is operated or stored in freezing conditions, the cable chain may freeze. Before moving the saw carriage, check to see if the chain is frozen: 1. Remove the chain support bracket (See Section 1.1). -
Page 10: Hydraulic Control Operation
Remote Operation Hydraulic Control Operation Hydraulic Control Operation The hydraulic control levers become operational when the contacts at the bottom of the carriage touch the power strip on the frame tube. The hydraulic control levers will only work when the cutting head is close enough to the front end of the mill to touch the power strip. - Page 11 Remote Operation Hydraulic Control Operation 1. Move the clamp out and down so it will not get in the way of logs being loaded onto the bed. Lower the clamp in/out lever to move the clamp out toward the loading side of the sawmill.
-
Page 12: Maintenance & Troubleshooting
Maintenance & Troubleshooting Control Pivot Lubrication SECTION 2 MAINTENANCE & TROUBLESHOOTING Control Pivot Lubrication Lubricate the control pivot as necessary to allow the control box to pivot freely. Apply a NLGI No. 2 grade lithium grease to the grease fitting supplied above the pivot locking handle. -
Page 13: Clean The Cable Chain & Support Tray
Maintenance & Troubleshooting Clean The Cable Chain & Support Tray Clean The Cable Chain & Support Tray As you operate the sawmill, be aware of any pieces of debris that may fall on the cable chain and/or support tray. Stop the sawmill and immediately remove any pieces of wood, bark or anything else that may divert the path of the chain or cause it to jam. -
Page 14: Cable Chain And Support Tray Alignment
Maintenance & Troubleshooting Cable Chain And Support Tray Alignment Cable Chain And Support Tray Alignment During each sawmill setup, check the alignment of the cable chain and the support tray: 1. The chain should travel in a straight line. Traveling at an angle will cause the chain to prematurely wear and break. - Page 15 Maintenance & Troubleshooting Cable Chain And Support Tray Alignment 2. The chain support tray must be level to prevent premature wear of the chain. Use a square to check the angle of the tray to the sawmill frame. Check at several locations along the length of the tray.
-
Page 16: Replacement Parts
REPLACEMENT PARTS SECTION 3 REPLACEMENT PARTS HDSdoc121516 REPLACEMENT PARTS... -
Page 17: How To Use The Parts List
+48-63-2626000 or +48-3912-1319. From the continental U.S., call 1-800-448-7881 to order parts. Have your customer number, vehicle identification number, and part numbers ready when you call. From other international locations, contact the Wood-Mizer distributor in your area for parts. REPLACEMENT PARTS... -
Page 18: Motor Assembly
REPLACEMENT PARTS Motor Assembly Motor Assembly REF. DESCRIPTION ( Indicates Parts Available In Assemblies Only) PART # MOTOR, 18.5 kW/380V 1LA7166-2AA60-Z ELECTRIC 087397 BUSHING, SPLIT TAPER (E25 MOTOR KIT) 085714 PLATE, E25LT80 MOTOR MOUNTING 090089-1 COVER WELDMENT, E25LT80 BELT - REAR 090050-1 KEY, 9.5h7x9.5x3.8 087384... -
Page 19: Control Box
REPLACEMENT PARTS Control Box Control Box REF. DESCRIPTION ( Indicates Parts Available In Assemblies Only) PART # PULPIT OPERATORA MASZYNY BOX, LT40/70 AC CONTROL 500630 BOX WELDMENT, AC CONTROL 086546-1 SWITCH, 1992GS PWR/FEED (SERVICE PACKAGE) E20438 SWITCH, 1992 UP/DOWN (SERVICE PACKAGE) E20440 RAIL, CIRCUIT BREAKER 015310... - Page 20 REPLACEMENT PARTS Control Box REF. DESCRIPTION ( Indicates Parts Available In Assemblies Only) PART # CONNECTOR, 1 1/4 STRAIGHT METAL CONDUIT 024402 CONDUIT, 1-1/4IN FLEX 024401 PLUG, ASO75 OILTITE E20570 SCREW, 10-24X3/8 PH PHIL MS W/NEO WASHER F05004-148 NUT, #10-24 KEPS F05010-14 GREASE, DRUM SWITCH A20463...
-
Page 21: Mounting Kit
REPLACEMENT PARTS Mounting Kit Mounting Kit REF. DESCRIPTION (Indicates Parts Available In Assemblies Only) PART # BOX, AC REMOTE ELECTRIC 087808 BOLT, M8X30-8.8 HEX HEAD FULL THREAD ZINC F81002-7 NUT, M8-8-B HEX ZINC F81032-1 TRAY, WATER TANK (AC REMOTE) - COMPLETE 088307-1 SWITCH, FA139 Z11 SAFETY 086469... - Page 22 F81031-2 BOLT, #10-24X1/2 SELF-TAPPING F05015-7 BRACKET, LT80AC REMOTE ELECTRIC BOX 090639-1 STOP, LT20 SAW HEAD PTD 091852-1 LIMIT SWITCH ASSEMBLY, LT70 LOWER 505711 CARRIER, R4.56.10.150.0 - 50 o AIG 536922 CONTROLLER, ALTIVAR ATV31HU11N4 SPEED 093488 BRACKET, LT40 CABLE CARRIER 516829-1 BOLT, M8X25-8.8 CARRIAGE HEAD ZINC...
-
Page 23: Lower Limit Switch Assembly
REPLACEMENT PARTS Lower Limit Switch Assembly Lower Limit Switch Assembly REF. DESCRIPTION ( Indicates Parts Available In Assemblies Only) PART # SWITCH ASSEMBLY, LT70 LOWER LIMIT 505711 BAR, LIMIT SWITCH MOUNTING 505125-1 LIMIT SWITCH, FA138 Z11 100931 STUFFING-BOX, SKINTOP PG 13.5 086524 WASHER, 4.3 FLAT ZINC... -
Page 24: Electrical Wiring Diagrams, Lt40Me20Srah4-St
Electrical Information SECTION 4 ELECTRICAL WIRING DIAGRAMS, LT40ME20SRAH4-ST IMPORTANT! When using a sawmill with the rewired control panel it is very important not to switch between saw head forward/backward movement until the saw head stops. Failure to do so may result in serious sawmill damage. - Page 25 BTL5-E10-M900-P-KA05 ALTIVAR Li3 Li4 ALTIVAR 1S-1 ALTIVAR ALTIVAR Ai1 +10 COM Li1 Li2 C0 C1 C2 +V DIRECT D0-05DR - D LOGIC V1 W1 V1 W1 V1 W1 V1 W1 Y1 Z1 HAMULEC 7 2 8 9 10 SILNIK GLOWNY 11 14 15 16 23 5 START...
- Page 26 FIG. 4-2...
Need help?
Do you have a question about the LT70 and is the answer not in the manual?
Questions and answers