NI PXIe-1487 Manual
Hide thumbs
Also See for PXIe-1487:
- Safety, environmental, and regulatory information (4 pages) ,
- Getting started manual (22 pages)
Table of Contents
Advertisement
Quick Links
Advertisement
Table of Contents

Subscribe to Our Youtube Channel
Related Manuals for NI PXIe-1487


Summary of Contents for NI PXIe-1487
- Page 1 PXIe-1487 2023-03-27...
-
Page 2: Table Of Contents
Configuring the PXIe-1487 in MAX........ -
Page 3: Pxie-1487 Getting Started Guide
After completing the tasks described in this document, you will have a hardware and driver setup that allows you to design and test your software application. Note If you purchased the PXIe-1487 as part of an NI system, refer to your system documentation for application-specific instructions for using the PXIe-1487. -
Page 4: Preparing The System Components
PXIe-1487 Document Contents Physical and mechanical specifications ■ PXIe-1487 Safety, Environmental, and Safety and compliance information ■ Regulatory Information Environmental information ■ LabVIEW FPGA Module Help Basic functionality of the FPGA module ■ Instructions for developing and ■ debugging custom hardware logic... -
Page 5: Verifying The Kit Contents
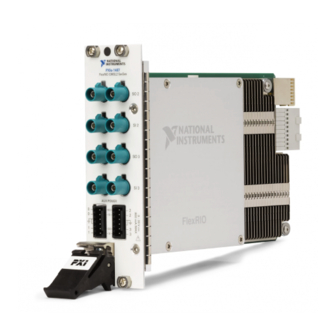
3. Unpack any other items and documentation from the kit. Store the device in the antistatic package when the device is not in use. Verifying the Kit Contents Verify that the following items are included in the PXIe-1487 kit. Figure 1. Kit Contents 1. PXIe-1487 Module 2. -
Page 6: Prerequisites
To use the FlexRIO instrument driver, your system must meet certain requirements. Refer to the product readme, which is available online on the driver software download page or at ni.com/manuals, for more information about minimum system requirements, recommended system, and supported application development environments (ADEs). -
Page 7: Installing The Pxie-1487
PXIe-1487 Installing the PXIe-1487 For instructions on how to install your PXIe-1487 into the chassis, refer to your chassis documentation, available at ni.com/manuals. Cabling the PXIe-1487 Complete the following steps to connect your PXIe-1487 to other system components. 1. Connect your chassis to a power source as described in the chassis Getting Started Guide. - Page 8 AUX power connector pins map to serial input and serial output connectors one to one. Refer to the following diagrams for examples of cabled configurations. Figure 1. PXIe-1487 Deserializer 1. PXIe-1487 Deserializer Module 2. Camera or Serial Device 3. Power Source 4.
- Page 9 PXIe-1487 Figure 1. PXIe-1487 Serializer 1. PXIe-1487 Serializer Module 2. Engine Control Unit (ECU) 3. Power Sink 4. FAKRA Female Code Z to FAKRA Female Code Z Cable 5. Power Connector Wire, Grounding 6. Power Connector Wire, Positively Charged © National Instruments...
-
Page 10: Configuring The Pxie-1487 In Max
4. Camera or Serial Device 5. Power Connector Wire, Positively Charged Note In the PXIe-1487 SerDes module configuration shown, the power connector wire allows the ECU to power the camera or serial device. Related reference: PXIe-1487 Deserializer Front Panel, Connectors, and Block Diagram ■... -
Page 11: Accessing Flexrio With Integrated I/O Examples
PXIe-1487 Use Measurement & Automation Explorer (MAX) to configure your NI hardware. MAX informs other programs about which NI hardware products are in the system and how they are configured. MAX is automatically installed with FlexRIO. 1. Launch MAX. 2. In the configuration tree, expand Devices and Interfaces to see the list of installed NI hardware. -
Page 12: Common Flexrio With Integrated I/O Examples
FlexRIO examples in the Search the community field at ni.com/ examples. Common FlexRIO with Integrated I/O Examples In addition to the examples within the FlexRIO with Integrated IO Project Creator, NI provides several examples that apply to all FlexRIO with Integrated I/O modules to help you perform common tasks. -
Page 13: Front Panels, Connectors, And Block Diagrams
PXIe-1487 The PXIe-1487 ships with socketed CLIP items that add module I/O to the LabVIEW project. PXIe-1487 Deserializer Front Panel, Connectors, and Block Diagram Figure 5. PXIe-1487 Deserializer Front Panel PXIe-1487 FlexRIO GMSL2 Deserializer SI 0 SI 4 SI 1... - Page 14 SI 7 Serial input to internal deserializer Figure 6. PXIe-1487 Deserializer AUX Power Connectors Table 3. PXIe-1487 Deserializer AUX Power Connectors Signal Descriptions Signal Pin Description Power supply for channel SI 0 Power supply for channel SI 1 Digital/chassis grounding...
-
Page 15: Pxie-1487 Serializer Front Panel, Connectors, And Block Diagram
SI 6 SI 7 Deserializer I2C / Des3_I2C Internal (12 V) Des3 Aux Power Select MAX9296A None SI 7 CSI-2 Data Port B SIOB Internal (12 V) Des3_RefClk Aux Power Select None Aux Power Power PXIe-1487 Serializer Front Panel, Connectors, and Block Diagram © National Instruments... - Page 16 SO 4 SO 1 SO 5 SO 2 SO 6 SO 3 SO 7 AUX POWER Table 4. PXIe-1487 Serializer Front Panel Connectors Signal Descriptions Signal Name Description FlexRIO Terminal Name SO 0 Serial output from internal serializer SO 1...
- Page 17 FlexRIO Terminal Name SO 7 Serial output from internal serializer Figure 9. PXIe-1487 Serializer AUX Power Connectors Table 5. PXIe-1487 Serializer AUX Power Connectors Signal Descriptions Signal Pin Description Power sink for channel SO 0 Power sink for channel SO 1...
-
Page 18: Pxie-1487 Serdes Front Panel, Connectors, And Block Diagram
SO6 Serializer I2C / Ser6_I2C Aux Power Ser6_RefClk None Select SO 7 CSI-2 Data Ser7 SO 7 SerializerMFP MAX9295A SO 7 Serializer I2C / Ser7_I2C Aux Power Ser7_RefClk None Select Aux Power Power PXIe-1487 SerDes Front Panel, Connectors, and Block Diagram ni.com... - Page 19 SO 2 SI 0 SI 2 SO 1 SO 3 SI 1 SI 3 AUX POWER Table 6. PXIe-1487 SerDes Front Panel Connectors Signal Descriptions Signal Name Description FlexRIO Terminal Name SO 0 Serial output from internal serializer SI 0...
- Page 20 FlexRIO Terminal Name SI 3 Serial input to internal deserializer Figure 12. PXIe-1487 SerDes AUX Power Connectors Table 7. PXIe-1487 SerDes AUX Power Connectors Signal Descriptions Signal Pin Description Power sink for channel SO 0 Power supply for channel SI 0...
-
Page 21: Fpga Carrier Block Diagram
PXIe-1487 Figure 1. PXIe-1487 SerDes I/O Block Diagram SO 0 CSI-2 Data SO 0 Serializer MFP Ser0 MAX9295A SO 0 Serializer I2C / Ser0_I2C Aux Power Ser0_RefClk Select None SI 0 CSI-2 Data Port B SI 0 Deserializer MFP SIOB... -
Page 22: Where To Go Next
Where to Go Next Before you can use your system, you need to configure the connection between the serial device and the PXIe-1487, build your application, then test and troubleshoot your application. Contact NI for more information about developing the software resources to operate your system. - Page 23 PXIe-1487 NI corporate headquarters is located at 11500 N Mopac Expwy, Austin, TX, 78759-3504, USA. © National Instruments © 2023 National Instruments Corporation.
Need help?
Do you have a question about the PXIe-1487 and is the answer not in the manual?
Questions and answers