JVC KD-LH300 Instructions Manual
Hide thumbs
Also See for KD-LH300:
- Instructions manual (171 pages) ,
- Service manual (65 pages) ,
- Service manual (34 pages)
Table of Contents
Advertisement
Quick Links
CD RECEIVER
RECEPTOR CON CD
RECEPTEUR CD
• This unit is equipped with the display demonstration. To cancel it, see page 8.
• Esta unidad está equipada con demostración en la pantalla. Para cancelarla, consulte la página 8.
• Cet appareil est équipé d'une fonction de démonstration des affichages. Pour l'annuler, référez-
vous à la page 8.
For installation and connections, refer to the separate manual.
Para la instalación y las conexiones, refiérase al manual separado.
Pour l'installation et les raccordements, se référer au manuel séparé.
ATT
SOUND
U
R
SOURCE
F
D
VOL
VOL
ATT
SOUND
U
R
SOURCE
F
D
VOL
VOL
INSTRUCTIONS
MANUAL DE INSTRUCCIONES
MANUEL D'INSTRUCTIONS
KD-AR3000/KD-LH300
KD-AR3000/KD-LH300
KD-AR3000/KD-LH300
KD-AR3000
KD-LH300
For customer Use:
Enter below the Model No. and
Serial No. which are located on
the top or bottom of the
cabinet. Retain this information
for future reference.
Model No.
Serial No.
GET0201-001A
[J]
Advertisement
Table of Contents

Related Manuals for JVC KD-LH300


Summary of Contents for JVC KD-LH300
- Page 1 CD RECEIVER KD-AR3000/KD-LH300 RECEPTOR CON CD KD-AR3000/KD-LH300 RECEPTEUR CD KD-AR3000/KD-LH300 KD-AR3000 SOUND SOURCE KD-LH300 SOUND SOURCE • This unit is equipped with the display demonstration. To cancel it, see page 8. • Esta unidad está equipada con demostración en la pantalla. Para cancelarla, consulte la página 8.
-
Page 2: How To Reset Your Unit
INFORMATION (For U.S.A.) This equipment has been tested and found to comply with the limits for a Class B digital device, pursuant to Part 15 of the FCC Rules. These limits are designed to provide reasonable protection against harmful interference in a residential installation. This equipment generates, uses, and can radiate radio frequency energy and, if not installed and used in accordance with the instructions, may cause harmful interference to radio communications. -
Page 3: Table Of Contents
Thank you for purchasing a JVC product. Please read all instructions carefully before operation, to ensure your complete understanding and to obtain the best possible performance from the unit. CONTENTS GRAPHIC DISPLAYS ....... 29 How to reset your unit ....... -
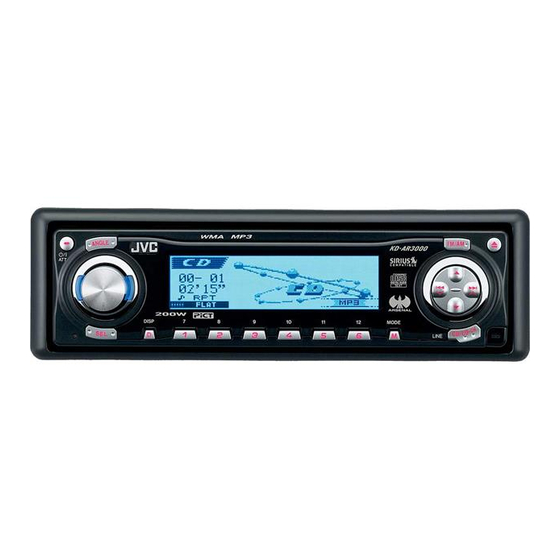
Page 4: Location Of The Buttons
6 5 (up) button y For KD-AR3000: 7 FM/AM button CD/CD-CH (CD changer) LINE button 8 0 (eject) button For KD-LH300: 9 SEL (select) button CD/CD-CH (CD changer) button p D DISP (display) button Illumination Navigation for easy operations If you use M MODE or SEL (select), the display and some controls (such as the number buttons, /¢... -
Page 5: Remote Controller
Remote controller 3 • Selects the preset stations while listening to the radio. Each time you press the button, the preset station number increases, and the selected station is tuned in. • Skips to the first track of the previous folder SOUND while listening to an MP3 or a WMA disc. -
Page 6: Preparing The Remote Controller
Preparing the remote controller Return the battery holder. Insert again the battery holder by pushing it until you hear a clicking sound. Before using the remote controller: • Aim the remote controller directly at the remote sensor on the main unit. Make sure there is no obstacle in between. -
Page 7: Basic Operations
For details, see “Selecting CD-CH* the display theme” on page 28. (or SIRIUS* LINE-IN For KD-LH300: NOTICE: • Press CD/CD-CH repeatedly. The illustrations of the display used in this manual are mainly of the initial setting when shipped from the factory. -
Page 8: Canceling The Display Demonstration
To drop the volume in a moment Press number button 1 to select Press briefly while listening to any “MOVIE”—Movie category of the source. “ATT” starts flashing on the display, and PSM settings. the volume level will drop in a moment. The “Graphics”... -
Page 9: Setting The Clock
Setting the clock Set the minute. 1 Select “Clock Min” (minute). You can also set the clock system to either 2 Adjust the minute. 24 hours or 12 hours. Press and hold SEL (select) for more than 2 seconds so that one of the PSM items appears on the display. -
Page 10: Radio Operations
RADIO OPERATIONS Listening to the radio To stop searching before a station is received, press the same button you have pressed for searching. You can use either automatic searching or manual searching to tune in to a particular station. Searching for a station manually: Manual search Searching for a station automatically: Auto search... - Page 11 When an FM stereo broadcast is hard to Tune in to a station you want while receive: “Manual Search” is flashing. Set the FM reception mode to “Mono On.” To tune in to stations of higher frequencies Press M MODE while listening to an FM stereo broadcast.
-
Page 12: Storing Stations In Memory
Storing stations in memory Local FM stations with the strongest signals are searched and stored automatically in the band number you have selected (FM1, FM2, or FM3). You can use one of the following two methods to These stations are preset in the number buttons store broadcasting stations in memory. -
Page 13: Tuning In To A Preset Station
Tuning in to a preset station Press and hold the number button (in this example, 1) for more than You can easily tune in to a preset station. 2 seconds. Remember that you must store stations first. If you have not stored them yet, see “Storing stations in memory”... -
Page 14: Changing The Display Pattern
Changing the display pattern Selecting a preset station using the preset station list By pressing D DISP, you can change the If you forget what stations are stored in which information shown on the display. preset numbers, you can check the preset station Each time you press the button, list, then select your desired station. -
Page 15: Disc Operations
(word “file” is not used to indicate MP3 or WMA pressing CD/CD-CH LINE (for KD-AR3000) or files, “track” is used in this manual) are recorded CD/CD-CH (for KD-LH300) turns on the unit in “folders.” and starts playback automatically. During recording, the tracks and folders can be arranged in a way similar to arranging files and Insert a disc into the loading slot. - Page 16 Display indications when inserting an audio Display indications when inserting an MP3 CD or a CD Text: or a WMA discs: Total folder and track numbers Total track number and total playing time of the inserted CD MP3 indicator* Current track and elapsed playing time Notes: •...
- Page 17 What is ImageLink? To activate ImageLink, follow the procedure below: When an MP3 or a WMA folder includes an • See also “Changing the general settings image <jml> file edited by Image Converter (PSM)” on page 36. (supplied in the CD-ROM), you can show the image on the display while the tracks in the Press and hold SEL (select) for more than folder are played back.
-
Page 18: Locating A Track Or A Particular Portion On A Disc
Locating a track or a To go to a track quickly particular portion on a disc Press M MODE while playing a disc. “Mode” appears on the display. The next-step-operation buttons To fast-forward or reverse the track start flashing. Press and hold ¢ while playing a disc, to fast-forward the track. - Page 19 To go to a particular folder directly To skip to the next or previous folder (Only possible for MP3 or WMA disc) (Only possible for MP3 or WMA disc) IMPORTANT: Press 5 (up) while playing a disc To directly select the folders using the number to skip to the next folder.
-
Page 20: Selecting A Folder And A Track Using The Name Lists
Selecting a folder and a track Selecting a track and start playback using the name lists Press and hold 5 (up) or ∞ (down) so that the folder name list of the inserted disc appears on the The following operations are only possible when playing an MP3 or a WMA disc. -
Page 21: Selecting The Playback Modes
Selecting the playback modes To play back tracks repeatedly (Repeat Play) To play back tracks at random You can play back the current track (or a folder (Random Play) for MP3 and WMA discs) repeatedly. You can play back all tracks on the disc (or a Press M MODE while playing a disc. -
Page 22: Prohibiting Disc Ejection
Prohibiting disc ejection To play back only intros (Intro Scan) You can prohibit disc ejection and can lock a disc You can play back the first 15 seconds of each in the loading slot. track sequentially. While pressing SEL (select), press and Press M MODE while playing a disc. -
Page 23: Changing The Display Pattern
Changing the display pattern By pressing D DISP, you can change the information shown on the display. If the information cannot be shown at a time, it will scroll on the display. See also “To select the scroll mode—Scroll” on page 38. Some characters or symbols will not be shown (will be blanked or substituted) on the display. -
Page 24: Sound Adjustments
SOUND ADJUSTMENTS Adjusting the sound Make adjustments. • To adjust fader and balance—Fad, Bal: You can set the speaker output balance, subwoofer You can make these two adjustments at output level, and input level of each source. the same time. •... -
Page 25: Selecting Preset Sound Modes (Ieq: Intelligent Equalizer)
Selecting preset sound modes • To adjust the input level of each source —Vol Adj: (iEQ: intelligent equalizer) Volume adjustment level can be separately stored for each source—CD, AM, Line in, CD changer, and SIRIUS. You can select a preset sound mode (iEQ: intelligent equalizer) suitable to the music genre. - Page 26 To cancel the sound mode, select “FLAT” in Press the number button to select step 2 . the sound mode you want. • This unit has two sound mode selection Notes: screens. To move to the other screen, • You can adjust the preset sound modes temporarily. press 5 (up) or ∞...
-
Page 27: Storing Your Own Sound Modes
Storing your own sound modes Make adjustments as you like. You can adjust the sound modes to your preference and store your own adjustments in memory (USER 1, USER 2, and USER 3). Press ¢ or 4 to select the •... -
Page 28: Selecting The Display Theme
Selecting the display theme View 1: A scenery display appears. You can select the theme of the display during • Positive pattern display: playback. • There is a time limit in doing the following procedure. If the setting is canceled before you finish, start from step 1 again. -
Page 29: Graphic Displays
What is Image Converter? Image Converter is a JVC’s original software to produce customize images to be shown on your JVC Car Audio. Here is a basic procedure to make a CD-R including still images (pictures) and animations... -
Page 30: Downloading Images And Animations
Downloading images and Insert a CD-ROM with the files animations (images and animations) into the loading slot. The unit draws the Before starting the following procedure, prepare disc, the control panel a CD-ROM including still images (pictures) and goes back to the animations (movies). - Page 31 Notes: • Opening : Opening screen To download an animation to be shown • On this list, the folders including the target after the unit is turned on. (You can store files—<jml> files for “Picture” and <jma> only one animation consisting of a files for the others—are shown.
-
Page 32: Deleting Unwanted Files
Deleting unwanted files Select (highlight) a file you want to download. • When “BACK” is shown on the display above number button 5, you can go back to the previous screen by pressing number button 5. To delete all the stored files at a time Press M MODE while playing any source. - Page 33 To delete the files stored for “Opening,” Press number button 5 to resume the source indication screen. “Ending,” “Picture (all stored images at a time),” and “Movie” Press M MODE while playing any source. “Mode” appears on the display. To delete the stored files for “Picture” The next-step-operation buttons start flashing.
-
Page 34: Activating The Downloaded Images And Animations
Press number button 3 to start erasure. Select “Opening” (opening screen “Now Deleting...” appears while setting) or “Ending” (ending screen erasing the selected file. When setting). erasure is over, the name list of the stored file appears again. To delete more files, repeat from steps Press D DISP to resume the source indication screen. - Page 35 Selecting a still image for graphic Press number button 1 to select display—User Picture “MOVIE”—Movie category of the PSM settings. You cannot select “UserPict.” as a PSM item in the following cases: The “Graphics” setting screen appears on • If no image is stored in “Picture,” or the display.
-
Page 36: Other Main Functions
OTHER MAIN FUNCTIONS Changing the general settings Select the PSM item you want to (PSM) adjust. You can change the items listed on the table below and on page 37 by using the PSM (Preferred Setting Mode) control. • The PSM items are grouped into six •... - Page 37 00 – 11 Day: 07/Night: 05 Green 00 – 11 Day: 07/Night: 05 Blue SlotLight Slot light Displayed only when “Dimmer” is set to “Time Set.” Not displayed when the current source is the external component. Only for KD-LH300 Only for KD-AR3000...
- Page 38 To show the graphics on the display To adjust the display contrast level —Graphics —Contrast You can change the graphics shown on the Adjust the display contrast (1 – 10) to make the display. These graphics appear if no operation is display indications clear and legible.
- Page 39 KD-LH300). • SIRIUS: To use the JVC SIRIUS Radio. Notes: • Only for KD-LH300: For connecting the Line Input Adapter KS-U57 and the external component, refer to the Installation/Connection Manual (separate volume). • For connecting the JVC SIRIUS Radio, refer to the...
-
Page 40: Selecting The Dimmer Mode
Selecting the dimmer mode Set the dimmer mode as you like. You can dim the display at night automatically or as you set the timer. Note: Auto Dimmer equipped with this unit may not work correctly on some vehicles, particularly on those •... -
Page 41: Changing The Display Color
You can set the display color using the PSM Line In control. You can select your favorite color for each source (or for all sources). You can also create your own colors, and set For KD-LH300: them as the display color. All SRC* Changer (or Line In, SIRIUS) - Page 42 Creating your own color—User Select the user color adjustment screen. You can create your own colors—“Day” and “Night,” and select them as the display color for One of the user color any desired source. adjustment screens • Day: Can be used as your user color during appears.
-
Page 43: Assigning Names To The Sources
Repeat steps 3 to 5 until you finish entering the name. Finish the procedure while the last selected character is flashing. (For KD-AR3000) (For KD-LH300) When you select a source, the power automatically comes on. While pressing D DISP, press and To erase the input characters hold SEL (select) for more than 2 seconds. -
Page 44: Changing The Control Panel Angle
Changing the control panel CAUTION: angle NEVER insert your finger in between the control panel and the You can change the angle of the control panel to unit, as it may get four positions. caught or hurt. Press ANGLE repeatedly to adjust the angle of the control panel to the position you want. -
Page 45: Detaching The Control Panel
Detaching the control panel Attaching the control panel Insert the left side of the control You can detach the control panel when leaving panel into the groove on the panel the car. holder. When detaching or attaching the control panel, be careful not to damage the connectors on the back of the control panel and on the panel holder. -
Page 46: Cd Changer Operations
CD CHANGER OPERATIONS Playing discs We recommend that you use the JVC MP3- compatible CD changer with your unit. Select the CD changer (CD-CH). By using this CD changer, you can play back your original CD-Rs (Recordable) and CD-RWs (Rewritable) recorded either in audio CD format or in MP3 format. - Page 47 Notes: during play, to fast-forward • When you press CD/CD-CH LINE (for KD-AR3000) the track. or CD/CD-CH (for KD-LH300), the power automatically comes on. You do not have to press Press and hold 4 , during play, to reverse to turn on the power.
- Page 48 This operation is only possible when How to go to the desired track quickly using JVC MP3-compatible CD changer (CH-X1500). • Ex. 1: To select track number 32 while playing track number 6 To go to a track quickly Press M MODE while playing a disc.
-
Page 49: Selecting A Disc/Folder/Track Using The Name Lists
Selecting a disc/folder/track While playing an MP3 disc, you can also show the folder name list(s) and track name list(s) on using the name lists the display, then select a folder or track. While playing an MP3 disc, press and hold If you forget what discs are loaded in the CD 5 (up) or ∞... -
Page 50: Selecting The Playback Modes
Selecting the playback modes Note: MP3 indicator also lights up if the current playing disc is an MP3 disc. To play back tracks at random (Random Play) To cancel random play, select “Random Off” by pressing number button 3 repeatedly or press Press M MODE during play. - Page 51 Each time you press the button, intro scan Active Mode Plays repeatedly mode changes as follows: indicator Repeat (track The current (or For MP3 discs: Track repeat) indicator specified) track. Intro Track Intro Folder lights up. Intro Off Intro Disc Repeat (folder All tracks of the...
-
Page 52: External Component Operations
“Ext Input” setting correctly (see Turn on the connected component page 39). and start playing the source. • To use the JVC SIRIUS Radio, refer to the SIRIUS Radio Setup Manual (separate Adjust the volume. volume). Adjust the sound as you want. -
Page 53: Troubleshooting
TROUBLESHOOTING What appears to be trouble is not always serious. Check the following points before calling a service center. Remedies Symptoms Causes Adjust it to the optimum level. • Sound cannot be heard The volume level is set to the from the speakers. - Page 54 Symptoms Causes Remedies • Disc cannot be played No MP3/WMA tracks are Change the disc. back. recorded on the disc. MP3/WMA tracks do not have Add the extension code the extension code <.mp3> or <.mp3> or <.wma> to their track <.wma>...
- Page 55 Symptoms Causes Remedies • Download does not seem to You are trying to download an This is normal (see page 30). finish. animation of many frames. • Animation does not move. Temperature in the car Wait until the operating compartment is very low— temperature resumes—until •...
-
Page 56: Maintenance
MAINTENANCE Handling discs When playing a CD-R or CD-RW Before playing back CD-Rs or CD-RWs, read This unit has been designed to reproduce CDs, their instructions or cautions carefully. CD-Rs (Recordable), CD-RWs (Rewritable), and • Use only “finalized” CD-Rs or CD-RWs. CD Texts. -
Page 57: Specifications
DC 14.4 V (11 V to 16 V allowance) KD-AR3000: 5.0 V/20 kΩ load (full scale) Grounding System: Negative ground KD-LH300: 4.0 V/20 kΩ load (full scale) Allowable Operating Temperature: Output Impedance: 1 kΩ 0°C to +40°C (32°F to 104°F) Subwoofer-Out Level/Impedance: Dimensions (W ×... - Page 58 US RESIDENTS ONLY Having TROUBLE with operation? Please reset your unit Refer to page of How to Reset Still having trouble?? USA ONLY Call 1-800-252-5722 http://www.jvc.com We can help you! EN, SP, FR 1103KKSMDTJEIN © 2003 VICTOR COMPANY OF JAPAN, LIMITED...
- Page 59 NEGATIVA. Si su vehículo no courant continu de 12 V à masse NEGATIVE . Si votre véhicule voltage inverter is required, which can be purchased at JVC car posee este sistema, será necesario un inversor de tensión, que n’offre pas ce type d’alimentation, il vous faut un convertisseur de...
- Page 60 JVC. concesionario de JVC de equipos de audio para automóviles. • It is recommended to connect to the speakers with maximum • Il est recommandé de connecter des enceintes avec une power of more than 50 W (both at the rear and at the front, with •...
- Page 61 To the remote lead of other equipment (or automatic antenna for KD-LH300)—200 mA max. Azul con rayas blancas Al conductor remoto de otro equipo (o de la antena automática, si hubiere, para KD-LH300) Bleu avec bande blanche —máx. 200 mA Au fil de télécommande de l’autre appareil (ou à...
- Page 62 Pour brancher la radio JVC Appareil extérieur SIRIUS, référez-vous au Manuel d’installation de la radio SIRIUS (volume séparé). Only for KD-LH300 / Sólo para KD-LH300 / Seulement pour le KD-LH300 KS-U57 External component Componente exterior Line Input Adapter KS-U57 (not supplied KD-LH300 Appareil extérieur...
- Page 63 This file has been downloaded from: www.UsersManualGuide.com User Manual and User Guide for many equipments like mobile phones, photo cameras, monther board, monitors, software, tv, dvd, and othes.. Manual users, user manuals, user guide manual, owners manual, instruction manual, manual owner, manual owner's, manual guide, manual operation, operating manual, user's manual, operating instructions, manual operators, manual operator, manual product, documentation manual, user maintenance, brochure, user reference, pdf manual Downloaded from:...
Need help?
Do you have a question about the KD-LH300 and is the answer not in the manual?
Questions and answers