JVC KD-LHX502 Instructions Manual
Cd receiver
Hide thumbs
Also See for KD-LHX502:
- Instructions manual (259 pages) ,
- Service manual (213 pages) ,
- Installation & connection manual (4 pages)
Table of Contents
Advertisement
Quick Links
CD RECEIVER
CD-RECEIVER
RECEPTEUR CD
CD-RECEIVER
KD-LHX502/KD-LHX501
This unit is equipped with the display demonstration. To cancel it, see page 7.
Dieses Gerät ist mit einer Demonstrationsfunktion für das Display ausgestattet. Auf
Seite 7 wird beschrieben, wie Sie diese Demonstrationsfunktion deaktivieren können.
Cet appareil est équipé d'une démonstration des affichages. Pour l'annuler, référez-
vous à la page 7.
Dit toestel heeft een display-demonstratiefunctie. Zie bladzijde 7 voor het annuleren
van deze functie.
For installation and connections, refer to the separate manual.
Angaben zu Einbau und Verkabelung entnehmen Sie bitte der gesonderten Anleitung.
Pour l'installation et les raccordements, se référer au manuel séparé.
Zie de afzonderlijke handleiding voor details aangaande het installeren en verbinden van het
toestel.
INSTRUCTIONS
BEDIENUNGSANLEITUNG
MANUEL D'INSTRUCTIONS
GEBRUIKSAANWIJZING
T/P
LVT1136-001B
[E/EX]
Advertisement
Chapters
Table of Contents
Troubleshooting

Related Manuals for JVC KD-LHX502


Summary of Contents for JVC KD-LHX502
- Page 1 CD-RECEIVER RECEPTEUR CD CD-RECEIVER KD-LHX502/KD-LHX501 This unit is equipped with the display demonstration. To cancel it, see page 7. Dieses Gerät ist mit einer Demonstrationsfunktion für das Display ausgestattet. Auf Seite 7 wird beschrieben, wie Sie diese Demonstrationsfunktion deaktivieren können.
-
Page 2: How To Reset Your Unit
Thank you for purchasing a JVC product. Please read all instructions carefully before operation, to ensure your complete understanding and to obtain the best possible performance from the unit. IMPORTANT FOR LASER PRODUCTS 1. CLASS 1 LASER PRODUCT 2. CAUTION: Do not open the top cover. There are no user serviceable parts inside the unit;... -
Page 3: Table Of Contents
Contents How to reset your unit ........2 General Settings—PSM ......33 Basic procedure ..........33 Location of the Buttons ......... 4 Selecting the dimmer mode ......38 Basic Operations ..........6 Changing the display color ......39 Canceling the display demonstration ....7 Other Main Functions ......... -
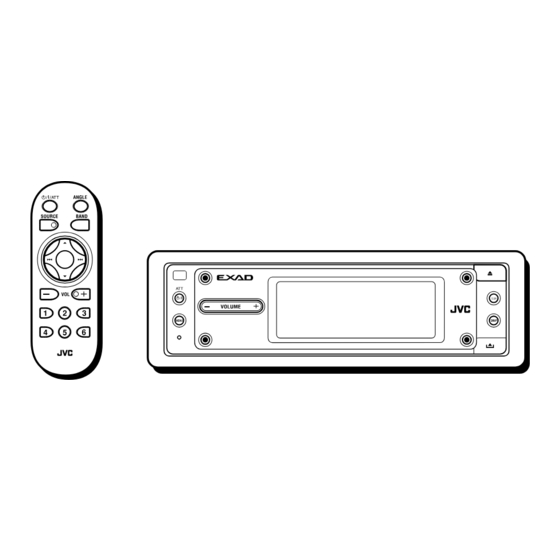
Page 4: Location Of The Buttons
Location of the Buttons Control panel T/P button Activates or deactivates TA Standby (Standby/On/Attenuator) button Reception (and Road Traffic News Turns on and off the power, and also attenuates Standby Reception). the sounds. 0 (eject) button Remote VOLUME+/– button Open the control panel (and eject the sensor* Adjust the volume level. - Page 5 Remote controller (Standby/On/Attenuator) button ANGLE button Adjust the control panel angle. BAND button SOURCE button Select the band for FM/AM and Select the source. DAB. 5/∞ buttons 4/¢ buttons • Change the preset stations. • Searches for stations (or • Change the services for ensembles)—Auto Search, if DAB.
-
Page 6: Basic Operations
Basic Operations Turn on the power Adjust the volume Hold Hold The Operation screen for last selected source is recalled. Select the source Adjust the sound You can also change the source by..• For details, see pages 24 to 26. When operating the touch panel Make sure to touch the area inside the key icon boundary, but not on the boundary. -
Page 7: Canceling The Display Demonstration
What information is shown on the touch panel The following information are shown commonly for all sources. • If you press DISP on the control panel, the touch panel will show the different information or different screens. (Details about this will be explained later separately for each source.) Current source Current source i-EQ setting... -
Page 8: Setting The Clock
Exit Select “Clock Min.” To activate the display demonstration, repeat the same procedure and select any one other than “Off” in step 3 . • For more details, see “To show the display demonstration” on page 35. ○ ○ ○ ○ ○ ○ ○ ○ ○ Adjust the minute. -
Page 9: Radio Operations
Radio Operations ○ ○ ○ ○ ○ ○ ○ ○ Listening to the radio Start searching for a station Select the Tuner You can also change the source by..“Auto Search” begins. When a station is received, searching stops. Then just wait. To stop searching, press the same icon. -
Page 10: Storing Stations In Memory
When an FM stereo broadcast is hard to Hold receive: Local FM stations with the strongest signals are searched and stored automatically in the selected FM band. Manual presetting Ex. Storing an FM station of 92.5 MHz into the preset number 1 of the FM1 band. Reception improves, but stereo (in this example, FM1) effect will be lost. -
Page 11: Tuning In To A Preset Station
○ ○ ○ ○ ○ ○ ○ ○ ○ ○ ○ ○ ○ ○ ○ ○ ○ ○ Tuning in to a preset station Changing the display pattern Select a preset Tuner Operation screen number. Station name (PS) for FM RDS stations To select a preset station using the Preset Station List •... -
Page 12: Fm Rds Operations
FM RDS Operations ○ ○ ○ ○ ○ ○ ○ ○ Searching for your favorite Select “PTY SEARCH” ○ ○ ○ ○ ○ ○ ○ ○ programme You can tune in to a station broadcasting Preset PTY Code List your favorite programme by searching for a appears (see below). - Page 13 What you can do with RDS RDS (Radio Data System) allows FM stations to send an additional signal along with their regular programme signals. For example, the stations send their station names, as well as information about what type of programme they broadcast, such as sports or music, etc. By receiving the RDS data, this unit can do the following: •...
-
Page 14: Using The Standby Reception
○ ○ ○ ○ ○ ○ ○ ○ ○ Using the Standby Reception Using PTY Standby Reception PTY Standby Reception allows the unit to You can use two types of Standby Reception— switch temporarily to your favorite programme TA Standby Reception and PTY Standby (PTY: Programme Type) from any source other Reception. -
Page 15: Tracking The Same Programme
○ ○ ○ ○ ○ ○ ○ ○ ○ Tracking the same programme— To activate PTY Standby Reception • After activating PTY Standby Reception, you ○ ○ ○ ○ ○ ○ ○ ○ ○ Network-Tracking Reception can change the source without canceling PTY Standby Reception (except to AM). -
Page 16: Using Programme Search
Exit Select “TUNER.” Now “PTY Stnby” setting appears. AF or REG indicator ○ ○ ○ ○ ○ ○ ○ ○ ○ Using Programme Search When you select a preset station, the station of Select “AF-Regn’l.” the frequency stored is tuned in. However, when the preset station is an RDS station, something different will happen with Programme Search activated. - Page 17 Exit Select “P-Search.” To deactivate Programme Search, follow the procedure above and select “Off” in step 5 . Select “On.” Activates Programme Search. Off: Cancels the Search. PTY codes News: News Social: Programmes on social activities Affairs: Topical programmes expanding on Religion: Programmes dealing with any current news or affairs aspect of belief or faith, or the...
-
Page 18: Basic Disc Operations
Basic Disc Operations To fast-forward or reverse the track: Open the control panel The unit turns on, then... Hold Hold To go to the next or previous tracks: Insert a disc To go to the next or previous folders: The unit draws the disc, the control panel For MP3/WMA discs only: closes then goes back to the previous position (see page 42), and playback starts... - Page 19 About MP3 and WMA discs ® Level 1 Level 2 Level 3 Level 4 Level 5 MP3 and WMA (Windows Media Audio) “tracks” (words “file” and “track” are used interchangeably) are recorded in “folders.” ROOT “Root” is similar to the root of a tree. Every track and folder can be linked to and be accessed from the root.
-
Page 20: Advanced Disc Operations
Advanced Disc Operations ○ ○ ○ ○ ○ ○ ○ ○ ○ Locating a track or folder on a disc • If you select the currently selected folder (highlighted on the screen), the File List To locate a folder on the screen (only screen (see step 3 below), then you can for MP3/WMA discs) select a track to start with. -
Page 21: Prohibiting Disc Ejection
To locate a track (or folder) directly using the remote controller • To select a track (or folder for MP3 and WMA discs) number from 1 – 6: (3 times) First time you press “+10” or “–10,” the track skips to the nearest higher or lower •... -
Page 22: Selecting Playback Modes
○ ○ ○ ○ ○ ○ ○ ○ ○ Selecting playback modes To play back tracks repeatedly (Repeat Play) You can use only one of the following playback You can repeat playback. modes at a time. To play back only intros (Intro Scan) You can play back the first 15 seconds of each track sequentially. -
Page 23: Changing The Display Pattern
○ ○ ○ ○ ○ ○ ○ ○ ○ Changing the display pattern To play back tracks at random (Random Play) You can play back tracks at random. Disc Operation screen Folder Disc Clock time is enlarged. Mode Plays randomly Folder* : All tracks of the current folder, then moves to the next folder and so on. -
Page 24: Sound Adjustments
Sound Adjustments ○ ○ ○ ○ ○ ○ ○ ○ Setting the basic sound selection Adjust the item ○ ○ ○ ○ ○ ○ ○ ○ menu—SEL To adjust fader and balance: Show the Main Menu To select the cutoff frequency and adjust Show the basic sound the subwoofer output level: selection menu... -
Page 25: Selecting Preset Sound Modes
○ ○ ○ ○ ○ ○ ○ ○ ○ To adjust subwoofer output—SUB OUT: Selecting preset sound modes Select an appropriate cutoff frequency level ○ ○ ○ ○ ○ ○ ○ ○ ○ (i-EQ: intelligent equalizer) according to the subwoofer connected. You can select a sound mode suitable to the music genre. -
Page 26: Storing Your Own Sound Modes
○ ○ ○ ○ ○ ○ ○ ○ ○ Storing your own sound modes Repeat steps 2 and 3 to adjust the other frequency bands. You can adjust the sound modes and store your own adjustments in memory. Repeat steps 1 to 3 on page 25 to select a sound mode you want to adjust. -
Page 27: Graphic Displays
Graphic Displays ○ ○ ○ ○ ○ ○ ○ ○ Basic procedure Show the Main Menu Before starting the following procedure, prepare a CD-R including still images (pictures) and animations (movies). • With Image Converter (Wide) included in the supplied CD-ROM, you can create your own images and animations. -
Page 28: Downloading The File For "Opening/ Ending/Movie
IMPORTANT: • Refer to Image Converter PDF files included in the “Manual” folder of the supplied CD- ROM. • Still images (pictures) should have <jll>, and animations (movies) should have <jla> as their extension code in their file names. • Before you download or delete the files, observe the following: –... -
Page 29: Downloading The Files For "Picture
To delete the stored animation: Repeat steps 1 to 4 on page 27, then in step 5 ... Only the folders including the <jll> files are shown. (once for the Select a folder. currently selected; twice for the others) File name of the stored file appears. Select a file. - Page 30 Download more files if you want. • To select a file from the same folder: Delete more files if you want. • To select a file from another folder: Repeat steps 3 to 5 . Select a file. After deleting all the files you do not After downloading all the files you want...
-
Page 31: Deleting All Files
○ ○ ○ ○ ○ ○ ○ ○ ○ Deleting all files You can easily delete all files—animations and pictures stored for “OPENING/ENDING/ MOVIE/PICTURE.” Select “MOVIE.” Now “Demo” setting appears. Select “Opening” or “Ending.” Select “User.” Default: Factory-preset animation is used. User: Your own animation is used. - Page 32 To select a still image for “UserPict.” • If “UserPict.” is not selected for “Graphics” you cannot select “UserPict.” in step 4 below. Select “MOVIE.” Now “Demo” setting appears . The last selected item appears. Select “Graphics.” Select “MOVIE.” Now “Demo” setting appears .
-
Page 33: General Settings-Psm
General Settings—PSM ○ ○ ○ ○ ○ ○ ○ ○ Basic procedure Select a PSM item You can change the Preferred Setting Mode (PSM) items listed on the table that follows. • The PSM items are grouped into six categories—MOVIE, CLOCK, DISP (display), TUNER, AUDIO, and COLOR. - Page 34 PSM items Selectable settings Initial Pages All Time ImageLink Demo Demonstration Interval 7, 35 Interval UserMovie UserPict. Graphics Graphics UserPict. UserSlide KeyIn CFM Key-in confirmation Opening Opening screen Default User Default Ending Ending screen Default User Default UserPict. User picture First stored From the stored files Clock Hr...
- Page 35 PSM items Selectable settings Initial Pages Beep Voice Voice support system Voice VSS Level VSS level Deutsch English Language Language English Français Ext Input External Input Changer Line In Changer Muting2 Muting1 Telephone Telephone mute Amp Gain Amp gain control High PWR Low PWR High PWR...
- Page 36 To select the scroll mode—Scroll To turn the tag display on or off—Tag The entire text information is shown by An MP3 and WMA track can contain track scrolling if it cannot be shown at a time. information called “Tag” where its album •...
- Page 37 • Changer: To use a JVC CD changer. interference noise will be reduced. • Line In: To use any external component. (But the stereo effect will also be To select the telephone muting lost.)
-
Page 38: Selecting The Dimmer Mode
○ ○ ○ ○ ○ ○ ○ ○ ○ Selecting the dimmer mode You can dim the display at night automatically or as you set the timer. Select “From–To.” Set the dimmer start time. The last selected item appears. Select “DISP.” Now “Scroll”... -
Page 39: Changing The Display Color
○ ○ ○ ○ ○ ○ ○ ○ ○ Changing the display color You can select your favorite color for each source (or for all sources). Setting the desired color for the source Select the color. O Aqua O Sky O Sea O Every* Leaves O Grass O Apple O Rose O Amber O Honey O Violet O Grape O... - Page 40 Creating your own color—User Adjust the selected user color. You can create your own colors—“USER DAY” and “USER NIGHT,” and select them for the display color. • USER DAY: Can be used as your user color during the day time*. •...
-
Page 41: Other Main Functions
Other Main Functions ○ ○ ○ ○ ○ ○ ○ ○ ○ Assigning titles to the sources You can assign titles 40 CDs (both in this unit and in the CD changer) and the external component. Select a character. Source Maximum number CDs: 32 characters... -
Page 42: Changing The Control Panel Angle
○ ○ ○ ○ ○ ○ ○ ○ ○ ○ ○ ○ ○ ○ ○ ○ ○ ○ Detaching the control panel Changing the control panel angle • When detaching and attaching the control You can change the angle of the control panel. panel, be careful not to damage the connectors. -
Page 43: Basic Cd Changer Operations
Basic CD Changer Operations With JVC MP3-compatible CD changer To fast-forward or reverse the track: connected, you can play back your original CD-Rs and CD-RWs recorded either in audio CD format or in MP3 format. Select CD changer Hold Hold... - Page 44 (track) indicator appears instead of the track name. Before operating your CD changer: It is recommended to use the JVC MP3- compatible CD changer with your unit. • Refer also to the Instructions supplied with • You can also connect the CH-X series your CD changer.
-
Page 45: Advanced Cd Changer Operations
Hold Main touch panels used in this section CD Changer Mode screen Disc List screen* Works only when JVC MP3 compatible CD changer (CH-X1500) is connected. The lists show the disc names actually recorded or assigned (the first 8 characters, Appears only for MP3 discs. -
Page 46: Locating A Track Or Folder On A Disc
Main touch panels used in this section File (Track) List screen (only for MP3)* Folder List screen (only for MP3)* The lists show the folder/file names actually recorded (the first 8 characters). Press to go to the next list; hold to go back to •... - Page 47 You can quickly reach a desired track on a disc including many tracks. • This operation is only possible when using a JVC MP3 compatible CD changer (CH-X1500) . • For MP3 discs, you can select only a track within the current folder.
-
Page 48: Selecting Playback Modes
○ ○ ○ ○ ○ ○ ○ ○ ○ Selecting playback modes To play back tracks repeatedly (Repeat Play) You can use only one of the following playback You can repeat playback. modes at a time. To play back only intros (Intro Scan) You can play back the first 15 seconds of each track sequentially. -
Page 49: Changing The Display Pattern
○ ○ ○ ○ ○ ○ ○ ○ ○ To play back tracks at random (Random Changing the display pattern Play) You can play back tracks at random. CD Changer Operation screen Folder Disc Mode Plays randomly Clock time is enlarged. Folder* : All tracks of the current folder, then moves to the next folder and so on. -
Page 50: External Component Operations
External Component Operations You can connect the external component Adjust the volume to the CD changer jack on the rear using the special adapter for the component (not Hold Hold supplied). See the Installation/Connection Manual (separate volume). • Before operating the external component, select the “Ext Input”... -
Page 51: Dab Tuner Operations
DAB Tuner Operations ○ ○ ○ ○ ○ ○ ○ ○ Listening to the DAB tuner Start searching for an ensemble Select the DAB Tuner You can also change the source by..“Auto Search” begins. When a station is received, searching stops. Then just wait. - Page 52 (services) broadcast at the same time. It is recommended to use DAB (Digital Audio Broadcasting) tuner KT-DB1500 or KT-DB1000 with this unit. If you have another DAB tuner, consult your JVC IN-CAR ENTERTAINMENT dealer. • Refer also to the Instructions supplied with your DAB tuner.
-
Page 53: Storing Dab Services In Memory
To search for your favorite service You can search for any one of the PTY codes (either Dynamic or Static PTY). • Operations are exactly the same as explained on pages 12 and 13 for FM RDS stations. • You cannot store PTY codes separately for the DAB tuner and for the FM tuner. -
Page 54: Using The Standby Reception
To activate Road Traffic News Standby Reception (and TA Standby Reception): TP indicator (either lights up or flashes) • If the TP indicator lights up, Road Traffic News Standby Reception (or TA Standby Select a preset number. Reception) is activated. –... - Page 55 Using Announcement Standby Reception Announcement Standby Reception allows the unit to switch temporarily to your favorite service (Announcement type) from any source except AM. To select your favorite announcement type for Select an announcement type. Announcement Standby Reception Travel: Programmes about travel You can select your favorite announcement destinations, package tours, and type for Announcement Standby Reception.
-
Page 56: Tracing The Same Programme -Alternative Reception
Using PTY Standby Reception PTY Standby Reception allows the unit to switch temporarily to your favorite programme (PTY: Programme Type) from any source except AM stations • Operations are exactly the same as explained Announcement type on pages 14 and 15 for FM RDS stations. (Travel, Warning, etc.) •... -
Page 57: Changing The Display Pattern
○ ○ ○ ○ ○ ○ ○ ○ ○ Changing the display pattern The last selected item appears. DAB Tuner Operation screen Service label Ensemble label Select “TUNER.” Now “PTY Stnby” setting appears. Preset number Lights when receiving a if any service providing Dynamic Label Segment (DLS—DAB radio text). -
Page 58: Maintenance
Maintenance How to clean the touch panel How to handle discs Center holder When removing stains or dust on the surface, When removing a disc from turn off the power, then wipe with dry soft its case, press down the center cloth. -
Page 59: More About This Receiver
More about This Receiver ○ ○ ○ ○ ○ ○ ○ ○ ○ ○ ○ ○ ○ ○ ○ ○ ○ ○ Basic Operations Tuner Operations General Storing stations in memory • The clock in the “BACK” icon on the screen •... - Page 60 ○ ○ ○ ○ ○ ○ ○ ○ ○ Basic Disc Operations When playing a CD-R or CD-RW • Use only “finalized” CD-Rs or CD-RWs. General • Some CD-Rs or CD-RWs may not play back • This unit has been designed to reproduce on this unit because of their disc CDs/CD Texts, and CD-Rs (Recordable)/ characteristics, and for the following causes:...
- Page 61 ImageLink Storing your own sound modes • ImageLink will not work in the following • If you do not want to store your current cases: adjustment, but only to apply the adjustment – If no <jll> file is included in an MP3/WMA to the current playback source, press folder.
- Page 62 ○ ○ ○ ○ ○ ○ ○ ○ ○ ○ ○ ○ ○ ○ ○ ○ ○ ○ General Settings—PSM DAB Tuner Operations • “Auto Dimmer” may not work correctly on • PTY Standby Reception works for the DAB some vehicles, particularly on those having a tuner only using a Dynamic PTY, but not a control dial for dimming.
-
Page 63: Troubleshooting
Troubleshooting What appears to be trouble is not always • Disc cannot be recognized (“No Disc,” serious. Check the following points before “Loading Error,” or “Eject Error” calling a service center. flashes). ] The CD player may function incorrectly. and 0 at the same time Press General for more than 2 seconds to display the... - Page 64 • “No Files” appears for a while, then the • “Opening” and “Ending” cannot be disc ejects. selected. ] The current MP3/WMA disc does not ] If “KeyIn CFM” is set to “Off,” you contain any MP3/WMA tracks. cannot select them. •...
-
Page 65: Specifications
Specifications AUDIO AMPLIFIER SECTION [MW Tuner] Sensitivity: 20 µV Maximum Power Output: Front: 50 W per channel Selectivity: 65 dB Rear: 50 W per channel [LW Tuner] Continuous Power Output (RMS): Sensitivity: 50 µV 19 W per channel into 4 Ω, 40 Hz Front: to 20 000 Hz at no more than CD PLAYER SECTION... - Page 66 Having TROUBLE with operation? Please reset your unit Refer to page of How to reset your unit Haben Sie PROBLEME mit dem Betrieb? Bitte setzen Sie Ihr Gerät zurück Siehe Seite Zurücksetzen des Geräts Vous avez des PROBLÈMES de fonctionnement? Réinitialisez votre appareil Référez-vous à...
- Page 67 JVC IN-CAR ENTERTAINMENT dealer or brauchen, wenden Sie sich an ihren JVC inbouwpakketten contact op met uw JVC car audio a company supplying kits. Autoradiohändler oder ein Unternehmen das d’autoradios JVC ou une compagnie dealer of een dealer of een bedrijf dat •...
-
Page 68: Electrical Connections
JVC IN-CAR ENTERTAINMENT dealer. Nennleistung ersetzen. Brennt die Sicherung • Remplacer le fusible par un de la valeur doorslaat, moet u uw JVC car audio dealer • It is recommended to connect to the speakers häufig durch, wenden Sie sich an ihren JVC précisée. - Page 69 NEDERLANDS ENGLISH DEUTSCH FRANÇAIS If your car is equipped with the ISO connector For some VW/Audi or Opel (Vauxhall) automobile Wenn Ihr Auto mit ISO-Steckern ausgestattet ist Für manche VW/Audi oder Opel (Vauxhall) Fahrzeuge Si votre voiture est équippée d’un connecteur ISO Pour certaine voiture VW/Audi ou Opel (Vauxhall) Indien uw auto is uitgerust met de ISO-connector Voor bepaalde modellen VW/Audi of Opel (Vauxhall) geldt...
- Page 70 If your car is equipped with the steering wheel remote controller, you can operate this receiver using the Radio-Lenkrad-Fernbedienungsadaption controller. To do it, a JVC’s OE remote adapter (not supplied) which matches with your car is required. (nicht im Lieferumfang enthalten) Steering wheel remote input Consult your JVC IN-CAR ENTERTAINMENT dealer for details.
- Page 71 CD RECEIVER RECEPTOR CON CD RECEPTEUR CD CD RECE∑VER KD-LHX502/KD-LHX501 This unit is equipped with the display demonstration. To cancel it, see page 7. Esta unidad está equipada con la demostración en indicación. Para cancelarla, consulte la página 7. Cet appareil est équipé d’une démonstration des affichages. Pour l’annuler, référez- vous à...
- Page 72 Thank you for purchasing a JVC product. Please read all instructions carefully before operation, to ensure your complete understanding and to obtain the best possible performance from the unit. IMPORTANT FOR LASER PRODUCTS 1. CLASS 1 LASER PRODUCT 2. CAUTION: Do not open the top cover. There are no user serviceable parts inside the unit;...
- Page 73 Contents How to reset your unit ........2 General Settings—PSM ......33 Basic procedure ..........33 Location of the Buttons ......... 4 Selecting the dimmer mode ......38 Basic Operations ..........6 Changing the display color ......39 Canceling the display demonstration ....7 Other Main Functions .........
-
Page 74: Location Of The Buttons
Location of the Buttons Control panel T/P button Activates or deactivates TA Standby (Standby/On/Attenuator) button Reception (and Road Traffic News Turns on and off the power, and also attenuates Standby Reception). the sounds. 0 (eject) button Remote VOLUME+/– button Open the control panel (and eject the sensor* Adjust the volume level. - Page 75 Remote controller (Standby/On/Attenuator) button ANGLE button Adjust the control panel angle. BAND button SOURCE button Select the band for FM/AM and Select the source. DAB. 5/∞ buttons 4/¢ buttons • Change the preset stations. • Searches for stations (or • Change the services for ensembles)—Auto Search, if DAB.
-
Page 76: Basic Operations
Basic Operations Turn on the power Adjust the volume Hold Hold The Operation screen for last selected source is recalled. Select the source Adjust the sound You can also change the source by..• For details, see pages 24 to 26. When operating the touch panel Make sure to touch the area inside the key icon boundary, but not on the boundary. -
Page 77: Canceling The Display Demonstration
What information is shown on the touch panel The following information are shown commonly for all sources. • If you press DISP on the control panel, the touch panel will show the different information or different screens. (Details about this will be explained later separately for each source.) Current source Current source i-EQ setting... -
Page 78: Setting The Clock
Exit Select “Clock Min.” To activate the display demonstration, repeat the same procedure and select any one other than “Off” in step 3 . • For more details, see “To show the display demonstration” on page 35. ○ ○ ○ ○ ○ ○ ○ ○ ○ Adjust the minute. -
Page 79: Radio Operations
Radio Operations ○ ○ ○ ○ ○ ○ ○ ○ Listening to the radio Start searching for a station Select the Tuner You can also change the source by..“Auto Search” begins. When a station is received, searching stops. Then just wait. To stop searching, press the same icon. -
Page 80: Storing Stations In Memory
When an FM stereo broadcast is hard to Hold receive: Local FM stations with the strongest signals are searched and stored automatically in the selected FM band. Manual presetting Ex. Storing an FM station of 92.5 MHz into the preset number 1 of the FM1 band. Reception improves, but stereo (in this example, FM1) effect will be lost. -
Page 81: Tuning In To A Preset Station
○ ○ ○ ○ ○ ○ ○ ○ ○ ○ ○ ○ ○ ○ ○ ○ ○ ○ Tuning in to a preset station Changing the display pattern Select a preset Tuner Operation screen number. Station name (PS) for FM RDS stations To select a preset station using the Preset Station List •... -
Page 82: Fm Rds Operations
FM RDS Operations ○ ○ ○ ○ ○ ○ ○ ○ Searching for your favorite Select “PTY SEARCH” ○ ○ ○ ○ ○ ○ ○ ○ programme You can tune in to a station broadcasting Preset PTY Code List your favorite programme by searching for a appears (see below). - Page 83 What you can do with RDS RDS (Radio Data System) allows FM stations to send an additional signal along with their regular programme signals. For example, the stations send their station names, as well as information about what type of programme they broadcast, such as sports or music, etc. By receiving the RDS data, this unit can do the following: •...
-
Page 84: Using The Standby Reception
○ ○ ○ ○ ○ ○ ○ ○ ○ Using the Standby Reception Using PTY Standby Reception PTY Standby Reception allows the unit to You can use two types of Standby Reception— switch temporarily to your favorite programme TA Standby Reception and PTY Standby (PTY: Programme Type) from any source other Reception. -
Page 85: Tracking The Same Programme
○ ○ ○ ○ ○ ○ ○ ○ ○ Tracking the same programme— To activate PTY Standby Reception • After activating PTY Standby Reception, you ○ ○ ○ ○ ○ ○ ○ ○ ○ Network-Tracking Reception can change the source without canceling PTY Standby Reception (except to AM). -
Page 86: Using Programme Search
Exit Select “TUNER.” Now “PTY Stnby” setting appears. AF or REG indicator ○ ○ ○ ○ ○ ○ ○ ○ ○ Using Programme Search When you select a preset station, the station of Select “AF-Regn’l.” the frequency stored is tuned in. However, when the preset station is an RDS station, something different will happen with Programme Search activated. - Page 87 Exit Select “P-Search.” To deactivate Programme Search, follow the procedure above and select “Off” in step 5 . Select “On.” Activates Programme Search. Off: Cancels the Search. PTY codes News: News Social: Programmes on social activities Affairs: Topical programmes expanding on Religion: Programmes dealing with any current news or affairs aspect of belief or faith, or the...
-
Page 88: Basic Disc Operations
Basic Disc Operations To fast-forward or reverse the track: Open the control panel The unit turns on, then... Hold Hold To go to the next or previous tracks: Insert a disc To go to the next or previous folders: The unit draws the disc, the control panel For MP3/WMA discs only: closes then goes back to the previous position (see page 42), and playback starts... - Page 89 About MP3 and WMA discs ® Level 1 Level 2 Level 3 Level 4 Level 5 MP3 and WMA (Windows Media Audio) “tracks” (words “file” and “track” are used interchangeably) are recorded in “folders.” ROOT “Root” is similar to the root of a tree. Every track and folder can be linked to and be accessed from the root.
-
Page 90: Advanced Disc Operations
Advanced Disc Operations ○ ○ ○ ○ ○ ○ ○ ○ ○ Locating a track or folder on a disc • If you select the currently selected folder (highlighted on the screen), the File List To locate a folder on the screen (only screen (see step 3 below), then you can for MP3/WMA discs) select a track to start with. -
Page 91: Prohibiting Disc Ejection
To locate a track (or folder) directly using the remote controller • To select a track (or folder for MP3 and WMA discs) number from 1 – 6: (3 times) First time you press “+10” or “–10,” the track skips to the nearest higher or lower •... -
Page 92: Selecting Playback Modes
○ ○ ○ ○ ○ ○ ○ ○ ○ Selecting playback modes To play back tracks repeatedly (Repeat Play) You can use only one of the following playback You can repeat playback. modes at a time. To play back only intros (Intro Scan) You can play back the first 15 seconds of each track sequentially. -
Page 93: Changing The Display Pattern
○ ○ ○ ○ ○ ○ ○ ○ ○ Changing the display pattern To play back tracks at random (Random Play) You can play back tracks at random. Disc Operation screen Folder Disc Clock time is enlarged. Mode Plays randomly Folder* : All tracks of the current folder, then moves to the next folder and so on. -
Page 94: Sound Adjustments
Sound Adjustments ○ ○ ○ ○ ○ ○ ○ ○ Setting the basic sound selection Adjust the item ○ ○ ○ ○ ○ ○ ○ ○ menu—SEL To adjust fader and balance: Show the Main Menu To select the cutoff frequency and adjust Show the basic sound the subwoofer output level: selection menu... -
Page 95: Selecting Preset Sound Modes
○ ○ ○ ○ ○ ○ ○ ○ ○ To adjust subwoofer output—SUB OUT: Selecting preset sound modes Select an appropriate cutoff frequency level ○ ○ ○ ○ ○ ○ ○ ○ ○ (i-EQ: intelligent equalizer) according to the subwoofer connected. You can select a sound mode suitable to the music genre. -
Page 96: Storing Your Own Sound Modes
○ ○ ○ ○ ○ ○ ○ ○ ○ Storing your own sound modes Repeat steps 2 and 3 to adjust the other frequency bands. You can adjust the sound modes and store your own adjustments in memory. Repeat steps 1 to 3 on page 25 to select a sound mode you want to adjust. -
Page 97: Graphic Displays
Graphic Displays ○ ○ ○ ○ ○ ○ ○ ○ Basic procedure Show the Main Menu Before starting the following procedure, prepare a CD-R including still images (pictures) and animations (movies). • With Image Converter (Wide) included in the supplied CD-ROM, you can create your own images and animations. -
Page 98: Downloading The File For "Opening/ Ending/Movie
IMPORTANT: • Refer to Image Converter PDF files included in the “Manual” folder of the supplied CD- ROM. • Still images (pictures) should have <jll>, and animations (movies) should have <jla> as their extension code in their file names. • Before you download or delete the files, observe the following: –... -
Page 99: Downloading The Files For "Picture
To delete the stored animation: Repeat steps 1 to 4 on page 27, then in step 5 ... Only the folders including the <jll> files are shown. (once for the Select a folder. currently selected; twice for the others) File name of the stored file appears. Select a file. - Page 100 Download more files if you want. • To select a file from the same folder: Delete more files if you want. • To select a file from another folder: Repeat steps 3 to 5 . Select a file. After deleting all the files you do not After downloading all the files you want...
-
Page 101: Deleting All Files
○ ○ ○ ○ ○ ○ ○ ○ ○ Deleting all files You can easily delete all files—animations and pictures stored for “OPENING/ENDING/ MOVIE/PICTURE.” Select “MOVIE.” Now “Demo” setting appears. Select “Opening” or “Ending.” Select “User.” Default: Factory-preset animation is used. User: Your own animation is used. - Page 102 To select a still image for “UserPict.” • If “UserPict.” is not selected for “Graphics” you cannot select “UserPict.” in step 4 below. Select “MOVIE.” Now “Demo” setting appears . The last selected item appears. Select “Graphics.” Select “MOVIE.” Now “Demo” setting appears .
-
Page 103: General Settings-Psm
General Settings—PSM ○ ○ ○ ○ ○ ○ ○ ○ Basic procedure Select a PSM item You can change the Preferred Setting Mode (PSM) items listed on the table that follows. • The PSM items are grouped into six categories—MOVIE, CLOCK, DISP (display), TUNER, AUDIO, and COLOR. - Page 104 PSM items Selectable settings Initial Pages All Time ImageLink Demo Demonstration Interval 7, 35 Interval UserMovie UserPict. Graphics Graphics UserPict. UserSlide KeyIn CFM Key-in confirmation Opening Opening screen Default User Default Ending Ending screen Default User Default UserPict. User picture First stored From the stored files Clock Hr...
- Page 105 PSM items Selectable settings Initial Pages Beep Voice Voice support system Voice VSS Level VSS level Deutsch English Language Language English Français Ext Input External Input Changer Line In Changer Muting2 Muting1 Telephone Telephone mute Amp Gain Amp gain control High PWR Low PWR High PWR...
- Page 106 To select the scroll mode—Scroll To turn the tag display on or off—Tag The entire text information is shown by An MP3 and WMA track can contain track scrolling if it cannot be shown at a time. information called “Tag” where its album •...
- Page 107 • Changer: To use a JVC CD changer. interference noise will be reduced. • Line In: To use any external component. (But the stereo effect will also be To select the telephone muting lost.)
-
Page 108: Selecting The Dimmer Mode
○ ○ ○ ○ ○ ○ ○ ○ ○ Selecting the dimmer mode You can dim the display at night automatically or as you set the timer. Select “From–To.” Set the dimmer start time. The last selected item appears. Select “DISP.” Now “Scroll”... -
Page 109: Changing The Display Color
○ ○ ○ ○ ○ ○ ○ ○ ○ Changing the display color You can select your favorite color for each source (or for all sources). Setting the desired color for the source Select the color. O Aqua O Sky O Sea O Every* Leaves O Grass O Apple O Rose O Amber O Honey O Violet O Grape O... - Page 110 Creating your own color—User Adjust the selected user color. You can create your own colors—“USER DAY” and “USER NIGHT,” and select them for the display color. • USER DAY: Can be used as your user color during the day time*. •...
-
Page 111: Other Main Functions
Other Main Functions ○ ○ ○ ○ ○ ○ ○ ○ ○ Assigning titles to the sources You can assign titles 40 CDs (both in this unit and in the CD changer) and the external component. Select a character. Source Maximum number CDs: 32 characters... -
Page 112: Changing The Control Panel Angle
○ ○ ○ ○ ○ ○ ○ ○ ○ ○ ○ ○ ○ ○ ○ ○ ○ ○ Detaching the control panel Changing the control panel angle • When detaching and attaching the control You can change the angle of the control panel. panel, be careful not to damage the connectors. -
Page 113: Basic Cd Changer Operations
Basic CD Changer Operations With JVC MP3-compatible CD changer To fast-forward or reverse the track: connected, you can play back your original CD-Rs and CD-RWs recorded either in audio CD format or in MP3 format. Select CD changer Hold Hold... - Page 114 (track) indicator appears instead of the track name. Before operating your CD changer: It is recommended to use the JVC MP3- compatible CD changer with your unit. • Refer also to the Instructions supplied with • You can also connect the CH-X series your CD changer.
-
Page 115: Advanced Cd Changer Operations
Hold Main touch panels used in this section CD Changer Mode screen Disc List screen* Works only when JVC MP3 compatible CD changer (CH-X1500) is connected. The lists show the disc names actually recorded or assigned (the first 8 characters, Appears only for MP3 discs. -
Page 116: Locating A Track Or Folder On A Disc
Main touch panels used in this section File (Track) List screen (only for MP3)* Folder List screen (only for MP3)* The lists show the folder/file names actually recorded (the first 8 characters). Press to go to the next list; hold to go back to •... - Page 117 You can quickly reach a desired track on a disc including many tracks. • This operation is only possible when using a JVC MP3 compatible CD changer (CH-X1500) . • For MP3 discs, you can select only a track within the current folder.
-
Page 118: Selecting Playback Modes
○ ○ ○ ○ ○ ○ ○ ○ ○ Selecting playback modes To play back tracks repeatedly (Repeat Play) You can use only one of the following playback You can repeat playback. modes at a time. To play back only intros (Intro Scan) You can play back the first 15 seconds of each track sequentially. -
Page 119: Changing The Display Pattern
○ ○ ○ ○ ○ ○ ○ ○ ○ To play back tracks at random (Random Changing the display pattern Play) You can play back tracks at random. CD Changer Operation screen Folder Disc Mode Plays randomly Clock time is enlarged. Folder* : All tracks of the current folder, then moves to the next folder and so on. -
Page 120: External Component Operations
External Component Operations You can connect the external component Adjust the volume to the CD changer jack on the rear using the special adapter for the component (not Hold Hold supplied). See the Installation/Connection Manual (separate volume). • Before operating the external component, select the “Ext Input”... -
Page 121: Dab Tuner Operations
DAB Tuner Operations ○ ○ ○ ○ ○ ○ ○ ○ Listening to the DAB tuner Start searching for an ensemble Select the DAB Tuner You can also change the source by..“Auto Search” begins. When a station is received, searching stops. Then just wait. - Page 122 (services) broadcast at the same time. It is recommended to use DAB (Digital Audio Broadcasting) tuner KT-DB1500 or KT-DB1000 with this unit. If you have another DAB tuner, consult your JVC IN-CAR ENTERTAINMENT dealer. • Refer also to the Instructions supplied with your DAB tuner.
-
Page 123: Storing Dab Services In Memory
To search for your favorite service You can search for any one of the PTY codes (either Dynamic or Static PTY). • Operations are exactly the same as explained on pages 12 and 13 for FM RDS stations. • You cannot store PTY codes separately for the DAB tuner and for the FM tuner. -
Page 124: Using The Standby Reception
To activate Road Traffic News Standby Reception (and TA Standby Reception): TP indicator (either lights up or flashes) • If the TP indicator lights up, Road Traffic News Standby Reception (or TA Standby Select a preset number. Reception) is activated. –... - Page 125 Using Announcement Standby Reception Announcement Standby Reception allows the unit to switch temporarily to your favorite service (Announcement type) from any source except AM. To select your favorite announcement type for Select an announcement type. Announcement Standby Reception Travel: Programmes about travel You can select your favorite announcement destinations, package tours, and type for Announcement Standby Reception.
-
Page 126: Tracing The Same Programme
Using PTY Standby Reception PTY Standby Reception allows the unit to switch temporarily to your favorite programme (PTY: Programme Type) from any source except AM stations • Operations are exactly the same as explained Announcement type on pages 14 and 15 for FM RDS stations. (Travel, Warning, etc.) •... -
Page 127: Changing The Display Pattern
○ ○ ○ ○ ○ ○ ○ ○ ○ Changing the display pattern The last selected item appears. DAB Tuner Operation screen Service label Ensemble label Select “TUNER.” Now “PTY Stnby” setting appears. Preset number Lights when receiving a if any service providing Dynamic Label Segment (DLS—DAB radio text). -
Page 128: Maintenance
Maintenance How to clean the touch panel How to handle discs Center holder When removing stains or dust on the surface, When removing a disc from turn off the power, then wipe with dry soft its case, press down the center cloth. -
Page 129: More About This Receiver
More about This Receiver ○ ○ ○ ○ ○ ○ ○ ○ ○ ○ ○ ○ ○ ○ ○ ○ ○ ○ Basic Operations Tuner Operations General Storing stations in memory • The clock in the “BACK” icon on the screen •... - Page 130 ○ ○ ○ ○ ○ ○ ○ ○ ○ Basic Disc Operations When playing a CD-R or CD-RW • Use only “finalized” CD-Rs or CD-RWs. General • Some CD-Rs or CD-RWs may not play back • This unit has been designed to reproduce on this unit because of their disc CDs/CD Texts, and CD-Rs (Recordable)/ characteristics, and for the following causes:...
- Page 131 ImageLink Storing your own sound modes • ImageLink will not work in the following • If you do not want to store your current cases: adjustment, but only to apply the adjustment – If no <jll> file is included in an MP3/WMA to the current playback source, press folder.
- Page 132 ○ ○ ○ ○ ○ ○ ○ ○ ○ ○ ○ ○ ○ ○ ○ ○ ○ ○ General Settings—PSM DAB Tuner Operations • “Auto Dimmer” may not work correctly on • PTY Standby Reception works for the DAB some vehicles, particularly on those having a tuner only using a Dynamic PTY, but not a control dial for dimming.
-
Page 133: Troubleshooting
Troubleshooting What appears to be trouble is not always • Disc cannot be recognized (“No Disc,” serious. Check the following points before “Loading Error,” or “Eject Error” calling a service center. flashes). ] The CD player may function incorrectly. and 0 at the same time Press General for more than 2 seconds to display the... - Page 134 • “No Files” appears for a while, then the • “Opening” and “Ending” cannot be disc ejects. selected. ] The current MP3/WMA disc does not ] If “KeyIn CFM” is set to “Off,” you contain any MP3/WMA tracks. cannot select them. •...
-
Page 135: Specifications
Specifications AUDIO AMPLIFIER SECTION [MW Tuner] Sensitivity: 20 µV Maximum Power Output: Front: 50 W per channel Selectivity: 65 dB Rear: 50 W per channel [LW Tuner] Continuous Power Output (RMS): Sensitivity: 50 µV 19 W per channel into 4 Ω, 40 Hz Front: to 20 000 Hz at no more than CD PLAYER SECTION... - Page 136 Having TROUBLE with operation? Please reset your unit Refer to page of How to reset your unit ¿Tiene PROBLEMAS con la operación? Por favor reinicialice su unidad Consulte la páfina de Cómo reposicionar su unidad Vous avez des PROBLÈMES de fonctionnement? Réinitialisez votre appareil Référez-vous à...
- Page 137 JVC de equipos de audio para automóviles o a d’autoradios JVC ou une compagnie • Bu ünitenin gerekti∂i gibi nasΩl monte d’approvisionnement.
- Page 138 50 W (both concesionario de JVC de equipos de audio votre revendeur d’autoradios JVC. • Maksimum gücü 50 W’den daha fazla alan hoparlörlere (hem önde hem de arkada, 4 Ω ila 8 Ω...
- Page 139 ENGLISH ESPAÑOL FRANÇAIS TÜRKÇE AINMENT dealers. If your car is equipped with the ISO connector For some VW/Audi or Opel (Vauxhall) automobile Si su automóvil está equipado con el conector ISO Para algunos automóviles VW/Audi u Opel (Vauxhall) Si votre voiture est équippée d’un connecteur ISO Pour certaine voiture VW/Audi ou Opel (Vauxhall) TaπΩtΩnΩzda ISO konektörü...
- Page 140 Adaptador para control remoto OE (no suministrado) Entrada del control remoto del volante controller. To do it, a JVC’s OE remote adapter (not supplied) which matches with your car is required. Adaptateur pour télécommande au volant (non fourni) de dirección Consult your JVC IN-CAR ENTERTAINMENT dealer for details.
Need help?
Do you have a question about the KD-LHX502 and is the answer not in the manual?
Questions and answers