Table of Contents
Advertisement
Quick Links
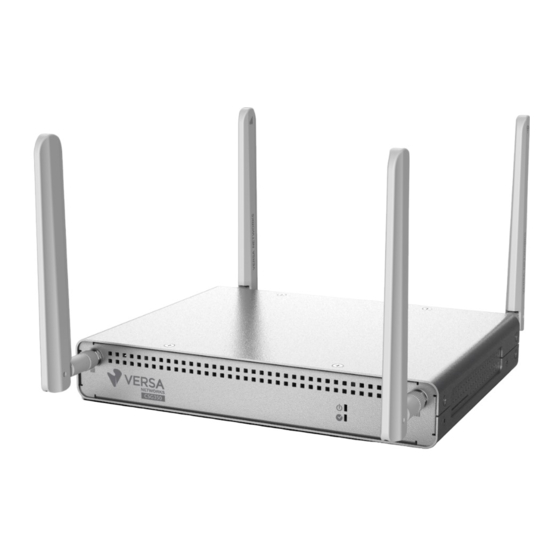
Cloud Services Gateway 300 Series
At a Glance
The Versa Cloud Services Gateway (CSG) 300 series appliances deliver highly secure site-to-site data connectivity to
small businesses and to home offices.
These appliances provide the following features:
• Support for different CPUs and memory sizes:
• Management Ethernet ports with dual use and dedicated options:
◦ One RJ45 RS-232 console port
◦ One USB 2.0 management port for plugging in external LTE or WiFi modems
◦ One copper Gigabit Ethernet dual-purpose port for data and management
• MDI and MDIX autoswitchable copper Gigabit Ethernet ports
• PoE source support on four Ethernet ports, with network interface card (NIC) module add-on
• Wireless options:
• CSG350–Two built-in wireless slots
• CSG355 and CSG365–Two LTE slots and one dedicated built-in wireless slot
• External AC power supply
• Fan for cooling
• Desktop mount, or rack-mountable in a 19" rack (CSG355 and CSG365 only)
CSG300 Appliance Models
The CSG300 appliances are available in the following models:
• CSG350—Compact and optimized appliance for deployment in small branches (up to 75 users) that require
advanced application and cloud intelligence with hierarchical QoS and that provide a cost-effective SD-WAN
solution.
• CSG355–Powerful appliance for deployment in both small- and medium-sized branches that require advanced SD-
Security (NGFW and UTM) along with comprehensive advanced application and cloud-intelligent SD-WAN services
on premises.
• CSG365—High-performance, powerful appliance for deployment at medium-sized branch locations that
require advanced application and cloud-intelligent SD-WAN services and advanced SD-Security (NGFW and UTM).
https://docs.versa-networks.com/Versa_Internal/WIP/Antony/Cloud_Services_Gateway_300_Series
Updated: Tue, 01 Dec 2020 03:50:36 GMT
Copyright © 2020, Versa Networks, Inc.
1
Advertisement
Table of Contents

Related Manuals for Versa Networks CSG 300 Series


Summary of Contents for Versa Networks CSG 300 Series
- Page 1 • CSG365—High-performance, powerful appliance for deployment at medium-sized branch locations that require advanced application and cloud-intelligent SD-WAN services and advanced SD-Security (NGFW and UTM). https://docs.versa-networks.com/Versa_Internal/WIP/Antony/Cloud_Services_Gateway_300_Series Updated: Tue, 01 Dec 2020 03:50:36 GMT Copyright © 2020, Versa Networks, Inc.
-
Page 2: Chassis Views
The rear panel has the power and reset buttons and various connectors and ports. Figure 1: Front Panel of the CSG350 Appliance Figure 2: Rear Panel of the CSG350 Appliance https://docs.versa-networks.com/Versa_Internal/WIP/Antony/Cloud_Services_Gateway_300_Series Updated: Tue, 01 Dec 2020 03:50:36 GMT Copyright © 2020, Versa Networks, Inc. - Page 3 A CSG300 series appliance chassis is made of aluminum for optimal heat dissipation. This article lists the chassis and regulatory compliance specifications for the CSG300 series appliance. It also lists certifications and export control classification numbers (ECCNs) for the appliance. https://docs.versa-networks.com/Versa_Internal/WIP/Antony/Cloud_Services_Gateway_300_Series Updated: Tue, 01 Dec 2020 03:50:36 GMT Copyright © 2020, Versa Networks, Inc.
-
Page 4: Chassis Specifications
5.91" (152 mm) 2.75 lb (1.25 kg) Chassis weight Chassis weight with installation kit: 3.96 lb (1.8 kg) maximum Package Specifications Package height 7" (17.78 cm) https://docs.versa-networks.com/Versa_Internal/WIP/Antony/Cloud_Services_Gateway_300_Series Updated: Tue, 01 Dec 2020 03:50:36 GMT Copyright © 2020, Versa Networks, Inc. - Page 5 Minimum of 70,000 hours CSG355 and CSG365 Appliance Table 2 lists the specifications for the CSG355 and CSG365 appliance chassis. Table 2: CSG355 and CSG365 Chassis Specifications https://docs.versa-networks.com/Versa_Internal/WIP/Antony/Cloud_Services_Gateway_300_Series Updated: Tue, 01 Dec 2020 03:50:36 GMT Copyright © 2020, Versa Networks, Inc.
- Page 6 Chassis weight with installation kit: 5.5 lb (2.5 kg) maximum Package Specifications Package height 7" (17.78 cm) Package width 16.7" (42.4 cm) Package depth 12" (30.48 cm) https://docs.versa-networks.com/Versa_Internal/WIP/Antony/Cloud_Services_Gateway_300_Series Updated: Tue, 01 Dec 2020 03:50:36 GMT Copyright © 2020, Versa Networks, Inc.
- Page 7 • 2LA—2 LTE modules (North America) • 2LB—2 LTE modules (APAC) • LA—1 LTE module (North America) • LB—1 LTE module (APAC) • W—1 WiFi Module https://docs.versa-networks.com/Versa_Internal/WIP/Antony/Cloud_Services_Gateway_300_Series Updated: Tue, 01 Dec 2020 03:50:36 GMT Copyright © 2020, Versa Networks, Inc.
-
Page 8: Regulatory Compliance
• EN 301 489-17 (Bluetooth) Europe • EN 50385 MPE (SAR Evaluation) • EN 55032 • EN 60950-1 CE (LVD) America • FCC 47 CFR Part 15B https://docs.versa-networks.com/Versa_Internal/WIP/Antony/Cloud_Services_Gateway_300_Series Updated: Tue, 01 Dec 2020 03:50:36 GMT Copyright © 2020, Versa Networks, Inc. -
Page 9: Front And Rear Panel Components
The front panel of a CSG300 series appliance has two status LEDs. LEDs Table 1 lists the LEDs, their colors and states, and the status they indicate. Table 1: Front Panel LEDs in a CSG300 Series Appliance https://docs.versa-networks.com/Versa_Internal/WIP/Antony/Cloud_Services_Gateway_300_Series Updated: Tue, 01 Dec 2020 03:50:36 GMT Copyright © 2020, Versa Networks, Inc. -
Page 10: Rear Panel
The rear panel of a CSG300 series appliance has six LEDs, located in two rows. Table 2 lists the LEDs, their color and states, and the status they indicate. Table 2: Rear Panel LEDs in a CSG300 Series Appliance https://docs.versa-networks.com/Versa_Internal/WIP/Antony/Cloud_Services_Gateway_300_Series Updated: Tue, 01 Dec 2020 03:50:36 GMT Copyright © 2020, Versa Networks, Inc. -
Page 11: Sim Card Slots
To turn the power off, press the Power button when the appliance is on, as follows: • If you press and immediately release the button, the appliance does a graceful software shutdown that is equivalent https://docs.versa-networks.com/Versa_Internal/WIP/Antony/Cloud_Services_Gateway_300_Series Updated: Tue, 01 Dec 2020 03:50:36 GMT Copyright © 2020, Versa Networks, Inc. -
Page 12: Reset Button
IP address 10.10.10.10/24. Configure the PC IP address to any IP from this segment, for example, 10.10.10.1/24. Open an SSH session to the appliance using its IP address, 10.10.10.10. https://docs.versa-networks.com/Versa_Internal/WIP/Antony/Cloud_Services_Gateway_300_Series Updated: Tue, 01 Dec 2020 03:50:36 GMT Copyright © 2020, Versa Networks, Inc. -
Page 13: Additional Information
Running, [*] process 6093 versa-auditd is Running, [*] process 6116 versa-nodejs is Running, [-] process 5775 5. Power off the appliance. Additional Information Factory Default Settings for Branch Devices https://docs.versa-networks.com/Versa_Internal/WIP/Antony/Cloud_Services_Gateway_300_Series Updated: Tue, 01 Dec 2020 03:50:36 GMT Copyright © 2020, Versa Networks, Inc. - Page 14 Figure 2 shows the four RJ-45 connectors slots for the 1-GB Copper GE combination port. Figure 2: CSG355 RJ-45 Connectors for 1-GB Copper GE Combination Port https://docs.versa-networks.com/Versa_Internal/WIP/Antony/Cloud_Services_Gateway_300_Series Updated: Tue, 01 Dec 2020 03:50:36 GMT Copyright © 2020, Versa Networks, Inc.
- Page 15 • Connects to most global carriers' network depending on the SIM card inserted. For example, if the SIM card inserted is from Carrier A, the modem autodetects the SIM card and connects to Carrier A's network. https://docs.versa-networks.com/Versa_Internal/WIP/Antony/Cloud_Services_Gateway_300_Series Updated: Tue, 01 Dec 2020 03:50:36 GMT Copyright © 2020, Versa Networks, Inc.
- Page 16 SIM slot or two SIM slots. For modules with one SIM slot, you insert the SIM card into the SIM1 slot, which is on the back of the appliance. For modules with two SIM slots, you insert a SIM card into each of the two SIM slots, which are https://docs.versa-networks.com/Versa_Internal/WIP/Antony/Cloud_Services_Gateway_300_Series Updated: Tue, 01 Dec 2020 03:50:36 GMT Copyright © 2020, Versa Networks, Inc.
- Page 17 (WRR). In addition, the WiFi AP module has a built-in QoS feature that prioritizes and manages over-the-air traffic. It also has built-in spectrum analyzer capabilities to detect rogue frequencies in an environment. https://docs.versa-networks.com/Versa_Internal/WIP/Antony/Cloud_Services_Gateway_300_Series Updated: Tue, 01 Dec 2020 03:50:36 GMT Copyright © 2020, Versa Networks, Inc.
-
Page 18: Interface Numbering
Figure 2: CSG355 and CSG365 Port-to-VNI Mapping Power Supply and Airflow This article describes the AC power supply and airflow requirements for CSG300 appliances. https://docs.versa-networks.com/Versa_Internal/WIP/Antony/Cloud_Services_Gateway_300_Series Updated: Tue, 01 Dec 2020 03:50:36 GMT Copyright © 2020, Versa Networks, Inc. -
Page 19: Ac Power Supply
When you are installing or removing an appliance, ensure that you wear an ESD grounding wrist strap. To put the ESD grounding strap on properly, attach it to an ESD point and then place the other end of the strap https://docs.versa-networks.com/Versa_Internal/WIP/Antony/Cloud_Services_Gateway_300_Series Updated: Tue, 01 Dec 2020 03:50:36 GMT Copyright © 2020, Versa Networks, Inc. -
Page 20: Federal Communication Commission Interference Statement
This transmitter must not be collocated or operating in conjunction with any other antenna or transmitter. Radiation Exposure Statement https://docs.versa-networks.com/Versa_Internal/WIP/Antony/Cloud_Services_Gateway_300_Series Updated: Tue, 01 Dec 2020 03:50:36 GMT Copyright © 2020, Versa Networks, Inc. - Page 21 Le présent émetteur radio IC:2417C-EM7455 and 26338-CSGW1 a été approuvé par Innovation, Sciences et Développement économique Canada pour fonctionner avec les types d'antenne énumérés ci-dessous et ayant un gain https://docs.versa-networks.com/Versa_Internal/WIP/Antony/Cloud_Services_Gateway_300_Series Updated: Tue, 01 Dec 2020 03:50:36 GMT Copyright © 2020, Versa Networks, Inc.
-
Page 22: Prepare The Site For Installation
• Keep the area around the appliance free from dust and conductive material. • Follow ESD prevention procedures to avoid any damage to the appliance. https://docs.versa-networks.com/Versa_Internal/WIP/Antony/Cloud_Services_Gateway_300_Series Updated: Tue, 01 Dec 2020 03:50:36 GMT Copyright © 2020, Versa Networks, Inc. -
Page 23: Environmental Requirements
Install a CSG300 Series Appliance This article provides instructions about how to unpack a CSG300 series appliance and how to mount a CSG355 or CSG365 appliance in a 19-inch rack. https://docs.versa-networks.com/Versa_Internal/WIP/Antony/Cloud_Services_Gateway_300_Series Updated: Tue, 01 Dec 2020 03:50:36 GMT Copyright © 2020, Versa Networks, Inc. - Page 24 4. Remove the accessories from the accessories box. 5. Verify the components against the packing list that is included in the box. Figure 1: Unpack a CSG300 Series Appliance https://docs.versa-networks.com/Versa_Internal/WIP/Antony/Cloud_Services_Gateway_300_Series Updated: Tue, 01 Dec 2020 03:50:36 GMT Copyright © 2020, Versa Networks, Inc.
- Page 25 The cardboard carton in which a CSG300 series appliance is shipped contains a packing list. Check the packing list against the parts that you receive in the shipping carton. https://docs.versa-networks.com/Versa_Internal/WIP/Antony/Cloud_Services_Gateway_300_Series Updated: Tue, 01 Dec 2020 03:50:36 GMT Copyright © 2020, Versa Networks, Inc.
- Page 26 Mount a CSG355 or CSG365 Appliance in a Rack You can mount a CSG355 or CSG365 appliance in a four-post 19-inch rack. Two people are required to mount the appliance. https://docs.versa-networks.com/Versa_Internal/WIP/Antony/Cloud_Services_Gateway_300_Series Updated: Tue, 01 Dec 2020 03:50:36 GMT Copyright © 2020, Versa Networks, Inc.
- Page 27 4. Attach the two mounting ears to each side of the appliance chassis using the eight mounting ear screws that are shipped with the appliance. Use four screws to attach each mounting ear. Figure 3: Attach the Mounting Ears to a CSG300 Series Appliance https://docs.versa-networks.com/Versa_Internal/WIP/Antony/Cloud_Services_Gateway_300_Series Updated: Tue, 01 Dec 2020 03:50:36 GMT Copyright © 2020, Versa Networks, Inc.
- Page 28 7. Have the second person secure the mounting ears to the front of the rack using the rack-mount screws that are shipped with the appliance. Insert and then tighten the screws. Figure 5: Secure the Mounting Ears to the Rack https://docs.versa-networks.com/Versa_Internal/WIP/Antony/Cloud_Services_Gateway_300_Series Updated: Tue, 01 Dec 2020 03:50:36 GMT Copyright © 2020, Versa Networks, Inc.
- Page 29 2. Secure the grounding lug to the protective grounding terminal with washers and screws. Step 2: Connect AC Power to a CSG300 Series Appliance Before you begin connecting AC power to a CSG300 series appliance, ensure that you have: https://docs.versa-networks.com/Versa_Internal/WIP/Antony/Cloud_Services_Gateway_300_Series Updated: Tue, 01 Dec 2020 03:50:36 GMT Copyright © 2020, Versa Networks, Inc.
- Page 30 • Parity: None • Flow control: None To connect a management console to a CSG300 series appliance: 1. Open the PuTTY application. The PuTTY configuration window displays. https://docs.versa-networks.com/Versa_Internal/WIP/Antony/Cloud_Services_Gateway_300_Series Updated: Tue, 01 Dec 2020 03:50:36 GMT Copyright © 2020, Versa Networks, Inc.
- Page 31 2. In the Category navigation pane, click Session, and then in the Connection Type menu, click Serial. https://docs.versa-networks.com/Versa_Internal/WIP/Antony/Cloud_Services_Gateway_300_Series Updated: Tue, 01 Dec 2020 03:50:36 GMT Copyright © 2020, Versa Networks, Inc.
- Page 32 3. In the Category navigation pane, click Connection > Serial. The Options Controlling Local Serial Lines page displays. https://docs.versa-networks.com/Versa_Internal/WIP/Antony/Cloud_Services_Gateway_300_Series Updated: Tue, 01 Dec 2020 03:50:36 GMT Copyright © 2020, Versa Networks, Inc.
- Page 33 4. In the Serial Line To Connect To field, enter the COM port that your device is connected to. The default COM port is COM1. https://docs.versa-networks.com/Versa_Internal/WIP/Antony/Cloud_Services_Gateway_300_Series Updated: Tue, 01 Dec 2020 03:50:36 GMT Copyright © 2020, Versa Networks, Inc.
- Page 34 5. In the Configure the Serial Line section, enter the following information. https://docs.versa-networks.com/Versa_Internal/WIP/Antony/Cloud_Services_Gateway_300_Series Updated: Tue, 01 Dec 2020 03:50:36 GMT Copyright © 2020, Versa Networks, Inc.
- Page 35 In the Flow Control field, select None. This is the method of preventing data overflow. 6. Optionally, in the Category navigation pane, click Session, and then in the Saved Sessions field, enter a name to save the session settings. https://docs.versa-networks.com/Versa_Internal/WIP/Antony/Cloud_Services_Gateway_300_Series Updated: Tue, 01 Dec 2020 03:50:36 GMT Copyright © 2020, Versa Networks, Inc.
- Page 36 7. Click Save. 8. To open the session, click Open. https://docs.versa-networks.com/Versa_Internal/WIP/Antony/Cloud_Services_Gateway_300_Series Updated: Tue, 01 Dec 2020 03:50:36 GMT Copyright © 2020, Versa Networks, Inc.
- Page 37 9. Log in to the appliance CLI with the username "admin" and the password "versa123". https://docs.versa-networks.com/Versa_Internal/WIP/Antony/Cloud_Services_Gateway_300_Series Updated: Tue, 01 Dec 2020 03:50:36 GMT Copyright © 2020, Versa Networks, Inc.
- Page 38 1. Plug one end of the console cable into the console port located on the rear panel of the CSG300 series appliance. 2. Plug the other end of the cable into the console server or into a management console. https://docs.versa-networks.com/Versa_Internal/WIP/Antony/Cloud_Services_Gateway_300_Series Updated: Tue, 01 Dec 2020 03:50:36 GMT Copyright © 2020, Versa Networks, Inc.