Table of Contents
Advertisement
Quick Links
Support and E-Warranty Certificate https://www.vevor.com/support
INSTRUCTIONS FOR TOOL CABINET
ASSEMBLY
We continue to be committed to provide you tools with competitive price.
"Save Half", "Half Price" or any other similar expressions used by us only represents an
estimate of savings you might benefit from buying certain tools with us compared to the major
top brands and doses not necessarily mean to cover all categories of tools offered by us. You
are kindly reminded to verify carefully when you are placing an order with us if you are
actually saving half in comparison with the top major brands.
Advertisement
Table of Contents

Related Manuals for VEVOR GSC7100


Summary of Contents for VEVOR GSC7100
- Page 1 Support and E-Warranty Certificate https://www.vevor.com/support INSTRUCTIONS FOR TOOL CABINET ASSEMBLY We continue to be committed to provide you tools with competitive price. "Save Half", "Half Price" or any other similar expressions used by us only represents an estimate of savings you might benefit from buying certain tools with us compared to the major top brands and doses not necessarily mean to cover all categories of tools offered by us.
- Page 2 CustomerService@vevor.com This is the original instruction, please read all manual instructions carefully before operating. VEVOR reserves a clear interpretation of our user manual. The appearance of the product shall be subject to the product you received. Please forgive us that we won't inform you again if there are any technology or software updates on our product.
-
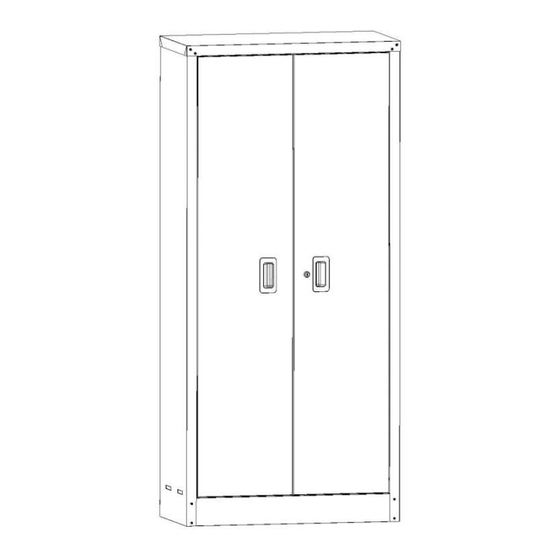
Page 3: Assembly Parts List
Please read instructions carefully before assembly. Warning-To reduce the risk of injury, user must read instructions manual carefully. Assembly Parts List Part Description Left back Right back Screw-ST4.2*10 Left side panel Right side panel Kickplate - 2 -... -
Page 4: Part Description
Bolt-M6*15 Part Description Bottom Top cover Shelf clip shelf Left door Right door Door stop ADDITIONAL TOOLS REQUIRED: 1.Phillips Head Screwdriver. 2. Rubber Mallet (or hammer with soft covering). SAFETY TIPS: 1. Please handle metal edges carefully. 2. Prepare a soft, level surface on ground level before commencing assembly. 3. -
Page 5: Instructions For Installation
Table of Parameters Items Description Name Tool Cabinet Model GSC7100 800×400×1750 mm External Dimensions 31.5×15.75×70 inch Package Size 1820×480×175 mm G.W. 43 kg Instructions for Installation STEP 1 ①Left back and ②right back align to holes of each, screw them with 8 screw-ST4.2*10(1). - Page 6 STEP 2 a)Remove the protective covers from left side panel(4) and right side panel(5). b) Left side panel(4)and right side panel (1)align to holes of each, screw them with 8 ST4.2*10 screws. STEP 3 Right side panel (5)and right back(2) align to holes of each, screw them with 8 ST4.2*10 screws.
- Page 7 STEP 4 Assemble the kickplate(6) on the inside between left side panel(4) and right side panel(5), aligns holes to two lateral plates, and secure them with 4 M6*15 bolts. STEP 5 Assemble bottom (8) to limit slot. STEP 6 Assemble top cover(9) to limit slot,aligns holes to 3 plates and secure it with 4 M6*15.
- Page 8 STEP 7 a)Fit the shelf clip(10) into the round hole. b)Stuck shelf(11)into the inside of the cabinet. - 7 -...
- Page 9 STEP 8 a) Press door stop(14) into the holes of the top cover and the bottom . b) Insert the pin at the bottom of the left door (12) into the bottom hole first,then insert the springlatch at the top of the left door into the top cover hole,and iInstall the right door (13) on the body in the same way.
- Page 10 Manufacturer:Zhongshan City CYZ Coating Tech.Co.,Ltd. Address:Plant1,No.78,Zhongheng Avenue,Baoyu Village, Henglan Town, Zhongshan City,Guangdong Province,China EUREP UK LTD UNIT 2264, 100 OCK STREET, ABINGDON OXFORDSHIRE ENGLAND OX14 5DH EUREP GmbH Unterlettenweg 1a, 85051 Ingolstadt, Germany Importer: WAITCHX Address: 250 bis boulevard Saint-Germain 75007 Paris Importer: FREE MOOD LTD Address: 2 Holywell Lane, London, England, EC2A 3ET MADE IN CHINA...
- Page 12 Support and E-Warranty Certificate https://www.vevor.com/support...
Need help?
Do you have a question about the GSC7100 and is the answer not in the manual?
Questions and answers