
Related Manuals for Klarstein BAROSSA 123 DUO


Summary of Contents for Klarstein BAROSSA 123 DUO
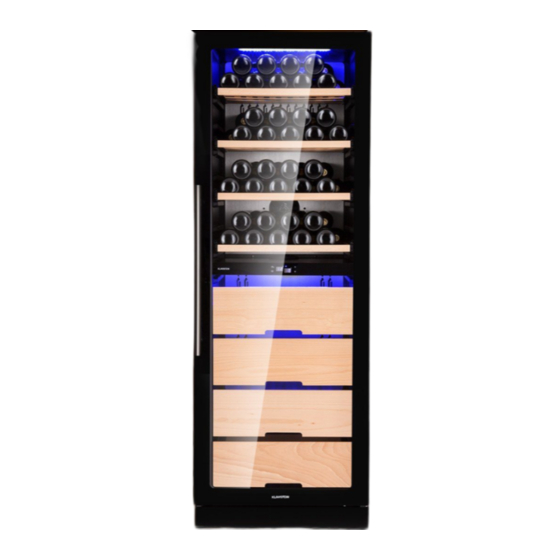
- Page 1 BAROSSA 123 DUO Weinkühlschrank Wine Cooler Vinoteca Cave à vin Frigorifero per vino 10040721 www.klarstein.com...
-
Page 3: Table Of Contents
Sehr geehrter Kunde, wir gratulieren Ihnen zum Erwerb Ihres Gerätes. Lesen Sie die folgenden Hinweise sorgfältig durch und befolgen Sie diese, um möglichen Schäden vorzubeugen. Für Schäden, die durch Missachtung der Hinweise und unsachgemäßen Gebrauch entstehen, übernehmen wir keine Haftung. Scannen Sie den folgenden QR-Code, um Zugriff auf die aktuellste Bedienungsanleitung und weitere Informationen rund um das Produkt zu erhalten. -
Page 4: Technische Daten
TECHNISCHE DATEN Artikelnummer 10040721 Stromversorgung 220-240 V ~ 50/60 Hz Kapazität 123 Flaschen Maße (B*T*H) (mm) 630 x 718 x 1797 Gewicht 130 kg Klimaklasse N/ST Geeignete Umgebungstemperatur 16-38 °C Art der Aufstellung freistehend... -
Page 5: Sicherheitshinweise
SICHERHEITSHINWEISE • Dieses Gerät ist nicht dafür bestimmt, durch Personen (einschließlich Kinder) mit eingeschränkten physischen, sensorischen oder geistigen Fähigkeiten oder mangels Erfahrung und mangels Wissen benutzt zu werden, es sei denn, sie werden durch eine für ihre Sicherheit zuständige Person beaufsichtigt oder erhielten von ihr Anweisungen, wie das Gerät zu benutzen ist. - Page 6 Um eine Kontamination von Getränken zu vermeiden, beachten Sie bitte die folgenden Anweisungen: • Ein längeres Öff nen der Tür kann zu einem deutlichen Temperaturanstieg in den Fächern des Gerätes führen. • Reinigen Sie regelmäßig Oberfl ächen, die mit Getränken in Berührung kommen können.
- Page 7 Besondere Hinweise zum korrekten Gebrauch • Dieses Gerät ist ausschließlich für die Lagerung von Wein bestimmt. • Dieses Gerät ist nicht für die Verwendung als Einbaugerät vorgesehen, außer es wird explizit in der Anleitung erwähnt. • Dieses Gerät ist nicht zum Einfrieren von Lebensmitteln geeignet. •...
-
Page 8: Installation
INSTALLATION Vor dem ersten Betrieb Lassen Sie das Gerät vor dem ersten Betrieb 24 Stunden lang stehen, damit sich das Kühlmittel verteilen kann. Lassen Sie die Tür in dieser Zeit offen, damit sich produktionsbedingter Geruch verflüchtigen kann. Hinweis: Alle Modelle ohne Frontbelüftung bzw. Belüftungsschlitze an der Front sind keine Einbaugeräte und müssen frei stehen. - Page 9 Einbau der Regale Öffnen Sie die Tür vollständig. Richten Sie die Noppen des Einlegebodens mit den Schienen-Kerben auf der rechten und linken Seite aus. Schieben Sie den Einlegeboden nach unten und dann ganz nach innen, bis der Einlegeboden vollständig im Inneren des Geräts liegt und Sie die Tür schließen können.
- Page 10 Wechsel der Türöffnungsseite Öffnen Sie die Tür, entfernen Sie die beiden Schrauben im unteren Scharnier und heben Sie die Tür heraus. Bewegen Sie die beiden Kunststoffkappen von oben nach unten und drehen Sie die Tür um 180 Grad. Das beiliegende obere Scharnier sollte auf der gegenüberliegenden Seite angebracht werden.
-
Page 11: Geräteübersicht
GERÄTEÜBERSICHT Licht Bedienfeld Abstellfl ächen Schubladen Belüftung Glastür Belüftung... -
Page 12: Verwendung Des Geräts
Bedienfeld Ein/Aus-Taste Licht-Taste Kompressor-Betriebsanzeige Digitale Temperaturanzeige der oberen Zone Digitale Temperaturanzeige der unteren Zone Einstellknopf der oberen Zone Einstellknopf der unteren Zone VERWENDUNG DES GERÄTS Inbetriebnahme Nach ordnungsgemäßer Installation des Geräts empfehlen wir eine Reinigung des Innenraums mit etwas lauwarmem Seifenwasser (Spülmittel). Verwenden Sie keine Scheuermittel oder Scheuerpulver, die die Oberfläche beschädigen könnten. - Page 13 Temperaturregelung Halten Sie die Temperatureinstelltaste drei Sekunden lang gedrückt, um die aktuelle Temperatur anzuzeigen. Die Innentemperatur wird durch einen elektronischen Thermostat geregelt, der über Tasten im Inneren des Geräts gesteuert wird. Jedes Mal, wenn die Taste für die obere Zone oder die untere Zone gedrückt wird, wird die gewählte Zone um ein Grad erhöht.
- Page 14 Hinweise • Die Standardtemperatur beträgt 6 °C in der oberen Zone und 12 °C in der unteren Zone. • Der Temperaturbereich dieses Weinklimaschranks liegt zwischen 5 °C und 10 °C in der oberen Zone und zwischen 10 °C und 18 °C in der unteren Zone. •...
- Page 15 Befüllen des Geräts • Das Gerät eignet sich ideal zum Lagern von Weinflaschen, welche der Größe und der Form von 0,75 Liter Bordeaux entsprechen. Es besteht die Möglichkeit, größere Weinflaschen zu lagern. Es muss jedoch darauf geachtet werden, dass die Gerätetür richtig geschlossen werden kann. •...
- Page 16 Befüllen für maximale Kapazität • Das maximale Füllvermögen basiert auf Bordeaux-Flaschen mit 0,75-Liter- Standard. • 123 Flaschen sind die maximale Füllkapazität. Es wird empfohlen, das o Diagramm für den täglichen Gebrauch zu verwenden. • Zur besseren Konservierung und Vermeidung von Lebensmittelverschwendung •...
-
Page 17: Reinigung Und Wartung
REINIGUNG UND WARTUNG Abtauen Die Abtauung Ihres Weinschranks erfolgt vollautomatisch. Sie müssen nichts tun. Während des Betriebs kann es vorkommen, dass sich an der hinteren Innenwand des Schranks Kondensationstropfen bilden. Sie werden während der automatischen Abtauung beseitigt. Reinigung Vor der Reinigung des Geräts den Netzstecker ziehen. Verwenden Sie niemals Scheuermittel oder -schwämmchen für die Reinigung der Innen- und Außenseite des Geräts. -
Page 18: Fehlerbehebung
FEHLERBEHEBUNG Viele einfache Probleme bei Ihrem Weinklimaschrank können Sie selbst beheben, ohne sofort den Kundendienst anrufen zu müssen. Probieren Sie die folgenden Vorschläge aus. Problem Mögliche Ursaceh Das Gerät funktioniert nicht - Überprüfen Sie die Stromzufuhr - Überprüfen Sie den Schutzschalter - Eine Sicherung ist durchgebrannt. -
Page 19: Produktdatenblatt
PRODUKTDATENBLATT Angaben nach Verordnung (EU) Nr. 2019/2016 Name oder Handelsmarke des Herstellers: Klarstein Adresse des Herstellers: Wallstraße 16, 10179 Berlin, Deutschland. Artikelnummer: 10040721 Art des Kühlgeräts: Geräuscharmes Gerät: nein Bauart: freistehend Weinlagerschrank: Anderes Kühlgerät: nein Allgemeine Produktparameter: Parameter Wert Parameter Wert Höhe... - Page 20 Art der Lichtquelle Energieeffizienzklasse Mindestlaufzeit der vom Hersteller angebotenen Garantie: 24 Monate Weitere Angaben: Weblink zur Website des Herstellers, auf der die Informationen gemäß Nummer 4 Buchstabe a des Anhangs der Verordnung (EU) 2019/2019 der Kommission zu finden sind: www.klarstein.de...
-
Page 21: Spezielle Entsorgungshinweise Für Verbraucher In Deutschland
SPEZIELLE ENTSORGUNGSHINWEISE FÜR VERBRAUCHER IN DEUTSCHLAND Entsorgen Sie Ihre Altgeräte fachgerecht. Dadurch wird gewährleistet, dass die Altgeräte umweltgerecht verwertet und negative Auswirkungen auf die Umwelt und menschliche Gesundheit vermieden werden. Bei der Entsorgung sind folgende Regeln zu beachten: • Jeder Verbraucher ist gesetzlich verpflichtet, Elektro- und Elek- tronikaltgeräte (Altgeräte) sowie Batterien und Akkus getrennt vom Hausmüll zu entsorgen. - Page 22 • Bei einem Vertrieb unter Verwendung von Fernkommunikationsmitteln ist die unentgeltliche Abholung am Ort der Abgabe auf Elektro- und Elektronikgeräte der Kategorien 1, 2 und 4 gemäß § 2 Abs. 1 ElektroG, nämlich „Wärmeüberträger“, „Bildschirmgeräte“ (Oberfläche von mehr als 100 cm²) oder „Großgeräte“...
-
Page 23: Hinweise Zur Entsorgung
HINWEISE ZUR ENTSORGUNG Wenn es in Ihrem Land eine gesetzliche Regelung zur Entsorgung von elektrischen und elektronischen Geräten gibt, weist dieses Symbol auf dem Produkt oder auf der Verpackung darauf hin, dass dieses Produkt nicht im Hausmüll entsorgt werden darf. Stattdessen muss es zu einer Sammelstelle für das Recycling von elektrischen und elektronischen Geräten gebracht werden. - Page 25 Dear Customer, Congratulations on purchasing this device. Please read the following instructions carefully and follow them to prevent possible damages. We assume no liability for damage caused by disregard of the instructions and improper use. Scan the QR code to get access to the latest user manual and more product information.
-
Page 26: Technical Data
TECHNICAL DATA Item number 10040721 220-240 V ~ 50/60 Hz Power supply Capacity 123 bottles Dimensions (B*T*H) (mm) 630 x 718 x 1797 Weight 130 kg Climate class N/ST Suitable ambient temperature 16-38 °C Installation type freestanding... -
Page 27: Safety Instructions
SAFETY INSTRUCTIONS • This appliance is not intended for use by persons (including children) with reduced physical, sensory or mental capabilities, or lack of experience and knowledge, unless they have been given supervision or instruction concerning use of the appliance by a person responsible for their safety. •... - Page 28 To avoid contamination of drinks, please respect the following instructions: • Opening the door for long periods can cause a signifi cant increase of the temperature in the compartments of the appliance. • Clean regularly surfaces that can come in contact with drink and accessible drainage systems.
- Page 29 Special notes on correct use • This device is intended exclusively for the storage of wine. • This appliance is not intended for use as a built-in appliance unless explicitly stated in the instructions. • This appliance is not suitable for freezing food. •...
-
Page 30: Installation
INSTALLATION Before first Use Allow 24 hours before switching on the wine cellar. During this time we recommend that you leave the door open to clear any residual odors. Note: All models without front venting (air opening) are strictly for free standing only. - Page 31 Installing the Shelves Open the door completely. Line up the shelf notches with the rail posts on both the right and left sides. Push the shelf down and then push it all the way inwards until the shelf fully rests inside of the unit and you are able to close the door. The shelf should glide smoothly back and forth.
- Page 32 Changing door opening side Open the door, remove the two screws in the bottom hinge and lift out the door. Move the two plastic caps from top to bottom and rotate the door 180 degrees. The enclosed top hinge should be fitted at the opposite side. Move the plastic support to the opposite side.
-
Page 33: Product Overview
PRODUCT OVERVIEW Light (LED) Control Panel Shelves Drawers Ventilation Glass door... -
Page 34: Usage
Control panel Start/Stop button Light button Compressor operation indicator Digital display of the temperature in the upper zone Digital display of the temperature in the lower zone Setting button for the upper zone Setting button for the lower zone USAGE Starting up the device Once the wine cabinet is properly installed, we advise that you clean the inside using warm water with a low concentration of dishwashing liquid. - Page 35 Each time the “upper zone” or “lower zone” key is pressed, the selected zone is incremented by one degree. To obtain a temperature lower than the one indicated, You can adjust the temperature degree by degree. After the temperature is selected, the display will flash for 5 seconds and display the set-point temperature.
- Page 36 Filling the wine cabinet • The device is ideal for storing wine bottles of the size and shape of 0.75 litres of Bordeaux. It is possible to store larger wine bottles. However, care must be taken to ensure that the appliance door can be closed properly. •...
- Page 37 Loading for Max capacities • The maximum filling capacity is based on Bordeaux bottles with 0.75 litre standard. • 123 bottles is the maximum filling capacity. It is recommended to use the o diagram for daily use. • For better preservation and to avoid food waste. •...
-
Page 38: Cleaning And Care
CLEANING AND CARE Defrosting of your wine cabinet is fully automatic. It requires no action on your part. During operation, you may notice condensation drops forming on the rear inside wall of the cabinet. They will be eliminated during automatic defrosting. Cleaning Before any cleaning, unplug the device from the mains. -
Page 39: Troubleshooting
TROUBLESHOOTING You can resolve many of the problems that may arise without having to call Customer Care Service. Please try the suggestions below. PROBLEM POSSIBLE CAUSE No operation - Check your installation's power supply. - Check your circuit breaker. - A fuse has blown. Not cold enough - Check the setting temperature. -
Page 40: Product Data Sheet
PRODUCT DATA SHEET Information according to Regulation (EU) No. 2019/2016 Supplier's name or trademark: Klarstein Supplier's address: Wallstraße 16, 10179 Berlin, DE Model identifier: 10040721 Type of refrigerating appliance: Low-noise appliance: Design type: freestanding Wine storage appliance: Other refrigerating appliance:... - Page 41 Light source parameters: Type of light source Energy efficiency class Minimum duration of the guarantee offered by the manufacturer: 24 months Additional information: Weblink to the manufacturer‘s website, where the information in point4(a) Annex of Commission Regulation (EU) 2019/2019 is found: www.klarstein.co.uk...
-
Page 42: Disposal Considerations
DISPOSAL CONSIDERATIONS If there is a legal regulation for the disposal of electrical and electronic devices in your country, this symbol on the product or on the packaging indicates that this product must not be disposed of with household waste. Instead, it must be taken to a collection point for the recycling of electrical and electronic equipment. - Page 43 Cher client, chère cliente, Toutes nos félicitations pour l’acquisition de ce nouvel appareil. Veuillez lire attentivement et respecter les instructions de ce mode d’emploi afin d’éviter d’éventuels dommages. Nous ne saurions être tenus pour responsables des dommages dus au non-respect des consignes et à la mauvaise utilisation de l’appareil.
-
Page 44: Fiche Technique
FICHE TECHNIQUE Numéro d'article 10040721 Alimentation 220-240 V ~ 50/60 Hz Capacité 123 bouteilles Dimensions (L*P*H) (mm) 630 x 718 x 1797 Poids 130 kg Classe climatique N/ST Température ambiante adaptée 16-38 °C Type d’installation installation sur pied... -
Page 45: Consignes De Sécurité
CONSIGNES DE SÉCURITÉ • Cet appareil n'est pas destiné à être utilisé par des personnes (y compris des enfants) ayant des capacités physiques, sensorielles ou mentales limitées ou dénuées d'expérience et de connaissances, sauf sous surveillance ou après avoir été formées par un responsable de leur sécurité aux instructions et à la façon d'utiliser l'appareil. - Page 46 Pour éviter de contaminer les boissons, respectez les consignes suivantes : • L'ouverture prolongée de la porte peut entraîner une hausse signifi cative de la température dans les compartiments de l'appareil. • Nettoyez régulièrement les surfaces pouvant entrer en contact avec les aliments.
- Page 47 Consignes particulières pour une utilisation correcte • Cet appareil est exclusivement destiné à la conservation du vin. • Cet appareil n'est pas destiné à être encastré, sauf si cela est explicitement mentionné dans les instructions. • Cet appareil n'est pas destiné à la congélation d'aliments. •...
-
Page 48: Installation
INSTALLATION Avant la première utilisation Avant d'utiliser l'appareil pour la première fois, laissez-le reposer pendant 24 heures afin que le liquide de refroidissement puisse se répartir. Pendant ce temps, laissez la porte ouverte pour que l'odeur de neuf puisse s'échapper. Remarque : tous les modèles sans ventilation ou fentes de ventilation à... - Page 49 Installation des étagères Ouvrez complètement la porte. Alignez les picots de la tablette avec les encoches du rail sur les côtés droit et gauche. Faites glisser la tablette vers le bas, puis complètement vers l'intérieur, jusqu'à ce que la tablette soit complètement à l'intérieur de l'appareil et que vous puissiez fermer la porte.
- Page 50 Changement du côté d'ouverture de la porte Ouvrez la porte, retirez les deux vis de la charnière inférieure et soulevez la porte. Déplacez les deux capuchons en plastique du haut vers le bas et tournez la porte de 180 degrés. La charnière supérieure fournie doit être placée du côté...
-
Page 51: Aperçu De L'appareil
APERÇU DE L'APPAREIL Éclairage Tiroirs Surfaces de rangement Porte en verre Aération Aération Panneau de commande... -
Page 52: Utilisation De L'appareil
Panneau de commande Touche de marche/arrêt Touche d'éclairage Indicateur de fonctionnement du compresseur Affichage numérique de la température de la zone supérieure Affichage numérique de la température de la zone inférieure Bouton de réglage de la zone supérieure Bouton de réglage de la zone inférieure UTILISATION DE L'APPAREIL Mise en marche Une fois l'appareil correctement installé, nous recommandons de nettoyer... - Page 53 Réglage de la température Maintenez le bouton de réglage de la température enfoncé pendant trois secondes pour afficher la température actuelle. La température intérieure est réglée par un thermostat électronique commandé par des boutons à l'intérieur de l'appareil. Chaque fois que l'on appuie sur le bouton de la zone supérieure ou de la zone inférieure, la zone sélectionnée augmente d'un degré.
- Page 54 Remarques • La température standard est de 6 °C dans la zone supérieure et de 12 °C dans la zone inférieure. • La plage de température de cette cave à vin se situe entre 5 °C et 10 °C dans la zone supérieure et entre 10 °C et 18 °C dans la zone inférieure.
- Page 55 Chargement de l'appareil • L'appareil est idéal pour conserver des bouteilles de vin dont la taille et la forme correspondent aux bouteilles de Bordeaux de 0,75 litre. Il est possible de conserver des bouteilles de vin de plus grande taille. Vous devez toutefois faire attention à...
- Page 56 Remplir pour une capacité maximale • La capacité de remplissage maximale est basée sur des bouteilles bordelaises au standard de 0,75 litre. • 123 bouteilles représentent la capacité de remplissage maximale. Il est recommandé d'utiliser le diagramme o pour un usage quotidien. •...
-
Page 57: Nettoyage Et Maintenance
NETTOYAGE ET MAINTENANCE Décongélation Le dégivrage de votre cave à vin est totalement automatique. Vous n'avez rien à faire. Pendant le fonctionnement, il peut arriver que des gouttes de condensation se forment sur la paroi intérieure arrière de l'armoire. Elles sont éliminées pendant le dégivrage automatique. -
Page 58: Résolution Des Problèmes
RÉSOLUTION DES PROBLÈMES Vous pouvez résoudre vous-même de nombreux problèmes simples avec votre cave à vin sans devoir appeler immédiatement le service client. Essayez les propositions suivantes. Problème Cause possible L'appareil ne fonctionne pas. - Vérifier l'alimentation électrique - Vérifier le disjoncteur - Un fusible est hors service. -
Page 59: Fiche De Données Produit
FICHE DE DONNÉES PRODUIT Informations selon le règlement (UE) n ° 2019/2016 Nom ou marque du fabricant : Klarstein Adresse du fabricant : Wallstraße 16, 10179 Berlin, Allemagne. Numéro d'article : 10040721 Type d'appareil réfrigérant : Appareil silencieux : Type de construction :... - Page 60 Durée minimale de la garantie offerte par le fabricant : 24 mois Indications supplémentaires : Lien web vers le site Internet du fabricant sur lequel vous trouverez des informations au point 4.a. de l'annexe du règlement (UE) 2019/2019 de la Commission : www.klarstein.fr...
-
Page 61: Informations Sur Le Recyclage
INFORMATIONS SUR LE RECYCLAGE S‘il existe une réglementation pour l‘élimination ou le recyclage des appareils électriques et électroniques dans votre pays, ce symbole sur le produit ou sur l‘emballage indique que cet appareil ne doit pas être jeté avec les ordures ménagères. - Page 63 Estimado cliente: Le felicitamos por la adquisición de este producto. Lea atentamente las siguientes instrucciones y sígalas para evitar posibles daños. No asumimos ninguna responsabilidad por los daños causados por el incumplimiento de las instrucciones y el uso inadecuado. Escanee el siguiente código QR para obtener acceso a la última guía del usuario y más información sobre el producto: ÍNDICE...
-
Page 64: Datos Técnicos
DATOS TÉCNICOS Número del artículo 10040721 Suministro eléctrico 220-240 V ~ 50/60 Hz Capacidad 123 botellas Medidas (ancho x largo x alto) (mm) 630 x 718 x 1797 Peso 130 kg Clase climática N/ST Temperatura ambiente recomendada 16-38 °C Instalación Independiente... -
Page 65: Indicaciones De Seguridad
INDICACIONES DE SEGURIDAD • Este aparato no está diseñado para ser manejado por personas (incluidos niños) con discapacidad física, sensorial o psíquica o con falta de experiencia y conocimientos, salvo bajo supervisión de una persona responsable o tras recibir instrucciones sobre cómo utilizar el aparato. •... - Page 66 Para evitar la contaminación de las bebidas, siga las siguientes instrucciones: • Mantener la puerta abierta durante un período prolongado puede provocar un aumento signifi cativo de la temperatura en los compartimentos del aparato. • Limpie regularmente las superfi cies que puedan estar en contacto con los alimentos.
- Page 67 Indicaciones específicas para un uso adecuado • Este aparato está destinado únicamente al almacenamiento de vino. • Este aparato no está destinado a ser utilizado como aparato empotrado a menos que se indique explícitamente en las instrucciones. • Este aparato no es adecuado para congelar alimentos. •...
-
Page 68: Instalación
INSTALACIÓN Antes del primer uso Deje reposar la unidad durante 24 horas antes de utilizarla por primera vez para que el refrigerante se disperse. Deje la puerta abierta durante este tiempo para que se disipe cualquier olor relacionado con la producción. Nota: todos los modelos sin ventilación frontal o respiraderos frontales son unidades independientes no empotrables. - Page 69 Instalación de las estanterías Abra completamente la puerta. Alinee las protuberancias del estante con las muescas del riel a la derecha e izquierda. Deslice el estante hacia abajo y luego hasta el final hasta que el estante esté completamente dentro del aparato y pueda cerrar la puerta. El estante debe deslizarse hacia adelante y hacia atrás con suavidad.
- Page 70 Cómo cambiar el lado de apertura de la puerta Abra la puerta, retire los dos tornillos de la bisagra inferior y levante la puerta. Mueva las dos tapas de plástico de arriba a abajo y gire la puerta 180 grados. La bisagra superior adjunta debe colocarse en el lado opuesto.
-
Page 71: Vista General Del Aparato
VISTA GENERAL DEL APARATO Panel de control Áreas de Cajones almacenamiento Ventilación de la Ventilación puerta de cristal... -
Page 72: Uso Del Aparato
Panel de control Botón de encendido/apagado Botón de luz Pantalla de funcionamiento del compresor Termómetro digital de la zona superior Termómetro digital de la zona inferior Regulador de la zona superior Regulador de la zona inferior USO DEL APARATO Puesta en marcha Tras la instalación correcta de la unidad, se recomienda limpiar el interior con un poco de agua jabonosa tibia (detergente). - Page 73 Cómo regular la temperatura Mantenga presionado el botón de ajuste de temperatura durante tres segundos para mostrar la temperatura actual. La temperatura interna está regulada por un termostato electrónico controlado por botones dentro de la unidad. Cada vez que se pulsa el botón de la zona superior o de la zona inferior, la zona seleccionada aumenta un grado.
- Page 74 Notas • La temperatura estándar es de 6 °C en la zona superior y de 12 °C en la zona inferior. • El rango de temperatura de esta vinoteca va de los 5 °C a los 10 °C en la zona superior y de los 10 °C a los 18 °C en la zona inferior.
- Page 75 Cómo llenar el aparato • El aparato es ideal para almacenar botellas de vino correspondientes al tamaño y forma bordelesa, de 0,75 litros. También se pueden introducir botellas de mayor tamaño. No obstante, hay que asegurarse de que la puerta del aparato se cierre correctamente.
- Page 76 Llenar hasta capacidad máxima • Capacidad máxima de botellas bordelesas con estándar de 0,75 litros. • La capacidad máxima es de 123 botellas. Se recomienda emplear el diagrama anterior para el uso diario. • Mejor conservación y menor desperdicio de alimentos •...
-
Page 77: Limpieza Y Mantenimiento
LIMPIEZA Y MANTENIMIENTO Descongelación El proceso para descongelar la vinoteca es totalmente automático. No tendrá que hacer nada. Durante el funcionamiento, pueden formarse gotas de condensación en la pared interior trasera de la nevera. Estas se eliminan durante la descongelación automática. -
Page 78: Reparación De Anomalías
REPARACIÓN DE ANOMALÍAS Usted mismo podrá arreglar muchos problemas sencillos de la vinoteca sin necesidad del servicio de atención al cliente. Pruebe las siguientes sugerencias. Anomalía Posible causa El aparato no funciona - Compruebe el suministro de energía - Compruebe el interruptor de protección - Se ha fundido un fusible No enfría lo suficiente - Compruebe la temperatura configurada... -
Page 79: Ficha Técnica Del Producto
FICHA TÉCNICA DEL PRODUCTO Información de conformidad con el reglamento (UE) Núm. 2019/2016 Nombre o marca comercial del fabricante: Klarstein Dirección del fabricante: Wallstraße 16, 10179 Berlín, Alemania. Número de artículo: 10040721 Tipo de aparato de refrigeración: Aparato de bajo nivel de Tipo de instalación:... - Page 80 Duración mínima de la garantía ofrecida por el fabricante: 24 meses Información adicional: Enlace al sitio web del fabricante, en el que se encuentra la información contemplada en el punto 4, letra a), del anexo del Reglamento (UE) 2019/2019 de la Comisión: www.klarstein.es...
-
Page 81: Indicaciones Sobre La Retirada Del Aparato
INDICACIONES SOBRE LA RETIRADA DEL APARATO Si en su país existe una disposición legal relativa a la eliminación de aparatos eléctricos y electrónicos, este símbolo estampado en el producto o en el embalaje advierte que no debe eliminarse como residuo doméstico. En lugar de ello, debe depositarse en un punto de recogida de reciclaje de aparatos eléctricos y electrónicos. - Page 83 Gentile cliente, La ringraziamo per aver acquistato il dispositivo. La preghiamo di leggere attentamente le seguenti istruzioni per l’uso e di seguirle per evitare possibili danni. Non ci assumiamo alcuna responsabilità per danni scaturiti da una mancata osservazione delle avvertenze di sicurezza e da un uso improprio del dispositivo.
-
Page 84: Dati Tecnici
DATI TECNICI Numero articolo 10040721 Alimentazione 220-240 V ~ 50/60 Hz Capacità 123 bottiglie Dimensioni (LxPxA) (mm) 630 x 718 x 1797 Peso 130 kg Classe climatica N/ST Temperatura ambiente ideale 16-38 °C Tipo di posizionamento Posizionamento libero... -
Page 85: Indicazioni Per La Sicurezza
INDICAZIONI PER LA SICUREZZA • Questo dispositivo non è progettato per essere utilizzato da persone (inclusi bambini) dalle limitate capacità fisiche, psichiche e sensoriali o con esperienza e/o conoscenze insufficienti, fatto salvo quando supervisionate da una persona responsabile o nel caso abbiano ricevuto istruzioni sull'utilizzo corretto e sicuro del dispositivo. - Page 86 Per evitare la contaminazione delle bevande, rispettare le seguenti indicazioni: • Se la porta rimanere aperta più a lungo, si verifi ca un signifi cativo aumento della temperatura nei vani del dispositivo. • Pulire regolarmente le superfi ci che potrebbero entrare in contatto con le bevande.
- Page 87 Note particolari sul corretto utilizzo • Questo dispositivo è progettato esclusivamente per la conservazione di vini. • Questo dispositivo non è adatto all'incasso, a meno che non sia espressamente indicato nel manuale. • Questo dispositivo non è adatto al congelamento degli alimenti. •...
-
Page 88: Installazione
INSTALLAZIONE Operazioni preliminari Lasciare in posizione il frigorifero per 24 ore prima di procedere all'utilizzo, in modo che il liquido refrigerante possa distribuirsi omogeneamente. In questa face lasciare la porta aperta per permettere all'odore legato al processo di produzione di scomparire. Nota: tutti i modelli senza ventilazione frontale o prese d'aria sul lato anteriore non sono dispositivi adatti all'incasso e necessitano di posizionamento libero. - Page 89 Installazione dei ripiani Lasciare la porta completamente aperta. Allineare le sporgenze del ripiano con le tacche della guida sui lati destro e sinistro. Far scorrere il ripiano verso il basso e poi fino in fondo, finché si trova completamente all'interno del dispositivo ed è possibile chiudere lo sportello. Il ripiano dovrebbe scorrere avanti e indietro senza difficoltà.
- Page 90 Cambiare la direzione di apertura della porta Aprire la porta, rimuovere le due viti della cerniera inferiore ed estrarre la porta Spostare i due tappi di plastica dall'alto verso il basso e ruotare la porta di 180 gradi. La cerniera superiore chiusa deve essere montata sul lato opposto. Spostare il supporto di plastica sul lato opposto.
-
Page 91: Descrizione Del Dispositivo
DESCRIZIONE DEL DISPOSITIVO Luce Cassetto Aree di stoccaggio Ventilazione della porta Ventilazione di vetro Pannello di controllo... -
Page 92: Utilizzo Del Dispositivo
Pannello di controllo Tasto on/off Tasto della luce Indicazione di funzionamento del compressore Indicazione digitale della temperatura per la zona superiore Indicazione digitale della temperatura per la zona inferiore Manopola di regolazione della zona superiore Manopola per ridurre la temperatura della zona inferiore UTILIZZO DEL DISPOSITIVO Messa in funzione Dopo una corretta installazione del dispositivo, si raccomanda di pulire l'interno... - Page 93 Regolazione della temperatura Per mostrare la temperatura attuale, tenere premuto questo tasto per 3 secondi. La temperatura interna è regolata dal termostato elettronico, controllato tramite i tasti del dispositivo. Premendo il pulsante relativo alla zona superiore o inferiore, nella zona selezionata la temperatura aumenta di un grado.
- Page 94 Note • La temperatura standard è di 6 °C nella zona superiore e 12 °C in quella inferiore. • L'intervallo di temperatura di questo frigorifero per vini è tra 5 °C e 10 °C nella zona superiore e tra 10 °C e 18 °C nella zona inferiore. •...
- Page 95 Riempire il dispositivo • Nel dispositivo si possono conservare bottiglie di vino tipo Bordeaux da 0,75 litri. Si possono conservare anche bottiglie più grandi. Bisogna però fare attenzione che la porta si chiuda senza problemi. • Prima di chiudere la porta assicurarsi che non sia bloccata da qualche bottiglia.
- Page 96 Riempimento massimo • La capacità massima di riempimento è basata su bottiglie di Bordeaux standard da 0,75 litri. • La capacità massima è pari a 123 bottiglie. Consigliamo di utilizzare il diagramma in alto per l'uso quotidiano. • Per una migliore conservazione ed evitare sprechi •...
-
Page 97: Pulizia E Manutenzione
PULIZIA E MANUTENZIONE Sbrinare Lo sbrinamento della cantinetta è completamente automatico. Non è necessario fare nulla. Durante il funzionamento, gocce di condensa possono formarsi sulla parete interna posteriore della cantinetta. Queste vengono rimosse durante lo sbrinamento automatico. Pulizia Staccare la spina dalla presa prima della pulizia. Non usare mai spugnette o detergenti abrasivi per pulire l'interno e l'esterno del dispositivo. -
Page 98: Risoluzione Dei Problemi
RISOLUZIONE DEI PROBLEMI Molti problemi del frigorifero per vini possono essere risolti autonomamente senza contattare immediatamente il servizio di assistenza ai clienti. Provare i seguenti suggerimenti. Problema Possibile causa Il dispositivo non funziona. - Controllare l'alimentazione elettrica - Controllare l'interruttore di protezione - Un fusibile è... -
Page 99: Scheda Informativa Del Prodotto
SCHEDA INFORMATIVA DEL PRODOTTO Informazioni secondo il regolamento (UE) N. 2019/2016 Nome o marchio commerciale del produttore: Klarstein Indirizzo del produttore: Wallstraße 16, 10179 Berlino, Germania. Numero articolo: 10040721 Tipo di apparecchio di refrigerazione: Dispositivo a bassa Struttura: posizionamento rumorosità:... - Page 100 Tipo di sorgente luminosa Classe di efficienza energetica Durata minima della garanzia offerta dal produttore: 24 mesi Altri dati: Link al sito web del produttore dove sono disponibili le informazioni al numero 4, lettera A dell'allegato del Regolamento della Commissione (UE) 2019/2019: www.klarstein.de...
-
Page 101: Avviso Di Smaltimento
AVVISO DI SMALTIMENTO Se nel proprio paese si applicano le regolamentazioni inerenti lo smaltimento di dispositivi elettrici ed elettronici, questo simbolo sul prodotto o sulla confezione segnala che questi prodotti non possono essere smaltiti con i rifiuti normali e devono essere portati a un punto di raccolta di dispositivi elettrici ed elettronici.
Need help?
Do you have a question about the BAROSSA 123 DUO and is the answer not in the manual?
Questions and answers