
Related Manuals for Established & Sons ISLAND


Summary of Contents for Established & Sons ISLAND
- Page 1 ISLAND ESTABLISHED & SONS Ronan & Erwan Bouroullec United Kingdom Phone +44 (0)20 7608 0990 establishedandsons.com ESTANDSONS LTD Estandsons Warehouse Intereuropa d.d. Mednarodni prehod 8, SI-5290 Šempeter pri Gorici, Slovenija...
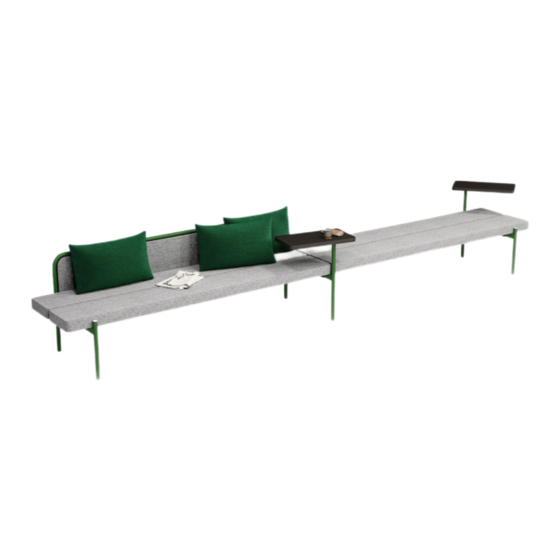
- Page 2 ISLAND Ronan & Erwan Bouroullec A versatile, space-optimising bench seating system with unlimited configurations, ISLAND gives in-between areas a collaborative, functional use. Inviting passersby to sit, perch or lounge, its understated design creates a central focal point for high-traffic communal environments.
- Page 3 M5 x 20 with washer USER INSTRUCTIONS Island seats and tables are designed and tested for EN 16139:2013+AC2013 and EN 15372:2016 - Level 2, “General Use” areas. Appropriate applications include office buildings, showrooms, general hotel spaces, function rooms, cafés, restaurants, public halls, banks, bars, meeting rooms, churches, or libraries.
- Page 4 Installation Installation Configuration 02 Configuration 03 REQUIRED FOR INSTALLATION REQUIRED FOR INSTALLATION 12x Countersunk 24x Button Head 12x Button Head 15x Button Head 8x Button Head 16x Countersunk 32x Button Head 16x Button Head 9x Button Head 4x Button Head M8 x 20 M8 x 70 M8 x 25...
- Page 5 Installation Installation Configuration 04 Configuration 05 REQUIRED FOR INSTALLATION REQUIRED FOR INSTALLATION 24x Countersunk 48x Button Head 24x Button Head 12x Button Head 8x Button Head 8x Countersunk 16x Button Head 8x Button Head 9x Button Head 20x Button head M8 x 20 M8 x 70 M8 x 25...
- Page 6 Installation Installation Configuration 06 Display Configuration REQUIRED FOR INSTALLATION REQUIRED FOR INSTALLATION 4x Countersunk 8x Button Head 4x Button Head 9x Button Head 4x Button Head 20x Countersunk 45x Button Head 20x Button Head 9x Button Head 14x Button Head M8 x 20 M8 x 70 M8 x 25...
- Page 7 Installation Installation Large Table Large Table with Integrated Power REQUIRED FOR INSTALLATION REQUIRED FOR INSTALLATION 8x Button Head 16x Button Head 8x Button Head 16x Button Head M6 x 60 with Hex Nut M6 x 16 M6 x 60 with Hex Nut M6 x 16...
- Page 8 Installation Integrated Power Unit REQUIRED FOR INSTALLATION 1x Button Head 2x Button Head M8 x 70 M6 x 60 with Hex Nut...
- Page 9 Assembly Layout components on a rug or soft surface to prevent scratching of the parts. Check the correct fixings are included before assembling. Platforms, Legs & Seat Panels Begin assembly by securing single / double platforms to single / double legs. REQUIRED FOR INSTALLATION Countersunk M8 x 20...
- Page 10 3. To assemble seat panels to platforms, select appropriate type 4. Secure appropriate seat panel (MIDDLE / END / SOLO) to platform. (MIDDLE / END / SOLO) and align with holes on frame. IMPORTANT Each platform type is a specific length MIDDLE L2000mm L2200mm...
- Page 11 5. Insert cap into top of legs not used for accessories.
- Page 12 Assembly 1. To assemble Internal Single Partition, insert stainless steel tube into structure and secure with fixings. External Single Partition REQUIRED FOR INSTALLATION 4x Button Head M6 x 25...
- Page 13 Secure Cylindrical Head Screws at either end of tubular structure. Pass fixings through upholstered panel and tighten into frame. REQUIRED FOR INSTALLATION REQUIRED FOR INSTALLATION 2x Cylindrical 4x Button Head Head M5 x 25 M5 x 20 with washer...
- Page 14 Insert tubular frame of External Single Partition into open tops of legs. Secure in place using fixing at underside of leg at the two locations shown. REQUIRED FOR INSTALLATION 2x Button Head M6 x 25...
- Page 15 Assembly 1. To assemble External Single Partition, insert stainless steel tube into structure and secure with fixings. External Double Partition REQUIRED FOR INSTALLATION 6x Button Head M6 x 25...
- Page 16 3. Pass fixings through upholstered panel and tighten into frame. Secure locator pins at ends of tubular structures. REQUIRED FOR INSTALLATION REQUIRED FOR INSTALLATION 4x Cylindrical 8x Button Head Head M5 x 25 M5 x 20 with washer...
- Page 17 Insert tubular frame of External Single Partition into open tops of legs. Secure in place using fixing at underside of leg at the three locations shown. REQUIRED FOR INSTALLATION 3x Button Head M6 x 25...
- Page 18 Assembly 1. Secure Cylindrical Head Screws at either end of tubular structure. Internal Single Partition REQUIRED FOR INSTALLATION 2x Cylindrical Head M5 x 25...
- Page 19 2. To assemble Internal Single Partition, pass fixings through 3. Place assembled Internal Single Partition between seat panels and upholstered panel and tighten into frame. secure to platform using fixings at the two locations shown. REQUIRED FOR INSTALLATION REQUIRED FOR INSTALLATION 4x Button Head 2x Collar 2x Cylindrical Head...
- Page 20 Assembly 1. Secure locator pins at ends of tubular structures. Internal Double Partition REQUIRED FOR INSTALLATION 4x Cylindrical Head M5 x 25...
- Page 21 2. Pass fixings through upholstered panel and tighten into frame. 3. Place assembled Internal Double Partition between seat panels and secure to platform using fixings at the three locations shown. REQUIRED FOR INSTALLATION REQUIRED FOR INSTALLATION 8x Button Head 3x Collar 3x Cylindrical Head M5 x 20 with washer Ø18 x 50...
- Page 22 Assembly 1. To assemble Small Table, insert stainless steel tube into structure and secure with fixings. Small Table REQUIRED FOR INSTALLATION 2x Button Head M6 x 25...
- Page 23 2. Secure table top to metal structure. 3. Secure fixing as shown to block exit of rotating structure. REQUIRED FOR INSTALLATION REQUIRED FOR INSTALLATION 4x Button Head 1x Grub Screw M6 x 16 M6 x 8...
- Page 24 6. Do not place items that exceed 15kg on the Small Table. Insert tubular frame of Small Table into open tops of legs. Secure in place using fixing at underside of leg as shown. 15KG REQUIRED FOR INSTALLATION 1x Button Head M6 x 25...
- Page 25 Assembly 1. To assemble Long Table, insert stainless steel tube into structure and secure with fixings. Long Table REQUIRED FOR INSTALLATION 4x Button Head M6 x 25...
- Page 26 2. Secure L-Brackets to metal structure. 3. Secure table top to metal structure. REQUIRED FOR INSTALLATION REQUIRED FOR INSTALLATION 8x Button Head 8x Button Head M6 x 16 M6 x 16...
- Page 27 5. Do not place items that exceed 30kg on the Long Table. Insert tubular frame of Long Table into open tops of legs. Secure in place using fixing at underside of leg at the two locations shown. 30KG REQUIRED FOR INSTALLATION 2x Button Head M6 x 25...
- Page 28 Assembly 1. To assemble Large Table, begin by securing table top to brackets. Large Table / Large Table with Intergrate Power REQUIRED FOR INSTALLATION 16x Button Head M6 x 16...
- Page 29 2. To assemble Large Table with Integrated Power, insert Netbox Point into metal casing. Align adjustable clips with slots on either side of metal casing. Push upwards to secure Netbox Point in place. Secure assembled Netbox Point and metal casing to table top as shown in step 25. (NOTE: Table top must have cut-out for power integration)
- Page 30 5. Place assembled Large Table / Large Table with Integrated Power between 6. Do not place items that exceed 30kg on the Large Table. seat panels and secure to platform from the underside as shown. 30KG REQUIRED FOR INSTALLATION 8x Button Head M6 x 60 with Hex Nut...
- Page 31 Assembly 1. To assemble Integrated Power Unit, insert Netbox Point into metal casing. Integrated Power Unit...
- Page 32 2. Align adjustable clips with slots on either side of metal casing. 3. Place assembled Integrated Power Unit at desired location under Push upwards to secure Netbox Point in place. seat panels and secure to platform using fixings as shown. View from above View from below REQUIRED FOR INSTALLATION...
- Page 33 About Established & Sons Established & Sons is a British brand representing all that is innovative in contemporary design. By supporting the best creators of our time, it has built a collection for people who are passionate about design, presenting imaginative products with style and personality. Designers and artists are afforded the freedom to explore their own language, advancing pioneering ideas that deliver exceptional furniture and lighting collections.
Need help?
Do you have a question about the ISLAND and is the answer not in the manual?
Questions and answers