
Related Manuals for Nirvana NE55


Summary of Contents for Nirvana NE55
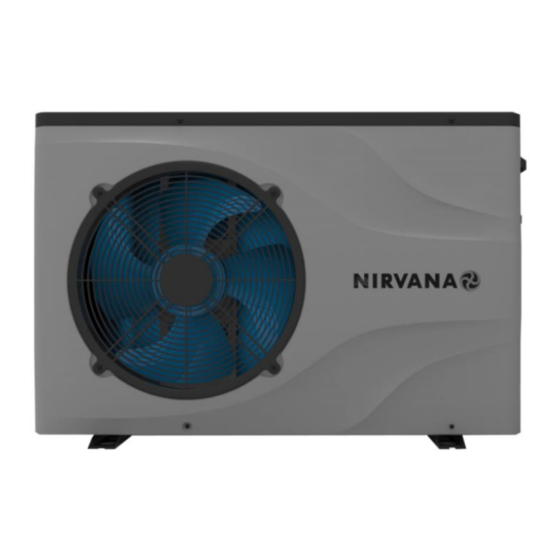
- Page 1 SWIMMING POOL HEAT PUMP Installation & Instruction Manual IMPORTANT NOTE: Thank you very much for purchasing our product. Before using your unit, please read this manual carefully and keep it for future reference.
-
Page 3: Table Of Contents
CONTENTS SWIMMING POOL HEAT PUMP ........................1 Installation & Instruction Manual ........................ 1 1. FOREWORD ............................... 1 1.1. Statement ............................1 1.2. Safety Factors ........................... 1 2. OVERVIEW OF THE UNIT........................... 3 2.1. Accessories Supplied with the Unit ....................3 2.2. -
Page 4: Swimming Pool Heat Pump
① Wrong operation may result in injury or damage; ② Please install the unit in compliance with local laws, regulations and standards; ③ Confirm power, voltage and frequency – NE55 Requires permanent 240Volt, 1 Phase, 60HZ Connection; ④ The unit must be permanently connected to the power supply by a qualified electrician according to local rules and regulations. - Page 5 ⑨ Don't touch or operate the unit when your hands are wet. It may cause fire or electric shock. ⑩ Do not let water permeate into the electrical components. Warning ① Do not install the unit in a location where there may be flammable gas. ②...
-
Page 6: Overview Of The Unit
2.1. Accessories Supplied with the Unit After unpacking, please check if you have all the following components. Components Quantity Components Quantity ① ④ User Manual Drain Pipe ⑤ ② Rubber Blanket Water Pipe Joint ③ Drain Connector 2.2. Dimensions of the Unit Model: NE55... -
Page 7: Main Parts Of The Unit
2.3. Main Parts of the Unit Top cover Front plate Middle plate Left handle Fan motor cover Pipe component Motor support Chassis Left plate Right plate Fan motor Fan blade Wire controller High efficiency finned heat exchanger Fixed plate 1 Compressor Electrical box Fixed plate 2... -
Page 8: Specifications
2.4. SPECIFICATIONS Model NE55 Power supply(V/Ph/Hz) 208-230V~/60Hz Rated Ambient Temp Range (°F) 23~104 Heating Capacity (Btu/h) – 80/80/80 55000 Heating Capacity (Btu/h) - 50/63/80 35000 Maximum Water Outlet Temp. (°F) Rated Water Flow (gpm) 23.8 Rated Water Pressure Drop (psi) 3.77... -
Page 9: Transportation
WARNING: The heat pump must be installed by a qualified technician. Improper installation, adjustment, service, maintenance or use can cause fire, electrical shock or other conditions which may cause injury or property damage. This section is provided for information purposes only and must be adapted according to the actual site conditions. -
Page 10: Pre-Requirements
3.3.1 Pre-requirements Equipment necessary for the installation of your heat pump: ① Power supply cable suitable for the unit’s power requirements and compliant with your local regulations. ② A By-Pass kit, sufficient PVC tubing suitable for your installation, as well as PVC , PVC adhesive and sandpaper. -
Page 11: Installation Layout
⑦ To prevent external damage to the unit, do not install it near a road or track. ⑧ To avoid causing nuisance to neighbors, make sure the unit is installed in an area that is not sensitive to noise. ⑨ Keep the unit out of the reach of children. ⑩... -
Page 12: Electrical Installation
Power Supply Wire Size Power Supply Wires Model Electrical Supply Cable Diameter Specification NE55 selected by electrician selected by 208-230V~/60Hz electrician 3.3.6 Electrical Connection WARNING: Power supply must be disconnected before performing any work on the heat pump. -
Page 13: Inspection Before First Trial Run
WARNING: Please check all the wiring carefully before turning on the heat pump. 3.4.1 Inspection Before First Trial Run Before performing initial functional test, confirm below items and write √ in block; Correct unit installation Power supply voltage is the same as unit rated voltage ... -
Page 14: Control Panel Diagram
4.1. Control Panel Diagram Basic Icons ① When in heating mode, " " light up; ② When in Cooling mode, " " light up; ③ When in defrost mode, " " flash. ④ When the unit is on, it displays an error code if an error is detected, and it displays water inlet temperature if there are no errors. - Page 15 Item Operation Way In the start-on state, press " " to decrease the temperature setting, and Set Temperature press " " to increase the temperature setting. Press " " on the main interface to enter the current time hour setting. The hour part flashes.
-
Page 16: System Status
4.3. System Status Code Meaning Range Remarks Water inlet temp. -9~99℃ (16℉-210℉) Measured Water outlet temp. -9~99℃ (16℉-210℉) Measured Coil temp. -9~99℃ (16℉-210℉) Measured Exhaust temp. 0~125℃(0-257℉) Measured Ambient temp. -9~99℃ (16℉-210℉) Measured Suction temp. -9~99℃ (16℉-210℉) Measured Cooling coil Temp. -9~99℃... -
Page 17: Trouble Shooting
4.4. Trouble Shooting Code Description Trouble shooting Check the sensor connection, change the sensor if necessary. Water inlet temp. sensor failure Check the sensor connection, change the sensor if necessary. Water outlet temp. sensor failure Check the sensor connection, change the sensor if necessary. Coil temp. -
Page 18: Maintenance And Winterizing
Code Description Trouble shooting 1. Replace exhaust temperature sensor. 2. Replace PCB control board. 3. Contact Service to Check for a refrigerant circuit leak. If High exhaust temperature there is a refrigerant leak, repair the leak, vacuum unit, charge protection the refrigerant according to the type and weight of the refrigerant on the nameplate. - Page 19 !! Important: Unscrew the water inlet pipe fitting to let the water flow out of the unit. If water freezes in the machine during the winter season, the titanium heat exchanger may be damaged. c. Cover the machine body when not in use.
- Page 20 NIRVANA HEAT PUMP INC 4215 Rue St-Joseph Trois-Rivieres, QC, G8Z 4G3 Tel Canada: (819) 519-8970 Tel USA: (844) 447-7665 www.nirvanahp.com...
Need help?
Do you have a question about the NE55 and is the answer not in the manual?
Questions and answers
why does control panel give temperature and also a lock message