Advertisement
Quick Links
PRODUCT NAME
DIMENSIONS
ITEM NO.
1. Check for damaged or missing parts . Call 1-800-696-8446 to order missing supplies.
2. Use a soft surface or the carton as a working surface to prevent damage during assembly.
3. It is recommended to have 2 adults on hand for assembly.
4. Gather all tools prior to assembly.
5. WARNING! When included, anti-tipping hardware MUST be installed for your safety.
QUESTIONS? Call 1-800-696-8446, or email cs@ptsamerica.com
All manuals and user guides at all-guides.com
ASSEMBLY INSTRUCTIONS
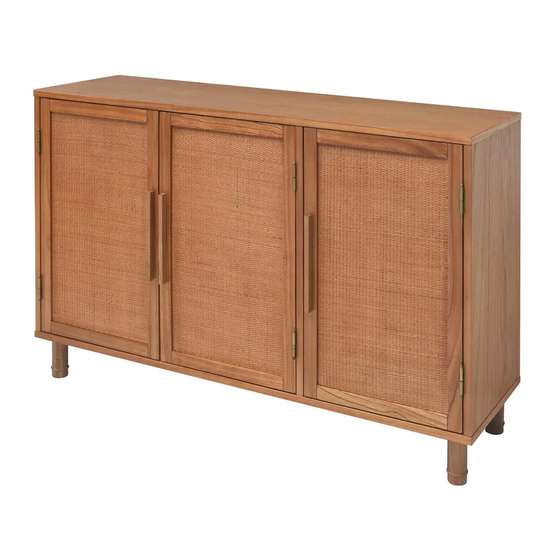
: Delancey 3 Door Cabinet
: 51" L x 15" W x 34" H
: 7161LN583AUJ09
PAGE 1 OF 11
©
2020. PTS America, lnc. All rights reserved.
Advertisement

Related Manuals for HOPPER STUDIO Delancey 7161LN583AUJ09


Summary of Contents for HOPPER STUDIO Delancey 7161LN583AUJ09
- Page 1 All manuals and user guides at all-guides.com PAGE 1 OF 11 ASSEMBLY INSTRUCTIONS PRODUCT NAME : Delancey 3 Door Cabinet DIMENSIONS : 51" L x 15" W x 34" H ITEM NO. : 7161LN583AUJ09 1. Check for damaged or missing parts . Call 1-800-696-8446 to order missing supplies. 2.
- Page 2 All manuals and user guides at all-guides.com PAGE 2 OF 11 how to use cam lock system 180° QUESTIONS? Call 1-800-696-8446, or email cs@ptsamerica.com © 2020. PTS America, lnc. All rights reserved.
-
Page 3: Parts List
All manuals and user guides at all-guides.com PAGE 3 OF 11 PARTS LIST : Top Assembly Left Side Panel Right Side Panel 2pcs Back Rail Middle Panel Bottom Panel 5pcs Back Panel Left Door Right Door 2pcs Left Shelf Panel Right Shelf Panel HARDWARE : 20pcs... - Page 4 All manuals and user guides at all-guides.com PAGE 4 OF 11 HARDWARE : 2pcs Screw Ø5/16" x 5/8" 2pcs Cable QUESTIONS? Call 1-800-696-8446, or email cs@ptsamerica.com © 2020. PTS America, lnc. All rights reserved.
- Page 5 All manuals and user guides at all-guides.com PAGE 5 OF 11 STEP 1 STEP 2 QUESTIONS? Call 1-800-696-8446, or email cs@ptsamerica.com © 2020. PTS America, lnc. All rights reserved.
- Page 6 All manuals and user guides at all-guides.com PAGE 6 OF 11 STEP 3 STEP 4 QUESTIONS? Call 1-800-696-8446, or email cs@ptsamerica.com © 2020. PTS America, lnc. All rights reserved.
- Page 7 All manuals and user guides at all-guides.com PAGE 7 OF 11 STEP 5 QUESTIONS? Call 1-800-696-8446, or email cs@ptsamerica.com © 2020. PTS America, lnc. All rights reserved.
- Page 8 All manuals and user guides at all-guides.com PAGE 8 OF 11 STEP 6 STEP 7 QUESTIONS? Call 1-800-696-8446, or email cs@ptsamerica.com © 2020. PTS America, lnc. All rights reserved.
- Page 9 All manuals and user guides at all-guides.com PAGE 9 OF 11 STEP 8 STEP 9 QUESTIONS? Call 1-800-696-8446, or email cs@ptsamerica.com © 2020. PTS America, lnc. All rights reserved.
- Page 10 All manuals and user guides at all-guides.com PAGE 10 OF 11 STEP 10 STEP 11 Note: adjust levelers on an uneven floor. QUESTIONS? Call 1-800-696-8446, or email cs@ptsamerica.com © 2020. PTS America, lnc. All rights reserved.
- Page 11 All manuals and user guides at all-guides.com PAGE 11 OF 11 STEP 12 Note: The long screw included is suitable for most wall situations. Use appropriate screw for your application. Do not overtightened the cable. WARNING! Anti-tipping hardware MUST be installed for your safety. STEP 13 QUESTIONS? Call 1-800-696-8446, or email cs@ptsamerica.com ©...
Need help?
Do you have a question about the Delancey 7161LN583AUJ09 and is the answer not in the manual?
Questions and answers