
Related Manuals for LUTEC 7635202053


Summary of Contents for LUTEC 7635202053
- Page 1 MOTION-ACTIVATED FLOODLIGHT Owners Manual MODEL #7635202053/7635202412 IMPORTANT, RETAIN FOR FUTURE REFERENCE: READ CAREFULLY...
-
Page 2: Package Contents
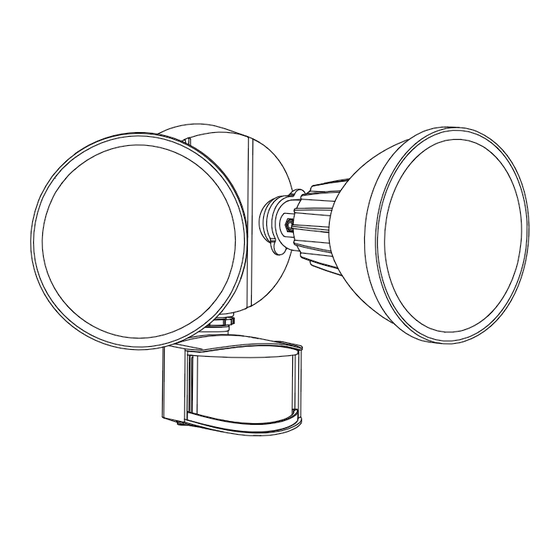
PACKAGE CONTENTS PART DESCRIPTION QUANTITY Fixture HARDWARE CONTENTS (not shown actual size) Screw Wire Nut Mounting Rubber Foam Mounting Plate Plug Plate Screw Qty. 3 Qty. 1 Qty. 1 Qty. 1 Qty. 1 Qty. 2... -
Page 3: Safety Information
SAFETY INFORMATION Please read and understand this entire manual before attempting to assemble, operate or install the product. WARNING: • Consult a qualified electrician if you are not certain about the installation process. Always install wiring connections in accordance with local code, ordinances and the National Electric Code. •... - Page 4 2. Attach the mounting plate (CC) to the junction box (not included) using the two screws (AA). Then attach the foam pad (EE) to the mounting plate (CC). This fixture can also be installed on the ceiling. 3. Connect the ground wire from the junction box to the ground screw on the mounting plate.
- Page 5 5. After mounting the fixture, apply silicone caulking compound completely around the perimeter of the cover plate where the back of the cover plate meets the mounting surface. Silicone caulking prevents water from seeping into the junction box. 6. Loosen the screws in the lamp heads to adjust the angle of the lamp heads.
-
Page 6: Care And Maintenance
OPERATING INSTRUCTIONS MODE TIME SETTING DISTANCE SETTING DESCRIPTION Tests the sensor's functionality even during daylight hours. When DISTANCE turns to L/M/H, after motion stops, the light will remain on full brightness for 5 seconds and TEST TEST Any setting then turns off. When DISTANCE turns to D2D, after motion stops, the light will remain on full brightness for 5 seconds and then turns to low brightness. -
Page 7: Troubleshooting
TROUBLESHOOTING PROBLEM POSSIBLE CAUSE CORRECTIVE ACTION 1. No power to light. 1. Check that the circuit is on, The light will not go on. wall switch is on, and there is power to light fixture. 2. There may be a poor 2. -
Page 8: Year Limited Warranty
PRODUCT. SOME STATES DO NOT ALLOW THE EXCLUSION OR LIMITATION OF INCIDENTAL OR CONSEQUENTIAL DAMAGES SO THE ABOVE EXCLUSION OR LIMITATION MAY NOT APPLY TO YOU. LUTEC USA LLC: 149B Houston Rd Troutman NC 28166 Ningbo UTEC Electric Co.,LTD CN8, Far East Industry Park, Yuyao, China www.lutec.com...
Need help?
Do you have a question about the 7635202053 and is the answer not in the manual?
Questions and answers