Advertisement
Quick Links
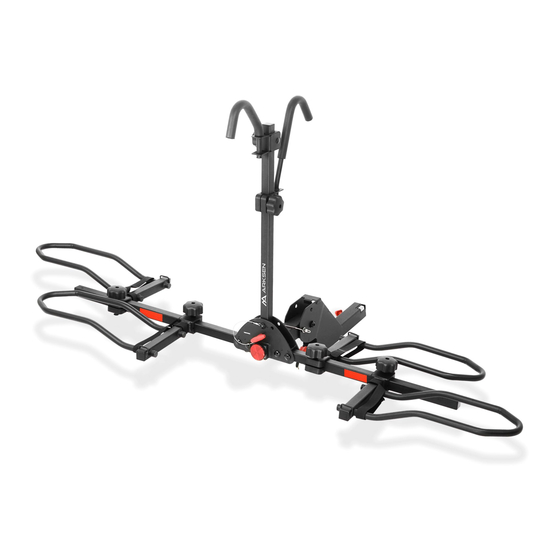
Hitch Mounted Foldable Bike Rack Platform
Style (2 Bike) w/Built-in Anti-Wobble Lock
OWNER'S MANUAL
WARNING:
Manufacturer and seller expressly disclaim any and all liability for personal injury, property
damage or loss, whether direct, indirect, or incidental, resulting from the incorrect attachment,
improper use, inadequate maintenance, unapproved modification,or neglect of this product.
Item# 005-PBK-FH2-SD
Advertisement

Related Manuals for ARKSEN 005-PBK-FH2-SD


Summary of Contents for ARKSEN 005-PBK-FH2-SD
- Page 1 OWNER’S MANUAL WARNING: Manufacturer and seller expressly disclaim any and all liability for personal injury, property damage or loss, whether direct, indirect, or incidental, resulting from the incorrect attachment, improper use, inadequate maintenance, unapproved modification,or neglect of this product. Item# 005-PBK-FH2-SD...
- Page 2 owner’s manual Thank you for purchasing our product. This manual covers operation and maintenance information about the product. Read carefully and understand all instruction before using the product. All information in this publication is based on the latest product information available at the time of approval for printing.
-
Page 3: Specification
Keep all plastic bags and packaging lm away from pets and children to avoid su ocation. SAVE THESE INSTRUCTIONS SPECIFICATION Model Number 005-PBK-FH2-SD 2 bikes Load Capacity 150 lbs Fitting... - Page 4 owner’s manual ASSEMBLY INSTRUCTION HARDWARE LIST Red Pin Folding Bracket Connecting Bracket Horizontal Tube Vertical Tube Short Hook Long Hook Wheel holders-L Wheel holders-R...
-
Page 5: Hardware List
owner’s manual HARDWARE LIST M1 0x55 Bolt x4 M8x70 Bolt x6 Lock Knob x6 10 Flat Washer x4 8 Spring Washer x6 M10 Lock Nut x4 8 Flat Washer x6 M10x60 Boltx1 Triangle Pin x1 10 Flat Washerx2 Screw x1 M10 Lock Nutx1 M12x80 Boltx1 12 Flat Washerx2... -
Page 6: Assembly Instruction
owner’s manual Required tools for assembly (Not included) ASSEMBLY INSTRUCTION NOTE: The nuts supplied with the rack have nylon thread locker at the end of each nut. Once the threads of the bolt reach the thread locker, you will feel resistance as you tighten the nut and bolt. Continue to tighten until it is secured. - Page 7 owner’s manual ASSEMBLY INSTRUCTION The use of security locks Tighten knob until there is no more play between the tongue and receiver. NOTE: Lock must be in unlocked position to tighten or loosen knob.
- Page 8 owner’s manual ASSEMBLY INSTRUCTION The use of security locks When the knob is tightened and folding bracket(1) is not shaken, insert the key and turn counter clockwise to enter the security anti-theft mode. Similarly,if you want to remove the bike rack from the car. Please insert the key and turn it clock wise, and then turn the knob anticlockwise with your hand until folding bracket (1) is loose, Remove triangle pin(13), you can remove the bike rack.
-
Page 9: User Instruction
owner’s manual USER INSTRUCTION Insert the connecting bracket (2) into folding bracket (1). Line up the hold with long bolt(16) and insert bolt throngh each hole.Threads the nuts onto the bolt and securely tighten. Finally,hitch the buckle pin(22) to secure the rack. M12x80 M12x80 Boltx1... - Page 10 owner’s manual USER INSTRUCTION Insert the end of tubes (5) on both side of connecting bracket (2). Line up each holes on bracket (2) with bolts (10) and threads the nuts onto the bolt and securely tighten. M1 0x55 Bolt x4 10 Flat Washer x4 10 10 M10 Lock Nut x4...
- Page 11 owner’s manual USER INSTRUCTION Insert bolts (19) connect with bottom side of connecting bracket (2).
- Page 12 owner’s manual ASSEMBLY INSTRUCTION Insert the vertical tube (4) into the second hole of connecting bracket (2) with pin(3). Install the bolt (15) through the top hole in connecting bracket (2) and the tube (4). Use bolt(15)to cover the pull rope of red pin (3)according to the gure,and Tighten the bolt securely using wrench.
- Page 13 owner’s manual ASSEMBLY INSTRUCTION Install the covers (17) on the tube (5) and line up them with wheel holder (8,9) into the groove on the cover and tighten the knobs (12) of the wheel holders . M8x70 Bolt x4 8 Spring Washer x4 8 Flat Washer x4 Attention: Please remember to put lock washer and at washer on it, then the knobs (12) can be tighten.
- Page 14 owner’s manual ASSEMBLY INSTRUCTION Install the covers (17) on the tube (4) and install bolts (11) through the holes with hooks (6,7) into the groove on the cover and tighten the knobs (12) of the hooks. Long Hook Short Hook M8x70 Bolt x2 8 Spring Washer x2 8 Flat Washer x2...
- Page 15 owner’s manual ASSEMBLY INSTRUCTION NOTE: Please remember to put lock washer and at washer on it, then the knobs (12) can be tighten.
- Page 16 owner’s manual USER INSTRUCTION LOADING THE BIKES Adjust the wheel holder (8,9) in position, and put the bike on the rack. Make sure the padded hooks (6,7) are pressing the bike frames, so that bikes are held tightly. In the end, secure the bike wheel to the bike with the stabilizer straps. ATTENTION! Safety strap is required at all time during transport.
- Page 17 owner’s manual USER INSTRUCTION Put the bike on the rack and secure in plack with tie-down strap (18) to provide extra security.
- Page 18 owner’s manual USER INSTRUCTION LOWERING THE RACK FOR TAILGATE / BACK DOOR When using this feature, open the tailgate / back-door slowly and make sure there is enough clearance between the tailgate / back-door and the rack to prevent any damage on the vehicle. WARNING: Remove the buckle pin(22), tilt down the carrier.
- Page 19 owner’s manual USER INSTRUCTION Fold Function:Remove the buckle pin (22) and replace it to fold up when no carring bikes Remove the pin (3) and fold down the tube (4). NOIE: Insert the Red pin (3) into the other hole according to the gure to x the vertical tube (4). Removethe buckle pin (22), tilt up the carrier, and then secure the position by replacing pin, insert the buckle pin into the upper hole.
- Page 20 owner’s manual USER INSTRUCTION ATTENTION! WARNING! Failure to install the rack to the car receiver properly may result in the rack separating from the receiver and fall onto the road way, causing potential road hazard.
Need help?
Do you have a question about the 005-PBK-FH2-SD and is the answer not in the manual?
Questions and answers
Lost key. Can I get a replacement. Nick rack 031 is the number on the lock
Bike rack.
I am trying to find information that will allow me to contact Arksen for a replacement Short Arm on model #005-PBK-H2S, but have been unsuccessful in my internet search. If someone could please contact me a.s.a.p. I really need to replace this as our bike rack is used several times a week.
Does anyone have a number/email for Arksen bike rack customer service? I'm trying to order a replacement part.