Table of Contents
Advertisement
Quick Links
Advertisement
Table of Contents

Subscribe to Our Youtube Channel
Related Manuals for Zanussi ZCG61026XA


Summary of Contents for Zanussi ZCG61026XA
- Page 1 User Manual GETTING STARTED? EASY. ZCG61026XA EN User Manual Cooker...
-
Page 2: Safety Information
VISIT OUR WEBSITE TO: Get usage advice, brochures, trouble shooter, service and repair information: www.zanussi.com/support SAFETY INFORMATION Before the installation and use of the appliance, carefully read the supplied instructions. The manufacturer is not responsible for any injuries or damage that are the result of incorrect installation or usage. - Page 3 accommodation where such use does not exceed (average) domestic usage levels. Only a qualified person must install this appliance and replace • the cable. This appliance is intended for use up to an altitude of 2000 m • above sea level. This appliance is not intended to be used on ships, boats or •...
-
Page 4: Safety Instructions
WARNING: Ensure that the appliance is switched off before • replacing the lamp to avoid the possibility of electric shock. If the mains power supply cable is damaged, it must be • replaced by the manufacturer, its Authorised Service Centre or similarly qualified persons to avoid an electrical hazard. -
Page 5: Gas Connection
GAS CONNECTION WARNING! Risk of fire and explosion • All gas connections must be made by a qualified person. • Before installation, make sure that the local • Fats and oil when heated can release flammable distribution conditions (nature of the gas and vapours. -
Page 6: Internal Lighting
• Make sure the flame does not go out when you • Keep the lid glass open, while the oven is in quickly turn the knob from the maximum to the operation (if applicable). minimum position. INTERNAL LIGHTING • Use only the accessories supplied with the appliance. -
Page 7: Product Description
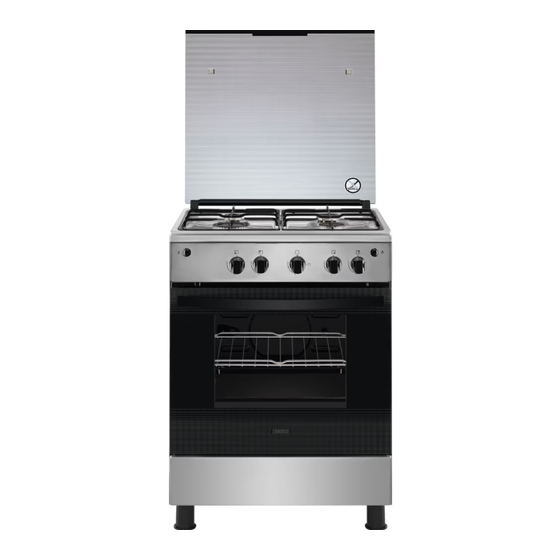
PRODUCT DESCRIPTION GENERAL OVERVIEW Button for the spark generator Knob for the heating functions Button for the lamp Knobs for the hob Grill Lamp Shelf positions COOKING SURFACE LAYOUT Auxiliary burner Steam outlet - number and position depend on the model Semi-rapid burner Semi-rapid burner Rapid burner... -
Page 8: Hob - Daily Use
PREHEATING The appliance can emit an odour and smoke. This is normal. Make sure that the airflow is sufficient. Preheat the empty appliance to burn off the remaining grease. Let the oven cool down. Dampen a soft cloth with warm water and a little mild washing-up liquid and 1. -
Page 9: Hob - Hints And Tips
TURNING THE BURNER OFF WARNING! Always turn the flame To put the flame out, turn the knob to the off down or switch it off before you position remove the pans from the burner. HOB - HINTS AND TIPS DIAMETERS OF COOKWARE WARNING! Refer to Safety chapters. -
Page 10: Periodic Maintenance
4. For the burner to operate correctly, make sure Be very careful when you replace that the arms of the pan supports are aligned the pan supports to prevent the with the centre of the burner. hob top from damage. 2. -
Page 11: Oven - Using The Accessories
Do not keep the knob for the oven CAUTION! Do not put the meat on the functions pushed for more than 15 highest shelf level. There is a risk of seconds. If the oven burner does not fire. light after 15 seconds, release the knob for the oven functions, turn it into CAUTION! Make sure to turn the knob off position, open the oven door and... -
Page 12: Oven - Hints And Tips
OVEN - HINTS AND TIPS BAKING CAKES WARNING! Refer to Safety chapters. Do not open the oven door before 3/4 of the set cooking time is up. The temperature and baking times in COOKING MEAT AND FISH the tables are guidelines only. They Leave the meat for approximately 15 minutes before depend on the recipes and the quality carving so that the juice does not seep out. - Page 13 Preheating Food Quantity (kg) Knob position Time (min) Shelf position time (min) Potato gratin 1.5 - 2.5 80 - 90 Macaroni oven 1.5 - 2.5 40 - 50 Kebab Hala 1.5 - 2.5 40 - 50 Meat Preheating Food Quantity (kg) Knob position Time (min) Shelf position...
-
Page 14: Oven - Care And Cleaning
Cakes Preheating Food Quantity (kg) Knob position Time (min) Shelf position time (min) Biscuits 0.3 - 0.5 10 - 20 Flat cake 0.6 - 1.0 25 - 30 Orange cake 1.0 - 1.5 110 - 115 Feter Mshalted 1.0 - 1.5 50 - 60 Salty cake 1.0 - 1.2... - Page 15 WARNING! The oven door can close if you try to remove the internal panel of glass when the door is still assembled. Do not loosen the screws. 1. Open the door fully. 3. Close the oven door to the first opening position (halfway).
-
Page 16: Replacing The Lamp
7. Clean the oven door with water and soap. Clean the inner side of the door. Dry the oven door carefully. When the cleaning is completed, install the glass Make sure the levers are in their panels and the oven door. To install the oven door, original position before closing the do the above steps in the opposite sequence. -
Page 17: Troubleshooting
TROUBLESHOOTING WARNING! Refer to Safety chapters. WHAT TO DO IF... Problem Possible cause Remedy There is no spark when you try The hob is not connected to an Check if the hob is correctly to activate the spark generator. electrical supply or it is con- connected to the electrical nected incorrectly. -
Page 18: Installation
SERVICE DATA the oven cavity. Do not remove the rating plate from the oven cavity. If you cannot find a solution to the problem yourself, contact your dealer or an Authorised Service Centre. The necessary data for the service centre is on the rating plate. - Page 19 OTHER TECHNICAL DATA Appliance category: II2H3B/P Gas original: G30 (3B/P) 28-30 mbar Gas replacement: G20 (2H) 20 mbar BYPASS DIAMETERS BURNER Ø BYPASS 1/100 mm Auxiliary Semi-rapid Rapid Oven Grill GAS BURNERS FOR NATURAL GAS G20 20 mbar INJECTOR MARK 1/100 BURNER NORMAL POWER kW REDUCED POWER kW...
- Page 20 ADJUSTMENT TO DIFFERENT TYPES OF WARNING! Let only an authorized person do the adjustment to different types of gas. If the appliance is set for liquid gas you can change it to natural gas, with the correct injectors. The gas rate is adjusted to suit. WARNING! Before you replace the injectors, make sure that the gas knobs are in the Off position.
- Page 21 WARNING! Put the mains plug into the mains socket only if all parts are back into their initial position. There is a risk of injury. 4. Light the burner. Refer to "Hob - Daily use" chapter. 5. Turn the knob for the hob to the minimum position.
- Page 22 3. Connect the appliance to the electricity. Changing from liquid gas to natural gas 1. Unscrew approximately one turn the bypass screw position A. 2. Put the knob for the oven functions back. 3. Connect the appliance to the electricity. WARNING! Put the mains plug into the mains socket only if all parts are back into their initial...
-
Page 23: Electrical Installation
3. Assemble the burner in a reverse sequence. Before you fix the screw, make sure that the burner is pushed correctly to the back panel. 4. If the floor is not equally flat, use the adjustable Test the grill injectors. feet on the bottom of the appliance to set a stable position for the appliance. -
Page 24: Environmental Concerns
ENVIRONMENTAL CONCERNS Return the product to your local recycling facility or Recycle materials with the symbol . Put the contact your municipal office. packaging in relevant containers to recycle it. Help protect the environment and human health by The company is committed to provide the spare recycling waste of electrical and electronic part for the life Span Two years after warranty appliances. - Page 28 WWW.ZANUSSI.COM/SHOP...
Need help?
Do you have a question about the ZCG61026XA and is the answer not in the manual?
Questions and answers