Table of Contents
Advertisement
Quick Links
Advertisement
Table of Contents

Related Manuals for Zanussi ZCG612H1XA


Summary of Contents for Zanussi ZCG612H1XA
- Page 1 User Manual GETTING STARTED? EASY. ZCG612H1XA EN User Manual Cooker...
-
Page 2: Safety Information
VISIT OUR WEBSITE TO: Get usage advice, brochures, trouble shooter, service and repair information: www.zanussi.com/support SAFETY INFORMATION Before the installation and use of the appliance, carefully read the supplied instructions. The manufacturer is not responsible for any injuries or damage that are the result of incorrect installation or usage. - Page 3 Do not install the appliance behind a decorative door in order • to avoid overheating. Do not install the appliance on a platform. • Do not operate the appliance by means of an external timer or • separate remote-control system. WARNING: Unattended cooking on a hob with fat or oil can be •...
-
Page 4: Safety Instructions
suitable or hob guards incorporated in the appliance. The use of inappropriate guards can cause accidents. SAFETY INSTRUCTIONS INSTALLATION • Connect the mains plug to the mains socket only at the end of the installation. Make sure that WARNING! Only a qualified person there is access to the mains plug after the must install this appliance. -
Page 5: Care And Cleaning
• Deactivate the appliance after each use. lift these objects up when you have to move • Be careful when you open the appliance door them on the cooking surface. while the appliance is in operation. Hot air can • Provide good ventilation in the room where the release. -
Page 6: Internal Lighting
• Do not close the lid until the hob and oven are • Do not leave the appliance unattended during completely cold. grilling. Accessible parts become hot. • Glass lid can shatter, when heated (if • Keep children away when the grill is in use. applicable). - Page 7 Minimum distances Frequency 50 - 60 Hz Appliance class Dimension Dimension Height Width Depth TECHNICAL DATA Voltage 220 - 240 V OTHER TECHNICAL DATA Appliance category: II2H3B/P Gas original: G20 (2H) 20 mbar Gas replacement: G30/G31 (3B/P) 30/30 mbar BYPASS DIAMETERS BURNER Ø...
- Page 8 GAS BURNERS FOR LPG G30 30 mbar NORMAL POWER REDUCED POW- INJECTOR MARK NOMINAL GAS BURNER ER kW 1/100 mm FLOW g/h Rapid 0.72 Semi-rapid 0.43 Auxiliary 0.95 0.35 Oven 0.90 Grill GAS BURNERS FOR LPG G31 30 mbar NORMAL POW- REDUCED POWER INJECTOR MARK NOMINAL GAS FLOW...
- Page 9 • the fastening clamps are not rusted, • expired term is not due. If one or more defects are visible, do not repair the pipe, but replace it. The gas supply ramp is on the rear side of the control panel. ADJUSTMENT TO DIFFERENT TYPES OF Let only an authorized person do the adjustment to different types of gas.
- Page 10 WARNING! Put the mains plug into the mains socket only if all parts are back into their initial position. There is a risk of injury. 4. Light the burner. Refer to "Hob - Daily use" chapter. 5. Turn the knob for the hob to the minimum position.
-
Page 11: Electrical Installation
Changing from natural gas to liquid gas 2. Release the burner injector with a 7 mm socket spanner and replace it with a right one. 1. Fully tighten the bypass screw. 2. Put the knob back. 3. Connect the appliance to the electricity. Changing from liquid gas to natural gas 1. -
Page 12: Product Description
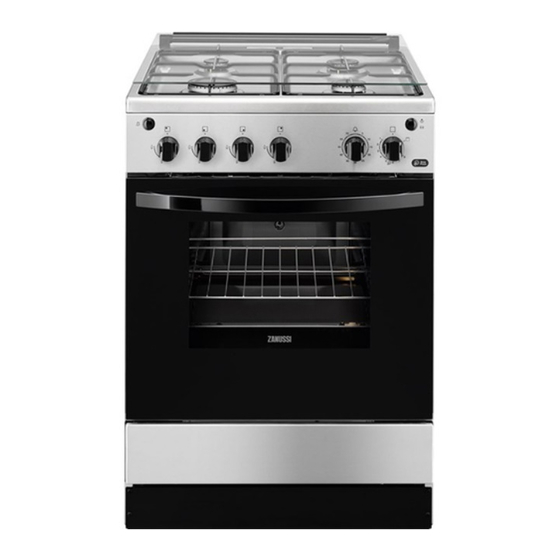
PRODUCT DESCRIPTION GENERAL OVERVIEW Button for the spark generator Knobs for the hob Knob for the Minute Minder Knob for the heating functions Button for the lamp and turnspit Grill Lamp Turnspit hole Shelf positions COOKING SURFACE LAYOUT Auxiliary burner Steam outlet - number and position depend on the model Semi-rapid burner... -
Page 13: Before First Use
BEFORE FIRST USE 1. Set the maximum temperature. WARNING! Refer to Safety chapters. 2. Let the appliance operate for approximately 20 minutes. WARNING! Accessories can become INITIAL CLEANING hotter than usual. Remove all accessories from the oven. Refer to "Care and cleaning" chapter. The appliance can emit an odour and smoke. -
Page 14: Hob - Hints And Tips
BURNER OVERVIEW A. Burner cap B. Burner crown C. Ignition candle D. Thermocouple TURNING THE BURNER OFF To put the flame out, turn the knob to the off position WARNING! Always turn the flame down or switch it off before you remove the pans from the burner. -
Page 15: Oven - Daily Use
• Scratches or dark stains on the surface have no PAN SUPPORTS effect on how the hob operates. The pan supports are not resistant to • Use a special cleaner suitable for the surface of washing in a dishwasher. They must the hob. - Page 16 Oven function Application Turnspit To spit roasting meat. To use this function, press the button for oven lamp and turnspit. 1) 1 - 135°C, 2 - 145°C, 3 - 160°C, 4 - 175°C, 5 - 190°C, 6 - 205°C, 7 - 225°C, 8 - 240°C IGNITION OF OVEN GAS BURNER flow position for 15 seconds or less to let the thermocouple warm up.
-
Page 17: Oven - Clock Functions
4. Release the spark generator button. 5. Keep the oven control knob in this position for approximately 15 seconds. Do not release it until the flame comes on. 6. Release the oven control knob. If the grill does not come on or if it accidentally goes out release the oven control knob and turn it to the Off position. - Page 18 D. Handle Do not push the baking tray all the way 1. Open the oven door. to the back wall of the cavity. This 2. Put the turnspit handle into the spit. prevents the heat from circulating 3. Put the baking tray on the lowest shelf level. around the tray.
-
Page 19: Oven - Hints And Tips
OVEN - HINTS AND TIPS You can extend the baking time by 10 – 15 minutes WARNING! Refer to Safety chapters. if you bake cakes on more than one shelf position. Trays in the oven can distort during baking. When the trays are cold again, the distortions disappear. -
Page 20: Cooking Tables
COOKING TABLES Always preheat an empty oven at the temperature required for the food for 15 minutes before cooking. Thermo- Cooking time Grilling time Shelf po- Food stat posi- Accessories (min) (min) sition tion Baking in tray Swedish buns 10 - 20 baking tray 3 - 5 Swiss roll... -
Page 21: Oven - Care And Cleaning
Thermo- Cooking time Grilling time Shelf po- Food stat posi- Accessories (min) (min) sition tion Quiche Lorraine 60 - 70 tray on wire shelf Potato gratin 55 - 65 tray Pyrex on wire shelf Meat Trout wire shelf and tray on lev- 35 - 45 el 2 Chicken... - Page 22 5. Release the locking system to remove the internal glass panel. 2. Lift and turn the levers fully on both hinges. 6. Turn the two fasteners by 90° and remove them from their seats. 90° 3. Close the oven door halfway to the first 7.
-
Page 23: Replacing The Lamp
2. Slowly lift the drawer. 3. Pull the drawer out fully. To install the drawer, do the above steps in the opposite sequence. REPLACING THE LAMP WARNING! Risk of electric shock. The lamp can be hot. 1. Turn off the oven. Wait until the oven is cold. 2. -
Page 24: Service Data
Problem Possible cause Remedy The fuse is blown. Make sure that the fuse is the cause of the malfunction. If the fuse is blown again and again, contact a qualified electrician. Burner cap and crown are Place the burner cap and placed incorrectly. -
Page 25: Energy Efficiency
......... Product number (PNC) ......... Serial number (S.N.) ......... ENERGY EFFICIENCY PRODUCT INFORMATION FOR HOB ACCORDING TO EU 66/2014 Model identifi- ZCG612H1XA cation Type of hob Hob inside Freestanding Cooker Number of gas burners Energy efficien- Left rear - Auxiliary... -
Page 26: Environmental Concerns
Volume 51 l Type of oven Oven inside Freestanding Cooker Mass 39.0 kg EN 15181 Measuring method of the energy consumption of gas fired ovens. Residual heat OVEN - ENERGY SAVING When the cooking duration is longer than 30 min, The oven has features which help you reduce the oven temperature to minimum 3 - 10 save energy during everyday cooking. - Page 28 WWW.ZANUSSI.COM/SHOP...
Need help?
Do you have a question about the ZCG612H1XA and is the answer not in the manual?
Questions and answers