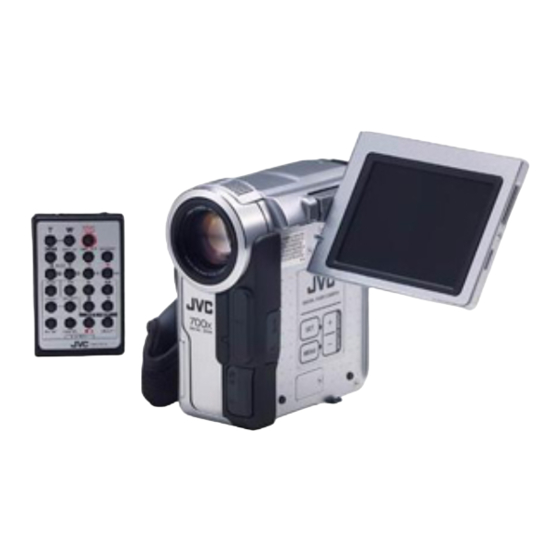
JVC GR-DX55 Instructions Manual
Hide thumbs Also See for GR-DX55:

Advertisement

Quick Links

DIGITAL VIDEO CAMERA
GR-DX55
GR-DX45
GR-DX35
GR-DX25
Please visit our Homepage on the World Wide Web for Digital
Video Camera:
http://www.jvc-victor.co.jp/english/cyber/
For Accessories:
http://www.jvc-victor.co.jp/english/accessory/
INSTRUCTIONS
ENGLISH
CONTENTS
AUTOMATIC
DEMONSTRATION
GETTING STARTED
TAPE
RECORDING &
PLAYBACK
ADVANCED
FEATURES
REFERENCES
EN
LYT1120-001A
6
7 – 10
11 – 15
16 – 33
34 – 47

Advertisement

Table of Contents
loading

Summary of Contents for JVC GR-DX55

  • Page 1 ENGLISH DIGITAL VIDEO CAMERA CONTENTS GR-DX55 AUTOMATIC DEMONSTRATION GR-DX45 GETTING STARTED 7 – 10 GR-DX35 GR-DX25 TAPE RECORDING & PLAYBACK 11 – 15 Please visit our Homepage on the World Wide Web for Digital ADVANCED Video Camera: FEATURES 16 – 33 http://www.jvc-victor.co.jp/english/cyber/...
  • Page 2: Table Of Contents

    CONTENTS USING MENUS FOR DETAILED ADJUSTMENT ..21 – 25 SAFETY PRECAUTIONS For Recording Menu ........21 – 24 SOME DO’S AND DON’TS ON THE For Playback Menu ........24 – 25 SAFE USE OF EQUIPMENT DUBBING ..........26 – 27 Dubbing To Or From A VCR ........
  • Page 3: Safety Precautions

    OR MOISTURE. However, live recording and LCD monitor/viewfinder playback are possible anywhere. ● Use the JVC BN-V107U/V114U battery packs and, to CAUTIONS: recharge them or to supply power to the camcorder ● To prevent shock, do not open the cabinet. No user from an AC outlet, use the provided multi-voltage AC serviceable parts inside.
  • Page 4: Some Do's And Don'ts On The Safe Use Of Equipment

    Do not point the lens or the viewfinder directly into the sun. This can cause eye injuries, as well as lead to the malfunctioning of internal circuitry. There is also a risk of fire or electric shock. CAUTION! The following notes concern possible physical damage to the camcorder and to the user. Do not carry or hold the camcorder by the viewfinder and/or the LCD monitor as this can result in dropping the unit, or in a malfunction.
  • Page 5: Provided Accessories

    PROVIDED ACCESSORIES AC Adapter AP-V11E or AP-V13E Battery Pack BN-V107U S-Video/Audio/ or BN-V107U-S Video/Editing Cable Power Cord Grip Belt Lens Cap Editing (Already attached (See below for Extension Cable to the camcorder) attachment) USB Cable AAA (R03) Core Filter Battery x 2 (for provided USB AAA (R03) Battery x 2 Cable Adapter...
  • Page 6: How To Attach The Core Filter

    HOW TO ATTACH THE CORE FILTER Attach the Core Filter(s) to the provided AC Adapter’s cord, S-Video/Audio/Video/Editing cable and USB cable. The Core Filter reduces interference. Release the 1) Run the cable through the Core Filter, leaving approx. 3 cm of cable between stoppers on both the cable plug and the Core Filter.
  • Page 7: Getting Started

    Battery pack LCD monitor on Viewfinder on Read the kit's instruction manual before using. Also, by using the optional JVC VC-VBN856U DC BN-V107U 1 hr. 5 min. 1 hr. 25 min. Cord, it will be possible to connect BN-V840U or...
  • Page 8: Grip Adjustment

    ● Since the AC Adapter processes electricity internally, Grip Adjustment it becomes warm during use. Be sure to use it only in well-ventilated areas. Separate the Velcro strip. ● The following operation stops charging: Pass your right hand through the loop and grasp the •...
  • Page 9: Tripod Mounting

    Tripod Mounting Loading/Unloading A Cassette CAUTION The camcorder needs to be powered up to load or eject a cassette. When attaching the camcorder to a tripod, extend its Slide and hold OPEN/EJECT in the direction of legs to stabilise the camcorder. It is not advised to use the arrow then pull the cassette holder cover open until small sized tripods.
  • Page 10: Date/Time Settings

    ● It takes a few seconds for the cassette holder to open. Do D I SPLAY D I SPLAY not apply force. ON SC RE N – LCD / TV DATE / I ME – ● There may be a delay after you open the cassette holder T I ME CODE –...
  • Page 11: Tape Recording & Playback

    Basic Recording Perform the procedures listed below before continuing. ● Power ( pg. 7) ● Grip Adjustment ( pg. 8) ● Viewfinder Adjustment ( pg. 8) ● Load A Cassette ( pg. 9) ● Recording Mode Setting ( pg. 10) Remove the lens cap.
  • Page 12: Zooming

    Journalistic Shooting Zooming In some situations, different shooting angles may To produce the zoom in/out effect, or an instantaneous provide more dramatic results. Hold the camcorder in change in image magnification. the desired position and tilt the LCD monitor in the Zoom In most convenient direction.
  • Page 13: Time Code

    Time Code Normal Playback During recording, a time code is recorded on the tape. Load a tape ( pg. 9). This code is to confirm the location of the recorded Set the Power Switch to “ ” while pressing scene on the tape during playback. down the Lock Button located on the switch.
  • Page 14: Blank Search

    Blank Search Helps you find where you should start recording in the middle of a tape to avoid time code interruption pg. 13). Load a tape ( pg. 9). Set the Power Switch to “ ” while pressing down the Lock Button located on the switch.
  • Page 15: Connections

    ● If no image is displayed or no sound is heard from the TV, set “S/AV INPUT” to “OFF” in the Menu Screen (GR-DX55/DX35 only, pg. 24). ● While the S-Video/Audio/Video/Editing cable is connected...
  • Page 16: For Recording

    Night-Scope SHUTTER 1/50: The shutter speed is fixed at 1/50th of a second. Makes dark subjects or areas even brighter than they Black bands that usually appear when shooting a TV would be under good natural lighting. Although the screen become narrower. recorded image is not grainy, it may look as if it is 1/120: The shutter speed is fixed at 1/120th of a strobing due to the slow shutter speed.
  • Page 17: Fade/Wipe Effects

    Fade/Wipe Effects FADER — WHITE Fade in or out with a white screen. These effects let you make pro-style scene transitions. Use them to spice up the transition from one scene to FADER — BLACK the next. Fade in or out with a black screen. Fade or Wipe works when tape recording is started or FADER —...
  • Page 18: Snapshot

    NOTES: Snapshot ● To remove the shutter sound, “BEEP” on pg. 23. This feature lets you record still images that look like ● If Snapshot recording is not possible, “PHOTO” blinks photographs onto a tape. when SNAPSHOT is pressed. ● If Programme AE with special effects ( pg.
  • Page 19: Manual Focus

    Manual Focus Exposure Control To obtain correct focus. Manual exposure adjustment is recommended in the following situations: If you are using the viewfinder, you should already • When shooting using reverse lighting or when the have made the necessary viewfinder adjustments background is too bright.
  • Page 20: Iris Lock

    Iris Lock Press + or – to select “ (W.BALANCE)”, then press SELECT/SET Use this function in the following situations: Press + or – to select the desired mode. • When shooting a moving subject. “AUTO”: White balance is adjusted automatically •...
  • Page 21: For Recording Menu

    WIPE/FADER For Recording Menu Refer to “Fade/Wipe Effects” ( pg. 17). This camcorder is equipped with an easy-to-use, on-screen menu system that simplifies many of the PROGRAM AE more detailed camcorder settings ( pg. 21 – 24). Refer to “Programme AE With Special Effects” Set the Power Switch to “...
  • Page 22 SNAP MODE TELE MACRO Refer to “Snapshot” ( pg. 18). [OFF]: To turn off this function. ON: Usually the distance to a subject where the lens GAIN UP is in focus depends on the zoom magnification. OFF: Allows you to shoot dark scenes with no picture Unless there is a distance more than 1m to the brightness adjustment.
  • Page 23: Using Menus For Detailed Adjustment

    SYSTEM PRIORITY [LCD]: When the LCD monitor is fully open, even if “ SYSTEM” functions which are set when the Power the viewfinder is pulled out, the image is displayed Switch is set to “ ” are also applied when the only on the LCD monitor;...
  • Page 24: For Playback Menu

    “ VIDEO” Menu when using this camcorder as a press SELECT/SET to display the Sub Menu. recorder during dubbing (GR-DX55/DX35 only, 26, 27). Press + or – to select the desired parameter and press SELECT/SET .
  • Page 25 VIDEO DISPLAY NOTES: • The camcorder cannot detect the sound mode in which • Settings made in the “ VIDEO DISPLAY” Menu are the recording was made during fast-forward or rewind. effective only for tape playback. During playback the sound mode is displayed in the upper left corner.
  • Page 26: Dubbing

    ** Connect when the S-Video connection is not used. To Use This Camcorder As A Recorder *** If your VCR has a SCART connector (GR-DX55/DX35 only) To use this camcorder as a player [ use the provided cable adapter. 1. Set the camcorder’s Power Switch to “...
  • Page 27: Dubbing To Or From A Video Unit Equipped With A Dv Connector (Digital Dubbing)

    ( pg. 7). ● If the remote control is used when both the player and recorder are JVC video units, both units will perform the same operation. To prevent this from happening, press the buttons on both units.
  • Page 28: Using The Remote Control Unit

    Playback Special Effects Make sure “REMOTE” in the SYSTEM Menu is set to “ON” ( pg. 23) and the remote control is To allow you to add creative effects to the playback pointed at the remote sensor . The transmitted image.
  • Page 29: Audio Dubbing

    15). While holding A.DUB (e) on the remote control, press PAUSE (6) . “6e” and “MIC” (GR-DX55/ Play back the tape, locate the Edit-Out point and DX35 only) appear. press PAUSE (6) . Confirm the time code at this point ( pg.
  • Page 30: Random Assemble Editing [R.a.edit]

    IMPORTANT Random Assemble Editing [R.A.Edit] Although the MBR is compatible with JVC VCRs Create edited videos easily using your camcorder as and those of many other makers, it may not work the source player. You can select up to 8 “cuts” for with yours or may offer limited functions.
  • Page 31 ● Make sure to set “S/AV INPUT” to “OFF” in the Menu If using a Fade/Wipe at the beginning of the scene, Screen (GR-DX55/DX35 only, pg. 24). press FADE/WIPE on the remote control. ● Set the video out select switch of the cable adapter as •...
  • Page 32: For More Accurate Editing

    AUTOMATIC EDITING TO VCR For More Accurate Editing Rewind the tape in the camcorder to the beginning Some VCRs make the transition from Record-Pause to of the scene you want to edit and press PAUSE (6) Record mode faster than others. Even if you begin editing for the camcorder and the VCR at exactly the Point the remote control towards the VCR’s remote same time, you may lose scenes you wanted, or find...
  • Page 33: System Connections

    ● The still images can also be transferred to a PC with a DV connector-equipped capture board. ● When using a DV cable, be sure to use the optional JVC VC-VDV206U or VC-VDV204U DV cable depend- ing on the type of DV connector (4 or 6 pins) on the PC with DV connector ●...
  • Page 34: Troubleshooting

    Before consulting your JVC dealer, please check the The focus does not adjust automatically. following to see it you can correct the problem yourself. • Focus is set to the Manual mode. ¥ Set Focus to the Auto mode ( pg.
  • Page 35 LCD monitor White Balance cannot be activated. become dark. Consult your nearest JVC dealer. • The Sepia or Monotone mode is activated. ¥ Adjust the brightness and angle of the LCD monitor pg.
  • Page 36 • This is normal. above two or three times, please consult your nearest JVC dealer. Do not eject the cassette. This Play, Rewind and Fast-Forward functions do will cause damage to the tape.
  • Page 37: Cautions

    NOTES: General Battery Precautions ● It is normal for the battery pack to be warm after If the remote control is not functioning even if it is being charging, or after use. operated correctly, the batteries are exhausted. Temperature Range Specifications Replace them with fresh ones.
  • Page 38 ... near appliances generating strong magnetic or If, after using the cleaning cassette, the problems electric fields (speakers, broadcasting antennas, still exist, consult your nearest JVC dealer. etc.). Mechanical moving parts used to move the video ... in places subject to extremely high (over 40°C) or heads and video tape tend to become dirty and worn extremely low (under 0°C) temperatures.
  • Page 39 RELEASE and remove the battery pack. If malfunctioning occurs, stop using the unit immediately and consult your local JVC dealer. 2) Cleaning The Camcorder 1. To clean the exterior, wipe gently with a soft cloth. Put the cloth in diluted mild soap and wring it well The camcorder is a microcomputer-controlled to wipe off heavy dirt.
  • Page 40: Index

    Controls, Connectors And Indicators Refer to this diagram while reading the instructions. LCD monitor Stereo microphone Speaker 2 3 4 & Viewfinder Remote Control INDEX...
  • Page 41 • A. DUB Button ......... pg. 29 Tally Lamp ........... pg. 11, 23 PLAY Button* • S-Video/Audio/Video Input (GR-DX55/DX35 only)/ FF Button* Output Connector [S/AV] ..... pg. 15, 26, 31 STOP Button* • Edit Connector ........
  • Page 42: Lcd Monitor/Viewfinder Indications

    LCD Monitor/Viewfinder Indications During Tape Recording 1h50m 0 x W & SOUND b i t 25 . 12 . 03 5 : 55 During Tape Playback SOUND BLANK SEARCH VOLUME 25 . 12 . 03 116 : 21 : 24 INDEX...
  • Page 43 Appears when the Power Switch Appears while a tape is running is set to “ ” ..........pg. 12 : Playback • : Appears when Night-Scope is : Fast-Forward/Shuttle Search engaged ........pg. 16 : Rewind/Shuttle Search • : Appears when “GAIN UP” is set to “AUTO” : Pause and the shutter speed is being automati- 64 : Forward Frame-By-Frame Playback/Slow-...
  • Page 44 When it does, you “ ”. can resume using the camcorder. If the indication TAPE END remains, consult your nearest JVC dealer. Appears when the tape ends during recording or E03 or E04 UNIT IN SAFEGUARD MODE EJECT playback. AND REINSERT TAPE...
  • Page 45: Specifications

    : Monaural Output : 4-pin, IEEE 1394 compliant Input* : 4-pin, IEEE 1394 compliant : 5-pin * GR-DX55/DX35 only. AC Adapter Power requirement : AC 110 V to 240 V`, 50 Hz/60 Hz Output : DC 11 V , 1 A Specifications shown are for SP mode unless otherwise indicated.
  • Page 46: Terms

    AC Adapter ........... pg. 7, 8 Gain Up ............pg. 22 Analogue Input ......... pg. 24, 26 Grip Adjustment ..........pg. 8 Audio Dubbing ..........pg. 29 Auto Date ............pg. 23 Icons ............pg. 21 – 25 Auto Focus ............. pg.
  • Page 47 Random Assemble Editing ..... pg. 30 – 32 Tally ..............pg. 23 Record-Standby ..........pg. 11 Tele Macro ............. pg. 22 Recording Mode ..........pg. 10 Time Code ......... pg. 13, 24, 25 Remote Control .......... pg. 5, 28 Tripod Mounting ..........pg.
  • Page 48 VICTOR COMPANY OF JAPAN, LIMITED Printed in Japan 0103-HO-UN-SN1 COPYRIGHT© 2003 VICTOR COMPANY OF JAPAN, LTD.
  • Page 49 This file has been downloaded from: www.UsersManualGuide.com User Manual and User Guide for many equipments like mobile phones, photo cameras, monther board, monitors, software, tv, dvd, and othes.. Manual users, user manuals, user guide manual, owners manual, instruction manual, manual owner, manual owner's, manual guide, manual operation, operating manual, user's manual, operating instructions, manual operators, manual operator, manual product, documentation manual, user maintenance, brochure, user reference, pdf manual Downloaded from:...

Table of Contents