Table of Contents
Advertisement
Quick Links
최초시작일자 : 2022-5-16
KUKJE-14195
문서번호
Order No.
CWROM-2205-00199
P/No.
MFL70441711
작업자
황용민 (055) 713-2909
개정일자 : 2016-6-1
QA 요청사항 :
1. 원고에 지시된 대로 작업한 후 이상없이 작업 되었는지 재차 검토 후 PDF 파일을 생성한다.
2. 작업완료 후 담당 연구원에게 수정부분에 대한 검증요청한다.
3. 아래 체크리스트에 따라 놓치기 쉬운 사항을 우선으로 한번 더 확인한다.
* 필수확인 - QA요구사항
작업원고와 수정내용이 일치하는가?
(실패사례:영어/비영어 수정사항 동일한지 확인할것.)
언어표시띠의 위치(누락여부)는 바른가?
약물(기호)이 깨지거나 위치가 어긋 난 곳은 없는가?
그림이 가려지거나 잘려나간 곳은 없는가?
바코드와 P/No.가 일치하는가? (바코드 확인)
번역 작업중 번역이 적용되지 않고 누락된 단어나 문장은 없는가?
작업원고 이외에 추가로 수정 된 부분은 없는가?
표지 작업시 인쇄물 종류 별 Naming이 일치 하는가?
*최종 확인후 본 체크리스트는 삭제됩니다.
(*** 반드시 필요 – 의뢰자가 요청한 의도대로 작업이 정확히 되었는지 반드시 확인이
필요함)
최종확인일자 : 2022-5-16
작업 의뢰한 원고와 대조하여 최종 이상이
없음을 확인 합니다.
작업 의뢰자
조정우
예
예
예
예
예
예
예
예
Advertisement
Table of Contents

Related Manuals for LG AG16GBWC0


Summary of Contents for LG AG16GBWC0
- Page 1 최종확인일자 : 2022-5-16 최초시작일자 : 2022-5-16 KUKJE-14195 문서번호 작업 의뢰자 Order No. CWROM-2205-00199 조정우 P/No. MFL70441711 작업 의뢰한 원고와 대조하여 최종 이상이 없음을 확인 합니다. 작업자 황용민 (055) 713-2909 개정일자 : 2016-6-1 QA 요청사항 : 1. 원고에 지시된 대로 작업한 후 이상없이 작업 되었는지 재차 검토 후 PDF 파일을 생성한다. 2.
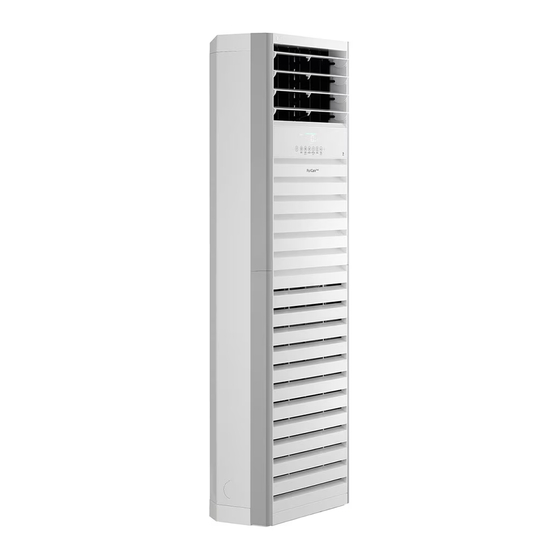
- Page 2 OWNER’S MANUAL AIR PURIFIER Read this owner’s manual thoroughly before operating the appliance and keep it handy for reference at all times. AG16GB Series EN ENGLISH www.lg.com MFL70441711 Rev.01_051622 Copyright © 2022 LG Electronics Inc. All Rights Reserved...
-
Page 3: Table Of Contents
Adjusting the Fan Speed .............18 Adjusting the Wind Direction ............18 Checking the Air Quality ..............19 Reserving Off Timer ..............21 Locking the Control Panel Buttons ..........22 Turning off the Screen ..............22 SMART FUNCTIONS ............. 23 LG ThinQ Application ..............23 Smart Diagnosis ................25... - Page 4 MAINTENANCE ............. 26 Cleaning the product exterior ............27 Cleaning the Filters ..............27 Replacing the filter ...............28 Cleaning the Particles Sensor .............28 Storage ..................29 TROUBLESHOOTING ........... 30 Appliance Specifications ..........33...
-
Page 5: Safety Instructions
SAFETY INSTRUCTIONS The following safety guidelines are intended to prevent unforeseen risks or damage from unsafe or incorrect operation of the appliance. The guidelines are separated into ‘WARNING’ and ‘CAUTION’ as described below. This symbol is displayed to indicate matters and operations that can cause risk. - Page 6 Operation • If the appliance is immersed in water, stop using it and contact the LG Electronics service centre. • If there is a gas leakage (isobutane, propane, LNG, etc.), do not touch the product or power plug and ventilate the area immediately.
- Page 7 • If you detect any abnormal noise, odor or smoke, unplug the product immediately and contact an LG Electronics service centre. • Only an authorized repair person from LG Electronics service centre should disassemble, repair, or modify the appliance. • Do not use or store fire, combustibles (ether, benzene, alcohol, drugs, propane, butane, combustible spray, insecticide, air freshener, cosmetics, etc.) or flammable materials (candles,...
- Page 8 CAUTION To reduce the risk of minor injury to persons, malfunction, or damage to the product or property when using this product, follow basic precautions, including the following: Installation • Do not tilt the appliance to pull or push it when transporting. • Do not install the appliance in transportation equipment (vehicle/vessel etc.).
- Page 9 • Do not use the product for special purposes such as preserving plants, precision instrument, artworks, etc. • Do not operate the appliance with wet hands. • Do not let the moisture from the humidifier directly touch the appliance. • Do not use the appliance while it is not in upright position. • Do not use the appliance near objects vulnerable to heat.
-
Page 10: Unpacking
UNPACKING Components Air purifier OWNER’S MANUAL Owner’s Manual • The exterior or components of the product may vary depending on the model. -
Page 11: Removing Packing Materials
Removing Packing Install the filter in the appliance. • Insert the filters so that the deodor- Materials izing care filter is placed at the inner side of the appliance and the aller- Unpack the appliance and remove any gen collection care filter is placed at packing tape or vinyl before using the the outer side of the appliance. -
Page 12: Installation
INSTALLATION Transporting or Moving the Installing the Appliance Appliance Install the appliance on a solid and level surface. Be sure to have two people transport the • If the installation surface is not even, appliance safely. vibration and noise may occur, and the •... -
Page 13: Fixing The Appliance
• Before installing the appliance, drill a hole on the wall after checking the position. • The appliance should be installed and transported by a professional installation Belt technician from LG, not arbitrarily by the customer. -
Page 14: Operation
OPERATION Appliance Overview Front View Left/Right wind controller PM1.0 (particles with a diameter between 1.0 and 2.5 micrometers) Use it to adjust the direction of wind sensor emission to the left and the right. It detects the concentration of particles. Up/Down wind controller Odor (Gas) sensor Use it to adjust the direction of wind... - Page 15 Filter system CAUTION Prefilter • Do not throw the filter or use it for other It primarily minimizes large particles purposes. floating in the air. NOTE Allergen collection care filter • Keep the windows or doors closed while It minimizes PM1.0 and cigarette using the product.
- Page 16 Control Panel Start/Stop Button Off Timer Button You can start or stop the operation. Allows you to use the Off Timer function. • Pressing and holding it for 3 Mode Button seconds or more locks or unlocks Use it to set the mode. the control panel buttons.
- Page 17 Off Timer time set in the appliance Display the concentration of odor or the ‘On/Off Timer’ is set from the (color) LG ThinQ application. It is displayed when the Screen Off Mode Display function is used. Air Flow Display...
-
Page 18: Operation Starting
Operation starting Purify Mode Press the Start/Stop button to start the Purifies indoor air at a desired speed. operation. Smart Mode Adjusts wind direction and strength automatically according to the level of overall air quality. NOTE • You can adjust the direction by pressing the left/right Swing or up/down Swing button during Smart operation. -
Page 19: Adjusting The Fan Speed
Adjusting the Fan Speed Adjusting the Wind Direction Adjust the air flow of the air purifier. Adjusting the Wind Direction to Press the Speed button during the operation. the Left/Right • Each time you press the button, the Operates the left/right wind controller and speed changes in the following order: blows air to the left or the right. -
Page 20: Checking The Air Quality
Checking the Air Quality The overall air quality can be checked through the status display panel. Understanding the Overall Air Quality The overall air quality is calculated based on the particles and odor (gas) concentrations and is categorized into 4 levels including green, yellow, orange or red depending on the contamination of the air. - Page 21 [Example of air status display] Display the size of Display the Display the dust particles and overall air concentration of the concentration quality odor in color of particles in color Concentration of particles The above picture displays PM10/PM2.5/ PM1.0, meaning that the concentration of NOTE super ultra-fine dust is higher than those of •...
-
Page 22: Reserving Off Timer
Reserving Off Timer NOTE Stops the operation automatically after the • You can also change the speed to a operation for the set time. desired speed by pressing the Speed Press the Off Timer button during the button in Purify mode while the Off Timer operation. -
Page 23: Locking The Control Panel Buttons
Locking the Control Panel Turning off the Screen Buttons Sets the screen to sleep mode. Press the Swing button for 3 seconds or You can lock the buttons on the Control more during the operation. Panel to prevent the appliance from operating due to unforeseen reasons, such •... -
Page 24: Smart Functions
NOTE • LG ThinQ is not responsible for any • If you change your wireless router, Internet network connection problems or any faults, service provider, or password, delete the... - Page 25 (WPA2 is recommended) and register the product again. Installing the LG ThinQ Application Search for the LG ThinQ application from the Google Play Store or Apple App Store on a smartphone. Follow instructions to download and install the application. Open Source Software Notice...
-
Page 26: Smart Diagnosis
Use this feature to help you diagnose and • Launch the LG ThinQ application and solve problems with your appliance. select the Smart Diagnosis feature in the menu. Follow the instructions for audible... -
Page 27: Maintenance
Scheduled maintenance when it has reached the end of its lifespan even during the warranty period. Contact Cleaning Replacement Component the LG Electronics service centre or frequency frequency consumables shop on the LG Electronics 2 weeks site (www.lg.com). Clean it using a vacuum •... -
Page 28: Cleaning The Product Exterior
Cleaning the product Cleaning the Filters exterior Open the air inlet of the appliance and separate the filter. Remove particles from the air inlet and Remove the particles from the filter the air outlet using a vacuum cleaner. using a vacuum cleaner or a soft brush. If the prefilter is severely contaminated, remove large particles first and wash it using running water. -
Page 29: Replacing The Filter
Replacing the filter Cleaning the Particles Sensor Open the air inlet of the appliance and PM1.0 sensor detects the fine particles as replace the allergen collection care filter well as coarse particles. Therefore, you need and the deodorizing care filter with new to clean its lens regularly. -
Page 30: Storage
Storage Close the sensor cover. If the appliance is not used for a long period of time, store it at a shaded and dry place. Operate the air purifier for one hour or more on a fine day. • This removes the moisture and prevents molds from building up inside the product. -
Page 31: Troubleshooting
TROUBLESHOOTING Before Calling for Service If a failure occurs in the product, check the following before contacting an LG Electronics Customer Information Center for service. Operation Symptoms Possible Causes & Solution Is the power plug unplugged from the outlet? The appliance does not operate. - Page 32 LG ThinQ app and your appliance. the appliance and the • The difference in the values could be caused by the difference in LG ThinQ app. updated time between the LG ThinQ app and the appliance. Performance Symptoms Possible Causes & Solution Is the indoor contamination severe? • Ventilate the indoor air before you use the product.
- Page 33 • Find the Wi-Fi network connected to your smartphone and remove it, then register your appliance on LG ThinQ. Mobile data for your smartphone is turned on. • Turn off the Mobile data of your smartphone and register the appliance using the Wi-Fi network.
-
Page 34: Appliance Specifications
Appliance Specifications Height Depth Width Appearance and specifications may vary without notice to improve the quality of the appliance. Model AG16GBWC0.AHP Power 220-240V~ 50 Hz Exterior dimensions (Depth x 320 mm x 590 mm x 1,840 mm Width x Height) - Page 35 MEMO...
- Page 36 MEMO...
- Page 37 MEMO...
- Page 38 MEMO...
- Page 39 MEMO...
- Page 40 MEMO...
Need help?
Do you have a question about the AG16GBWC0 and is the answer not in the manual?
Questions and answers