Table of Contents
Advertisement
Quick Links
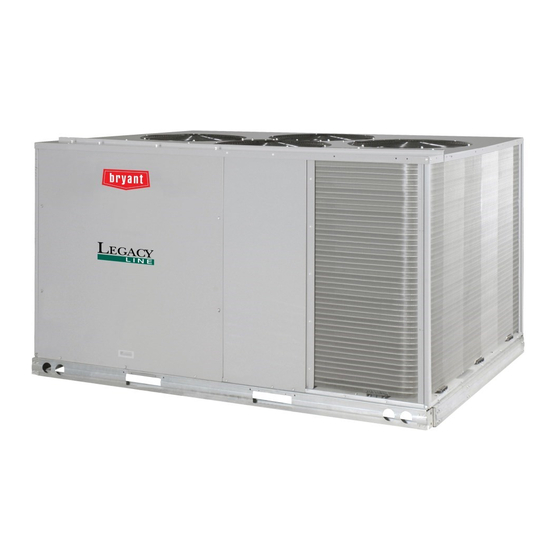
Legacy™ Line
5 6 9 J * 1 6 - 2 8
A i r - C o o l e d C o n d e n s i n g U n i t s
w ith Pu ro n
®
( R-4 10 A) R efr i g er an t
Installation, Start-Up and Service Instructions
CONTENTS
SAFETY CONSIDERATIONS . . . . . . . . . . . . . . . . . . . . . . 1
INSTALLATION GUIDELINES . . . . . . . . . . . . . . . . . . . . 2
Rated Indoor Airflow (cfm) . . . . . . . . . . . . . . . . . . . . . . . . . 2
Identify Factory Options . . . . . . . . . . . . . . . . . . . . . . . . . . . 3
Matching 569J Model to Evaporator Coil . . . . . . . . . . . . . 3
General . . . . . . . . . . . . . . . . . . . . . . . . . . . . . . . . . . . . . . . . . . 3
INSTALLATION . . . . . . . . . . . . . . . . . . . . . . . . . . . . . . . . . 7
Jobsite Survey . . . . . . . . . . . . . . . . . . . . . . . . . . . . . . . . . . . . 7
Step 1 - Plan for Unit Location . . . . . . . . . . . . . . . . . . . . . 7
Step 2 - Complete Pre-Installation Checks . . . . . . . . . . . 7
Step 3 - Prepare Unit Mounting Support . . . . . . . . . . . . . 7
Step 4 - Rig and Mount the Unit . . . . . . . . . . . . . . . . . . . . 7
Step 5 - Determine Refrigerant Line Sizes . . . . . . . . . . . . 8
Suction Riser . . . . . . . . . . . . . . . . . . . . . . . . . . . . . . . . . . . . 11
Connections . . . . . . . . . . . . . . . . . . . . . . . . . . . . . . . . . . 11
Step 7 - Install Accessories . . . . . . . . . . . . . . . . . . . . . . . 14
Step 8 - Complete Electrical Connections . . . . . . . . . . . 15
Step 9 - Wind Baffles for Low Ambient Control . . . . . . 20
PRE-START-UP . . . . . . . . . . . . . . . . . . . . . . . . . . . . . . . . . 20
System Check . . . . . . . . . . . . . . . . . . . . . . . . . . . . . . . . . . . 20
Turn On Crankcase Heater . . . . . . . . . . . . . . . . . . . . . . . . 20
Preliminary Charge . . . . . . . . . . . . . . . . . . . . . . . . . . . . . . 20
START-UP . . . . . . . . . . . . . . . . . . . . . . . . . . . . . . . . . . . . . 21
Preliminary Checks . . . . . . . . . . . . . . . . . . . . . . . . . . . . . . 21
Start Unit . . . . . . . . . . . . . . . . . . . . . . . . . . . . . . . . . . . . . . . 21
OPERATING SEQUENCE . . . . . . . . . . . . . . . . . . . . . . . . 27
Base Unit Controls . . . . . . . . . . . . . . . . . . . . . . . . . . . . . . . 27
All Units . . . . . . . . . . . . . . . . . . . . . . . . . . . . . . . . . . . . . . . . 27
MAINTENANCE . . . . . . . . . . . . . . . . . . . . . . . . . . . . . . . . 28
(and 30 days after initial start) . . . . . . . . . . . . . . . . . . . 28
Seasonal Maintenance . . . . . . . . . . . . . . . . . . . . . . . . . . . . 28
SERVICE . . . . . . . . . . . . . . . . . . . . . . . . . . . . . . . . . . . . . . . 29
Refrigeration System . . . . . . . . . . . . . . . . . . . . . . . . . . . . . 29
Comfort Alert Diagnostic Module . . . . . . . . . . . . . . . . . . . 29
Compressor Protection . . . . . . . . . . . . . . . . . . . . . . . . . . . . 36
Coils . . . . . . . . . . . . . . . . . . . . . . . . . . . . . . . . . . . . . . . . . 36
Fastener Torque Values . . . . . . . . . . . . . . . . . . . . . . . . . . . 37
TROUBLESHOOTING . . . . . . . . . . . . . . . . . . . . . . . . . . . 37
PUMP WITH PURON
GUIDE . . . . . . . . . . . . . . . . . . . . . . . . . . . . . . . . . . . . . . 39
APPENDIX B - WIRING DIAGRAMS . . . . . . . . . . . . . 40
APPENDIX C - LOW AMBIENT OPTION . . . . . . . . . 56
START-UP CHECKLIST. . . . . . . . . . . . . . . . . . . . . . . .CL-1
Manufacturer reserves the right to discontinue, or change at any time, specifications or designs without notice and without incurring obligations.
Catalog No. 04-53569006-01
®
- QUICK REFERENCE
Printed in U.S.A.
Form II569J-16-28-02
SAFETY CONSIDERATIONS
Page
Improper
installation,
maintenance, or use can cause explosion, fire, electrical shock
or other conditions which may cause personal injury or
property damage. Consult a qualified installer, service agency,
or your distributor or branch for information or assistance. The
qualified installer or agency must use factory-authorized kits or
accessories when modifying this product. Refer to the
individual instructions packaged with the kits or accessories
when installing.
Follow all safety codes. Wear safety glasses and work gloves.
Use quenching cloths for brazing operations and have a fire
extinguisher available. Read these instructions thoroughly and
follow all warnings or cautions attached to the unit. Consult
local building codes and appropriate national electrical codes
(in U.S.A., ANSI/NFPA70, National Electrical Code (NEC); in
Canada, CSA C22.1) for special requirements.
It is important to recognize safety information. This is the
safety-alert symbol
and in instructions or manuals, be alert to the potential for
personal injury.
Understand the signal
CAUTION, and NOTE. These words are used with the safety-
alert symbol. DANGER identifies the most serious hazards
which will result in severe personal injury or death.
WARNING signifies hazards which could result in personal
injury or death. CAUTION is used to identify unsafe practices,
which may result in minor personal injury or product and
property damage. NOTE is used to highlight suggestions
which will result in enhanced installation, reliability, or
operation.
ELECTRICAL SHOCK HAZARD
Failure to follow this warning will result in personal injury
or death.
Before performing service or maintenance operations on
unit, turn off main power switch to unit and install lock(s)
and lockout tag(s). Ensure electrical service to rooftop unit
agrees with voltage and amperage listed on the unit rating
plate. Unit may have more than one power switch.
UNIT OPERATION AND SAFETY HAZARD
Failure to follow this warning could cause personal injury,
death and/or equipment damage.
R-410A refrigerant systems operate at higher pressures
than standard R-22 systems. Do not use R-22 service
equipment
or
equipment.
Pg 1
adjustment,
alteration,
. When you see this symbol on the unit
words
DANGER, WARNING,
DANGER
WARNING
components
on
R-410A
3-23
Replaces: II569J-16-28-01
service,
refrigerant
Advertisement
Table of Contents

Subscribe to Our Youtube Channel
Related Manuals for Bryant Legacy 569J 16-28


Summary of Contents for Bryant Legacy 569J 16-28
-
Page 1: Table Of Contents
Legacy™ Line 5 6 9 J * 1 6 - 2 8 A i r - C o o l e d C o n d e n s i n g U n i t s w ith Pu ro n ®... -
Page 2: Installation Guidelines
than with R-22 (at 5°F pressure drop). A 1-1/8 inch OD suction line is rated at 53% higher tons with Puron than with R-22 (at WARNING 2°F pressure drop). Refrigeration lines selected for R-22 use are typically oversized for Puron applications. Carefully check PERSONAL INJURY AND ENVIRONMENTAL the existing suction line size against the table for maximum HAZARD... -
Page 3: Identify Factory Options
Identify Factory Options CANNOT be connected to a single-circuit evaporator coil. The Model 569J***T/U CANNOT be field-converted to a single- Factory options will affect 569J unit pipe sizing selections. circuit design. See Table 3. Coil type impacts liquid lift limits; Check this unit’s Model Table 3 —... - Page 4 NOTE: Dimensions and drawings for refrigerant option D also apply to option T. Fig. 3 — 569J*16 Base Unit Dimensions...
- Page 5 NOTE: Dimensions and drawings for refrigerant option D also apply to option T. Fig. 4 — 569J*25A/B / 569J*25-28T/U Base Unit Dimensions...
- Page 6 Table 4 — 569J*16-25A/B Physical Data UNIT 569J*16A/B 569J*25A/B NOMINAL CAPACITY (TONS) OPERATING WEIGHT (LB) REFRIGERATION SYSTEM No. Circuits / No. Comp. / Type 1 / 2 / Scroll 1 / 2 / Scroll Refrigerant Type R-410A R-410A R-410A Shipping Charge A/B (lb) System Charge w/ Fan Coil 43.0 38.0...
-
Page 7: Installation
INSTALLATION UN-CRATE UNIT Remove unit packaging except for the top skid assembly, Jobsite Survey which should be left in place until after the unit is rigged into Complete the following checks before installation. its final location. Consult local building codes and the NEC (National Electrical INSPECT SHIPMENT Code) ANSI/NFPA 70 for special installation requirements. -
Page 8: Step 5 - Determine Refrigerant Line Sizes
Step 5 — Determine Refrigerant Line Sizes NOTE: Equivalent line lengths will vary based on tube diameter. Calculate equivalent line length for each pipe by adding equiva- Select the recommended line sizes for 569J***A/B and lent length adjustments to linear lengths for each pipe. 569J***T/U unit from the appropriate tables. - Page 9 Table 7 — 569J*16-25A/B Piping Recommendations (Single-Circuit) MODEL LINEAR LINE (FT) 0-24 25-49 50-74 75-99 100-124 125-149 150-174 175-200 NOMINAL EQUIV. LINE (FT) 0-37 38-74 75-112 113-149 150-187 188-224 225-262 263-300 CAPACITY Liquid Line Size (in.) Liquid PD (F) Max Lift (ft) Max Lift PD (F) 5.65 11.3...
- Page 10 Table 8 — 569J*16-28T/U Piping Recommendations (Dual-Circuit) MODEL LINEAR LINE (FT) 0-24 25-49 50-74 75-99 100-124 125-149 150-174 175-200 NOMINAL EQUIV. LINE (FT) 0-37 38-74 75-112 113-149 150-187 188-224 225-262 263-300 CAPACITY Liquid Line Size (in.) Liquid PD (F) 10.3 Max Lift (ft) 569J*16T/U Max Lift PD (F)
-
Page 11: Suction Riser
Suction Riser A suction riser condition exists when the outdoor unit is locat- ed above the indoor (evaporator) unit and suction vapor must flow vertically up to return to the compressor. Oil return is a concern when the suction tube size is too large to produce the minimum refrigerant velocity to ensure oil return at minimum load conditions. - Page 12 Vertical Installation Liquid Line Connection Suction-Vapor Connection Coil Segment 1 Circuit 2 Condensate Drain Connections Connection Circuit 1 Coil Segment 2 First On/Last Off = 2 Connections Horizontal Installation Fig. 8 — 569J***T/U Service Valve Locations When a single piece evaporator coil with two separate circuits is connected to a 569J***T/U, the lower coil circuit should be connected to the 569J***T/U unit’s Circuit 1 so that the evapo- rator’s lower coil segment is first-on/last-off (to avoid re-...
- Page 13 Table 12 — Refrigerant Specialties Part Numbers LIQUID LINE LIQUID LINE FILTER MODEL SIZES LLSV COIL SIGHT GLASS SIZE (in.) SOLENOID VALVE (LLSV) DRIER EF680035 EF680037 KM680004 569J***T/U 16-28 Provided with unit, EF680036 EF680037 KM680005 see Table 11 569J***A/B 16-25 EF680036 EF680037 KM680005...
-
Page 14: Step 7 - Install Accessories
Circuit 2: 17.6 - 15.0 = 2.6 lb For linear line lengths longer than 125 ft (38 m), contact your UNIT OPERATION AND SAFETY HAZARD local Bryant representative for system charge value. Failure to follow this warning could cause personal injury, Step 7 — Install Accessories death and/or equipment damage. -
Page 15: Step 8 - Complete Electrical Connections
Step 8 — Complete Electrical Connections UNITS WITH FACTORY-INSTALLED NON-FUSED DISCONNECT The factory-installed option disconnect switch is located in a WARNING weatherproof enclosure located under the main control box. The manual switch handle is accessible through an opening in ELECTRIC SHOCK HAZARD the access panel. - Page 16 CONVENIENCE OUTLETS WARNING ELECTRICAL OPERATION HAZARD Failure to follow this warning could result in personal injury or death. Units with convenience outlet circuits may use multiple disconnects. Check convenience outlet for power status before opening unit for service. Locate its disconnect switch, if appropriate, and open it.
- Page 17 (air handler or packaged fan coil). Figures 18 (569J***A/B) and 19 (569J***T/U) depict typical connections to a Bryant 524J fan coil unit. Plan for field connections carefully and install control wiring correctly per the project plan.
- Page 18 The 569J***A/B is a single-circuit, two-stage cooling unit. Se- lect a two-stage cooling thermostat, with or without supple- mental heating as needed. The 569J***T/U is a dual-circuit, three-stage cooling unit. Se- lect a three-stage cooling thermostat, with or without supple- mental heating as needed.
- Page 19 Table 13 — 569J***A/B Unit Wire/Fuse Sizing Data NOMINAL COMPRESSOR NO C.O. OR POWERED C.O. VOLTAGE POWER RANGE UNIT NUMBER No. 1 No. 2 Power Supply Disconnect Size SUPPLY SIZE Fuse or 569J* STAGES V-Ph-Hz HACR (ea) Breaker 208/230 25.0 25.0 60.8/60.8 80/80...
-
Page 20: Step 9 - Wind Baffles For Low Ambient Control
Legend and Notes for Tables 13-14 PRE-START-UP LEGEND IMPORTANT: Before beginning Pre-Start-Up or Start-Up, C.O. — Convenience Outlet review Start-Up Checklist at the back of this book. The — Full Load Amps Checklist assures proper start-up of a unit and provides a —... -
Page 21: Start-Up
Refer to Cooling Charging Charts, Fig. 24-28. For applications separate, which stops compression. Suction and discharge with line lengths greater than 125 ft (38 m), contact Bryant rep- pressures balance while the motor continues to run. The longer resentative. Make sure that all condenser fans are operating be- the compressor runs unloaded, the longer it must cool before fore adjusting charge to the charging charts. - Page 22 gauge to the service port on the liquid line service valve. Mount the temperature sensing device on the liquid line close to the liquid line service valve, and insulate it so that outdoor ambient temperature does not affect the reading. Indoor airflow must be within the unit’s normal operating range.
- Page 23 20 Ton Charging Chart R-410A Refrigerant Add Charge if Above the Curve Remove Charge if Below the Curve 1050 1400 1750 2100 2450 2800 3150 3500 3850 Pressure at Liquid Valve (PSIG / kPa) 38AU500733 Fig. 25 — 569J*25A/B Charging Chart...
- Page 24 15 Tons Circuit A R-410A CHARGING CHART 15 Tons Circuit B R-410A CHARGING CHART 59.9 59.9 48.8 48.8 Add Charge if Above the Curve Add Charge if Above the Curve 37.7 37.7 26.6 26.6 15.5 15.5 Remove Charge if Below the Curve Remove Charge if Below the Curve –6.7 –6.7...
- Page 25 20 Ton Circuit A Charging Chart R-410A Refrigerant 20 Ton Circuit B Charging Chart R-410A Refrigerant Add Charge if Add Charge if Above the Curve Above the Curve Remove Charge if Remove Charge if Below the Curve Below the Curve 100 150 200 250 300 350 400 450 500 550 600 100 150 200 250 300 350 400 450 500 550 600 350 700 1050 1400 1750 2100 2450 2800 3150 3500 3850...
- Page 26 25 Tons Circuit A R-410A CHARGING CHART 25 Tons Circuit B R-410A CHARGING CHART 59.9 59.9 48.8 48.8 Add Charge if Above the Curve Add Charge if Above the Curve 37.7 37.7 26.6 26.6 15.5 15.5 Remove Charge if Below the Curve Remove Charge if Below the Curve -6.7 -6.7...
-
Page 27: Operating Sequence
OPERATING SEQUENCE period has not expired, CADM2 relay will remain open, de- energizing Solenoid Valve Relay 2 (SVR2) and preventing Base Unit Controls compressor start. When safety pressure switches are closed and CADM2 time delay expires, CADM2 relay closes, SVR2 and INDOOR (SUPPLY) FAN compressor contactor C2 are energized;... -
Page 28: Maintenance
Seasonal Maintenance a. The above list may not include all maintenance items. Inspection intervals may vary depending on climate and opening hours. Consult your Bryant dealer These items should be checked at the beginning of each season about a service contact for seasonal inspections. -
Page 29: Service
SERVICE FIELD REFRIGERANT ACCESS PORTS Field service access to refrigerant pressures is through the ac- Refrigeration System cess ports located at the service valves (see Fig. 30-37). These ports are 1/4-in. SAE Flare couplings with Schrader check valves and service caps. Use these ports to admit nitrogen to WARNING the field tubing during brazing, to evacuate the tubing and evaporator coil, to admit initial refrigerant charge into the low-... - Page 30 process. The number of blinks, defined in Table 19, correlates Power to a particular abnormal condition; troubleshooting tips are (GRN) Comfort Alert provided for each Alert code. Reset of the ALERT may be au- ™ Commercial Diagnostics tomatic or manual. If the fault condition causing the Alert is POWER Green LED - 24VAC Power Yellow LED - Flash Code...
- Page 31 Fig. 31 — 569J*16T/U Piping Suction Equalizer Oil Equalizer Line Fig. 32 — 569J*16A/B Compressor Assembly (Rear View)
- Page 32 Fig. 33 — 569J*16T/U Compressor Assembly (Rear View) Condenser Fans/Motors Outdoor Outdoor Fan 1 Fan 4 Outdoor Fan 2 Outdoor Fan 3 Access Panel - Control Box & Compressors Service Valves Fig. 34 — 569J*25/28 Cabinet...
- Page 33 Fig. 35 — 569J*25/28(T/U) Piping...
- Page 34 Fig. 36 — 569J*25(A/B) Compressor Assembly (Rear View) Fig. 37 — 569J*25/28(T/U) Compressor Assembly (Rear View)
- Page 35 TROUBLESHOOTING THE CADM WIRING Flashing LEDs also indicate wiring problems to the CADM. See Tables 19 and 20 for discussion of additional LED flash codes and troubleshooting instructions. Table 19 — LED Status Codes STATUS LED STATUS LED STATUS LED TROUBLESHOOTING INFORMATION DESCRIPTION Green “POWER”...
-
Page 36: Compressor Protection
(ASTP) coil cleaner is essential to extend the life of RTPF coils. This cleaner is available from Bryant Replacement parts division as See “Advanced Scroll Temperature Protection (ASTP)” on part number P902-0301 for a one gallon container, and part page 21. -
Page 37: Fastener Torque Values
TOTALINE ENVIRONMENTALLY BALANCED COIL should be applied in the direction of the fins. Coil surfaces can be easily damaged (fin edges can be easily bent over CLEANER APPLICATION EQUIPMENT and damage to the coating of a protected coil) if the tool is •... - Page 38 Table 22 — Troubleshooting PROBLEM SOLUTION COMPRESSOR DOES NOT RUN Contactor Open 1. Power off. 1. Restore power. 2. Fuses blown in field power circuit. 2. After finding cause and correcting, replace with correct size fuse. 3. No control power. 3.
-
Page 39: Appendix A - Air Conditioner And Heat
Table 22 — Troubleshooting (cont) PROBLEM SOLUTION UNIT OPERATES TOO LONG OR CONTINUOUSLY 1. Low refrigerant charge. 1. Add refrigerant. 2. Control contacts fused. 2. Replace control. 3. Air in system. 3. Purge and evacuate system. 4. Partially plugged expansion valve or filter drier. 4. -
Page 40: Appendix B - Wiring Diagrams
APPENDIX B — WIRING DIAGRAMS ELECTRICAL UNIT DIAGRAM NUMBER PAGE NUMBER CHARACTERISTICS 208/230-3-60 38AU501341 569J*16T/U 460-3-60 38AU501340 575-3-60 38AU501342 208/230-3-60 38AU501337 569J*25T/U 460-3-60 38AU501336 575-3-60 38AU501338 208/230-3-60 38AU501345 569J*28T/U 460-3-60 38AU501344 575-3-60 38AU501346 208/230-3-60 38AU500537 569J*16A/B 460-3-60 38AU500538 575-3-60 38AU500539 208/230-3-60 38AU500568 569J*25A/B... - Page 41 APPENDIX B — WIRING DIAGRAMS (CONT) Fig. A — Dual Circuit/Three Stage Wiring Diagram, 15 Ton — 208/230-3-60 Unit...
- Page 42 APPENDIX B — WIRING DIAGRAMS (CONT) Fig. B — Dual Circuit/Three Stage Wiring Diagram, 15 Ton — 460-3-60 Unit...
- Page 43 APPENDIX B — WIRING DIAGRAMS (CONT) Fig. C — Dual Circuit/Three Stage Wiring Diagram, 15 Ton — 575-3-60 Unit...
- Page 44 APPENDIX B — WIRING DIAGRAMS (CONT) Fig. D — Dual Circuit/Three Stage Wiring Diagram, 20 Ton — 208/230-3-60 Unit...
- Page 45 APPENDIX B — WIRING DIAGRAMS (CONT) Fig. E — Dual Circuit/Three Stage Wiring Diagram, 20 Ton — 460-3-60 Unit...
- Page 46 APPENDIX B — WIRING DIAGRAMS (CONT) Fig. F — Dual Circuit/Three Stage Wiring Diagram, 20 Ton — 575-3-60 Unit...
- Page 47 APPENDIX B — WIRING DIAGRAMS (CONT) Fig. G — Dual Circuit/Three Stage Wiring Diagram, 25 Ton — 208/230-3-60 Unit...
- Page 48 APPENDIX B — WIRING DIAGRAMS (CONT) Fig. H — Dual Circuit/Three Stage Wiring Diagram, 25 Ton — 460-3-60 Unit...
- Page 49 APPENDIX B — WIRING DIAGRAMS (CONT) Fig. I — Dual Circuit/Three Stage Wiring Diagram, 25 Ton — 575-3-60 Unit...
- Page 50 APPENDIX B — WIRING DIAGRAMS (CONT) Fig. J — Single Circuit/Two Stage Wiring Diagram, 15 Ton — 208/230-3-60 Unit...
- Page 51 APPENDIX B — WIRING DIAGRAMS (CONT) Fig. K — Single Circuit/Two Stage Wiring Diagram, 15 Ton — 460-3-60 Unit...
- Page 52 APPENDIX B — WIRING DIAGRAMS (CONT) Fig. L — Single Circuit/Two Stage Wiring Diagram, 15 Ton — 575-3-60 Unit...
- Page 53 APPENDIX B — WIRING DIAGRAMS (CONT) Fig. M — Single Circuit/Two Stage Wiring Diagram, 20 Ton — 208/230-3-60 Unit...
- Page 54 APPENDIX B — WIRING DIAGRAMS (CONT) Fig. N — Single Circuit/Two Stage Wiring Diagram, 20 Ton — 460-3-60 Unit...
- Page 55 APPENDIX B — WIRING DIAGRAMS (CONT) Fig. O — Single Circuit/Two Stage Wiring Diagram, 20 Ton — 575-3-60 Unit...
-
Page 56: Appendix C - Low Ambient Option
APPENDIX C — LOW AMBIENT OPTION Troubleshooting Units with the factory installed low ambient option are equipped with a solid-state head pressure control which regu- OBSERVATION POSSIBLE REMEDY lates fan speed. A temperature sensor, mounted on either cir- cuit 1 (569J***A/B units) or both circuits 1 and 2 All fans: Check power and wiring (569J***T/U units) of the outdoor coil controls the speed of... - Page 57 APPENDIX C — LOW AMBIENT OPTION (CONT) Low Ambient Sensor 2 Must Be Positioned On Vapor Stub Low Ambient Sensor 1 Must Be Positioned On Vapor Stub Circuit 2 Circuit 1 Fig. P — 569J*16T/U Low Ambient Sensor Locations Low Ambient Sensor 2 Must Be Positioned On Vapor Stub (Fourth From Top)
- Page 58 Low Ambient Sensor Must Be Positioned On Vapor Stub Fig. R — 569J*16-25A/B Low Ambient Sensor Location Table A — Wind Baffle Dimension DIMENSIONS (in.) UNIT BAFFLE LEFT SIDE 10-3/4 11-1/2 12-1/4 43-1/8 4-1/4 13-1/4 22-1/4 31-1/4 40-1/4 BACK 80-1/4 81-3/4 43-1/8 8-3/8...
- Page 59 APPENDIX C — LOW AMBIENT OPTION (CONT) NOTE: Dimensions are in inches. Fig. S — Wind Baffles – Fabrication...
- Page 60 APPENDIX C — LOW AMBIENT OPTION (CONT) NOTE: Dimensions are in inches. Fig. T — 15 Ton Wind Baffle Brackets – Fabrication...
- Page 61 APPENDIX C — LOW AMBIENT OPTION (CONT) TOP BRACKETS FRONT BOTTOM BRACKET BACK LEFT RIGHT Fig. U — Wind Baffle Installation – 15 Ton Units...
- Page 62 APPENDIX C — LOW AMBIENT OPTION (CONT) FRONT LEFT BACK RIGHT Fig. V — Wind Baffle Installation – 20 and 25 Ton Units Printed in U.S.A. Form No: II569J-16-28-02 © 2023 Carrier Cat. No. 04-53569006-01 Edition Date: 3-23 Manufacturer reserves the right to change, at any time, specifications and designs without notice and without obligations. Replaces: II569J-16-28-01...
-
Page 63: Start-Up Checklist
START-UP CHECKLIST (569J) (REMOVE AND USE FOR JOB FILE) NOTE: To avoid injury to personnel and damage to equipment or property when completing the procedures listed in this start-up checklist, use good judgment, follow safe practices, and adhere to the safety considerations/information as outlined in preceding sec- tions of this Installation, Start-Up, and Service document. - Page 64 CHECK VOLTAGE IMBALANCE LINE-TO-LINE VOLTS: AB __________V AC __________V BC __________V (AB + AC + BC)/3 = AVERAGE VOLTAGE = __________V MAXIMUM DEVIATION FROM AVERAGE VOLTAGE = __________V VOLTAGE IMBALANCE = 100 X (MAX DEVIATION)/(AVERAGE VOLTAGE) = __________ IF OVER 2% VOLTAGE IMBALANCE, DO NOT ATTEMPT TO START SYSTEM! CALL LOCAL POWER COMPANY FOR ASSISTANCE.
Need help?
Do you have a question about the Legacy 569J 16-28 and is the answer not in the manual?
Questions and answers