Advertisement
Assembly Instructions
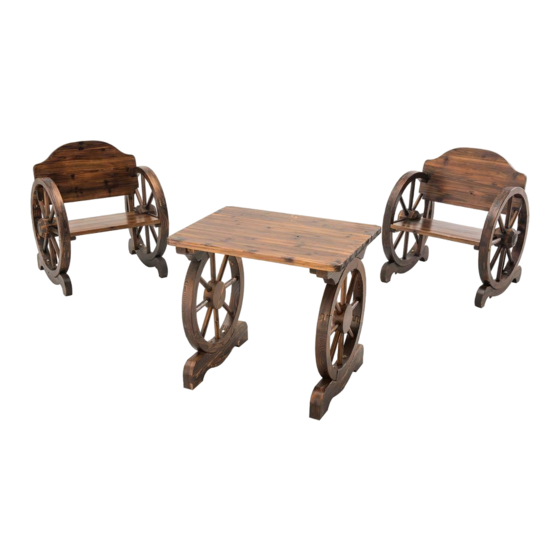
D-BS856PWD (Table)
WARNING:
Repeated assembly can weaken the locking ability of the screw/bolt/nut. Periodically
check all bolted connections on your product to make sure they are tight and secure. Keep
these instructions for future reference.
Some parts may contain sharp edges. Wear protective gloves as necessary.
Set it up on the level ground.
Attention: There may have slots on the product, this is not inferior, it is nature of
the wood item, this is to allow the wood to naturally shrink and expand.
Advertisement
Table of Contents

Related Manuals for HOMEDEPOT D-BS856PWD


Summary of Contents for HOMEDEPOT D-BS856PWD
- Page 1 Assembly Instructions D-BS856PWD (Table) WARNING: Repeated assembly can weaken the locking ability of the screw/bolt/nut. Periodically check all bolted connections on your product to make sure they are tight and secure. Keep these instructions for future reference. Some parts may contain sharp edges. Wear protective gloves as necessary.
- Page 2 Part# Description Table top Wheel support Reinforcing bar Bolt M8*95 Flat washer M8 Nut M8 Screw M4*40 Step 1: Attach table top (A) and wheel support (B) by bolt (AA), flat washer (BB) and nut (CC) as showed in the picture. Step 2: Fix the reinforcing bar into table top (A) and wheel support (B) by Screw (DD) as showed in the picture.
- Page 3 Limited Warranty: This limited warranty is extended to the original purchaser and applies to defects in materials and workmanship of your item provided the item is maintained with care and used only for personal, residential purposes. The item is warranted to be free from defects in material or workmanship for a period of six (6) months.
- Page 4 Assembly Instructions D-BS856PWD (Chair) WARNING: Repeated assembly can weaken the locking ability of the screw/bolt/nut. Periodically check all bolted connections on your product to make sure they are tight and secure. Keep these instructions for future reference. Some parts may contain sharp edges. Wear protective gloves as necessary.
- Page 5 Part# Description Back Wheel support Seat Bolt M8*75 Flat washer M8 Nut M8 Bolt M8*105 Step 1: Attach wheel support (B) and back (A) by using Bolt (AA), flat washer Step 2: Insert seat (C) into the wheel support (BB) and nut (CC). Then lock them (B) then fix by bolt (DD), flat washer (BB) tightly as showed in the picture.
- Page 6 Limited Warranty: This limited warranty is extended to the original purchaser and applies to defects in materials and workmanship of your item provided the item is maintained with care and used only for personal, residential purposes. The item is warranted to be free from defects in material or workmanship for a period of six (6) months.
Need help?
Do you have a question about the D-BS856PWD and is the answer not in the manual?
Questions and answers