Table of Contents
Advertisement
Quick Links
Download this manual
See also:
Basic Owner's Manual
Advertisement
Table of Contents

Related Manuals for Panasonic Lumix DMC-FP7


Summary of Contents for Panasonic Lumix DMC-FP7
- Page 1 Owner’s Manual for advanced features Digital Camera DMC-FP7 Model No. DMC-FP5 Before connecting, operating or adjusting this product, please read the instructions completely. VQT3F23...
-
Page 2: Table Of Contents
Contents Before Use Precaution ... 4 Standard Accessories... 6 Names of the Components ... 7 How to Use the Touch Panel ... 8 Preparation Charging the Battery ... 10 • Approximate operating time and number of recordable pictures ... 13 Inserting and Removing the Card (optional) / the Battery ... - Page 3 • [Party] ... 65 • [Candle Light] ... 65 • [Baby1] / [Baby2] ... 66 • [Pet] ... 66 • [Sunset] ... 67 • [High Sens.] ... 67 • [Hi-Speed Burst] ... 67 • [Flash Burst] ... 68 • [Starry Sky] ... 68 •...
-
Page 4: Before Use
Precaution Fully peel off the strip of tape A from the lens cover before using the camera. Do not strongly shake or bump the camera by dropping or hitting it. Do not subject to strong pressure. • When you use in the following cases, the camera may malfunction, recording pictures may become impossible, or the lens, the LCD monitor or the external case may be damaged. - Page 5 „ About Condensation (When the lens is fogged up) „ • Condensation occurs when the ambient temperature or humidity changes. Be careful of condensation since it causes lens stains, fungus and camera malfunctions. • If condensation occurs, turn the camera off and leave it for about 2 hours.
-
Page 6: Standard Accessories
• If any accessories are lost, customers in the USA and Puerto Rico should contact Panasonic’s parts department at 1 800 833-9626 and customers in Canada should contact 1 800 99-LUMIX (1-800-995-8649) for further information about obtaining replacement parts. -
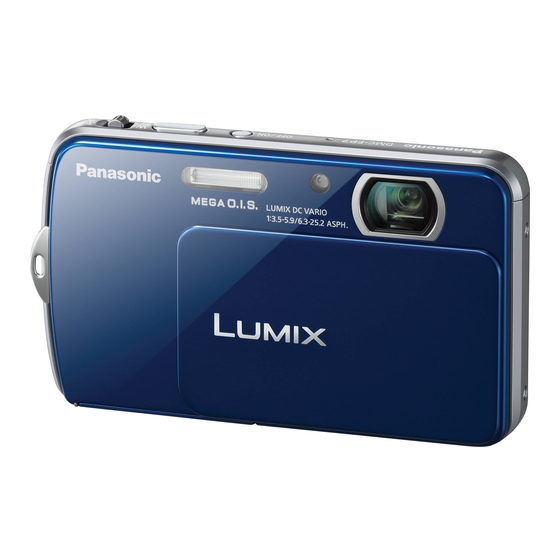
Page 7: Names Of The Components
(P14) 15 Release lever (P14) 16 DC coupler cover (P15) • When using an AC adaptor, ensure that the Panasonic DC coupler (optional) and AC adaptor (optional) are used. For connection details, refer to P15. Before Use (P8, 47, (P21) -
Page 8: How To Use The Touch Panel
How to Use the Touch Panel This touch panel is a type that detects pressure. You can operate the camera by directly touching the icons or images on the LCD monitor (Touch Panel) with your finger or the supplied stylus pen. Touch To touch and release the touch panel. - Page 9 Note • If you use a commercially available liquid crystal protection sheet, please follow the instructions that accompany the sheet. (Depending on the material, visibility or operability may be impaired.) • Apply a little extra pressure when touching if you have a commercially available protection sheet affixed or if you feel it is not responding well.
-
Page 10: Preparation
To ensure that safe products are used we would recommend that a genuine Panasonic battery pack is used. • Use the dedicated charger and battery. - Page 11 Connect the charger to the electrical outlet. • Charging starts when the [CHARGE] indicator A lights green. „ [CHARGE] indicator „ Lights on: Charging Lights off: Charging complete (Disconnect the charger from the electrical socket and detach the battery after charging is completed.) •...
- Page 12 „ Charging time „ Charging time (When charging the exhausted battery) „ Battery indication „ The battery indication is displayed on the LCD monitor. (Only when using the battery) • If the indication blinks, charge or replace the battery. Note •...
-
Page 13: Approximate Operating Time And Number Of Recordable Pictures
¼ • Temperature: 23 °C (73.4 °F) / Humidity: 50%RH when LCD monitor is on. • Using a Panasonic SD Memory Card (32 MB). • Using the supplied battery. • Starting recording 30 seconds after the camera is turned on. (When the Optical Image Stabilizer function is set to [ON].) -
Page 14: Inserting And Removing The Card (Optional) / The Battery
Inserting and Removing the Card • Check that this unit is turned off. • We recommend using a Panasonic card. Slide the release lever in the direction of the [OPEN] and open the card / battery door. • Always use genuine Panasonic batteries. - Page 15 „ Using an AC adaptor (optional) and a DC coupler (optional) instead of the battery „ The AC Adaptor (optional) can only be used with the designated Panasonic DC coupler (optional). The AC adaptor (optional) cannot be used by itself.
-
Page 16: About The Built-In Memory / The Card
The SD Speed Class Rating is the speed standard for successive writes. ¼ (Example) Class 6 • Please confirm the latest information on the following website. http://panasonic.jp/support/global/cs/dsc/ (This Site is English only.) Preparation Built-in Memory (P104) Card Remarks •... - Page 17 „ While accessing the built-in memory or card „ The access indication lights red. [2] (Built-in Memory) / [3] (Card) While lighting, operations such as writing/reading pictures, deleting or formatting are being performed. Do not turn the power off, or do not remove the battery, card or AC adaptor (optional).
-
Page 18: Setting Date / Time (Clock Set)
Preparation Setting Date / Time (Clock Set) • The clock is not set when the camera is shipped. Open the lens cover. • The camera is turned on. • If the language select screen is not displayed, proceed to step 4. Touch the language select icon on the screen. -
Page 19: Changing The Clock Setting
Touch the items you wish to set (Year / Month / Day / Hours / Minutes), and set using [e] / [r]. A : Time at the home area B : Time at the travel destination • You can continue to switch the settings by continuously touching [e] / [r]. -
Page 20: Basic
Recording Sequence Open the lens cover. The camera is turned on in Recording Mode. (Recording is possible with this setting.) A Shutter button Select Recording Mode. 1 Touch [ w 1]. 2 Touch the mode icon. • The description is displayed after the first touch. -
Page 21: Take The Picture
Take the picture. Press the shutter button halfway to focus and then press it fully to take the picture. (For details, see P22.) Close the lens cover. The camera is turned off. • The camera can also be turned off by pressing the camera ON / OFF switch. „... -
Page 22: Taking Pictures Using The Automatic Function (4: Intelligent Auto Mode)
[Rec] Mode: 4 Taking Pictures Using the Automatic Function ( 4 : Intelligent Auto Mode) The camera will set the most appropriate settings to match the subject and the recording conditions so we recommend this mode for beginners or those who want to leave the settings to the camera and take pictures easily. -
Page 23: Scene Detection
„ When taking pictures using the flash „ • When [w] is selected, [w], [e], [r] or [{] is set depending on the type or brightness of the subject. • When [e] or [r] is set, Digital Red-Eye Correction is activated. •... -
Page 24: Tracking Moving Subjects And Focus (Af Tracking)
Note • Due to conditions such as the ones below, a different scene may be identified for the same subject. – Subject conditions: When the face is bright or dark, the size of the subject, the color of the subject, the distance to the subject, the contrast of the subject, when the subject is moving –... -
Page 25: Settings In Intelligent Auto Mode
Settings in Intelligent Auto Mode [Rec] Mode menu – [Flash] / [Selftimer] / [Picture Size] • [Color Mode] can set the color effects of [STD.], [Happy], [B/W] or [SEPIA]. When [Happy] is selected, it is possible to automatically take a picture with a higher level of brilliance for the color brightness and vividness. -
Page 26: Taking Pictures With Your Favorite Settings (1: Normal Picture Mode)
[Rec] Mode: 1 Taking Pictures with Your Favorite Settings ( 1 : Normal Picture Mode) The camera automatically sets the shutter speed and the aperture value according to the brightness of the subject. You can take pictures with greater freedom by changing various settings in the [Rec]. -
Page 27: Confirming The Recording Information Such As Focus And Shutter Speed
Confirming the recording information such as focus and shutter speed A Focus indication B AF area (normal) C AF area (when using the Digital Zoom or when it is dark) D Focus range 1 E ISO sensitivity F Aperture value 2 G Shutter speed 2... -
Page 28: Preventing Jitter (Camera Shake)
Preventing jitter (camera shake) When the jitter alert [0] appears, use [Stabilizer] (P86), a tripod or the self-timer (P57). • Shutter speed will be slower particularly in the following cases. Keep the camera still from the moment the shutter button is pressed until the picture appears on the screen. We recommend using a tripod. -
Page 29: Touching The Screen To Release The Shutter (Touch Shutter Function)
[Rec] Mode: 4 1 < 5 / Touching the Screen to Release the Shutter (Touch Shutter function) Touching the subject on the screen to record can automatically focus and release the shutter. • Touch AF/AE (P30) or AF Tracking Touch [Q]. [R]: Touch Shutter recording enabled [Q]: Touch Shutter canceled Touch the subject you wish to focus on. -
Page 30: Touching The Screen To Adjust The Focus And The Exposure (Touch Af/Ae)
[Rec] Mode: 4 1 < 5 / Touching the Screen to Adjust the Focus and the Exposure (Touch AF/AE) Touching the subject to record can adjust the focus and the exposure. This is useful when the targeted subject is not in the center of the screen, etc. When [7] is set for [AF Mode] or the Intelligent Auto Mode is used, the AF Tracking functions at the same time and the camera continues to focus, tracking the movement of the touched subject. -
Page 31: Playing Back Pictures ([Normal Play])
[Playback] Mode: 5 Playing Back Pictures If the card is inserted, pictures in the card are played back. If not, pictures in the built-in memory are played back. Touch [9] in Recording Mode. • Touching [9] in Recording Mode will automatically enter Normal Playback Mode. -
Page 32: Displaying Multiple Screens (Multi Playback)
Displaying Multiple Screens (Multi Playback) Touch [[] to change to the 12 screen display. • Each time you touch, the display method is switched. [9] 1 screen, [[] 12 screens, []] 30 screens, [t] Calendar (P90) • This can also be switched by moving the zoom lever to [6] (W) or [7] (T). -
Page 33: Using The Playback Zoom
Touch the part to enlarge. 1"2"4"8"16 • Moving the zoom lever to [7] (T) can also enlarge the picture. • When you change the magnification, the zoom position indication A appears for about 1 second. • The more a picture is enlarged, the more its quality deteriorates. Move the position to be displayed by dragging the picture (P8). -
Page 34: Recording Motion Pictures
[Rec] Mode: 6 Recording Motion Pictures This records motion pictures with sound. (Motion pictures cannot be recorded without audio.) Touch [ w 1] in Recording Mode. Touch [6]. Press the shutter button halfway to focus and then press it fully to start recording. - Page 35 • This camera has improved sound quality so motion pictures recorded on this camera cannot be played back on a Panasonic Digital Camera (LUMIX models) that was sold in July 2008 or before. (However, motion pictures recorded on previous models can be played back on this camera.)
-
Page 36: Playing Back Motion Pictures
[Playback] Mode: 5 Playing Back Motion Pictures Select motion picture icon and touch [5] to play back. A Motion picture icon B The motion picture recording time • After playback starts, the elapsed playback time is displayed on the screen. For example, 8 minutes and 30 seconds is displayed as [8m30s]. -
Page 37: Deleting Pictures
[Playback] Mode: 5 Deleting Pictures Once deleted, pictures cannot be recovered. • Pictures on the built-in memory or the card, which are being played back will be deleted. Select the picture to be deleted, and then touch [4]. Touch [Delete Single]. Touch [Yes]. -
Page 38: To Delete Multiple Pictures (Up To 50) Or All The Pictures
To delete multiple pictures (up to 50) or all the pictures Touch [4]. Touch [Delete Multi] or [Delete All]. • [Delete All]: [Delete All] " step 5. • If you select [All Delete Exceptz] after selecting [Delete All], the pictures except ones of favorite setting are deleted. -
Page 39: Setting The Menu
Setting the Menu Using the menu, you can select your preferred recording or playback functions, or can make basic settings for the camera. This section describes the operation method using the example of how to set the [AF Mode] in the recording menu to [3] (Face Detection). Select Normal Picture Mode. -
Page 40: E Setup Menu
„ Type of menu „ 1 Recording menu (Only in Recording Mode) When recording with your preferred settings • Color shade, sensitivity, number of pixels, etc. can be set. 9 Playback menu (Only in Playback Mode) When enjoying or using the recorded pictures •... -
Page 41: Calling Up Frequently Used Menus Easily (Shortcut Setting)
Calling up frequently used menus easily (Shortcut setting) You can always display on the LCD monitor your favorite menu items among the recording menu and the playback menu. Up to 2 items for the recording menu and 2 items for the playback menu can be registered. -
Page 42: About The Setup Menu
Perform these settings if you need to. About the Setup Menu [Clock Set], [Auto Power Off] and [Auto Review] are important items. Check their settings before using them. For details on how to select the [Setup] menu settings, refer to P39. [Clock Set] •... - Page 43 [LCD Mode] • The brightness of the pictures displayed on the LCD monitor is increased so some subjects may appear differently from actuality on the LCD monitor. However, this does not affect the recorded pictures. • The LCD Monitor automatically returns to normal brightness after 30 seconds when recording in [Power LCD] Mode.
-
Page 44: Video Out
[Auto Review] • [Auto Review] is activated regardless of its setting when using [Hi-Speed Burst], [Flash Burst] and [Photo Frame] in Scene Mode and [Burst]. • In Intelligent Auto Mode, the Auto Review function is fixed to [2 SEC.]. • [Auto Review] does not work in Motion Picture Mode. [Reset] •... - Page 45 • If the built-in memory or the card cannot be formatted, consult your nearest Service Center. For USA and Puerto Rico assistance, please call: 1-800-211-PANA (7262) or, contact us via the web at: http://www.panasonic.com/contactinfo Basic This mode allows you to automatically display pictures vertically if they were recorded holding the camera vertically.
- Page 46 [Calibration] • Calibration is not done if correct position is not touched. Touch the [4] mark again. [Language] • If you set a different language by mistake, select [9] from the menu icons to set the desired language. [Demo Mode] •...
-
Page 47: Advanced (Recording Pictures)
About the LCD Monitor Touch [DISP.] to change. • During Playback Zoom, while playing back motion pictures and during a slide show, you can only select “Normal display D” or “No display F”. In Recording Mode A Normal display B No display ... -
Page 48: Taking Pictures With The Zoom
[Rec] Mode: 4 1 < 5 / 6 Taking Pictures with the Zoom Using the Optical Zoom / Using the Extended Optical Zoom (EZ) / Using the Intelligent Zoom / Using the Digital Zoom 4x magnification is possible with the Optical Zoom. Reducing the recording pixel level will activate the Extended Optical Zoom which can zoom up to 9.0x for DMC-FP7 or 8.4x for DMC-FP5. - Page 49 Feature Intelligent Zoom Maximum Approx. 1.3× of Optical Zoom or magnification Extended Optical Zoom Picture quality No noticeable deterioration [i.Resolution] Conditions menu is set to [i.Zoom]. Screen display B [i.Zoom] is displayed. • When using the Zoom function, an estimate of the focus range will appear in conjunction with the zoom display bar.
-
Page 50: Zooming With Touch Operation
Note • The indicated Zoom Magnification is an approximation. • “EZ” is an abbreviation of “Extended Optical Zoom”. • The Intelligent Zoom employs the super-resolution technology, which can increase the zoom ratio without noticeable deterioration of the image quality. • When using the Digital Zoom, we recommend using a tripod and the self-timer taking pictures. -
Page 51: Taking Pictures Using The Built-In Flash
[Rec] Mode: 4 1 < 5 / Taking Pictures Using the Built-in Flash A Photo flash Do not cover the flash with your fingers or other objects. Switching to the appropriate flash setting Set the flash to match the recording. Select [Flash] from the recording menu. - Page 52 Item The flash is automatically activated when the recording conditions q: AUTO make it necessary. The flash is automatically activated when the recording conditions make it necessary. It is activated once before the actual recording to reduce the red- AUTO / Red-Eye eye phenomenon (eyes of the subject appearing red in the picture) Reduction and then activated again for the actual recording.
- Page 53 „ Available flash settings by Recording Mode „ The available flash settings depend on the Recording Mode. : Available, —: Not available, (○ q @ t ` [ o ○ — — ○ ○ ○ ○ ○ ○ < ○...
- Page 54 „ Shutter speed for each flash setting „ Flash setting Shutter speed (Sec.) 1/60 to 1/1600 The shutter speed becomes a maximum of 1 second in the following cases. ¼ – When the Optical Image Stabilizer is set to [OFF]. –...
-
Page 55: Taking Close-Up Pictures
[Rec] Mode: 1 Taking Close-up Pictures Select [Macro Mode] from the recording menu. Select the setting. • [a] is displayed during AF Macro Mode and [.] is displayed during Macro Zoom Mode. • To cancel, select [OFF]. This mode allows you to take close-up pictures of a subject, e.g. when taking pictures of flowers. -
Page 56: Macro Zoom
You can take a picture with the Digital Zoom up to 3× while maintaining the distance to the subject for the extreme Wide position [10 cm (0.33 feet)]. • Focus range will be 10 cm (0.33 feet) to 7 during Macro Zoom Mode regardless of the zoom position. -
Page 57: Taking Pictures With The Self-Timer
[Rec] Mode: 4 1 < 5 / Taking Pictures with the Self-timer Select [Selftimer] from the recording menu. Select the setting. • After setting, close the menu. Press the shutter button halfway to focus and then press it fully to take the picture. -
Page 58: Compensating The Exposure
[Rec] Mode: 1 < 5 / 6 Compensating the Exposure Use this function when you cannot achieve appropriate exposure due to the difference in brightness between the subject and the background. Look at the following examples. Underexposed Compensate the exposure towards positive. -
Page 59: Taking Pictures While Changing The Skin Texture (<: Cosmetic Mode)
[Rec] Mode: < Taking Pictures While Changing the Skin Texture ( < : Cosmetic Mode) Pictures can be taken while setting the texture or clearness of the skin. Touch [ w 1] in Recording Mode. Touch [<]. Touch the item and the degree of effectiveness. -
Page 60: Taking Pictures That Match The Scene Being Recorded (5: Scene Mode)
[Rec] Mode: 5 / Taking Pictures That Match the Scene Being Recorded ( 5 : Scene Mode) When you select a Scene to match the subject and recording situation, the camera sets the optimal exposure and hue to obtain the desired picture. Touch [ w 1] in Recording Mode. -
Page 61: Calling Up The Frequently Used Scene Quickly (/: My Scene Mode)
Calling up the frequently used scene quickly (/: My Scene Mode) Registering the frequently used scene with My Scene Mode enables you to take pictures quickly. 1 In Recording Mode, touch [ w 1] " Touch [/]. 2 Touch the scene. The selected scene is registered with My Scene. -
Page 62: [Self Portrait]
Select this to take pictures of yourself. „ Technique for Self Portrait Mode „ • Press the shutter button halfway to focus. The self-timer indicator lights up when you are brought into focus. Making sure you hold the camera still, press the shutter button fully to take the picture. •... -
Page 63: [Panorama Assist]
You can take pictures with connections suitable for creating panorama images. „ Setting the recording direction „ 1 Select the direction to take picture. • The horizontal / vertical guideline will be displayed. 2 Take the picture. • You can retake the picture by selecting [Retake]. 3 Touch [Next]. -
Page 64: [Sports]
This mode allows you to take pictures of sports scenes or other fast-moving events. Note • The shutter speed becomes a maximum of 1 second. • This mode is suitable for taking pictures of subjects at distances of 5 m (16.4 feet) or more. -
Page 65: [Food]
This mode allows you to take pictures of food with a natural hue without being affected by the ambient light in restaurants etc. Select this mode when you want to take pictures at a wedding reception, an indoor party etc. This allows you to take pictures of people and the background with near real-life brightness. -
Page 66: [Baby1] / [Baby2]
This takes pictures of a baby with a healthy complexion. When you use the flash, the light from it is weaker than usual. It is possible to set different birthdays and names for [Baby1] and [Baby2]. You can select to have these appear at the time of playback, or have them stamped on the recorded image using [Text Stamp] (P96). -
Page 67: [Sunset]
Select this mode when you want to take pictures of a sunset view. This allows you to take vivid pictures of the red color of the sun. This mode minimizes the jitter of the subjects, and enables you to take pictures of these subjects in dimly lit rooms. -
Page 68: [Flash Burst]
Still pictures are taken continuously with flash. It is convenient to take continuous still pictures in dark places. „ Setting Picture size „ 3M (4:3), 2.5M (3:2), 2M (16:9) and 2.5M (1:1) is selected as the picture size. • Still pictures are taken continuously while the shutter button is pressed fully. Number of recordable pictures Note... -
Page 69: [Fireworks]
This mode allows you to take beautiful pictures of fireworks exploding in the night sky. „ Technique for Fireworks Mode „ • Since the shutter speed becomes slower, we recommend using a tripod. Note • This mode is most effective when the subject is 10 m (32.8 feet) or more away. •... -
Page 70: [Aerial Photo]
This mode allows you to take pictures through an airplane window. „ Technique for Aerial Photo Mode „ • We recommend using this technique if it is difficult to focus when taking pictures of clouds etc. Aim the camera at something with high contrast, press the shutter button halfway to fix the focus and then aim the camera at the subject and press the shutter button fully to take the picture. -
Page 71: [High Dynamic]
You can use this mode to easily record pictures in which bright and dark regions of the scene are expressed with suitable brightness when looking into the sun, at night, or in similar circumstances. „ Setting the effect „ [STD.] : Natural color effect [ART] : Eye-catching effect which emphasizes contrast and color [B&W] : Black and white effect Note... -
Page 72: Useful Functions At Travel Destinations
[Rec] Mode: 4 1 < 5 / 6 Useful Functions at Travel Destinations Recording which Day of the Vacation You Take the Picture For details on the [Setup] menu settings, refer to P39. If you set the departure date or the travel destination of the vacation in advance, the number of days that have passed since the departure date (which day of the vacation it is) is recorded when you take the picture. - Page 73 Touch [SET]. Enter the location. • For details on how to enter characters, refer to the “Entering Text” on P87. • After setting, close the menu. „ Canceling the travel date „ The travel date is automatically canceled if the current date is after the return date. If you want to cancel the travel date before the end of the vacation, touch [OFF] on the screen shown in step 3 or 7.
-
Page 74: Recording Dates / Times At Overseas Travel Destinations (World Time)
Recording Dates / Times at Overseas Travel Destinations (World Time) For details on the [Setup] menu settings, refer to P39. You can display the local times at the travel destinations and record them on the pictures you take. • Select [Clock Set] to set the current date and time in advance. Select [World Time] from the [Setup] menu. - Page 75 Touch [Destination]. • Depending on the setting, the time at the travel destination area or the home area is displayed. Touch [w] or [q] to select the area that the travel destination is in, and touch [Set]. C Current time of the destination area D Time difference •...
-
Page 76: Using The [Rec] Mode Menu
Using the [Rec] Mode Menu Refer to for details. Refer to for details. For details on [Rec] Mode menu settings, refer to P39. Set the number of pixels and aspect ratio of the pictures. The higher the number of pixels, the finer the detail of the pictures will appear even when they are printed onto large sheets. -
Page 77: [Rec Quality]
Refer to for details. For details on [Rec] Mode menu settings, refer to P39. This allows the sensitivity to light (ISO sensitivity) to be set. Setting to a higher number enables pictures to be taken even in dark places without the resulting pictures coming out dark. -
Page 78: [White Balance]
For details on [Rec] Mode menu settings, refer to P39. In sunlight, under incandescent lights or in other such conditions where the color of white takes on a reddish or bluish tinge, this item adjusts to the color of white which is closest to what is seen by the eye in accordance with the light source. -
Page 79: [Af Mode]
Auto White Balance Depending on the conditions when pictures are taken, the pictures may take on a reddish or bluish tinge. Furthermore, when a multiple number of light sources are being used or there is nothing with a color close to white, Auto White Balance may not function properly. In this case, set the White Balance to a mode other than [AWB]. - Page 80 „ About [3] (Face Detection) „ The following AF area frames are displayed when the camera detects the faces. Yellow: When the shutter button is pressed halfway, the frame turns green when the camera is focused. White: Displayed when more than one face are detected. Other faces that are the same distance away as faces within the yellow AF areas are also focused.
-
Page 81: [Macro Mode]
„ About [7] (AF Tracking) „ When the subject is touched on the screen, the subject is set as a target of AF tracking. • The AF area (AF tracking frame) is displayed in yellow. The camera continues to focus the subject and adjust the exposure even if the subject moves afterwards. -
Page 82: [Exposure]
Refer to for details. For details on [Rec] Mode menu settings, refer to P39. Contrast and exposure will be adjusted automatically when there is a big difference in brightness between the subject and background. Applicable modes: 1 6 [ON] / [OFF] Note •... -
Page 83: [Digital Zoom]
Advanced (Recording pictures) [Digital Zoom] For details on [Rec] Mode menu settings, refer to P39. This can enlarge subjects even more than the Optical Zoom, Extended Optical Zoom or Intelligent Zoom. Applicable modes: 1 < 5 / [ON] / [OFF] Note •... -
Page 84: [Color Mode]
Note • Do not turn the camera off or remove the card after recording until the access indication lights off. • The Burst speed becomes slower halfway. The exact timing of this depends on the type of card, the picture size and the quality. •... -
Page 85: [Af Assist Lamp]
For details on [Rec] Mode menu settings, refer to P39. Illuminating the subject makes it easier for the camera to focus when recording in low light conditions that make focusing difficult. Applicable modes: 1 < 5 / [ON]: When taking pictures in dark places, the AF Assist Lamp lights while the shutter button is pressed halfway. -
Page 86: [Stabilizer]
For details on [Rec] Mode menu settings, refer to P39. This automatically detects jitter and corrects for it. Applicable modes: 1 < 5 / [ON] / [OFF] Note • The Stabilizer function may not be effective in the following cases. –... -
Page 87: Entering Text
Entering Text It is possible to enter babies’ and pets’ names and the names of travel destinations when recording. (Only alphabetical characters and symbols can be entered.) You can use the stylus pen (supplied) if it is hard to operate with your fingers. Display the entry screen. -
Page 88: Advanced (Playback)
[Playback] Mode: 5 Playing Back Pictures in Sequence You can play back the pictures you have taken in synchronization with music, and you can do this in sequence while leaving a fixed interval between each of the pictures. Furthermore, you can play back the pictures grouped together by category or play back only those pictures you have set as favorites as a Slide Show. -
Page 89: Item Settings
„ Operations performed during slide show „ Display control panel by touching screen. • If there is no operation for approx. 2 seconds, the operation icon will disappear. [q/h]: Play/Pause [g]: Exit [i]: Forward to next picture (While paused) [u]: Back to previous picture (While paused) [:]: The setting screen returns. -
Page 90: Selecting Pictures And Playing Them Back
[Playback] Mode: 5 Selecting Pictures and Playing them Back You can display pictures by recording date. Touch [ w 9] in Playback Mode. Touch [0]. • You can also move the zoom lever to [6] (W) several times to display the calendar search display screen. -
Page 91: [Category Selection]
This mode allows you to search images by Scene Mode or other categories (such as [Portrait], [Scenery] or [Night Scenery]) and sort the pictures into each of the categories. You can then play back the pictures in each category. Touch [ w 9] in Playback Mode. Touch []] and touch [;]. -
Page 92: [Favorite]
You can play back the pictures you have set as [Favorite] pictures which have been set to [Favorite]). Touch [ w 9] in Playback Mode. Touch []] and touch [z]. Advanced (Playback) [Favorite] (P100) - 92 - (Only when there are... -
Page 93: Refining Portraits (Beauty Retouch)
[Playback] Mode: 5 Refining Portraits (Only for DMC-FP7) By adding make-up effects, adjusting texture of skin, etc., you can transform the faces of subjects even after taking pictures so they look more attractive. Make sure there is some space available on the built-in memory or card before transformed pictures are newly created. - Page 94 Touch [OK]. • Pre-transformed and post-transformed pictures are displayed side by side. Touch [OK]. • Returns to the screen on step 3. • If you want to transform other subjects in succession, touch other faces and perform from step 3. Touch [Save].
-
Page 95: Using The [Playback] Mode Menu
[Playback] Mode: 5 Using the [Playback] Mode Menu You can use various playback functions such as setting of pictures to upload to the image sharing sites, resizing recorded pictures, setting protection, etc. • Using [Text Stamp], [Resize] or [Cropping], a newly edited picture is created. A new picture cannot be created if there is no free space on the built-in memory or the card so we recommend checking that there is free space and then editing the picture. -
Page 96: [Text Stamp]
„ Canceling all the [Upload Set] settings „ Select [Upload Set] " [CANCEL] " [Yes] on the playback menu. Note • A card with the capacity of less than 512 MB cannot be set. • You may not be able to set pictures taken with other equipment. •... - Page 97 Select the items to stamp. Item [Shooting Date] [Name] [Location] [Travel Date] Touch [:]. Touch [OK]. • To stamp [Age] when [w/d] is selected, touch [Yes] and proceed to step 8. Touch [Yes]. • After saving, close the menu. Note •...
-
Page 98: [Resize] Reducing The Picture Size (Number Of Pixels)
[Resize] Reducing the picture size (number of pixels) You can reduce the size of the recorded picture(s) to attach them to an e-mail or use them on a website. Select [Resize] on the [Playback] Mode menu. Touch [S (Single)] or [M (Multi)]. Select the picture(s) and the size(s). -
Page 99: [Cropping]
You can enlarge and then crop the important part of the recorded picture. Select [Cropping] on the [Playback] Mode menu. Drag the screen horizontally to select an image, and then touch [Set]. • For how to select a picture, see P31. Select the part to be cropped. -
Page 100: [Favorite]
You can play back or print only pictures set as favorites. Also, you can delete pictures other than favorites. Select [Favorite] on the [Playback] Mode menu. Touch [S (Single)] or [M (Multi)]. Select the picture. • [z] is displayed on pictures that are already registered as favorites. •... -
Page 101: [Print Set]
When you want to use a photo printing store to print pictures recorded on the built-in memory, copy them to a card For more information visit: http://panasonic.jp/dc/dpof_110/white_e.htm Select [Print Set] on the [Playback] Mode menu. Touch [S (Single)] or [M (Multi)]. - Page 102 „ To print the date „ After setting the number of prints, set/cancel printing with the recording date by touching [Date]. • Depending on the photo printing store or the printer, the date may not be printed even if you set to print the date. For further information, ask at your photo printing store or refer to the operating instructions for the printer.
-
Page 103: [Protect]
You can set protection for pictures you do not want to delete by mistake. Select [Protect] on the [Playback] Mode menu. Touch [S (Single)] or [M (Multi)]. Select the picture. [Single] setting Drag the screen horizontally to select an image, and then touch [Set]. -
Page 104: [Copy] Copying Pictures From The Built-In Memory To A Card
• It may take time to copy the picture data. • Only pictures recorded with a Panasonic digital camera (LUMIX) will be copied. (Even if the pictures were recorded with a Panasonic digital camera, you may not be able to copy them if they were edited with a PC.) •... -
Page 105: Connecting To Other Equipment
[Playback] Mode: 5 Playing Back Pictures on a TV Screen Playing back pictures using the AV cable (supplied) Preparations: Set the [Output]. Turn this unit and the TV off. 1 Yellow: To the video input socket 2 White: To the audio input socket A Align the marks, and insert straight. -
Page 106: Playing Back Pictures On A Tv With An Sd Memory Card Slot
Note • Depending on the aspect ratio, black bands may be displayed on the top and bottom or the left and right of the pictures. • Do not use any other AV cables except the supplied one. • Read the operating instructions for the TV. •... -
Page 107: Connecting To A Pc
Connecting to a PC You can acquire recorded pictures to a PC by connecting the camera and the PC. • Some PCs can read directly from the card removed from the camera. For details, refer to the operating instructions of the PC. •... - Page 108 • Proceed with the hardware removal using “Safely Remove Hardware” on the task tray of the PC. If the icon is not displayed, check that [Access] is not displayed on the LCD monitor of the digital camera before removing the hardware. Note •...
- Page 109 „ Viewing the contents of the built-in memory or card using the PC (folder „ composition) • Built-in memory • Card A new folder is created when pictures are taken in the following situations: • When a card containing a folder with the same folder number has been inserted (such as when pictures were taken using another maker of camera) •...
-
Page 110: Uploading Pictures To The Image Sharing Sites
Uploading pictures to the image sharing sites Using the upload tool (LUMIX Image Uploader), you can upload pictures or motion pictures to the image sharing sites (Facebook, YouTube). You do not need to import pictures to the computer or to install software. Only with the computer that can be connected to the Internet, you can upload pictures. -
Page 111: Printing The Pictures
Printing the Pictures If you connect the camera to a printer supporting PictBridge, you can select the pictures to be printed out and instruct that printing be started on the camera’s LCD Monitor. • Some printers can print directly from the card removed from the camera. For details, refer to the operating instructions of the printer. -
Page 112: Selecting Multiple Pictures And Printing Them
Note • Do not use any other USB connection cables except the supplied one. Use of cables other than the supplied USB connection cable may cause malfunction. • Turn the camera off before connecting or disconnecting the AC adaptor (optional). •... -
Page 113: Print Settings
Item Multiple pictures are printed at one time. • Switch the screen by touching [e] / [r] if these are displayed on the slide bar. [Multi Select] • Touch the pictures and [2] appears on the pictures to be printed. (When the selected picture is touched again, the setting is canceled.) •... - Page 114 Item [ON] Date is printed. [OFF] Date is not printed. • If the printer does not support date printing, the date cannot be printed on the picture. • Since the printer’s settings may take precedence over the Print With Date setting, check the printer’s Print With Date setting as well.
- Page 115 [Page Layout] (Layouts for printing that can be set with this unit) Item Settings on the printer are prioritized 1 picture with no frame on 1 page 1 picture with a frame on 1 page 2 pictures on 1 page 4 pictures on 1 page •...
-
Page 116: Screen Display
Screen Display „ In recording „ Recording in Normal Picture Mode [1] (Initial setting) Recording Mode Picture size (P76) Recording quality (P34) Flash Mode (P51) Optical Image Stabilizer Jitter alert (P28): 0 Focus (P27) AF area (P27) AF Macro (P55) Macro Zoom (P56) AF mode... - Page 117 „ In recording (after settings) „ 15 Exposure Compensation 16 White Balance (P78) Color Mode (P84) 17 Burst (P83) 18 Intelligent Exposure (P82): - AF Assist Lamp (P85): W 19 Shortcut area (P41) 20 Elapsed recording time (P34): 00h00m00s 1 21 Zoom / Extended Optical Zoom Intelligent Zoom (P49)
- Page 118 „ In playback „ Playback Mode (P31) Recording quality (P34) Color Mode (P84) Protected picture (P103) Favorites (P100) Stamped with text indication Picture Size (P76) Motion picture playback Picture number / Total pictures Elapsed playback time (P36): 00h00m00s Battery indication (P12) Beauty retouched indication Number of prints...
-
Page 119: Cautions For Use
Cautions for Use Keep this unit as far away as possible from electromagnetic equipment (such as microwave ovens, TVs, video games etc.). • If you use this unit on top of or near a TV, the pictures and/or sound on this unit may be disrupted by electromagnetic wave radiation. - Page 120 Before cleaning the camera, remove the battery or the DC coupler (optional), or disconnect the power plug from the outlet. Then wipe the camera with a dry soft cloth. • When the camera is very dirty, it can be cleaned by wiping the dirt off with a wrung wet cloth, and then with a dry cloth.
- Page 121 The battery is a rechargeable lithium ion battery. Its ability to generate power comes from the chemical reaction that takes place inside it. This reaction is susceptible to the surrounding temperature and humidity. If the temperature is too high or too low, the operating time of the battery will become shorter. Always remove the battery after use.
- Page 122 • Information including personal information may be altered or vanish due to erroneous operation, effect of static electricity, accident, malfunction, repair, or other handlings. Please note in advance that Panasonic is not liable in any way for any direct or indirect damage from the alteration or vanishing of information or personal information.
- Page 123 • Recorded data may be damaged or lost if the camera breaks down due to inappropriate handling. Panasonic will not be liable for any damage suffered due to loss of recorded data. • When you use a tripod, make sure the tripod is stable when this unit is attached to it.
-
Page 124: Message Display
Message Display Confirmation messages or error messages will be displayed on the screen in some cases. The major messages are described below as examples. [This picture is protected] p Delete the picture after canceling the protect setting. [This picture cannot be deleted] / [Some pictures cannot be deleted] •... - Page 125 [Memory Card Error Format this card?] • It is a format that cannot be used with this unit. p Format the card again with the camera after saving necessary data on a PC etc. [Please turn camera off and then on again] / [System Error] •...
- Page 126 [A folder cannot be created] • A folder cannot be created because there are no remaining folder numbers that can be used. (P109) p Format the card after saving necessary data on a PC etc. [Picture is displayed for 4:3 TV] / [Picture is displayed for 16:9 TV] •...
-
Page 127: Troubleshooting
Troubleshooting First, try out the following procedures If the problem is not resolved, it may be improved by selecting [Reset] [Setup] menu when taking pictures. The camera cannot be operated even when it is turned on. • The battery is exhausted. The power cuts off during use. - Page 128 2 or 3 pictures are taken at one time. p Set [Hi-Speed Burst] (P67), [Flash Burst] [Rec] Mode menu to [OFF]. The subject is not focused properly. • The focus range varies depending on the Recording Mode. p Set to the proper mode for the distance to the subject. •...
-
Page 129: Lcd Monitor
Motion picture recording stops in the middle. • Depending on the type of the card, recording may stop in the middle. p Use a card with SD Speed Class with “Class 6” or higher when recording motion pictures. p In the event it stops even after using a “Class 6” card or higher, or if you are using a card that has been formatted with a PC or other equipment, the data writing speed has deteriorated. - Page 130 The LCD monitor is too bright or dark. • [LCD Mode] is activated. Black, red, blue and green dots appear on the LCD monitor. • This is not a malfunction. These pixels do not affect the recorded pictures. Noise appears on the LCD monitor. •...
- Page 131 • Is this a non-standard picture, a picture which has been edited using a PC or a picture which was taken by another maker of digital camera? • Did you remove the battery immediately after picture-taking or did you take the picture using a battery with a low remaining charge? p Format the data to delete the pictures mentioned above.
- Page 132 The SDXC Memory Card is not recognized by the PC. p Check if your computer supports SDXC Memory Cards. http://panasonic.net/avc/sdcard/information/SDXC.html p Do not format the card if you see the message prompting you to do so when connecting the camera to the PC.
- Page 133 The picture cannot be printed when the camera is connected to a printer. • Pictures cannot be printed using a printer which does not support PictBridge. • Set to [PictBridge(PTP)] in [USB Mode]. The ends of the pictures are cut at printing. p When using a printer with a cropping or borderless printing function, cancel this function before printing.
- Page 134 When pictures are taken using the zoom, they are slightly distorted and the areas around the subject contain colors which are not actually present. • It is possible that the subject may be warped slightly, or the borders get colored, depending on the zoom magnification, due to the characteristics of the lens, but this is not a malfunction.
-
Page 135: Number Of Recordable Pictures And Available Recording Time
Number of Recordable Pictures and Available Recording Time • The number of recordable pictures and the available recording time are an approximation. (These vary depending on the recording conditions and the type of card.) • The number of recordable pictures and the available recording time varies depending on the subjects. - Page 136 „ Available recording time (when recording motion pictures) „ Recording quality setting • Motion pictures can be recorded continuously up to 2 GB. The maximum available recording time for up to 2 GB only is displayed on the screen. Note •...
- Page 137 • SDXC Logo is a trademark of SD-3C, LLC. • QuickTime and the QuickTime logo are trademarks or registered trademarks of Apple Inc., used under license therefrom. • YouTube is a trademark of Google Inc. • This product uses “DynaFont” from DynaComware Corporation. DynaFont is a registered trademark of DynaComware Taiwan Inc.
Need help?
Do you have a question about the Lumix DMC-FP7 and is the answer not in the manual?
Questions and answers