
Subscribe to Our Youtube Channel
Related Manuals for DR. Heater DR-238EU


Summary of Contents for DR. Heater DR-238EU
- Page 1 Carbon Infrared Heater Indoor/Outdoor 3000 Watts Owner’s Manual Model No.: DR-238EU DO NOT RETURN TO PLACE OF PURCHASE! Please contact support via email: SERVICE@DRHEATERUSA.COM for customer service & warranty issues...
- Page 2 Warning THESE INSTRUCTIONS SHOULD BE READ CAREFULLY AND RETAINED FOR FUTURE REFERENCE, We cannot be liable for any damages caused by failure to observe these instructions. IMPORTANT INSTRUCTIONS READ CAREFULLY-The infrared heater is designed for safe operation. Nevertheless, installation, maintenance and operation of the heater can be dangerous. Observing the following procedures will reduce the risk of fire, electric shock, injury to person and keep installation time to a minimum.
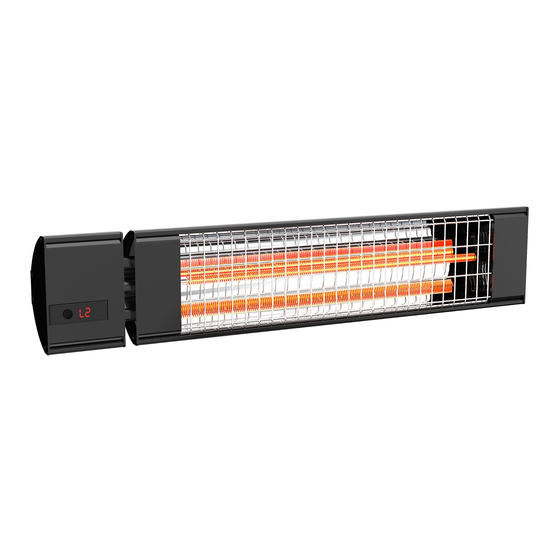
- Page 3 WARNING: HOT SURFACE, DO NOT TOUCH,DO NOT COVER SAVE THESE INSTRUCTIONS Introduction The DR-238EU carbon infrared heater produces instant and comfortable heat like the sun. This robust and weather-proof heater is designed for domestic and commercial heating applications within indoor and outdoor areas.
- Page 4 Mount Instruction Required hardware contents Desc. Desc. L shaped bracket Gasket Explosion screw Screw Wing nut H2 Explosion Screw parts Attention: Digital display position should be on left for correct installation direction P a g e...
- Page 5 1. Mark the locations using the provided dimensions in Fig - 1a and using the holes on the L- shaped bracket as a guide. Make sure the distance between 2 L-shaped brackets is 35mm/1.38”. Mounting Height: maintain at least 2.4m / 7.9 ft distance between the heater and the floor. 1.1 "...
- Page 6 4. Attached the 2 L-shaped bracket (H1) with 4 explosion screw (H2) Part A with the gasket from the explosion screw (H2) part B & C and nut part D as shown in Fig - 4a. H2 Part A x4 H1 x2 H2 Part B x4 H2 Part C x4...
- Page 7 6. Assemble the 4 L-shaped brackets (H1) with 2 nuts (H3), 2 gaskets (H4) and 2 screws (H5) as shown in Fig - 6a. H3 x2 H4 x2 Fig - 6a 7. Mounting Height: maintain at least 2.4m / 7.9ft distance from the heater to the ground as shown in Fig - 7a, Fig - 7b, Fig - 8a, Fig - 8b.
- Page 8 Min 2.4m / 7.9ft Min 2.4m / 7.9ft Fig - 8a Fig - 8b For wall mounted: The heater’s working angle is between 30 ° - 45 ° At least 2.4m / 7.9 ft mounting height Indoor or well protected environments will generally exceed average coverage areas.
- Page 9 WARNING THE POWER CORD MUST PLUG INTO A GFCI OUTLET FOR OUTDOOR USE. Ensure main power is OFF before commencing installation. The supplied main cable must not contact the surface of the heater during operation. The mounting height and intensity should reflect the intended use of the heater. P a g e...
- Page 10 P a g e...
-
Page 11: Function And Operation
FUNCTION & OPERATION A) The heater must be properly installed before it is used. B) The heater can be used at well-protected outdoor area with a height 2.4 meters fixed mounted installed, user-operated devices intended to reduce the risk of fire, electric shock, or injury to persons;... -
Page 12: Remote Control Instructions
OPERATING Operating unit with built-button 1. Apply power to the heater. The heater will be on standby mode display (- -) on the LED screen. 2. Press the button on the unit to cycle through the functions, heat levels (L1 - L2), standby, and off. -
Page 13: Troubleshooting
Caution: When the appliance is not operated for a long period of time, cleaning or maintenance is conducted or when the location of the heater is changed, the heater should be turned to OFF and unplugged from the electrical connection. Periodic inspection and removal of dirt and contaminants will ensure that equipment can be operated safely. - Page 14 Storage: Store the heater in a cool, dry location when not in use to prevent dust and dirt build-up. Wrap the power cord with ties. Use packaging cartons to store. ATTENTION: 1. Always disconnect the heater from the electricity supply and allow it to cool before attempting to work on it.
-
Page 15: Warranty Information
Please visit: https://www.amazon.com/review/review-your-purchases# At Dr. Heater USA, we are committed to bringing top quality alternative & supplemental heating products to our customers. Note: There may be a trace of smoke or odor when the unit is first operated. Do not be alarmed. This indicates a drop of oil fell on the interior coils during the manufacturing process.
Need help?
Do you have a question about the DR-238EU and is the answer not in the manual?
Questions and answers