Advertisement
Quick Links
USA office: Fontana
AUS office: Truganina
GBR office: Ipswich
If you're having difficulty, our friendly
customer team is always here to help.
FRA office: Saint Vigor d'Ymonville
USA:cs.us@costway.com
AUS:cs.au@costway.com
GBR:cs.uk@costway.com
FRA:cs.f r @costway.com
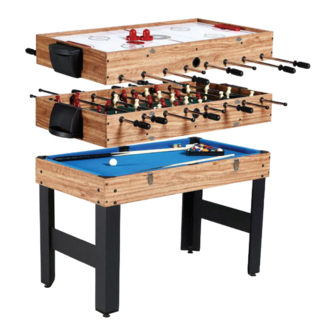
3-in-1 Multi Game Table
Table Multi-jeux 3 en 1
SP37328
THIS INSTRUCTION BOOKLET CONTAINS IMPORTANT SAFETY INFORMATION. PLEASE READ AND KEEP FOR FUTURE REFERENCE.
Advertisement

Related Manuals for Costway SP37328


Summary of Contents for Costway SP37328
- Page 1 GBR office: Ipswich FRA office: Saint Vigor d'Ymonville USA:cs.us@costway.com If you're having difficulty, our friendly AUS:cs.au@costway.com customer team is always here to help. GBR:cs.uk@costway.com THIS INSTRUCTION BOOKLET CONTAINS IMPORTANT SAFETY INFORMATION. PLEASE READ AND KEEP FOR FUTURE REFERENCE. FRA:cs.f r @costway.com...
-
Page 2: Before You Start
Soccer Playfield Billiard Mainframe End Apron -Hockey Playfield Cadre de billard Panneau d’extrémité Terrain de football Before You Start - Terrain de hockey Please read all instructions carefully. Retain instructions for future reference. Separate and count all parts and hardware. Read through each step carefully and follow the proper order. - Page 3 1/4'' x 1-1/8'' Bolt 1/4″ Washer Allen key Goal Box-Top Goal Box-Bottom Boulon de 1/4'' x 1-1/8'' Rondelle 1/4″ Pusher Clé Allen Boîtes de but Boîtes de but Buteur de hockey supérieures inférieures 4x35mm Screw 3x18mm Screw 4x12mm Screw 5-Hole Rod Felt Pad Round Puck Tige à...
- Page 4 FIG.1 IMAGE.1 ASSEMBLY INSTRUCTIONS: 1.Find a clean, level place to begin the assembly of your Multi Game. The table will be assembled upside down and then turned over on its legs once the assembly is completed. This game table is heavy, and turning it over will require at least two strong adults. 2.Remove all the parts from the box and verify that you have all of the listed parts as shown on the parts list pages.
- Page 5 FIG.2 5. Attach the Leg Panels (#8) to the Legs using four Screws(#A8) per Leg Panel. See FIG. 2. IMAGE.2 6. Lift the table assembly from the floor with two strong adults, turn it over, and set table on its legs in the location where you play.
- Page 6 FIG.3 FIG.4 IMAGE.3 IMAGE.4 FIG.4A IMAGE.4A The groove for Soccer & Hockey Playfield /Le sillon pour les Terrains de Football et de Hockey FIG.4B IMAGE.4B 7.Attach two Side Aprons (#6) to the one End Apron (#2) using four Screws (#A4). See FIG. 3. Note: Do not tighten the Screws at this step.
- Page 7 FIG.5 FIG.6 FIG.6B IMAGE.6 IMAGE.5 IMAGE.6B X 13 X 13 X 16 X 16 Handle Hole Trou de Poignée FIG.5A IMAGE.5A FIG.6C X 24 X 26 IMAGE.6C X 16 12.Turn the Soccer Table (See FIG. 5) over and then place it on the top of the Billiard Mainframe (#1).
- Page 8 15.Slide the Rods (#21, #22 and #23)) through the Rod Bushings (#P2) on one Side Apron (#6) in the order as shown in Fig. 6A and 6B. Note: The Rods have a hole at the end where their Handles will Soccer Football 16.Place the Rod Washers (#12), Foam Bumpers (#13) and...
- Page 9 DIRECTIONS FOR PLAYING VARIOUS GAMES 1)Billiard - Play the game as assembled using the Billiard Ball Set (#26), Cue (#27), Triangle (#28). Return / Damage Claim Instructions 2)Soccer - Place the Soccer table on the top of the Billiard Frame. Play the game using the Soccer Ball (#5). DO NOT discard the box / original packaging.
Need help?
Do you have a question about the SP37328 and is the answer not in the manual?
Questions and answers