Table of Contents
Advertisement
Quick Links
Advertisement
Table of Contents

Subscribe to Our Youtube Channel
Related Manuals for real living GBO23-900T


Summary of Contents for real living GBO23-900T
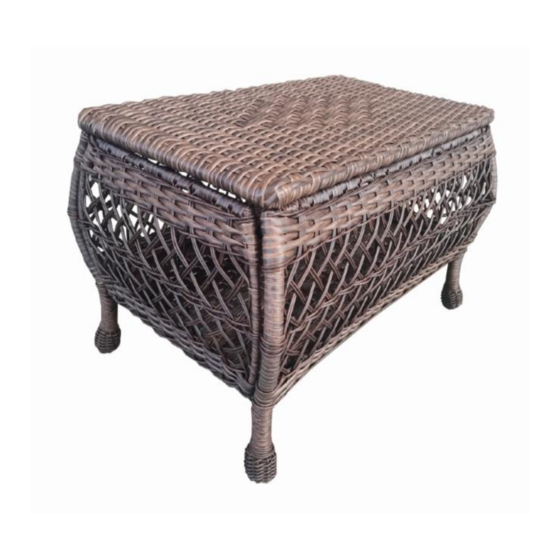
- Page 1 HARVEST RUN ALL WEATHER WICKER STORAGE COFFEE TABLE ASSEMBLY INSTRUCTIONS ITEM# : GBO23-900T SKU# : 810580413 Need help? We are here for you! 1-888-733-8169 Toll Free Or email us at customerservice_01@yeah.net,customerservice_02@yeah.net customerservice_03@yeah.net...
- Page 2 GENERAL BEST PRACTICES FOR ASSEMBLY: Read all instructions before starting Clear a flat covered space to begin assembly Always best to do it with a friend Note that hardware required is provided for every step Pay attention to orientation Number of the hardware corresponds to its letter in the package Helpful hints provided along the way WARNINGS: Use the correct screws as indicated.
- Page 3 PARTS LIST 1PC Table Top 1 PC Bottom Board 1PC Front Board 1PC Back Board 2PC Side Board HARDWARE LIST 8PC Short Screw(φ6x15mm) 8PC Washer 2PC Long Screw(φ5x44mm) 2PC Nut 2PC Iron Chain 1PC Allen Wrench 1PC Wrench...
- Page 4 STEP 1 Hook side board (D) by front board (C1) and back board (C2) shown in diagram above. Then assemble side board (D) to front board (C1) and back board (C2) by using 4 short screws (E) and 4 washers (F) with allen wrench (J). Do not fully tighten all screws now.
- Page 5 STEP 3 Place the assembled table frame on a flat surface to make sure that it is balanced and stable. FULLY TIGHTEN ALL SCREWS NOW. STEP 4 Assemble table top (A) to back board (C2) by using 2 long screws (G) and 2 nuts (H) with allen wrench (J) and wrench (K).
- Page 6 STEP 5 Lock 2 iron chains (I) on 2 side boards (D) and table top (A). STEP 6 Cover table top (A) and complete the assembly. Warranty One year limited warranty. Proof of purchase (dated register receipt) is required for warranty claims. It remains the customer's responsibility for freight and packing charges to and from the service center.
Need help?
Do you have a question about the GBO23-900T and is the answer not in the manual?
Questions and answers