Advertisement
Available languages
Available languages
Quick Links
All manuals and user guides at all-guides.com
Manual de instrucciones
ES
Instruction manual
EN
IO-HOB-0982 / 8506550 (10.2019 V2)
Placa vitrocerámica
ES
Ceramic hob
EN
PBZ4VQ247FN / 3VFT-40AS
¡Lea detenidamente este manual antes de usar el aparato!
Before using the appliance, please carefully read this manual!
Advertisement
Chapters

Related Manuals for Fagor IO-HOB-0982


Summary of Contents for Fagor IO-HOB-0982
- Page 1 All manuals and user guides at all-guides.com Manual de instrucciones Instruction manual IO-HOB-0982 / 8506550 (10.2019 V2) Placa vitrocerámica Ceramic hob PBZ4VQ247FN / 3VFT-40AS ¡Lea detenidamente este manual antes de usar el aparato! Before using the appliance, please carefully read this manual!
- Page 2 All manuals and user guides at all-guides.com ESTIMADO CLIENTE, La placa combina una facilidad de uso excepcional y un excelente rendimiento. Después de leer estas instrucciones, no tendrá ningún problema al usarla. La placa sale de fábrica una vez que su seguridad y funcionalidad han sido revisadas cuida- dosamente en los puestos de control antes de envasarla.
-
Page 3: Table Of Contents
All manuals and user guides at all-guides.com CONTENIDO Información básica..................2 Seguridad.........................4 Descripción del producto..................8 Instalación......................9 Funcionamiento.....................13 Limpieza y conservación..................19 Situaciones de emergencia................21 Datos técnicos......................23... -
Page 4: Seguridad
SEGURIDAD All manuals and user guides at all-guides.com Advertencia. La placa y sus partes externas se ca- lientan durante el uso. Tenga especial cuidado si toca los elementos calefactores. Aleje del aparato a los niños menores de 8 años si no están vigilados por un adulto. - Page 5 SEGURIDAD All manuals and user guides at all-guides.com Advertencia. Si la superficie de la placa está rota, desconecte la alimentación de la corriente para evitar descargas eléctricas. El dispositivo no debe ser controlado por un reloj ex- terno o un sistema de control remoto independiente. Para limpiar la placa, no se puede utilizar el equipo de limpieza a vapor.
- Page 6 All manuals and user guides at all-guides.com SEGURIDAD • Si la toma de red está cerca de la zona de cocción, tenga cuidado para que el cable de la placa no toque las zonas calientes. • En caso de emplear aceites y grasas no dejen las placas vitrocerámicas sin vigilancia ya que existe peligro de incendio.
- Page 7 All manuals and user guides at all-guides.com CÓMO AHORRAR ENERGÍA DESEMBALAJE Al usar la energía de forma El aparato ha sido protegido responsable protegemos el de posibles daños ocasio- presupuesto doméstico y nados durante el transporte. actuamos conscientemente Después de desembalar- en favor del medio ambien- lo, le rogamos elimine los te.
-
Page 8: Descripción Del Producto
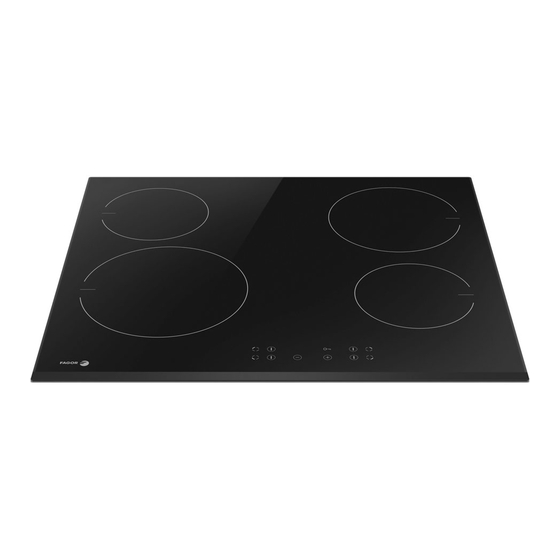
All manuals and user guides at all-guides.com DESCRIPCIÓN DEL PRODUCTO Descripción de la placa Zona de cocción trasera izquierda Ø 145 mm Zona de cocción trasera derecha Ø 180 mm Zona de cocción delantera izquierda Ø 210 mm Zona de cocción delantera derecha Ø... -
Page 9: Instalación
All manuals and user guides at all-guides.com INSTALACIÓN Preparación de la encimera para empotrar la placa l El grosor de la encimera debe ser de 28 a 40 mm y su anchura mínima de 600 mm. Debe ser plana, estar bien nivelada y tener el borde de la pared protegido contra líquidos y hu- medad. - Page 10 All manuals and user guides at all-guides.com INSTALACIÓN Advertencia. A la hora de instalar la pla- ca en la encimera del mueble de cocina debe montar un estante distanciador como el que se muestra en el dibujo del lateral. Cuando la placa se instala enci- ma del horno a empotrar, el montaje del distanciador no es necesario.
- Page 11 All manuals and user guides at all-guides.com INSTALACIÓN Instalación de la placa • En el caso de una encimera de 38 mm de espesor, se deben usar 4 mangos tipo “A” para fijar la placa. La forma de montaje se detalla en los dibujos 3 y 4. Para una encimera de 28 mm de espesor, además de los mangos de tipo “A”...
- Page 12 All manuals and user guides at all-guides.com INSTALACIÓN Conexión de la placa a la Esquema de conexiones posibles Advertencia. Tensión de los elementos instalación eléctrica calefactores: 230V. Advertencia. En cada una de las conexiones Advertencia el cable de tierra debe conectarse con un La conexión a la instalación eléctrica sólo borne puede ser realizada por un instalador cualifi-...
-
Page 13: Funcionamiento
All manuals and user guides at all-guides.com FUNCIONAMIENTO Antes de poner en marcha la placa por primera vez • Limpie a fondo la placa de inducción. Las placas de inducción se deben limpiar como el vidrio. • Al utilizar la placa por primera vez, podrían detectarse ciertos olores transitorios por lo que se debe encender la ventilación de la habitación o abrir la ventana. - Page 14 All manuals and user guides at all-guides.com FUNCIONAMIENTO Panel de control Después de conectar la placa a la red eléctrica debe aparecer el diodo por encima del sensor llave (5). Luego tenemos que desbloquear la placa al apretar el sensor (5) hasta el momento en que se apague el diodo por encima de este sensor y, luego, podemos activar la placa vitrocerámica.
- Page 15 All manuals and user guides at all-guides.com FUNCIONAMIENTO Ajuste del grado de la potencia de calentamiento Para ajustar el grado de la potencia de calentamiento en primer lugar tenemos que seleccionar con el sensor de selección de la zona de cocción (2) la deseada zona de cocción. Luego, a la hora de indicar en el indicador de la zona de cocción (3) “...
- Page 16 All manuals and user guides at all-guides.com FUNCIONAMIENTO Indicador de calor residual Después de la cocción, en el cristal cerámico se queda una energía calorífica que se denomi- na calor residual. La proyección para indicar el calor residual se lleva a cabo en dos etapas. Después de apagar la zona de calentamiento o todo el dispositivo, cuando la temperatura supera los 60°C, en la pantalla adecuada se mostrará...
- Page 17 All manuals and user guides at all-guides.com FUNCIONAMIENTO Desactivación de toda la placa de cocción La placa de calentamiento funciona cuando se activa al menos una de las zonas de calen- tamiento. Si apretamos el sensor principal (1) durante unos 3 segundos, activamos la zona y lo mismo hacemos con todas las zonas o apretamos y mantenemos el sensor principal (1) durante unos 5 segundos y desactivamos la placa entera.
-
Page 18: Limpieza Y Conservación
All manuals and user guides at all-guides.com LIMPIEZA Y CONSERVACIÓN El cuidado en la limpieza de la placa por parte del usuario y su mantenimiento adecuado tienen un impacto significativo en la extensión de su vida útil. Al limpiar el cristal cerámico, rigen las mismas reglas que en el caso de las superficies de vidrio. - Page 19 All manuals and user guides at all-guides.com LIMPIEZA Y CONSERVACIÓN Nunca aplique el detergente encima de la Advertencia pla- ca caliente. Es conveniente dejar que el Si por alguna razón, la placa no se detergente se seque ligeramente y después puede controlar cuando está...
-
Page 20: Situaciones De Emergencia
All manuals and user guides at all-guides.com SITUACIONES DE EMERGENCIA Si se produce una situación de emergencia: ● Desconecte los grupos de trabajo de la placa. ● Retire la alimentación eléctrica. ● Comunique el fallo. ● Usted mismo podrá resolver algunas averías leves si sigue las indicaciones que se mues- tran en la siguiente tabla. - Page 21 All manuals and user guides at all-guides.com SITUACIONES DE EMERGENCIA PROBLEMA MOTIVO PROCEDIMIENTO 6. A pesar de que la zona de Interrupción de suministro - El indicador de calor cocción aún está calien- te, de corriente, el aparato ha residual vuelve a funcionar el indicador de calor resi- sido desconectado de la después del próximo reini-...
-
Page 22: Datos Técnicos
All manuals and user guides at all-guides.com DATOS TÉCNICOS Tensión nominal: 230V 1N~50 Hz Potencia nominal: 6,5 kW Modelo: PB*4VQ247FN - Zona de calentamiento 2 x Ø 145 mm 1200 W - Zona de calentamiento 1 x Ø 180 mm 1800 W - Zona de calentamiento 1 x Ø... - Page 23 All manuals and user guides at all-guides.com DEAR CUSTOMER, Your hob combines exceptional ease of use with excellent effectiveness. Once you have read the instructions, operating your hob will not be a problem. Before being packed and leaving the factory, the safety and functions of this hob were carefully tested.
- Page 24 All manuals and user guides at all-guides.com CONTENTS Basic Information.....................24 Safety instructions....................26 Description of the appliance.................31 Installation......................32 Operation.......................36 Cleaning and maintenance................43 Troubleshooting....................45 Specification....................47...
-
Page 25: Safety Instructions
All manuals and user guides at all-guides.com SAFETY INSTRUCTIONS Warning: The appliance and its accessible parts be- come hot during use. Care should be taken to avoid touching heating elements. Children less than 8 years of age shall be kept away unless continuously super- vised. - Page 26 All manuals and user guides at all-guides.com SAFETY INSTRUCTIONS Warning: If the surface is cracked, switch off the ap- pliance to avoid the possibillity of electric shock. The appliance is not intended to be operated by me- ans of an external timer or separate remote-control system.
- Page 27 All manuals and user guides at all-guides.com SAFETY INSTRUCTIONS FOR USE ● Before using the ceramic plate for the first time read the Operating Manual carefully as thus you can ensure safe operation and avoid damage to the plate. ● If the ceramic plate is operated near a radio, TV set or other emitting device, please check whether the touch panel works correctly.
- Page 28 All manuals and user guides at all-guides.com SAFETY INSTRUCTIONS FOR USE ● Sugar, citric acid, salt etc., both in liquid and solid state, as well as plastic should not get into contact with a hot hotplate. ● If through carelessness, sugar or plastic gets on a hot hotplate, you may not switch off the plate but scrape away sugar or plastic using a sharp scrapper.
- Page 29 All manuals and user guides at all-guides.com HOW TO SAVE ELECTRICITY UNPACKING Using the electricity in a The appliance was protected responsible manner not only from damage at the time of saves money, but also helps transport. After unpacking, protect the environment. So please dispose of all ele- let’s save electricity! This is ments of packaging in a way...
-
Page 30: Description Of The Appliance
All manuals and user guides at all-guides.com DESCRIPTION OF THE APPLIANCE Description of hob Back left cooking zone Ø 145 mm Back right cooking zone Ø 180 mm Front left cooking zone Ø 210 mm Front right cooking zone Ø 145 mm Control Panel 1. -
Page 31: Installation
All manuals and user guides at all-guides.com INSTALLATION Making the worktop recess ● Worktop thickness should be 28 - 40 mm, while its width at least 600 mm. The worktop must be flat and level. Edge of the worktop near the wall must be sealed to prevent ingress of water or other liquids. - Page 32 All manuals and user guides at all-guides.com INSTALLATION Note. When installing the hob in the kit- chen worktop, install a partition panel, as shown on the picture. If the hob is to be installed above a built-in oven, installa- tion of the partition panel is not required. If the hob was installed in the kitchen Installing hob in kitchen cabinet worktop. worktop above the drawer, the bottom cover of the hob must be covered with a wooden panel or protective board for...
- Page 33 All manuals and user guides at all-guides.com INSTALLATION Installing PB*2VQ203FTN hob - bracket ● Use four “A” brackets for 48 mm thick worktops. Fit the hob into worktop opening as shown on figure2 and 3. To properly secure hob in 28 mm and 38 mm thick worktop, use four 15x15x50 mm wooden blocks in addition to “A”...
- Page 34 All manuals and user guides at all-guides.com INSTALLATION Electrical connection Connection diagram Caution! Voltage of heating elements 230V. Caution! In the event of any connection the safety Warning! wire must be connected to the PE terminal. All electrical work should be carried out by a suitably qualified and authorised electrician.
-
Page 35: Operation
All manuals and user guides at all-guides.com OPERATION Before first use ● carefully clean the ceramic plate treating it as a glass surface, ● when used for the first time the plate can give off a bit of a smell so switch on the ventilation system or open the window, ●... - Page 36 All manuals and user guides at all-guides.com OPERATION Control Panel When you connect the appliance to power, Child Lock indicator (5) will be on. Touch and hold the Child Lock sensor (5) until the indicator is off. Now you can use the appliance. No objects should be placed on the sensors (this could cause an error).
- Page 37 All manuals and user guides at all-guides.com OPERATION Set the heating power In order to set the heat setting, first select the desired cooking zone using the cooking zone selection sensor (2). Then, when the cooking zone display (3) shows “ ” start setting the desired heat setting using the (+)(5) or (-)(4) sensor field.
- Page 38 All manuals and user guides at all-guides.com OPERATION Automatic warm-up function Each cooking zone is equipped with an automatic warm-up function. When this is activated, then the given cooking zone is switched on at full power for a time depending on the heat set- ting selected, and is then switched back to the heat setting originally set.
- Page 39 All manuals and user guides at all-guides.com OPERATION Residual heat indicator Heat energy that remains accumulated in the cooking zone after cooking is called the residual heat. The appliance displays two different levels of residual heat. When a cooking zone tem- perature is above 65°C and the cooking zone or the appliance is switched off, the relevant cooking zone display will show the letter "H".
-
Page 40: Cleaning And Maintenance
All manuals and user guides at all-guides.com CLEANING AND MAINTENANCE Proper routine maintenance and cleaning of the appliance can significantly extend its trouble-free operation. When cleaning induction hobs, the same principles apply as for glass surfaces. Do not use under any cir- cumstances any abrasive or caustic cleaners or scouring powders or pads! Do not use steam or pressure... - Page 41 All manuals and user guides at all-guides.com CLEANING AND MAINTENANCE Never apply a detergent on the hot cooking Important! zone. It is best to let the cleaner dry and then If the hob’s controls do not respond wipe it wet. Any traces of the detergent should for whatever reason, then turn off the be wiped off clean with a damp cloth before main circuit breaker or remove the...
-
Page 42: Troubleshooting
All manuals and user guides at all-guides.com TROUBLESHOOTING In the event of any fault: ● turn off the appliance ● disconnect the power supply ● have the appliance repaired ● Based on the instructions given in the table below, some minor issues can be corrected by the user. - Page 43 All manuals and user guides at all-guides.com TROUBLESHOOTING PROBLEM POSSIBLE CAUSE REMEDY 6.Residual heat indicator - a power outage or the - residual heat indicator will extinguished even though appliance has been discon- be shown again the next the cooking zones are hot nected time the appliance is turned on and off again...
-
Page 44: Specification
All manuals and user guides at all-guides.com SPECIFICATION Rated voltage: 230V 1N~50 Hz Rated power: 6,5 kW Model: PB*4VQ247FN - hotplate: 2 x Ø 145 mm 1200 W - hotplate: 1 x Ø 180 mm 1800 W - hotplate: 1 x Ø 210 mm 2300 W Dimensions: 592 x 522 x 50;... - Page 45 All manuals and user guides at all-guides.com...
- Page 46 All manuals and user guides at all-guides.com...
- Page 47 All manuals and user guides at all-guides.com...
- Page 48 All manuals and user guides at all-guides.com F Electrodomésticos S.L. Avenida Sur del Aeropuerto de Barajas nº38 28042, Madrid España www.fagorelectrodomestico.es...
Need help?
Do you have a question about the IO-HOB-0982 and is the answer not in the manual?
Questions and answers