Table of Contents
Advertisement
Available languages
Available languages
Quick Links
PROJECT SOURCE and logo design are
trademarks or registered trademarks of
LF, LLC. All rights reserved.
Serial Number
Questions, problems, missing parts? Before returning to your retailer, call our customer
service department at
also contact us at partsplus@lowes.com.
SC22157
TM
Purchase Date
866-389-8827. 8 a.m. - 8 p.m., EST, Monday - Sunday. You could
Page 1
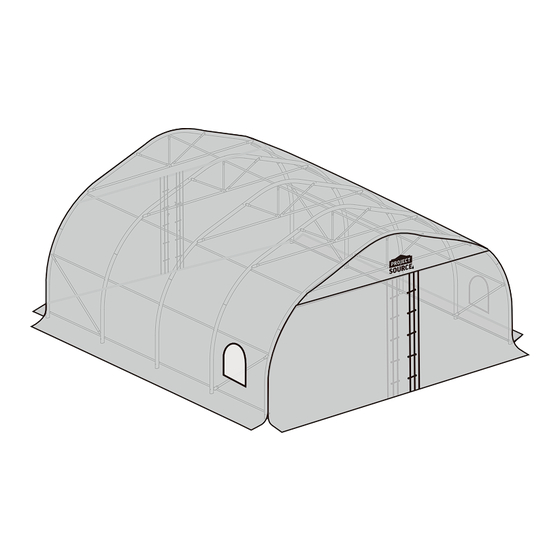
18'x20' Car Shelter
MODEL #05535040
ATTACH YOUR RECEIPT HERE
TM
ITEM #05535040
Advertisement
Chapters
Table of Contents

Related Manuals for Project Source 05535040


Summary of Contents for Project Source 05535040
- Page 1 ITEM #05535040 18’x20’ Car Shelter MODEL #05535040 ATTACH YOUR RECEIPT HERE PROJECT SOURCE and logo design are trademarks or registered trademarks of LF, LLC. All rights reserved. Serial Number Purchase Date Questions, problems, missing parts? Before returning to your retailer, call our customer service department at 866-389-8827.
-
Page 2: Table Of Contents
TABLE OF CONTENTS Package Contents...........................3 Hardware Contents..........................4 Safety Information..........................5 Preparation ............................5 l l a ...... -
Page 3: Package Contents
PACKAGE CONTENTS PART DESCRIPTION QUANTITY PART DESCRIPTION QUANTITY Elastic+S-Hook Floor Bracket Corner Arch Center Arch Nail Carriage Bolts 1 3/4” Male Door Rail Female Door Rail Carriage Bolts 2 1/2” Carriage Bolts 4” Diagonal Male Brace Wing Nuts Plastic Caps Female Brace T-Bar Tarp... -
Page 4: Hardware Contents
HARDWARE CONTENTS (shown actual size) Pipes Holder Elastic+S-Hook Big Door Rail Hook Qty. 10 Qty. 40 Qty. 24 Floor Bracket Nail Carriage Bolts 1 3/4” Qty. 4 Qty. 8 Qty. 15 Wing Nuts Carriage Bolts 2 1/2” Carriage Bolts 4” Qty. -
Page 5: Safety Information
IMPORTANT: VENDOR REPRESENTS, WARRANTS AND AGREES THAT LABELING, DESIGN, PACKAGING, SPECIFICATIONS SHALL COMPLY IN ALL RESPECTS WITH ALL APPLICABLE LAWS AND STANDARDS. SAFETY INFORMATION Please read and understand this entire manual before attempting to assemble, operate or install the product. This winter car shelter is designed specifically to provide vehicle shelter from the elements during winter months. - Page 6 ASSEMBLY INSTRUCTIONS 1. Take a Center Arch (C) and insert a Corner Arch (B) at each end. Secure the Male and Female Door Rail (D) and E to the arch B along with the pipe holders (J) . Slide the Rail Hooks (K) over the Door Rails before connecting them to the center arch using the T-Bar (I).
- Page 7 ASSEMBLY INSTRUCTIONS 3. At this point stand up the front or back frame and add 7 male braces (G). Then stand up another frame and add 7 female braces (H). Connect the first and second frame along with diagonals (F). For the remaining frames use the male braces (G).
- Page 8 ASSEMBLY INSTRUCTIONS 6. Tie all the ties around the bars. Take the straps and pass them underneath the bars, pull up and tighten through each metal buckle. 7. Use (L) elastics and S hooks to close the door. Hardware Used Elastic+S-Hook x 40 8.
-
Page 9: Care And Maintenance
CARE AND MAINTENANCE -Never allow snow or ice build-up on the roof. Remove ice and snow with a broom or non-sharp snow removal tool, always from the outside of the structure. -Closing the doors at both ends will prevent wind accumulation inside the unit and will avoid movement concerns and/or undue strain or damage to your canopy and/or its structure. - Page 10 ARTICLE #05535040 Abri d’auto de 5,48 m x 6,09 m MODÈLE #05535040 JOIGNEZ VOTRE REÇU ICI PROJECT SOURCE et le logo sont des marques de commerce ou des marques de commerce déposées de LF, LLC. Tous droits réservés. Numéro de série Date d’achat...
- Page 11 TABLE DES MATIÈRES Contenu de l’emballage........................3 Quincaillerie incluse..........................4 Consignes de sécurité ........................5 Préparation ............................5 Instructions pour l’assemblage ou l’installation ..... .
-
Page 12: Contenu De L'emballage
CONTENU DE L’EMBALLAGE PIÈCE DESCRIPTION QUANTITÉ PIÈCE DESCRIPTION QUANTITÉ Montant Élastique et crochet en S Fixation de sol Arche de coin Arche centrale Clou Boulons de carrosserie de 1 3/4 po Rail de porte mâle Rail de porte femelle Boulons de carrosserie de 2 1/2 po Boulons de carrosserie de 4 po Diagonale Traverse mâle... -
Page 13: Quincaillerie Incluse
QUINCAILLERIE INCLUSE (grandeur réelle) Support de tuyaux Élastique et crochet en S Gros crochet de rail de porte Qté : 10 Qté : 40 Qté : 24 Fixation de sol Clou Boulons de carrosserie de 1 3/4 po Qté : 4 Qté... -
Page 14: Consignes De Sécurité
IMPORTANT: LE FOURNISSEUR REPRÉSENTE, GARANTIT ET ACCEPTE QUE L’ÉTIQUETAGE, LA CONCEPTION, L’EMBALLAGE ET LES SPÉCIFICATIONS SONT CONFORMES EN VERTU DE TOUTES LES LOIS ET NORMES APPLICABLES. CONSIGNES DE SÉCURITÉ Assurez-vous de lire et de comprendre l’intégralité du présent manuel avant de tenter d’assembler, d’installer ou d’utiliser l’article. - Page 15 INSTRUCTIONS POUR L’ASSEMBLAGE 1. Prenez une arche centrale (C) et insérez une arche de coin (B) à chaque extrémité. Fixez les rails de porte mâles et femelles (D) et (E) à l’arche (B) avec les supports de tuyaux (J). Glissez les crochets de rail (K) sur les rails de porte avant de les relier à...
- Page 16 INSTRUCTIONS POUR L’ASSEMBLAGE 3. À ce stade, levez l’armature avant ou arrière et ajoutez 7 3 traverses mâles (G). Ensuite, montez une autre armature et ajoutez 7 traverses femelles (H). Reliez la première et la deuxième armature avec les diagonales (F).
- Page 17 INSTRUCTIONS POUR L’ASSEMBLAGE 6. Attachez toutes les attaches autour des barres. Prenez les courroies et passez-les sous les barres, tirez et serrez dans chaque boucle en métal. 7. Utilisez les élastiques et les crochets en S pour fermer la porte. Quincaillerie utilisée Élastique et crochet en S x 40...
-
Page 18: Entretien
ENTRETIEN -Ne laissez jamais la neige ou la glace s’accumuler sur le toit. Enlevez la glace et la neige avec un balai ou un outil de déneigement non tranchant, toujours de l’extérieur de la structure. -La fermeture des portes aux deux extrémités empêchera l’accumulation de vent à l’intérieur de l’article et évitera des problèmes de mouvement ou une contrainte et des dommages excessifs à...
Need help?
Do you have a question about the 05535040 and is the answer not in the manual?
Questions and answers