
Related Manuals for Vents TwinFresh Expert RW-30 V.2


Summary of Contents for Vents TwinFresh Expert RW-30 V.2
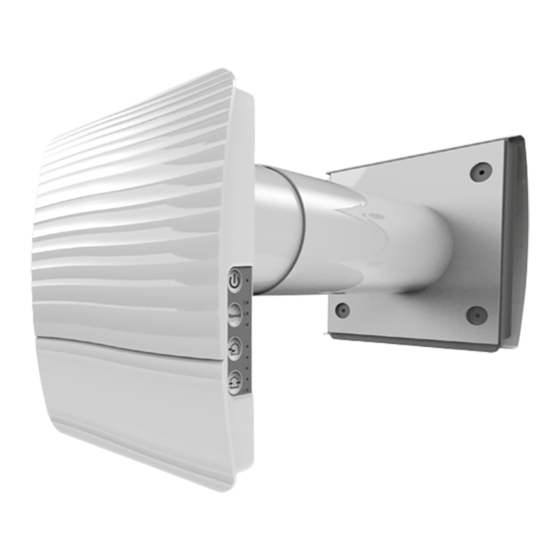
- Page 1 USER'S MANUAL TwinFresh Expert RW-30 V.2 Single-room reversible energy recovery ventilator...
-
Page 2: Table Of Contents
The manual contains information about purpose, technical details, operating principle, design, and installation of the TwinFresh Expert RW-30 V.2 unit and all its modifications. Technical and maintenance staff must have theoretical and practical training in the field of ventilation systems and should be able to work in accordance with workplace safety rules as well as construction norms and standards applicable in the territory of the country. - Page 3 Do not use the unit in a hazardous or explosive environment containing spirits, gasoline, insecticides, etc. Do not close or block the intake or extract vents in order to ensure the efficient air flow. Do not sit on the unit and do not put objects on it.
-
Page 4: Purpose
PURPOSE The ventilator is designed to ensure continuous mechanical air exchange in flats, cottages, hotels, cafes and other domestic and public premises. The ventilator is equipped with a regenerator that enables supply of fresh filtered air heated by means of extract air heat energy recovery. -
Page 5: Technical Data
TECHNICAL DATA The temperature in the room where the indoor unit of the ventilator is installed must be in the range from +1 ˚C to +40 ˚C with relative humidity up to 65 % (no condensation). The unit is rated as a class II electric appliance. Hazardous parts access and water ingress protection rating is IP24. -
Page 6: Design And Operating Principle
When the humidity sensor or relay sensor returns to its original position, the Boost mode deactivation delay timer is started. In the relevant sections of the Vents Home mobile app, the following ventilation parameters can be set: • activate or deactivate the humidity sensor and relay sensor;... - Page 7 Schedule If required, in the section of the Vents Home mobile app, different ventilation speeds can be set at different intervals by day «Date and time» section of the week. For the weekly schedule to work correctly, the current date and time must be set correctly in the...
-
Page 8: Mounting And Set-Up
MOUNTING AND SET-UP READ THE USER'S MANUAL BEFORE INSTALLING THE UNIT. DO NOT BLOCK THE AIR DUCT OF THE INSTALLED VENTILATOR WITH DUST ACCUMULATING MATERIALS, SUCH AS CURTAINS, CLOTH SHUTTERS, ETC. AS IT PREVENTS AIR CIRCULATION IN THE ROOM. 1. Prepare a round core hole in the outer wall. The hole size is shown in the figure below. min 300 ø... - Page 9 4. Pull the lug on the bottom to disconnect the front panel of the indoor unit from the rear part. Attach the mounting frame on the wall if you use it. Fix the rear part of the indoor unit on the wall or on the mounting frame using the screws supplied with the mounting kit of the ventilator. 5.
-
Page 10: Connection To Power Mains
CONNECTION TO POWER MAINS POWER OFF THE POWER SUPPLY PRIOR TO ANY OPERATIONS WITH THE UNIT. THE UNIT MUST BE CONNECTED TO POWER SUPPLY BY A QUALIFIED ELECTRICIAN. THE RATED ELECTRICAL PARAMETERS OF THE UNIT ARE GIVEN ON THE MANUFACTURER’S LABEL. ANY TAMPERING WITH THE INTERNAL CONNECTIONS IS PROHIBITED AND WILL VOID THE WARRANTY. - Page 11 VENTILATOR PRE-SETTING Prior to operating the ventilator set it up using the DIP switch. It is located on the controller circuit board. Remove the front panel of the indoor unit to access the DIP switch. To reset to factory settings, hold the reset button under the front panel for 5 seconds until an acoustic signal sounds. It is also possible to reset using a mobile app.
- Page 12 VENTILATOR CONTROL WITH THE BUTTONS ON THE INDOOR UNIT The table below shows the buttons and indicators on the ventilator indoor unit with a description of their purpose and functionality. ON/OFF Speed The speed selection sequence is follows: I-II-III. All the units integrated in a single network operate according to the speed Master settings of the unit.
- Page 13 VENTILATOR CONTROL USING THE VENTS HOME APP Download th Vents Home application and install it on the mobile device. Vents Home – App Store Vents Home – Play Market The ventilator with factory settings works as a Wi-Fi access point with the name FAN: + 16 characters of the ID number shown on the casing under the front panel.
- Page 14 VENTILATOR WIRELESS CONNECTION DIAGRAMS Wiring diagram 1 Connection to eight devices (Slave ventilators or Master Master mobile devices) to the control ventilator, with a Wi-Fi access point which has its own access point. Mobile Slave No. 1 Slave No. 2 Slave No.
- Page 15 Set the DIP switches on each ventilator to the position corresponding to its role in the group (see section "DIP switch position"). • Then configure the Wi-Fi settings of the Master ventilator by following the instructions in the Vents Home mobile app. •...
-
Page 16: Technical Maintenance
Restart the filter timer countdown in the Vents Home app on a mobile device or by holding down the button on the room unit for 5 seconds before the beep. Some dust may accumulate on the heat exchanger block even in case of regular maintenance of the filters. -
Page 17: Storage And Transportation Regulations
FAILURES AND TROUBLESHOOTING Failure Possible reasons Troubleshooting Make sure the power supply line is connected No power supply. correct, otherwise eliminate the connection error. The fan does not get started Turn the ventilator off. Troubleshoot the motor jam during turning on. The motor is jammed, the impeller blades are and the impeller clogging. -
Page 18: Manufacturer's Warranty
MANUFACTURER’S WARRANTY The product is in compliance with EU norms and standards on low voltage guidelines and electromagnetic compatibility. We hereby declare that the product complies with the provisions of Electromagnetic Compatibility (EMC) Directive 2014/30/EU of the European Parliament and of the Council, Low Voltage Directive (LVD) 2014/35/EU of the European Parliament and of the Council and CE-marking Council Directive 93/68/EEC. -
Page 19: Certificate Of Acceptance
CERTIFICATE OF ACCEPTANCE Unit Type Single-room reversible energy recovery ventilator Model Serial Number Manufacture Date Quality Inspector’s Stamp SELLER INFORMATION Seller Address Phone Number E-mail Purchase Date This is to certify acceptance of the complete unit delivery with the user’s manual. The warranty terms are acknowledged and accepted. - Page 20 V133-5EN-04...
Need help?
Do you have a question about the TwinFresh Expert RW-30 V.2 and is the answer not in the manual?
Questions and answers