Palm m100 Series Getting Started
Palm m100: user guide
Hide thumbs
Also See for m100 Series:
- Handbook (212 pages) ,
- Getting started (202 pages) ,
- Handbook (232 pages)
Table of Contents
Advertisement
Advertisement
Table of Contents
Troubleshooting

Related Manuals for Palm m100 Series


Summary of Contents for Palm m100 Series
- Page 1 Getting Started with the Palm m100 Series Handhelds ™...
- Page 2 HotSync cradle/cable adapter, go to the web site: http://www.palm.com/support/m100/extras. Palm™ Desktop software is supplied on a CD-ROM disc. If you do not have access to a CD-ROM drive for your computer, you can download the Palm Desktop software from http://www.palm.com.
-
Page 3: Table Of Contents
Attaching the cover ...4 Installing Palm Desktop software...4 Connecting the HotSync cradle/cable ...5 Installing Palm Desktop software on a Windows computer ...6 Installing Palm Desktop software on a Macintosh ...7 Synchronizing data: Performing the first HotSync operation ...8 Congratulations! ...9 Chapter 2: Enter Data Entering data with the onscreen keyboards ...11... - Page 4 I don’t see anything on my handheld screen ... 39 I can’t complete a HotSync operation ... 40 Troubleshooting communication problems ... 40 Troubleshooting data synchronization problems ... 42 Upgrading from another Palm OS handheld ... 43 Page iv Getting Started with Palm™ m100 Series Handhelds...
-
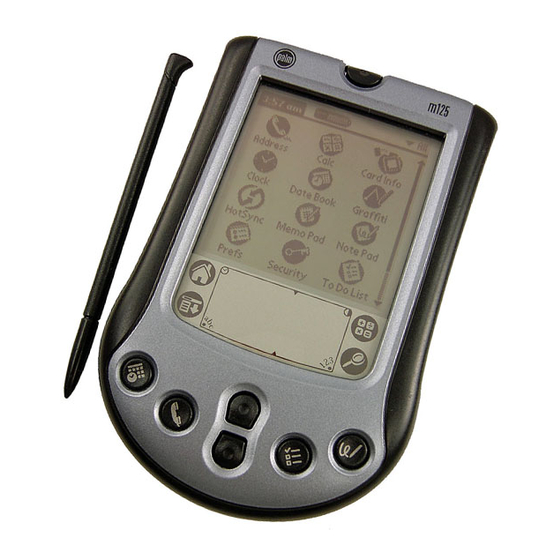
Page 5: Chapter 1: Get Started
Chapter 1 Get Started Palm™ m100 series handhelds will help you get to meetings and appointments on time, remember people’s names and personal details, and track items on your To Do list. You can enter your schedule in Date Book; keep all your contact names, addresses, phone numbers, and other details in Address Book;... -
Page 6: Installing Batteries
Installing batteries 1. Press the latch on the battery door and lift the battery door away from your handheld. 2. Install two AAA alkaline batteries into the battery compartment. 3. Insert the battery door back into place so that it is flush with the back of your handheld and “clicks”... -
Page 7: Setting Up Your Handheld
Important: For users outside the United States, choose the same language for your handheld and Palm Desktop software. Choosing a language that does not match the Palm Desktop software is not recommended or supported, and may result in data loss. If you need to reselect a language on your handheld, you must perform a hard reset. -
Page 8: Attaching The Cover
Note: If you are using Microsoft Outlook or other organizer software instead of Palm Desktop software, you still need to complete this process to install HotSync Manager, conduit software, and other features of Palm Desktop software. -
Page 9: Connecting The Hotsync Cradle/Cable
If your computer does not have a dedicated serial port available, or the cradle/cable does not fit your computer, you can order the following HotSync cradle/cable adapters from: m100/extras 25-pin serial Chapter 1 http://www.palm.com/support/ Macintosh serial... -
Page 10: Installing Palm Desktop Software On A Windows Computer
Shown with a HotSync cradle. Some models use a cable in place of the cradle. For information about how to use Palm Desktop software, refer to the online Help and the Quick Tour in Palm Desktop software. Page 6 Get Started... -
Page 11: Installing Palm Desktop Software On A Macintosh
4. Double-click the Palm Desktop Installer icon. 5. Follow the onscreen instructions to complete the installation. For information about how to use Palm Desktop software, refer to the online Help in Palm Desktop software and the Palm Desktop Software for the Macintosh User’s Guide on the Palm Desktop CD-ROM. -
Page 12: Synchronizing Data: Performing The First Hotsync Operation
If you’re sharing Palm Desktop soft- ware with another handheld user, you can change users by selecting a name from the User list on the right side of the Palm Desktop window. Be sure you select the correct user name be- fore entering data in Palm Desktop software. -
Page 13: Congratulations
Acrobat Reader folder, and then double-click the Reader 4.05 Installer icon. The Windows tutorial for Palm Desktop software, Quick Tour. To access this tutorial, go to the Help menu in Palm Desktop software and choose Quick Tour. The online user guide, Palm Desktop Software for the Macintosh User’s Guide. - Page 14 Page 10 Get Started...
-
Page 15: Chapter 2: Enter Data
Caps lock Caps shift Numeric Tap here to display numeric keyboard 5. Tap Done to close the onscreen keyboard. Chapter 2 writing, Note Pad, Palm™ Desktop software, an Alphabetic Tap here to display alphabetic keyboard Tap here for numeric keyboard... -
Page 16: Entering Data With Graffiti Writing
Entering data with Graffiti writing Graffiti characters are similar to uppercase letters that are formed with a single-stroke. Your writing turns into text wherever the blinking cursor appears on the handheld screen. Graffiti writing is easy, fun, accurate, and fast (up to 30 words per minute). It’s worth taking a few minutes to learn. -
Page 17: Entering Data With Note Pad
See the online Handbook for Palm™ m100 Series Handhelds and the online Help in Palm Desktop software for details. - Page 18 Page 14 Enter Data...
-
Page 19: Chapter 3: Get To Work
Chapter 3 Get to Work Adjusting the screen If lighting conditions make it difficult to see the information on your handheld, you can use the backlight and contrast control to adjust your screen. Using the backlight 1. Press the power button for about two seconds. Release the button when the backlight turns on. -
Page 20: Using Address Book
Saratoga. To accept the word, tap the next field. 4. After you finish entering information, tap Done. Tip: You can also import a database into Palm™ Desktop software and transfer it to your handheld during the next HotSync operation. See the online Handbook and Palm Desktop online Help for more information. -
Page 21: Viewing And Changing An Address Book Entry
3. Tap Record, and then tap Delete Address. Note: If you want to save a copy of the deleted item to an archive file in Palm Desktop software, select the check box in the confirmation dialog box. 4. Tap OK. -
Page 22: Using Date Book
Using Date Book Date Book lets you quickly and easily schedule appointments or any kind of “event” associated with a time and date. Creating an event 1. Press the Date Book application button 2. Select the date you want for the event. Previous week 3. -
Page 23: Creating An Untimed Event
Creating an untimed event You can also schedule events in your Date Book that occur on a particular date but have no specific start or end times, such as birthdays, holidays, and anniversaries. These are referred to as “untimed events.” Untimed events appear at the top of the list of times, marked with a diamond. -
Page 24: Creating A Repeating Or Continuous Event
Creating a repeating or continuous event The Repeat function lets you schedule events that recur at regular intervals or extend over a period of consecutive days. A birthday is a good example of an event that repeats annually. Another example is a weekly guitar lesson that falls on the same day of the week and the same time of day. -
Page 25: Changing The Date Book View
Changing the Date Book view In addition to displaying the time list for a specific day, you can also display a whole week, a month, or an agenda. Tap a view icon to display another view. Week View icon Month View icon Agenda View icon Tip: You can also press the Date Book application button repeatedly... -
Page 26: Deleting An Event
Deletes all occurrences of the repeating event. Note: If you want to save a copy of the deleted item to an archive file in Palm Desktop software, select the check box in the confirmation dialog box. 5. Tap OK. Tip:... -
Page 27: Using To Do List
Using To Do List To Do List is a convenient place to create reminders and prioritize the things that you have to do. A record in To Do List is called an “item.” Creating a To Do List item 1. Press the To Do List application button 2. -
Page 28: Changing A To Do List Item
Changing a To Do List item 1. Tap the text of the item you want to change. 2. Tap Details. 3. Tap the Due Date pick list and select a date for the item: Today Tomorrow One week later No Date Choose date 4. -
Page 29: Marking A To Do List Item Complete
3. Tap Record, and then tap Delete Item. Note: If you want to save a copy of the deleted item to an archive file in Palm Desktop software, select the check box in the confirmation dialog box. 4. Tap OK. -
Page 30: Using Note Pad
Using Note Pad Note Pad provides a place to take notes directly on the screen in your own handwriting. You can assign each “note” a title and store up to 999 notes on your handheld. Creating a note 1. Press the Note Pad application button Note: If Note Pad is already running, tap New. -
Page 31: Transcribing A Note
Transcribing a note You can use Palm Desktop software to view your notes and enter them in other applications. 1. Perform a HotSync operation. See “Synchronizing data: Performing the first HotSync operation” in Chapter 1 for details. 2. Open Palm Desktop software: Launch the Palm Desktop icon on your desktop. -
Page 32: Using Memo Pad
Using Memo Pad Memo Pad provides a place to store information that is not associated with Date Book, Address Book, or To Do List. A record in Memo Pad is called a “memo.” Each memo can contain up to 4,000 Graffiti characters. The number of memos you can store is dependent only on the memory available on your handheld. -
Page 33: Reviewing And Changing A Memo
3. Tap Record, and then tap Delete Memo. Note: If you want to save a copy of the deleted memo to an archive file in Palm Desktop software, select the check box in the confirmation dialog box. 4. Tap OK. -
Page 34: Using Clock
Using Clock Clock enables you to set the current date and time for all the applications on your handheld, to quickly view the time, and to set an alarm to sound during the next 24-hour period. Setting the time and date 1. -
Page 35: Viewing The Time
Viewing the time Do one of the following: When your handheld is on, tap the Clock icon corner of the Graffiti writing area. When your handheld is off, press the up scroll button. To activate the backlight while viewing the time, hold down the up scroll button for a few seconds. -
Page 36: Using Preferences And Other Settings
Using Preferences and other settings Changing the Applications Launcher display By default, the Applications Launcher displays each application as an icon. You can change the settings to show a list of applications. 1. Tap the Applications icon 2. Tap the Menu icon 3. -
Page 37: Setting General Preferences
Setting General preferences You can set your handheld’s auto shutoff interval and sounds, and prohibit anyone from beaming information to your handheld. 1. Tap the Applications icon 2. Tap the Preferences icon 3. Tap the pick list in the upper-right corner and select General. Tap arrow to select General... -
Page 38: Beaming Information
Beaming information You can use the IR (infrared) port on your handheld to beam the following information to another Palm OS and also has an IR port: The record currently displayed in Date Book, Address Book, To Do List, Note Pad (if installed on the other handheld), or Memo Pad... -
Page 39: Receiving Beamed Information
Simply press the Address Book application button for about two seconds. Beaming Tips For best results, Palm handhelds should be between 10 centimeters (approximately 4 inches) and 1 meter (approximately 39 inches) apart, and the path between the two handhelds must be clear of obstacles. -
Page 40: Installing Add-On Applications
You can install a variety of third-party applications on your handheld during a HotSync operation. To find the bonus add-on applications that come with your handheld, go to the Add-on folder on the Palm Desktop software CD-ROM. To learn about thousands of other add-on... -
Page 41: Installing Applications Using A Macintosh
Add-on folder in your Palm folder on your Macintosh. Note: If the software is compressed, expand it into this folder. 2. Double-click the Hotsync Manager icon in the Palm folder. 3. From the HotSync menu, choose Install Handheld Files. User pop-up menu 4. -
Page 42: Resetting Your Handheld
(or similar object without a sharp tip) to gently press and release the reset button. 3. Wait for the Palm™ logo to appear and release the power button. 4. When a message appears warning that you are about to erase all... -
Page 43: Chapter 4: Frequently Asked Questions
Support card that comes with your handheld or go to http://www.palm.com Note: There are thousands of third-party applications available for ® Palm OS handhelds. For questions and support, please contact the software developer directly. I don’t see anything on my handheld screen 1. -
Page 44: I Can't Complete A Hotsync Operation
Desktop icon, click the HotSync icon make sure Local is checked on the menu. If not, click it to insert a check mark. Double-click the HotSync Manager icon in the Palm Macintosh. folder. Click the HotSync Controls tab and make sure the En- abled option is selected. - Page 45 8 and 9. 8. Click the HotSync icon on the taskbar and select exit. 9. Restart HotSync Manager by selecting Start, Programs, Palm Desktop, and then HotSync Manager. Note: If you get a warning that the port is in use, then either move your HotSync cradle/cable to a different COM port or disable the conflicting device to perform HotSync operations.
-
Page 46: Troubleshooting Data Synchronization Problems
Troubleshooting data synchronization problems If your data does not appear on your handheld and in the Palm Desktop software after a HotSync operation, try the steps in this section. Note: If you are attempting to synchronize with applications other than the Palm™ Desktop software (e.g., Microsoft Outlook, Lotus Notes, etc.) using a third-party conduit, please consult... -
Page 47: Upgrading From Another Palm Os Handheld
If you already own a Palm OS handheld, we recommend that you install the version of Palm Desktop software that comes with your new Palm m100 series handheld into the same folder as your current Palm Desktop software. When you install the new version in the same folder as the previous version, all your data is preserved. - Page 48 (inside the Palm folder) and its contents, rename it (for example, My Old Palm Data), and store the copy outside the Palm folder. 3. If your old Palm Desktop software is version 1.0, uninstall your old Palm Desktop software. 4. Follow the installation instructions in “Installing Palm Desktop software on a Macintosh”...
Need help?
Do you have a question about the m100 Series and is the answer not in the manual?
Questions and answers