Table of Contents
Advertisement
Quick Links
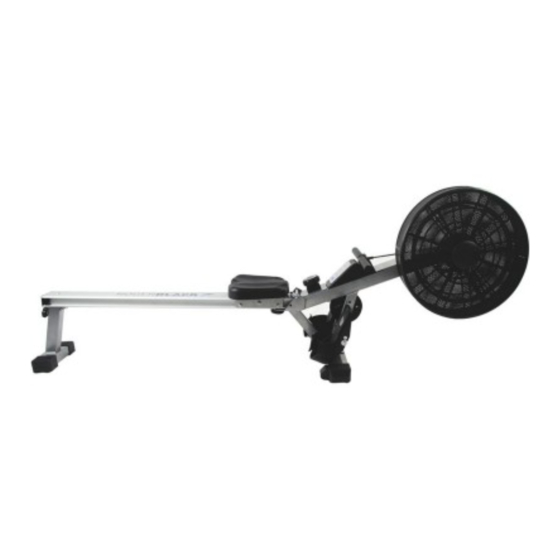
Air Rower
Assembly & User Instructions
- Please keep for future reference
527/8112
Important
– Please read these instructions fully before assembly or use
These instructions contain important information which will help you get the best from your
equipment and ensure safe and correct assembly, use and maintenance.
If you need help or have damaged or missing parts, call the
Customer contact number:
0345 600 1714 www.argos-support.co.uk
Advertisement
Table of Contents

Related Manuals for Rogerblack Fitness 527/8112


Summary of Contents for Rogerblack Fitness 527/8112
- Page 1 Air Rower Assembly & User Instructions - Please keep for future reference 527/8112 Important – Please read these instructions fully before assembly or use These instructions contain important information which will help you get the best from your equipment and ensure safe and correct assembly, use and maintenance.
-
Page 2: Table Of Contents
Contents Safety Information Components - Parts Components - Fixings Assembly Instructions 5-10 Storage Way Tension Knob Adjustment Free Area and Training Area Computer Operation 15-18 Exercising Information Before starting to exercise Muscle chart Warming up and cooling down 17-18 exercises Care and Maintenance Disposal information Exercise Instructions... -
Page 3: Safety Information
Safety Information Important – Please read fully before assembly or use To reduce the risk of serious injury, read the entire manual before you assemble or operate the Roger Black Air Rower. In particular, note the following safety precautions: trainers to protect your feet while exercising. Assembly •... -
Page 4: Components - Parts
Components - Parts If you have damaged or missing components, 0345 600 1714 call the Customer Helpline: Please check you have all the parts listed below Note: Some of the smaller components may be pre-fi tted to larger components. Please check carefully before contacting Argos regarding any missing components. -
Page 5: Components - Fixings
Components - Fixings lease check you have all the fi xings listed below Note: Some of the fi xings are pre-fi tted to the larger components. Please check carefully before contacting Argos regarding any missing fi xings. STOPPER x 2 ALUM BEAM END CAP x 1 KNOB M8 x 1 SPACER x 2... -
Page 6: Assembly Instructions
Assembly Instructions Total mass of the product is 19.9kg. Total size of the equipment is (width) 76cm x (depth) 210cm x (height) 54cm. Step 1 The Main Frame (1) of your air rower should look as above when removed from the carton. 5R 5R 5R 5R 5R 5R Step 2 Securely attach the Front Stabilizer (3) to the Main Frame (1) with 2 x M8*55 Carriage Bolt (41), 2 x M8... - Page 7 Assembly Instructions Step 3 Attach the Rear Stabilizer (4) to the Rowing Rail (2) using 1 x M8*70mm Allen Head Bolt (42), 1 x M8 Flat Washer (48) and 1 x M8 Nylon Nut (46). Unscrew Knob (7) from the Rear Stabilizer (4) and insert the bolt on the stabilizer into the groove of Bracket (77) located on the Rowing Rail (2).
- Page 8 Assembly Instructions Step 5 Note: This step is best carried out by 2 people. Warning: Please be careful when carrying out the following step, ensure that your face and body are at a safe distance from the cords as they can fling out at a high speed if it let go. Pull the Drive Strap (34) from the Main Frame (1) and run it along the underside of the Rowing Rail (2) to where the Bungee Cord (36) is held.
- Page 9 Assembly Instructions Step 6 1. Lower the Rowing Rail (2) back to its in-use position and lock the rail in place with the Pivot Knob (14), then tighten it securely. 2. Pull the Lock Pin (52) from the front fork of the Main Frame (1) . 3.
- Page 10 Assembly Instructions Step 8 For your convenience, the Velcro style adjustable Footplate Straps (16R/L) are pre-fitted to the Foot Pedals (15L/R) in the lower of the 2 positioning options. Slide the Foot Pedal Pivot Shaft (17) into the Main Frame (1) and then slide a foot pedal pivot shaft Spacer (18) onto each end of the shaft, followed by a Foot Pedal (15).
- Page 11 Assembly Instructions Installation of batteries ep 9 Install 2 x AA battery (not included) into the battery compartment of the Monitor (19). Connect the Senor Wires (21 and 22), as illustrated above, ensuring the contacts are pushed inward completely. (You will hear / feel 2 clicks indicating that correct contact has been made).
-
Page 12: Storage Way
Storage Way Step 1 Slide the Seat forward then unscrew and remove the Pivot Knob (14). Step 2 Carefully lift the Rowing Rail (2) up and over the top of the Main Frame (1). Lower gently so the Seat is positioned above the Main Frame (1). Note: The Front of the Rower will tip forward and rest on the floor. -
Page 13: Tension Knob Adjustment
Tension Knob Adjustment NOTE You should begin your “Exercise Period” at the resistance level and speed to suit your needs. Remember to start out slow and easy and work your way up to the fitness level you desire. -
Page 14: Free Area And Training Area
Workout area Free area and training area. The free area should be no less than 0.6m greater than the training area in the directions from which the equipment is accessed. The free area must also include the area for emergency dismount. here equipment is positioned adjacent to each other the value of the free area may be shared. -
Page 15: Computer Operation
Computer Operation Functions and operations COUNTER DISTANCE SPEED TIMER CALORIES PAGE FUNCTIONS CALORIES ~ (COMPUTED THEORETICAL CALORIE BURN) COUNTER ~ (TOTAL STROKES) DISTANCE ~ (EXERCISE DISTANCE [km]) SPEED ~ (ROWING SPEED [km/h]) STROKES per MINUTE ~ (COUNT UP STROKE RATE) TIMER ~ (COUNT UP [minutes and seconds]) NOTE ALL FIGURES ARE APPROXIMATE VALUES FUNCTION SPECIFICATIONS... -
Page 16: Exercising Information
Exercising Information Before starting to exercise How you begin your exercise program depends on your physical condition. If you have been inactive for several years, or are severely overweight, you must start slowly and increase your time on the equipment; a few minutes per workout. -
Page 17: Muscle Chart
Exercising Information Muscle chart Aerobic Exercise Aerobic exercise improves the fi tness of your lungs and heart - your body’s most important muscle. Aerobic exercise fi tness is promoted by any activity that uses your large muscles (arms, legs, or buttock, for example). Your heart beats quickly and you breathe deeply. -
Page 18: Warming Up And Cooling Down
Exercising Information Warming up and Cooling down exercises Each workout should include the following three parts: 1. A warm-up, consisting of 5 to 10 minutes of light exercise, such as jogging on the spot, star jumps and lunges. A proper warm-up increases your body temperature, heart rate, and circulation in preparation for exercise. - Page 19 Exercising Information Calf/achilles stretch With one leg in front of the other, reach forward and place your hands against a wall. Keep your back leg straight and your back foot flat on the floor. Bend your front leg, lean forward and move your hips toward the wall.
-
Page 20: Care And Maintenance
Care and Maintenance Using the Workout Bench 1. Examine the equipment perfect working order. of your exercise product or if periodically in order to detect you think that you may have 5. Replace defective any damage or wear which may parts missing, contact the have been produced. -
Page 21: Exercise Instructions
Exercise Instructions Using your ROWING MACHINE will provide you with several benefits. (1) It will improve your physical fitness, It strengthens the heart and improves circulation as well as exercising all the major muscle groups; the back, waist, arms, shoulders, hips and legs. (2) tone your muscles and, in conjunction with a calorie-controlled diet, help you lose weight. - Page 22 Alternate Rowing Styles Arms Only Rowing This exercise will tone muscles in your arms, shoulders, back and stomach. Sit as shown in Fig 4 with your legs straight, lean forward and grasp the handles. In a gradual and controlled manner lean back to just past the up right position continuing to pull the handles towards your chest.
-
Page 23: Exploded Parts Diagram
Exploded Parts Diagram Using the Workout Bench... -
Page 24: Exploded Diagram Parts List
Exploded Diagram Parts List Using the Workout Bench DESCRIPTION DESCRIPTION MAIN FRAME CROSS HEAD SCREW M5X15L ROWING RAIL CROSS HEAD SCREW M5X12L FRONT STABILIZER ROUND HEAD SCREW M5X30L REAR STABILIZER SPECER Ø12XØ8.4X8H FRONT STABILIZER TRANSPORTATION WHEELS SET (R&L) CROSS HEAD SCREW M5X0.8PX12L REAR STABILIZER END CAP DECORATION BOARD 320X113X1.0T KNOB Ø50XM8... - Page 25 Using the Workout Bench...
- Page 26 Guarantee Product Guarantee This product is guaranteed against manufacturing defects for a period of Year This product is guaranteed for twelve months from the date of original purchase. Any defect that arises due to faulty materials or workmanship will either be replaced, refunded or repaired free of charge where possible during this period by the dealer from whom you purchased the unit.
Need help?
Do you have a question about the 527/8112 and is the answer not in the manual?
Questions and answers