Palm Treo 600 Using Manual
Palm treo 600: user manual
Hide thumbs
Also See for Treo 600:
- User manual (228 pages) ,
- User manual (20 pages) ,
- Quick start manual (10 pages)
Table of Contents
Advertisement
Quick Links
Download this manual
See also:
User Manual
Advertisement
Table of Contents

Subscribe to Our Youtube Channel
Related Manuals for Palm Treo 600


Summary of Contents for Palm Treo 600
- Page 1 using your Treo Includes setup information and instructions for most tasks...
-
Page 2: Table Of Contents
Handspring website for your region, or start at www.handspring.com. Software download available Palm™ Desktop software is supplied on a CD-ROM disc. If you do not have access to a CD-ROM drive for your computer, you can download this software from www.handspring.com. - Page 3 4 :: Table of Contents Welcome Congratulations on the purchase of your Handspring™ Treo™ phone. You now have • an advanced mobile phone* • a Palm Powered™ organizer with portable expansion capability (SD media) • a digital camera • email* • web browsing* •...
-
Page 4: If You Read Nothing Else
First Two Weeks: Using Organizer Features Your Treo is not just a phone. It also includes a full-featured Palm Powered organizer that gives you instant access to your Calendar, To Do List, Memo Pad, CityTime, Calculator, and more. See pages 81-98. -
Page 5: Treo Overview
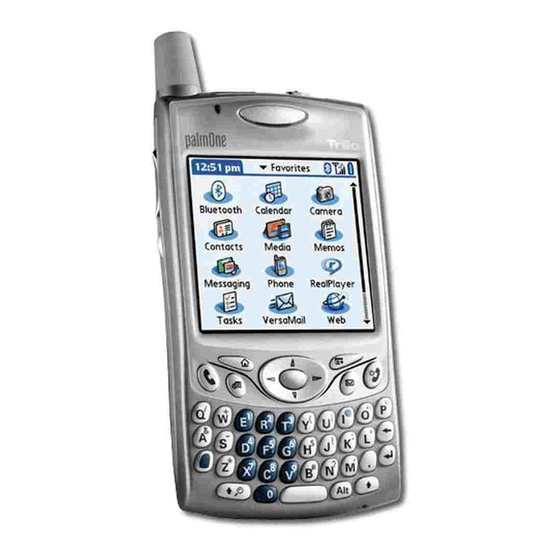
What you’ll need As you work through the instructions in this guide, you’ll need all the items that came in the Treo box (see page 9) as well as the following: • a SIM card for which you have an activated mobile account with data services •... - Page 6 Be careful not to scratch or crush your Treo’s touchscreen. Do not store it in a place where other items might damage it. A. Phone receiver B. LED (Wireless Mode and charge indicator) C. Volume buttons D. Phone E. Calendar F.
-
Page 7: Inserting The Sim Card
Charging the battery Before using your Treo, you need to charge the battery. It may not turn on at all when you first remove it from the box. We recommend three hours for a Battery consumption varies full charge, or until the LED is solid green. based on your personal 1. -
Page 8: Turning Treo On And Off
Mode. You will hear a series of descending tones. When Wireless Mode is off, your Treo does not have a connection to any mobile network. You can still use the organizer and other Palm OS features. This is ideal for airplane flights and for maximizing battery life. -
Page 9: Learning The Basics
Adjusting call volume While a call is in progress, press the volume buttons on the side of your Treo to adjust call volume. What’s my number? 1. Make sure Wireless Mode is on (see page 14). 2. Press Phone 3. Press Menu 4. -
Page 10: Moving Around The Treo Screen
Moving around the Treo screen To move around the Treo screen, you can use the 5-way navigation control, or tap items on the screen with the stylus. With use, you will find your own Some third-party applications favorite way to scroll, highlight, and select menu commands. may not work with 5-way The 5-way navigation control includes Right, Left, Up, Down, and navigation, and you must use... -
Page 11: Selecting Menu Items
You can also use the stylus to highlight text on the screen. When text is highlighted it appears in reverse type. • Drag the stylus across the text you want to highlight. • Double-tap a word to highlight it. • Triple-tap a line of text to highlight it. Accessing command buttons Command buttons, such as New, OK, and Details appear at the bottom of the screen. -
Page 12: Using The Keyboard
Using the keyboard When using the keyboard, most people find it easiest to hold the Treo with two hands and use the tips of both thumbs to press the keys, as shown above. A. Option B. Shift/Find C. Alt D. Space E. -
Page 13: Launching Applications
Symbols and accented characters Type... then press Alt Type... then press Alt to choose... to choose... á à ä â ã å æ ó ò ö ô œ õ ø Á À Ä Â Ã Å Æ Ó Ò Ö Ô Œ Õ Ø b or B ß... -
Page 14: Setting Up Your Computer
Press Applications Launcher repeatedly to cycle through different categories of applications. In Palm OS, you access all available applications through a screen called the Applications Launcher: In the Applications Launcher, 1. Press Applications Launcher you can type the first few 2. - Page 15 Installer icon. 3. Follow the onscreen instructions of the installation program. Click Install Now to install the Palm Desktop software. Please note these important points about the installation process: • If a language selection screen appears, click the same language you use on your Treo.
-
Page 16: Maximizing Battery Life
We strongly recommend that Before you can synchronize your contacts and other personal data, you you install the Palm Desktop must install the Palm Desktop software from the CD that came with your synchronization software Treo. See page 29 for instructions. -
Page 17: Where To Learn More
If you need more information • Books: Many books on Palm Powered devices are available in local or online book retailers (look in the computers section). • Online forums: Consult online Treo user discussion groups to swap information and learn about areas you may find nowhere else. -
Page 18: Phone Overview
Phone overview The Phone application lets you make and receive calls, store information about your contacts, and store Favorites for contacting people and launching applications. Be sure you know how to turn on Wireless Mode before reading this section (see page 14). Accessing the Phone application •... -
Page 19: Dialing Calls
Dialing calls Your Treo offers several options for making phone calls. As you get familiar with your Treo, you’ll discover which method you prefer. To see more information for a person in your Contacts Dialing with the keyboard list, highlight the name and 1. -
Page 20: Receiving Calls
If you can’t highlight and dial a phone number on a web page or in a text Dialing from a web page or text message message, using the 5-way navigation control or stylus, Treo recognizes most phone numbers that appear in web pages or text it means that Treo does not messages. -
Page 21: Using Voicemail
Using voicemail Setting up voicemail 1. Turn on Wireless Mode, as described on page 14. 2. Press Phone 3. Use the 5-way navigation control to access Favorites. 4. Choose the voicemail Favorites button. Your Treo connects to your mobile service provider’s automated voicemail system. -
Page 22: Managing Active Calls
Managing active calls When you make or receive a call, the Active Call view appears. Use the 5-way navigation control to access the onscreen buttons in this view: Press Phone repeatedly to • Hang Up (or pressing Backspace toggle between the Active also press the headset button (if the headset is attached). -
Page 23: Answering A Second Call (Call Waiting)
Answering a second call (call waiting) When you are on an active call, you can receive a second call. When the second call comes in, the Call Waiting dialog appears, giving you the following options for handling the second call: •... -
Page 24: Managing Contacts
4. Choose OK. 46 :: More ways to manage calls Managing contacts Contacts is a view in Phone. If you are familiar with Palm Powered devices, you may recognize this application as similar to the Address Book on previous devices. -
Page 25: Defining Favorites Buttons
2. While still in Contact Edit view, press Menu 3. From the Record menu, choose Select Business Card. Now you can beam your business card to other Palm OS devices. In any Phone view, press Menu . From the Record menu, choose Beam Business Card (/M). - Page 26 Creating a speed dial Favorites button 1. Press Phone 2. Use the 5-way navigation control to access your Favorites buttons. 3. Choose a blank button. 4. Choose the Types pick list, then select Speed Dial. 5. Enter a label for the favorite: To see all the contact •...
-
Page 27: Using A Phone Headset
Treo is not compatible with the You can press the headset button to perform any of the following tasks: Treo 600. • answer an incoming call • answer a call-waiting call • switch between two active calls •... -
Page 28: Creating A Bookmark
Navigating in Wide Page Mode Some web pages, such as maps, are easier to view without the optimization done in Optimized Mode. You may want to view these pages in Wide Page Mode. This mode presents the web page as you would expect to see it on your computer’s screen. - Page 29 Editing or deleting a bookmark or saved page 1. From the Bookmarks view, press Menu 2. From the Bookmarks menu, choose Edit Bookmarks. 3. Choose the bookmark you want to edit or delete. 4. Enter the desired changes. 5. Choose OK. Tap and hold the back or forward buttons to pop up a list of sites you’ve visited.
-
Page 30: Using The History List
Using the History list The History list stores the addresses of the last 100 pages you visited. Items in the History list are sorted chronologically. 1. From the Page view, press Menu 2. From the Page menu, choose History. 3. Press Down to navigate through the list. -
Page 31: Taking Pictures With The Camera
Taking pictures with the camera Your Treo includes a camera that lets you take pictures, send them to other people as attachments or picture messages, and use them to personalize To send a picture to your device (such as wallpaper or picture caller ID; see page 112 for details). someone at the same time You can move pictures to a Windows computer by performing a you save it, choose Send... -
Page 32: Moving Pictures
1. Locate your Pictures folder. This is most likely at C:\Program Files\Handspring\Treo Pictures\(user name) or if you upgraded from another Palm Powered device, at C:\Program Files\Palm\Treo Pictures\(user name). 2. Double-click any file to launch it with the default picture viewing software on your Windows computer. -
Page 33: Creating And Sending A Message
SMS messages are brief notes that you exchange with other mobile phones that have SMS capability (also known as short messaging). Long messages When entering a message, with more than 160 characters are split into several messages. Refer to your you can insert emotive service plan for per-message pricing and availability. -
Page 34: Managing Your Messages
Managing your messages The status icons that appear next to each message in the Inbox, Outbox, and Sent folders indicate the following: An incoming message. Unread messages appear in bold; messages you’ve read appear in plain text. An item that is locked and cannot be deleted or purged until you If you are out of a coverage unlock it. -
Page 35: Creating And Sending A Multimedia Message
• Chat: Your preferences for chat sessions. • Show timestamps in chats: Indicate whether you want to see the date and time stamps of each message in the Chat screen. • Display my name in chat window as: Enter the name you want displayed as the label for your messages in the Chat screen. -
Page 36: Receiving Multimedia Messages
5. If the recipient is in your Contacts list, start typing the first few letters of the recipient’s name. Otherwise, type the number of a phone that supports multimedia messaging, or an email address. 6. Press Down . If you typed a few letters of the recipient’s name, choose the recipient’s phone number or email address from the list that appears. - Page 37 Contact your mobile service provider for details. • Third-party email applications: A number of third-party developers offer Palm OS email applications. Consult the email application’s documentation to learn how to set it up. Setting up Mail The first time you use Mail, you need to set it up on your Treo.
-
Page 38: Creating And Sending Messages
4. Choose the type of item you want to attach. 5. Choose the specific item you want to attach. Attaching applications to your messages You can create a new email with a Palm OS application attached (subject to copyright restrictions). 1. Press Applications Launcher 2. -
Page 39: Receiving And Viewing Messages
Receiving and viewing messages By default, your Treo will automatically send and receive messages (see page 79 for more details). You can manually send and receive messages on-demand as described below. 1. Make sure Wireless Mode is turned on (see page 14) 2. -
Page 40: Switching Accounts
Deleting selected messages from the Inbox When you delete a message from the Inbox, it moves to the Deleted folder which stores the 200 most recently deleted messages. If you delete more than 200 messages, the oldest messages are automatically removed from the phone. - Page 41 If you want to access more than one email account with your Treo, choose Add 4. Choose the Delete tab and set any of the following preferences: Account. • Confirm message deletion: Asks if you’re sure you want to delete a If you assign Mail to an message before erasing it.
- Page 42 If you have several appointments to enter, it’s more efficient to use the Palm Desktop software or Microsoft Outlook on your • Use the 5-way navigation control to move to another day, week, or month computer and then (depending on the current view).
- Page 43 Scheduling a repeating event 1. Create an event, then highlight it. 2. Choose Details. 3. Choose the Repeat box, then choose a repeat interval. 4. For weekly events, choose the day(s) the event repeats; for monthly events, choose Day or Date to indicate the repeating method. 5.
-
Page 44: To Do List
Customizing To Do List preferences for your calendar You can display To Do List items in your calendar to keep on top of your tasks. 1. Press Calendar until you are in Day view. 2. Press Menu 3. From the Options menu, choose To Do Preferences. 4. -
Page 45: Checking Off A To Do Item
3. Set any of the following: • Priority: Choose the Priority number for this item (1 is most important). Later you can arrange your To Do List based on the importance of each item. • Category: Assign the item to a specific category. •... -
Page 46: Memo Pad
Memo Pad Memos are a great way to store notes on your Treo. Each Memo Pad item can Creating a memo include 4,096 characters of 1. Press Applications Launcher text. 2. Choose the pick list in the upper-right corner, then select All. You can assign categories 3. -
Page 47: Adding Cities
Selecting remote cities In addition to your Home City, you can display the day and time for four other cities anywhere around the globe. These other cities are called remote cities. 1. Use the stylus to tap a pick list in the lower part of the CityTime screen, then select the city closest to the city you want to display. -
Page 48: Looking Up Contacts And Other Information
• Statistics: Statistical functions such as sum, factorial and random number generator. • Weight/Temp: Weight and temperature conversions for metric and English values. • Length: Length conversions for metric and English values. • Area: Area conversions for metric, traditional and English values. Choose Sto to store a •... -
Page 49: Beaming Information
Beaming information Your Treo is equipped with an IR (infrared) port that lets you beam information to another Palm Powered device with an IR port. The IR port is located on the top of your Treo, between the Wireless Mode button behind the small dark shield. -
Page 50: Managing Applications
Beaming an application Not all applications can be beamed. A lock icon screen next to applications that cannot be beamed. 1. Press Applications Launcher 2. Press Menu 3. From the App menu, choose Beam (/B). For best results, the path 4. -
Page 51: Installing Applications From A Windows Computer
Programs folder. These instructions tell you how to install basic .prc (Palm OS application) and .pdb (Palm OS database) files onto your Treo. Some Palm OS software uses an installer or wizard to guide you through the process. Consult the documentation that came with the software for details. -
Page 52: Removing Applications
Installing applications from a Macintosh computer 1. On your Macintosh, launch Palm Desktop. 2. From the HotSync menu, choose Install Handheld Files. 3. Select the User Name that corresponds to your Treo phone from the User drop-down menu. 4. Click Add To List. -
Page 53: Using Application Info
Using Application Info The Info screens display basic statistics about the applications on your Treo. 1. Press Applications Launcher 2. Press Menu 3. From the App menu, choose Info. 4. At the bottom of the screen, choose the type of information you want to view: •... -
Page 54: Copying Applications To An Expansion Card
Using expansion cards :: 107 Before you copy an application to an expansion card, make sure that it is compatible with Palm OS version 5.2 or higher. Some applications do not work with expansion cards and do not allow you to store data files in a location that is separate from the application. -
Page 55: When You're Ready
Renaming an expansion card If you change the contents of an expansion card, you may at some point want to rename the card to better match its contents. 1. Insert the expansion card into the expansion slot. The Applications Launcher automatically appears. 2. -
Page 56: Phone Settings
Phone settings Selecting ring tones and messaging alert tones You can set different tones and volumes for incoming phone calls, Calendar You can also adjust the alarms, and Mail, MMS, and Messaging alerts. ringer volume by pressing 1. Press Applications Launcher the volume buttons when a 2. -
Page 57: System Sound Settings
Assigning a caller ID picture 1. Press Phone 2. Press Up to access your Favorites buttons. 3. Highlight the Favorites button you want to give a picture caller ID. 4. Press Menu 5. From the Edit menu, choose Edit Favorites Button (/E). If you prefer to use the onscreen Dial Pad, assign 6. -
Page 58: Display And Appearance
Display and appearance Turning on the keyboard backlight 1. Press Option then . The backlight illuminates the keys, and the screen dims slightly. 2. The backlight will turn off if the keyboard is not in use. Adjusting the contrast and brightness Depending on the lighting conditions in which you’re using your Treo, you may need to adjust the screen contrast and brightness. -
Page 59: Applications Launcher Settings
Applications Launcher settings Arranging applications by category You can assign an application to a category and then display a specific The Applications Launcher category of applications in the Applications Launcher. displays each application as an icon, or you can view 1. -
Page 60: Date And Time Settings
Date and time settings Setting the date and time Date & Time Preferences enable you to set the time, date, time zone, and If you check the box for daylight savings setting for your Treo. Enable Local Network Time, 1. Press Applications Launcher your Treo displays the time 2. -
Page 61: General Preferences
General Preferences General Preferences enable you to set the auto shutoff interval, the beam receive feature, sounds, and screen colors for your Treo. The Auto-off setting 1. Press Applications Launcher conserves battery power by 2. Choose the pick list in the upper-right corner, then select All. turning off your phone’s 3. -
Page 62: Phone Lock
Auto-Keyguard and touchscreen lockout Auto-Keyguard lets you automatically lock the keyboard after a period of inactivity. 1. Press Applications Launcher 2. Choose the pick list in the upper-right corner, then select All. 3. Choose the Prefs icon. To change your password, choose the Password box, 4. -
Page 63: Private Records
Setting Owner Preferences You can use Owner Preferences to record information that you want to associate with your Treo, such as your name, company name, and phone number. If you lock your keyboard, the Owner Preferences information appears on the screen that requests your password to unlock it, and you must also enter your password to change the Owner Preferences information. -
Page 64: If Something Happens: Help
Security and Palm Desktop (Windows) Palm Desktop for Windows observes the security password for your Treo. If you forget your Treo password, you cannot view your data in Palm Desktop. You can change your password, but all records marked as Private will be deleted. -
Page 65: Upgrading From Another Palm Powered Device
3. Some third-party applications may be quarantined by the HotSync Manager because they are not compatible with the Palm OS 5.2 on your Treo. Do not manually install any quarantined files (see the documentation that came with the third-party applications for more information). -
Page 66: Trouble Installing Palm Desktop
2. Quit any active applications, including virus scanners and Internet security applications. 3. Make sure you’re installing the version of Palm Desktop that came on the CD with your Treo. Other versions of Palm Desktop may not work with this Treo. -
Page 67: Hard Reset
1. Unscrew the stylus tip to access the reset tool. 2. While holding the Wireless Mode button press the reset button on the back of your Treo. 3. When the Palm Powered logo appears, release the Wireless Mode button 4. When the warning appears, press Up 5. -
Page 68: Network Connection
Network connection Signal strength is weak 1. If standing, move about 10 feet in any direction. Become familiar with low 2. In a building, move near a window. Open any metal blinds. coverage areas where you 3. In a building, move outdoors or to a more open area. live, commute, work, and 4. -
Page 69: Synchronization (Hotsync)
Before you attempt a HotSync operation, make sure you have installed the Palm Desktop and HotSync Manager software from the CD that came with your Treo. Desktop does not respond to HotSync attempt As you complete the following steps, perform a HotSync operation after each. - Page 70 If the synchronization is successful, you do not need to complete the remaining steps. 1. If you upgraded from a previous Palm Powered device, there may be conflicts with files from your previous device. Locate your Backup folder (Windows: C:\Program Files\Handspring\user name;...
-
Page 71: Mail
Mail I can’t receive email First, make sure you have Internet access: launch the Blazer web browser to If you use web-based email (Hotmail, AOL) or corporate see if you can view a web page you’ve successfully viewed before. If email (Microsoft Outlook, necessary, ensure that you are viewing the page directly from the Internet: Lotus Notes), the Mail... -
Page 72: Web
First, obtain this information from your mobile service provider • Does the Internet connection they provide support sending SMTP emails? • Is there an alternate SMTP authenticated server used for email? • Is SSL required for POP3 or SMTP email transactions? If you are using a circuit-switched data (CSD) connection, contact your Internet service provider for this information, instead of your mobile service provider. -
Page 73: Camera
(see page 132). Then, locate your Backup folder on your computer (Windows: C:\Program Files\Handspring\user name; Macintosh: Mac HD\Applications\Palm\Users\user name). If you find a .prc or .pdb file for any applications you just removed, delete the file(s) from the Backup folder. -
Page 74: Errors
Errors Your Treo is designed to minimize interruptions, when a system error occurs. If Treo encounters a system error, it automatically resets itself and resumes functioning as normal. If possible, it even turns Wireless Mode back on if it was on before the error occurred. Sometimes, you might want to know more about an error. - Page 75 Treo. Palm OS: The operating system of your Treo phone. A trademark of PalmSource, Palm OS is known for its simplicity of use and for the large number of applications that can be added to your Treo.
- Page 76 FCC Statement This device complies with part 15 of the FCC FCC RF Safety Statement In order to comply with FCC RF rules. Operation is subject to the following two conditions: (1) This exposure safety guidelines, users MUST use one of the following device may not cause harmful interference, and (2) this device must types of body-worn accessories.
- Page 77 outgoing 14, 15, 36–38, 71 Conflicting events 85 Contacts entries 47 placing a second 42, 43 Connection currency symbols 23–24, 64, placing on hold 42 AC charger 12 Preferences 45–46, 110 computer 28, 138 events 82–84 preventing 39, 46, 121, 134 headset 52 Favorites 49–51 receiving 14, 39, 44, 120, 135...
- Page 78 Punctuation marks 23–24 screen 10, 14, 25–26, 121, Purging 66, 71, 78, 87, 129 see also Touchscreen settings 110–112 Palm Desktop software. See signal strength 35, 134 Desktop software speed dial. See Favorites Quick Keys 41, 49, 50, 51 Passwords status 15, 35, 110, 134–136...
- Page 79 Serial port 9, 27–28, 137 opening 25–26, 64 Service Preferences 67–68 Safety 31, 150 ALS 35, 41, 148 purging messages 66 Saving customer 32 QuickText 64 attachments 70, 71, 141 data 8, 13, 53, 73, 135–136 receiving messages 65, 120 messages 66, 69, 72, 75 email 8, 73–74, 140–141, 142 saving draft messages 66...
-
Page 80: Specifications
16-bit applications) Keyboard • Built-in QWERTY keyboard plus 5-way navigation control • Backlight for low lighting conditions Included software • Phone (including Palm OS Contacts, Favorites, Dial Pad) • Camera • MMS • Blazer Web Browser (Internet) • Memo Pad •...
Need help?
Do you have a question about the Treo 600 and is the answer not in the manual?
Questions and answers